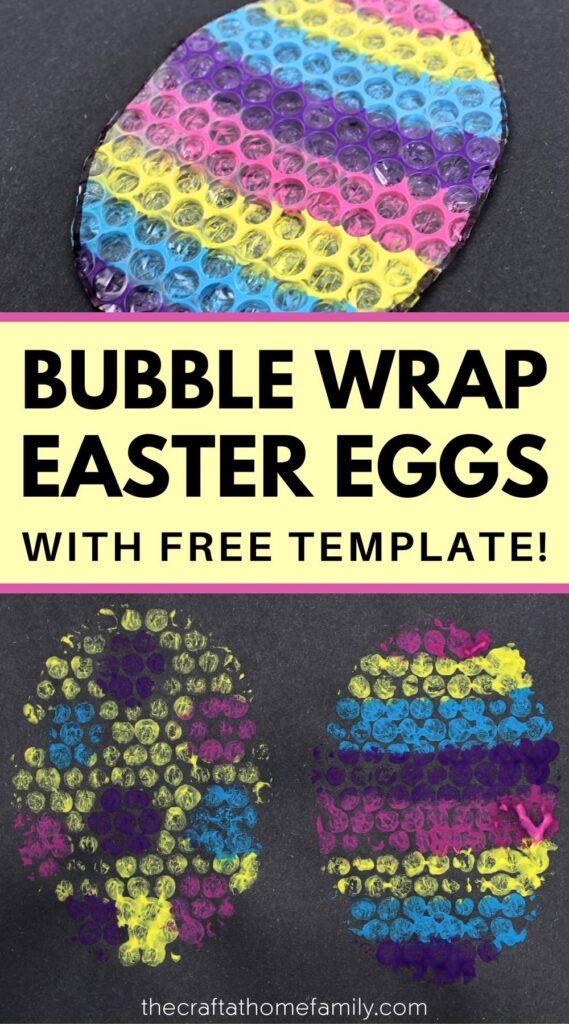
Looking for a fun Easter craft to do with supplies from around the house? This colorful bubble wrap Easter egg painting activity is perfect for preschool kids, and no expensive supplies are required!

JUMP TO…
It’s time to start making Easter crafts again! And since DIY projects are always better when they’re made with things you already have at home, this easy craft idea will allow you to recycle any bubble wrap you may have lying around.
It also reuses an Easter egg template that I’ve had on my site for a few years now and used for all sorts of other Easter-themed crafts and activities… so if you download the free template, you’ll be able to use it for lots of other projects, too!
Bubble wrap painting is so fun to do, and these DIY bubble wrap prints turned out really pretty and colorful. If you’ve been on the lookout for cute new Easter craft ideas, you’ll definitely want to give this one a try!
Related: Easter Peeps Painting

Get hundreds of pages of activities!
Get access to all our paid printables, as well as monthly activity planners, for just $5/month. (New printables added twice per month!)
Required Materials
Here’s what you’ll need in order to make this easy Easter egg craft with your toddler, preschooler or school-aged child:
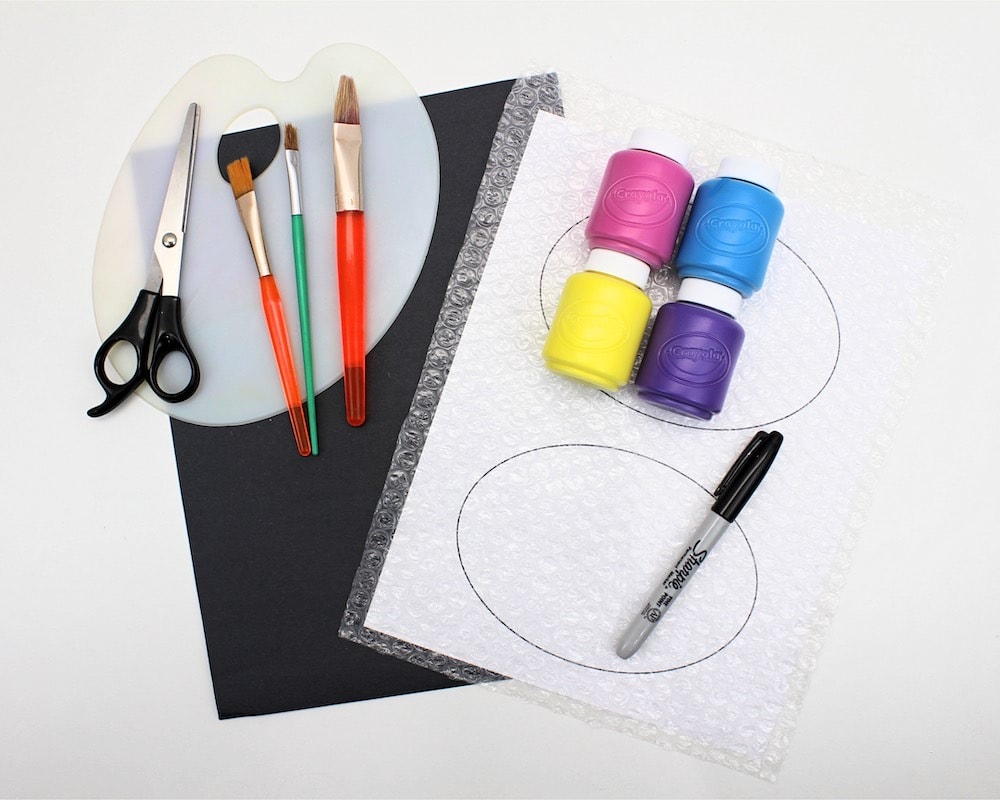
- Construction paper or regular printer paper
- My free Easter egg template (blank version)
- Permanent marker
- Bubble wrap
- Paintbrushes
- Washable kids’ paint
How to Make Bubble Wrap Easter Eggs (Step-by-Step)
1. Print Template
Download the template and print it on a sheet of regular US Letter-sized (8.5 x 11 inches) paper.
The template comes in multiple designs, but for this project, we used the blank template and created our own design with paint. That being said, you can absolutely print one of the pre-made designs and use it as inspiration!
2. Trace Template
Press some bubble wrap onto the printed template, textured side down, and trace the shape of the Easter eggs onto the flat side of the bubble wrap using a permanent marker. (Washable markers are likely to smudge.)
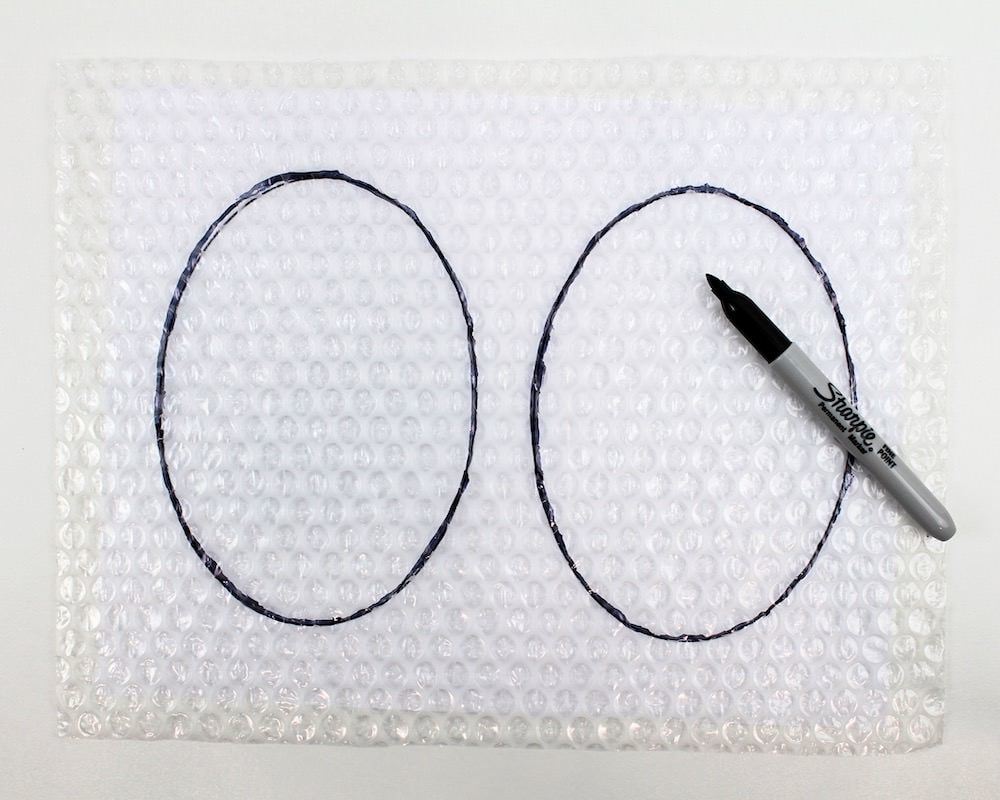
Since we used the blank Easter egg template, we only needed to trace the basic shape of the eggs. But if you printed out one of the pre-made designs, make sure to trace those lines too!
3. Cut Template
Use scissors to cut along the edges of the Easter eggs. If you chose to print one of the pre-made Easter egg designs, make sure you only cut along the outer edges and leave the design inside the egg intact.
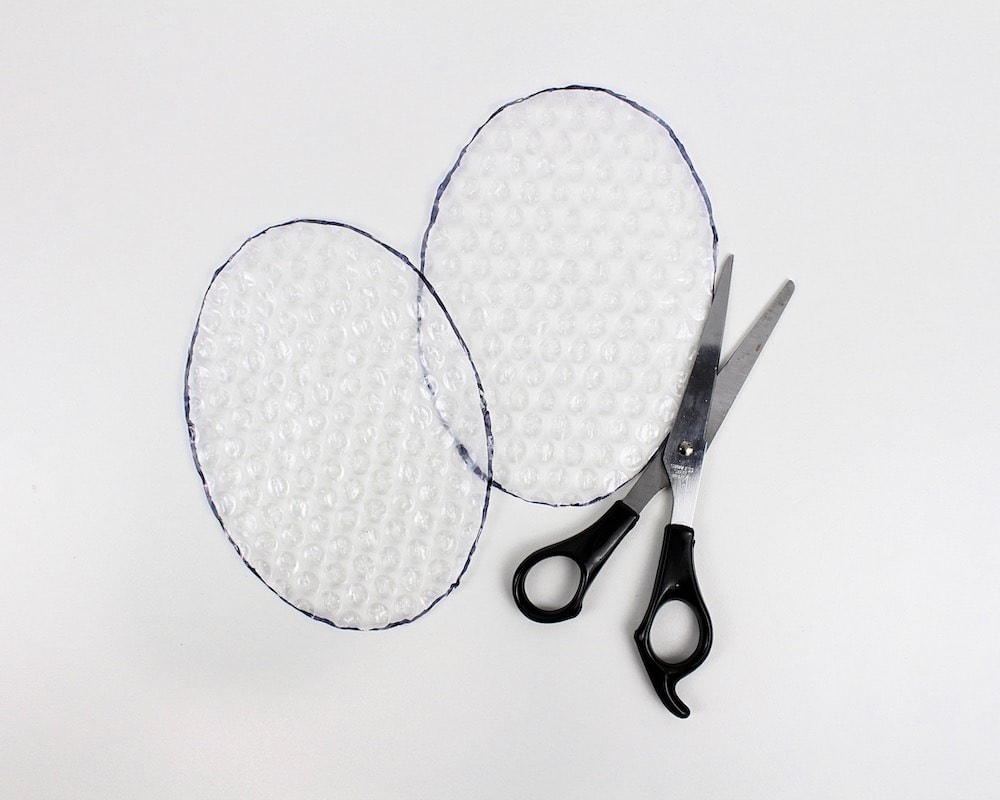
Note: There will be some leftover scraps of bubble wrap after you cut around the egg shapes. Feel free to give them to your kids to pop since you won’t be needing the scraps for this project!
4. Paint Easter Egg Design
Now that the prep work is done, it’s time to start painting! Use a paintbrush to cover the textured side of the bubble wrap with brightly colored paint.
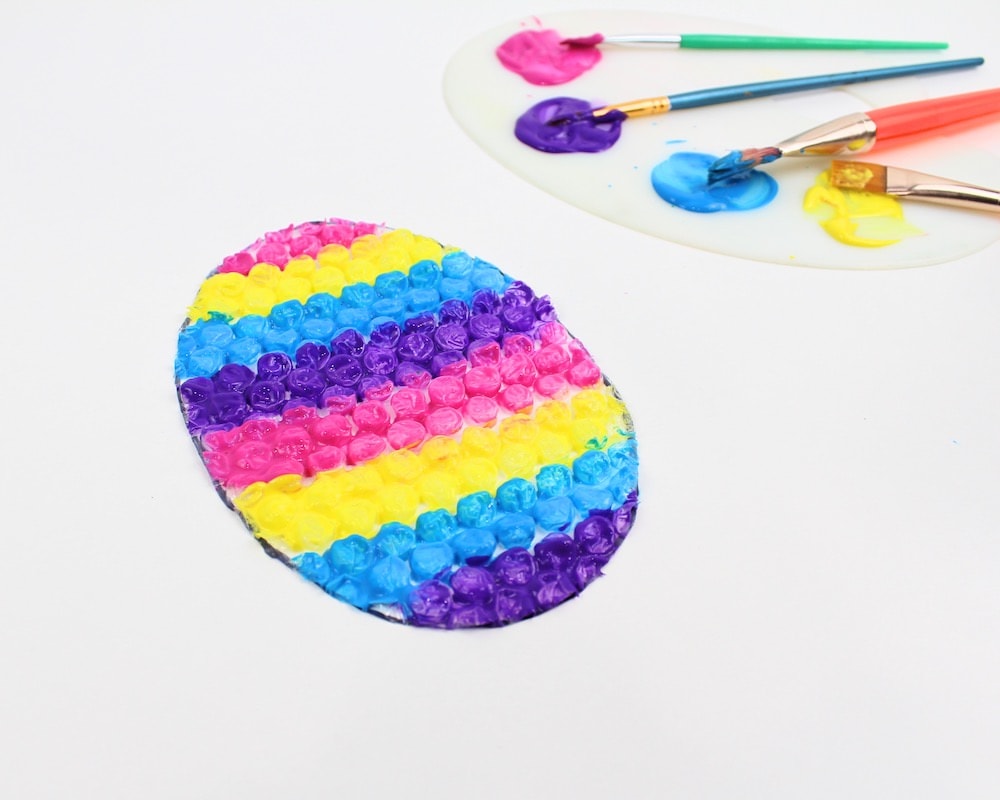
If you used one of our pre-made designs and traced it onto the other side of the bubble wrap, you can use that design as a starting point.
If not, feel free to create any design you can think of—or, if you’re doing this craft with a young toddler, just let them cover the whole egg with paint and don’t worry about creating a pattern.
Whatever you decide to do, just try not to use too much paint, as any excess that ends up in between the bubbles will spill over onto the paper when you create your Easter egg prints during the next step.
5. Create Prints
Once the Easter egg is covered in paint, carefully press it onto the paper. We decided to use black construction paper in order to make the colors pop, but feel free to use another color of construction paper or just plain old white printer paper.
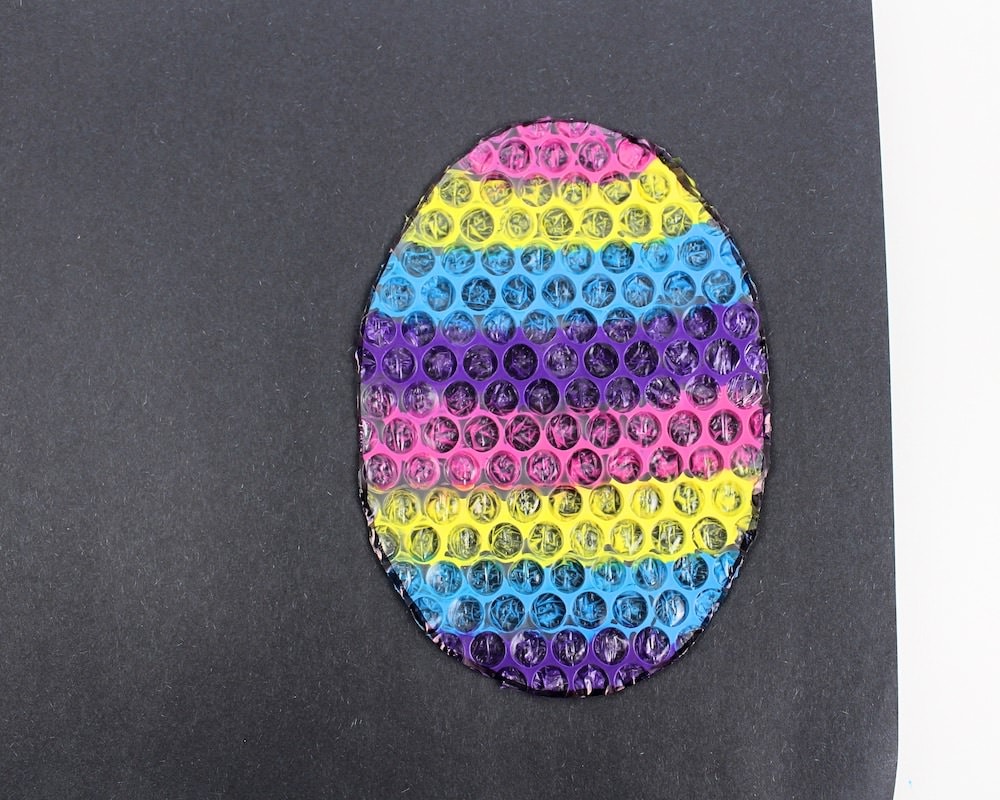
After gently pressing down on the bubble wrap, peel it off to reveal an imprint of your Easter egg. They turned out so pretty!
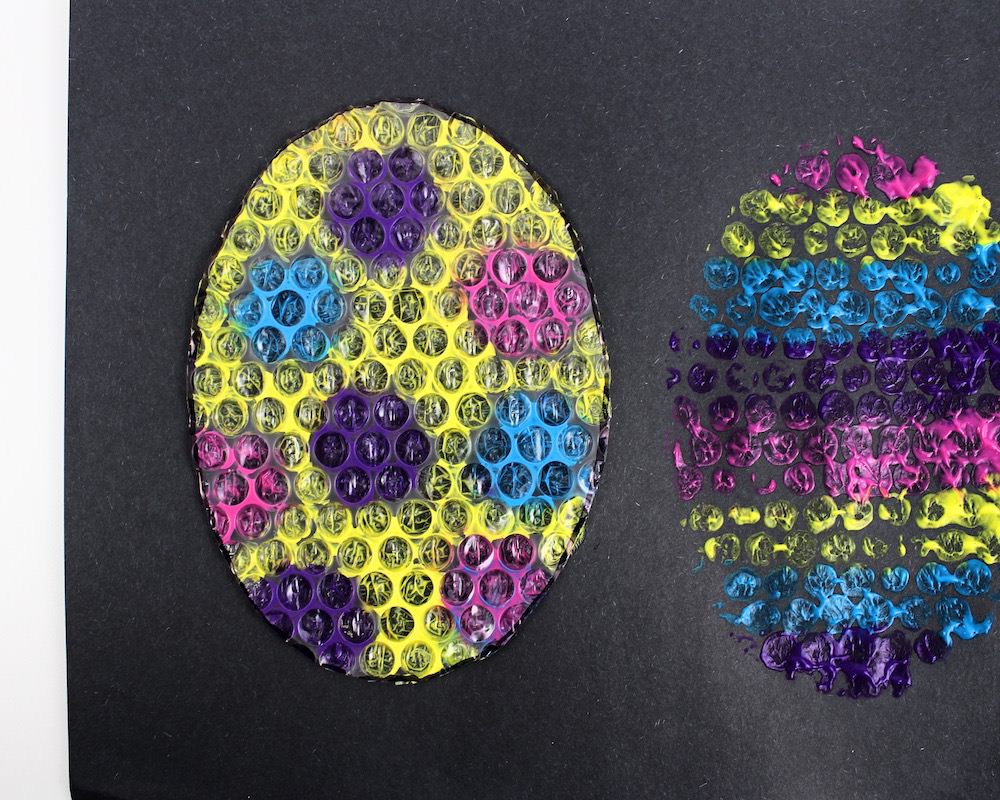
Since the template fits two Easter eggs per page, we created a second design and added it to the page. But if you’re doing this activity with several kids (or with a class full of preschoolers), feel free to cut the sheet of construction paper in half and give one half to each child so that they can each create their own bubble wrap Easter egg.
You can also leave one side of the paper blank and fold it in half to use as a DIY Easter card!
6. Let Paint Dry
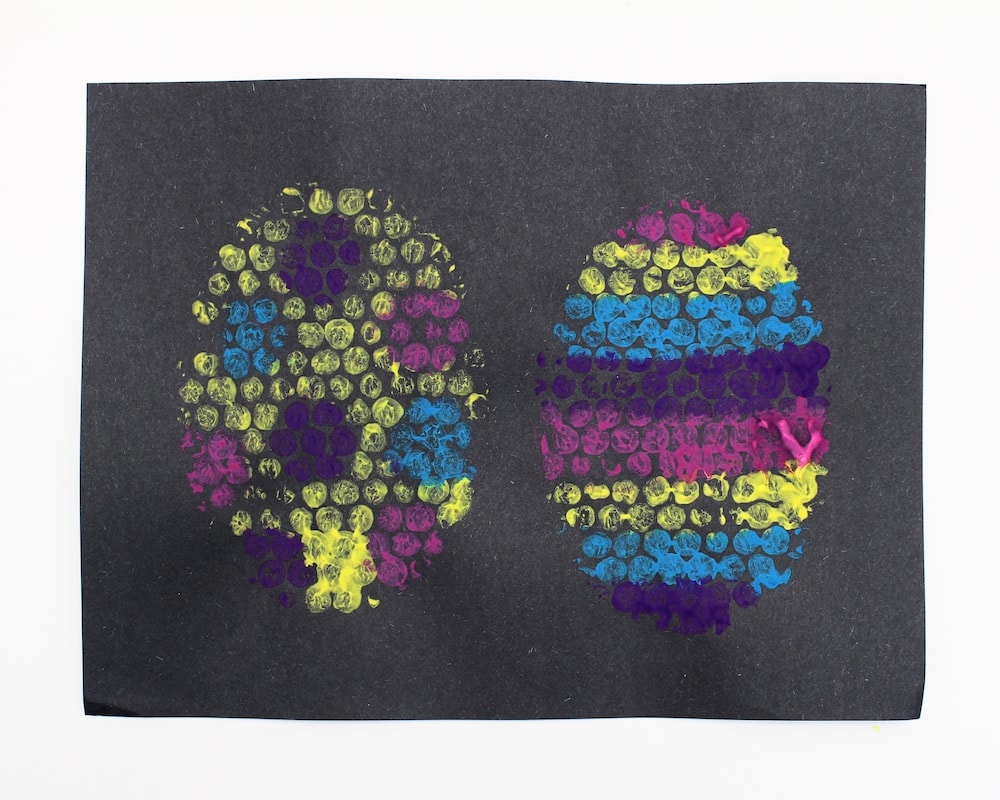
Once the paint has fully dried, your artwork will be ready to display. How cute did these textured Easter egg prints turn out?
And the best part is that the bubble wrap stamps are reusable—simply rinse off the paint, let the bubble wrap dry and you’ll be able to create as many Easter egg designs as you like!
If you have a lot of bubble wrap lying around and you’re looking for more bubble wrap painting ideas, you can also check out these Bubble Wrap Butterflies. They are perfect for spring and summer!
Related Easter Egg Crafts for Kids
Looking for more fun Easter projects to do using our free printable? Check out these articles:
Only your name will be made public. Please note that by submitting your comment, you are agreeing to the terms of our Privacy Policy.