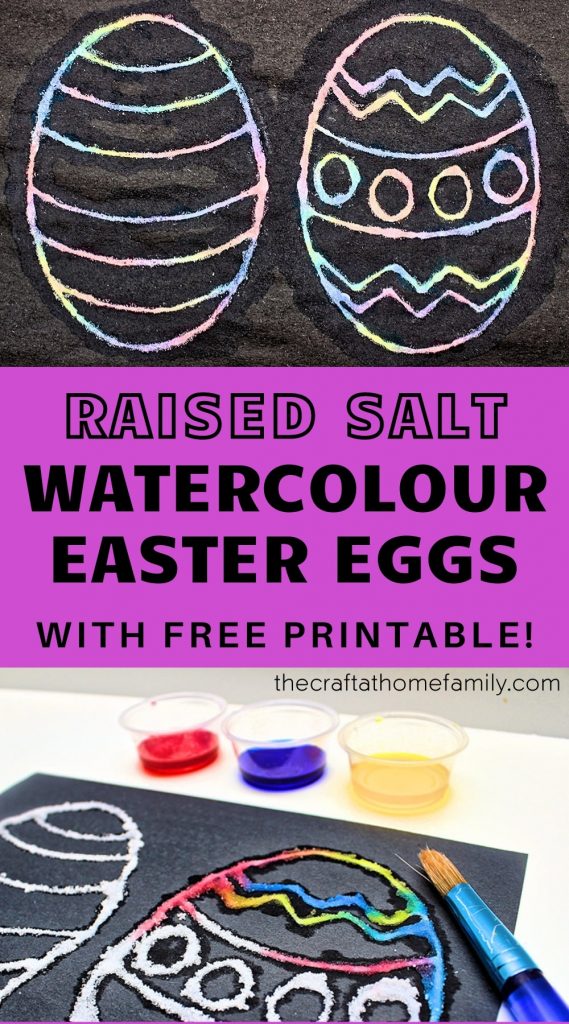
These raised salt watercolour Easter eggs are both beautiful and fun to make! Your kids will love seeing the liquid watercolour paint magically spread across the lines of salt. And to make this cool Easter-themed process art activity even easier, we’ve included a free Easter egg template that you can print and use as a guide!
This post may contain affiliate links, which means I may receive a commission, at no extra cost to you, if you make a purchase through a link. As an Amazon Associate, I earn from qualifying purchases. Please see my full disclosure for further information.
JUMP TO…
Raised salt watercolour painting is such a fun process art activity, and a lot of the steps are accessible to younger kids! It creates gorgeous artwork and if you know how to prep it properly, you can even display it on your walls once it’s dry!
Required Materials
Here’s what you’ll need to do this fun Easter-themed project with your kids:
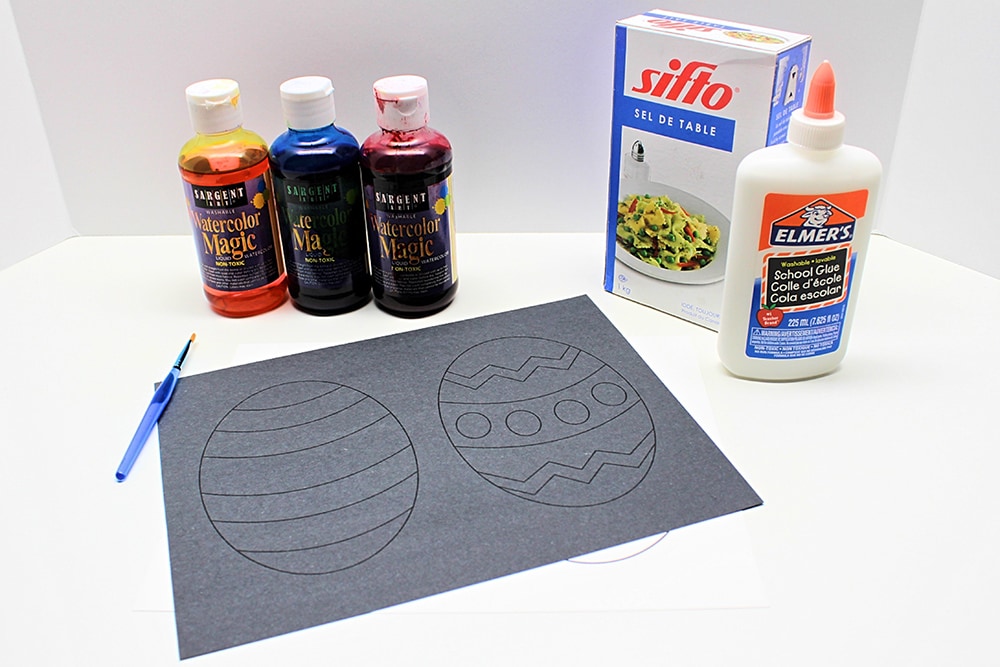
- My free Easter egg template
- White or coloured cardstock, printer paper or construction paper
- Bottle of white school glue with precision tip
- Table salt (we buy ours in packs of three at Costco)
- Paintbrush
- Liquid watercolours
About the Materials
For this project, you’ll be able to use whichever colour paper you want depending on the effect you’re going for. I’ve tried it with black, white and pastel colours and they all look nice in their own way.
Note: I recommend using something sturdy like cardstock rather than regular printer or construction paper—I used black construction paper in the pictures and the end result was a little wavy because the paper wasn’t thick enough to properly absorb the watercolour paint.
If you do use it anyway, keep in mind that depending on the type of printer you use and the size of your construction paper, you might have to cut the paper down to size. I like to use a paper trimmer to make clean cuts quickly and easily.

- SEWING, ARTS, AND CRAFTS STAPLE: Fiskars Recycled Bypass Paper Trimmer features a self-sharpening, bypass blade, and a 12″ deck made from 100% post-consumer-recycled materials
If you do too, make sure not to let your kids anywhere near it while you’re using it, and store it out of reach when not in use!
How to Make Raised Salt Watercolour Easter Eggs (Step-by-Step)
1. Print Template
Start by printing the template on the paper or cardstock of your choice.
2. Trace Lines with Glue
Once you’ve printed the template, trace all the lines using white school glue.
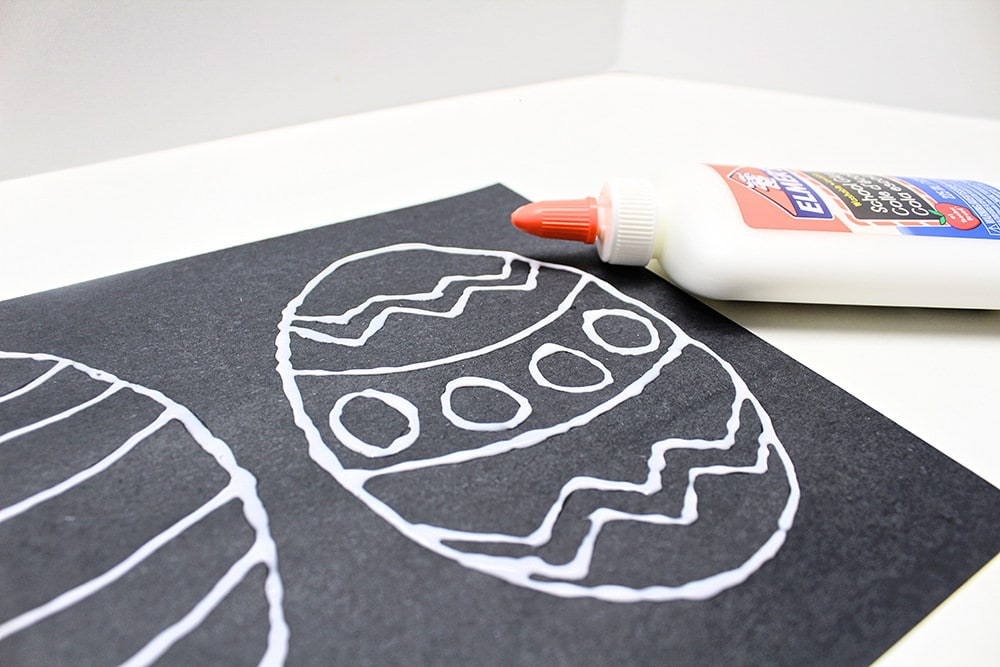
Note: If your kids are too young to trace the lines and want to do the whole project themselves, just use my blank Easter egg template and have them create their own design!
3. Add Salt
Once you’ve traced all the lines, pour table salt liberally onto the drawing until the glue is fully covered. Then, shake off the excess to reveal your pattern. My two- and three-year-old love helping with this step!
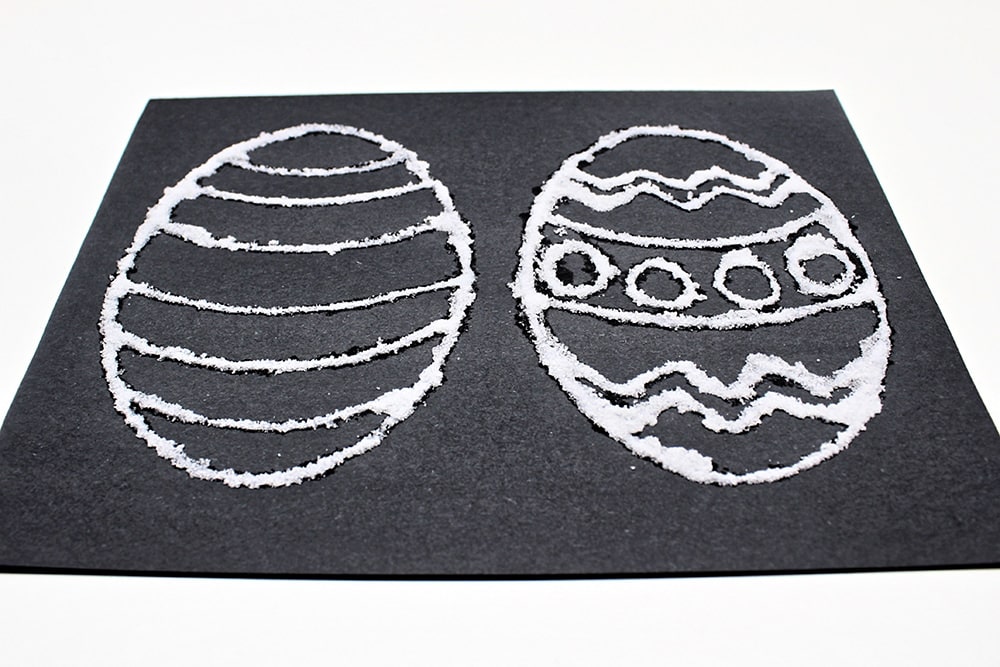
Tip: I recommend placing your paper onto a sheet of newspaper so you can easily get rid of the excess salt without getting it all over your work surface.
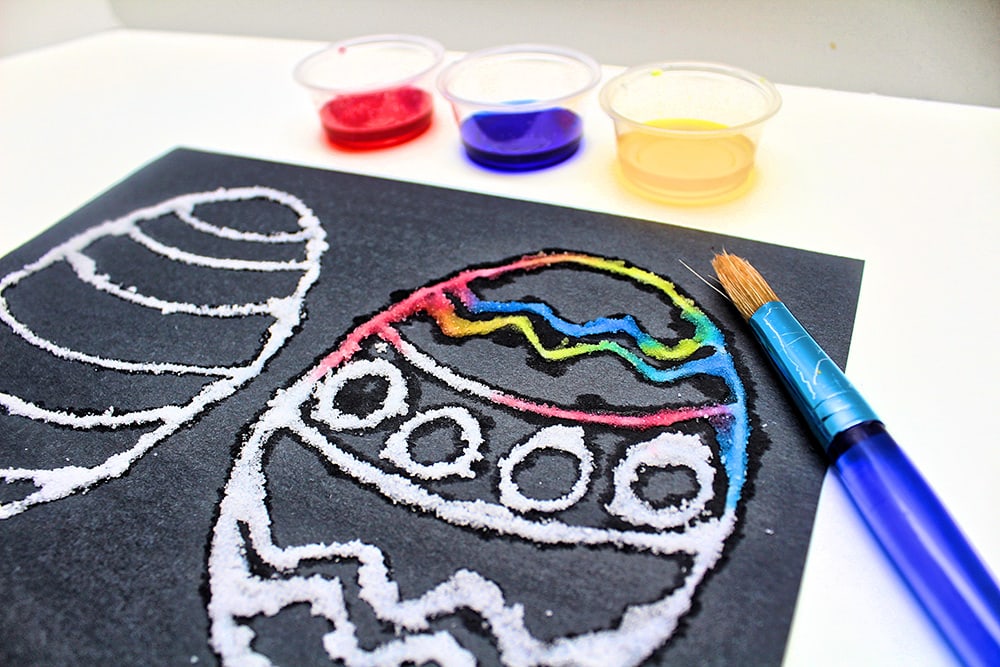
4. Add Watercolour Paint
Have your kids dip their paintbrushes in liquid watercolour paint and lightly touch the designs. If possible, try not to let them soak the paper completely—younger kids (like mine) tend to go a little heavy on the watercolour paint!
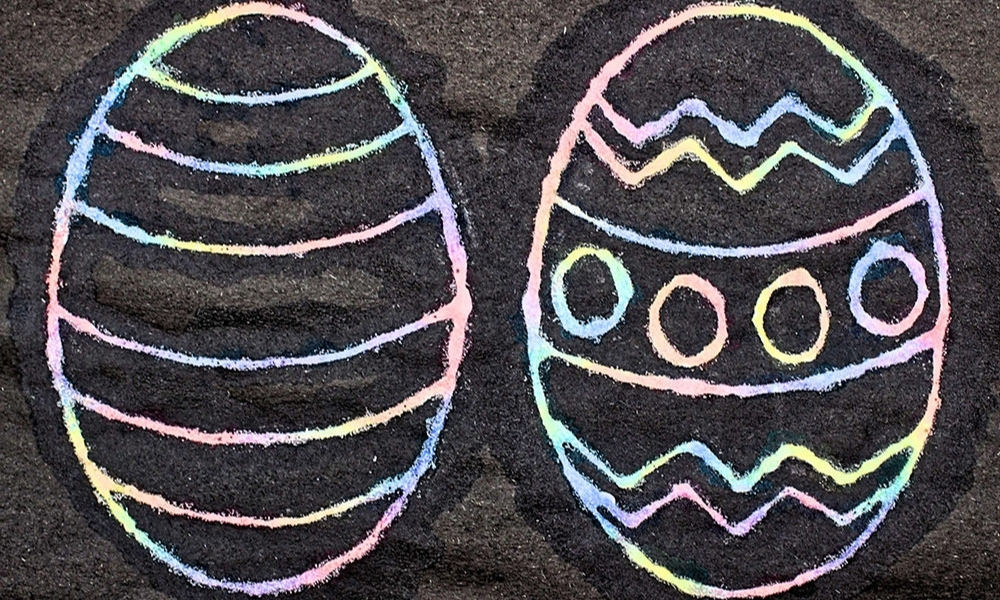
As their paintbrushes touch the salt, the colours will spread in both directions and combine as they come into contact. You can use any colours you want, but I chose to use only primary colours so my kids could see what happened when they mixed. This part is really cool to look at!
5. Let Dry
Once you’ve coloured all the lines, let your artwork dry completely. This might take a couple of days.
6. Remove Excess Salt (Optional)
If you want to hang it on your walls once it’s dry, you’ll need to brush off all the excess salt to prevent it from flaking off all over your floors.
Just use your fingers or a paintbrush to gently rub off as much salt as you can. Don’t be too rough with it or you might ruin the artwork! You’ll know it’s ready once it stops rubbing off easily.
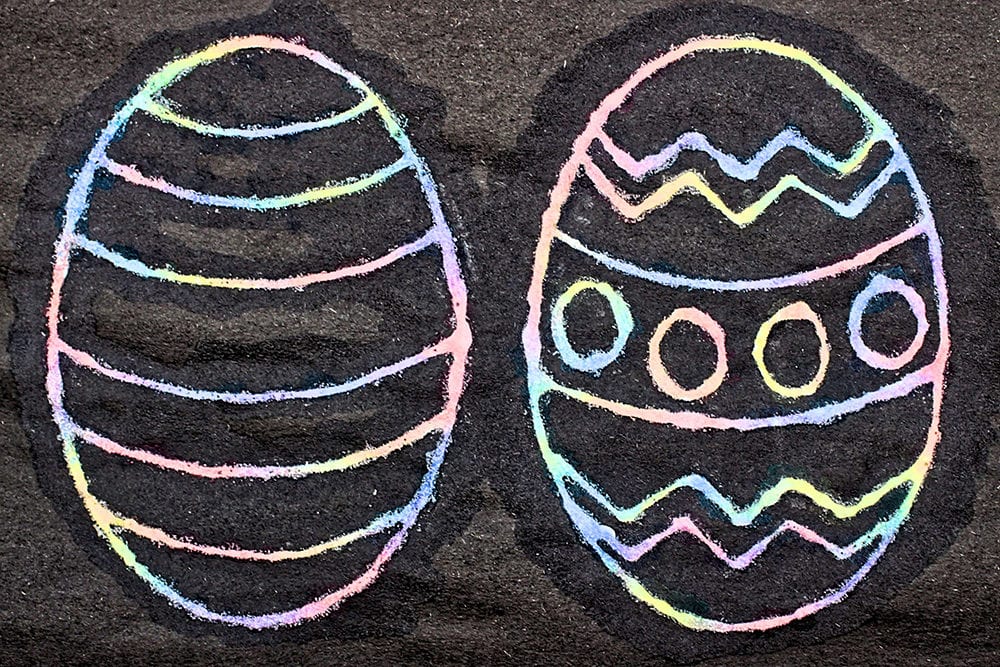
And there you have it—beautiful and so fun to make!
As you can see, the colours become lighter as they dry. My liquid watercolours were heavily diluted with water because I find pastel colours very Eastery, but you can dilute yours less if you prefer brighter colours!
Related Easter Egg Crafts
Looking for more fun Easter projects to do using our free printable? Check out these articles:
Only your name will be made public. Please note that by submitting your comment, you are agreeing to the terms of our Privacy Policy.