
Looking for an easy craft to celebrate the arrival of summer? This colorful butterfly suncatcher is sure to brighten up any window—and it includes a free template for you to download and print at home!

JUMP TO…
Looking for the printable? Enter your email address in the sign-up form!
Ever since we started making window clings and paper plate suncatchers, our kids have been hooked. There’s just something about having colorful designs on all our windows that feels so cheerful!
So with the (almost) summer sun brightening our windows, of course we had to make another one. And what better way to celebrate summer than with a butterfly craft? (Butterflies, and of course, ice cream—like this cute 3D Puffy Paint Ice Cream.)
The kids were really excited about this one, and we just LOVE how it turned out. The design is so pretty, and the colors are so bright!
And to make your life a little easier, I even created a template for you to download and print at home—which means you should have no difficulty making your own!
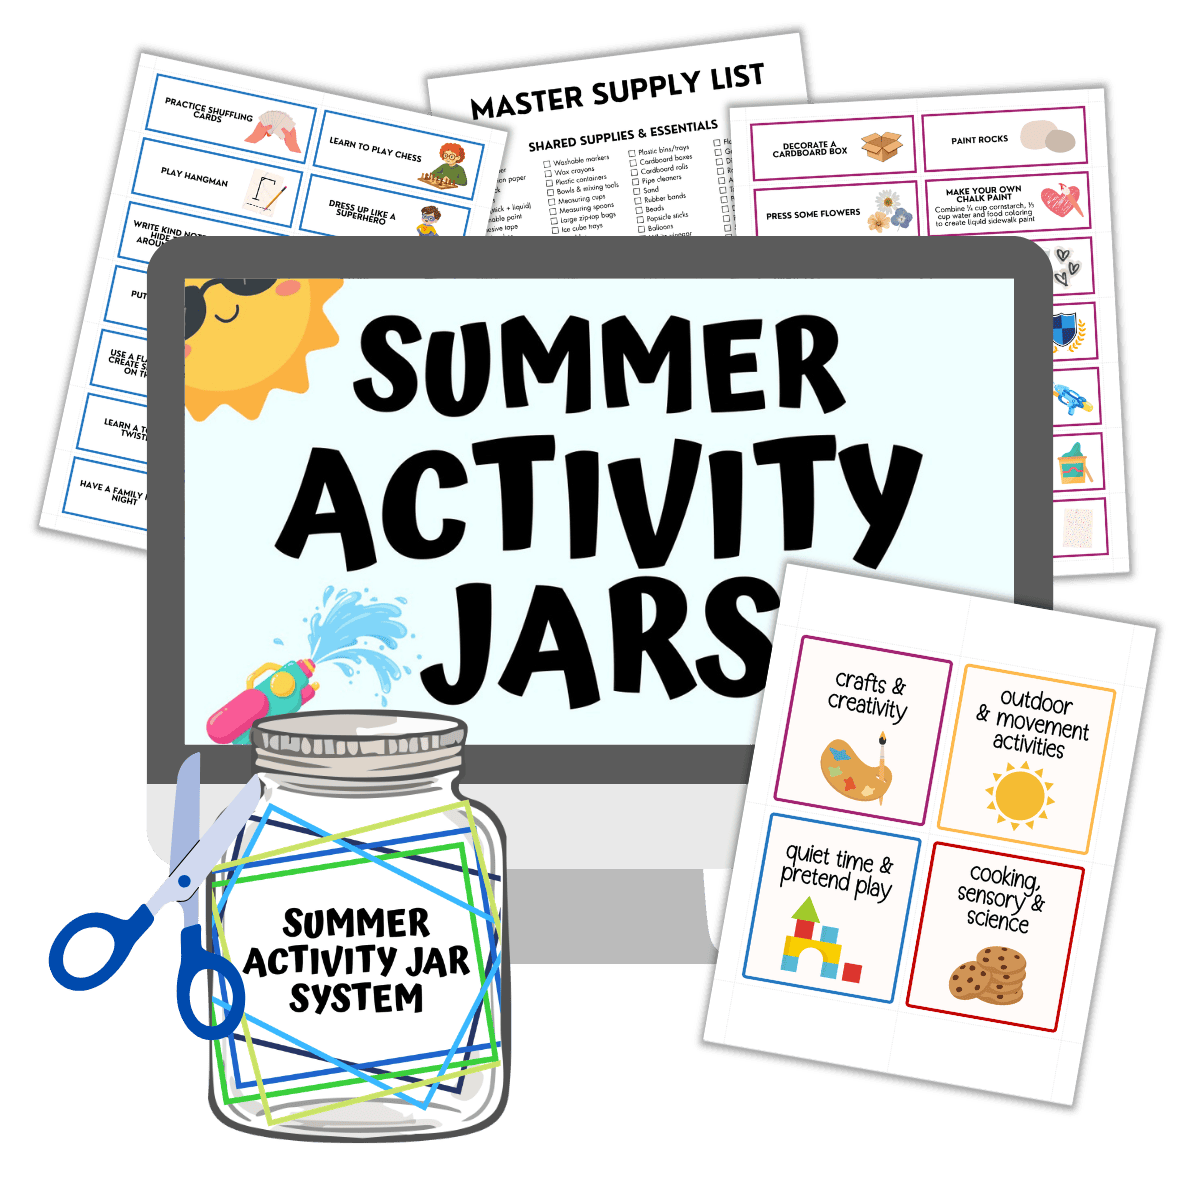
Get the “easy button” for summer!
Skip the planning and simplify summer break with this set of 280 activity cards that your child can pull out of a jar whenever they’re bored.
Required Materials
Here’s what you’ll need to make these cheerful DIY butterfly suncatchers at home:
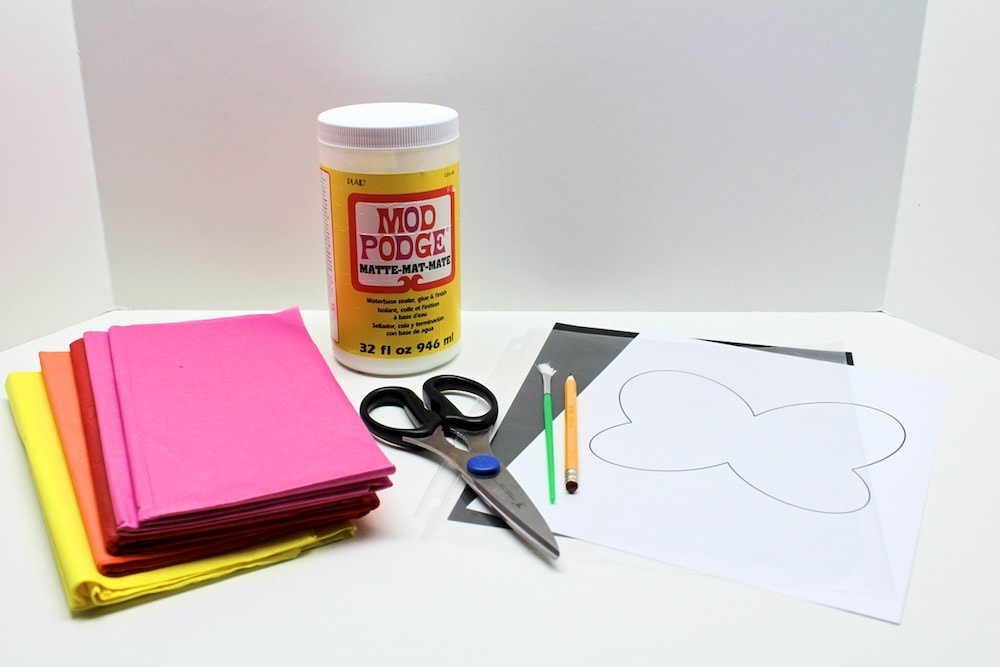
- My free butterfly suncatcher printable, which you can download using the form at the bottom of this article
- Clear plastic sheet protector
- Mod Podge
- Paintbrush
- Colorful tissue paper in the colors of your choosing (we went with yellow, orange, red and pink)
- Scissors
- Black cardstock
- Pencil (optional)
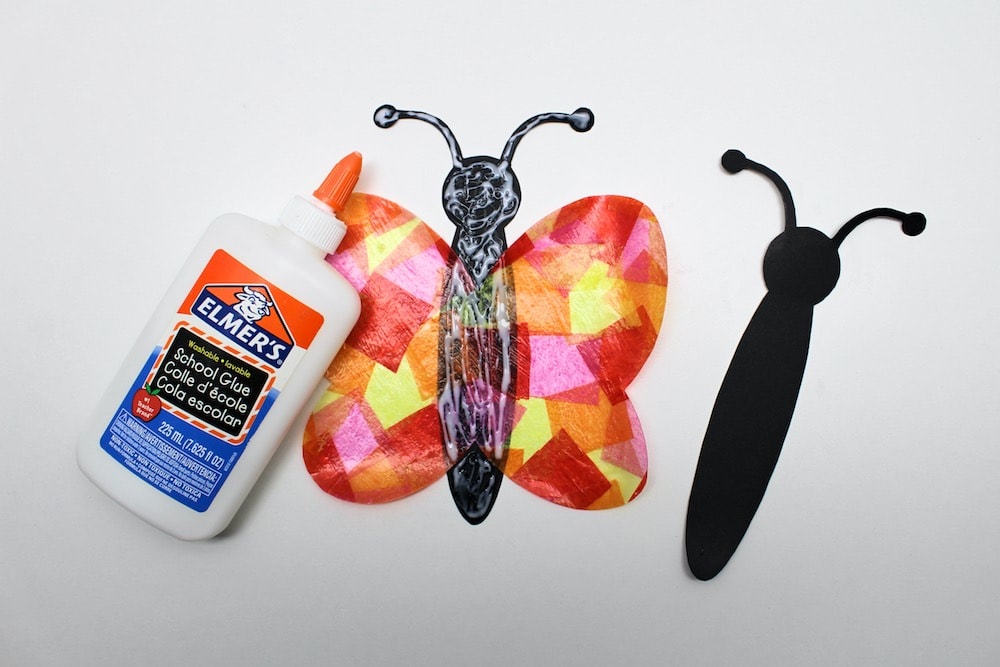
- School glue (not pictured)
- Adhesive tape (to place the suncatcher on your window)
How to Make a Butterfly Suncatcher (Step-by-Step)
1. Print Template
Start by downloading the template and printing it on Letter-sized paper. You’ll need to print the first page (with the butterfly wings) on regular printer paper, and the second page (with the butterfly’s body) on black cardstock.
Make sure to check your printer settings before you print the document. Some printers print pages in reverse order, so if that’s the case with yours, be sure to place the cardstock on top of your regular paper.
If you’re not sure and want to avoid a mishap, you can always print the pages separately.
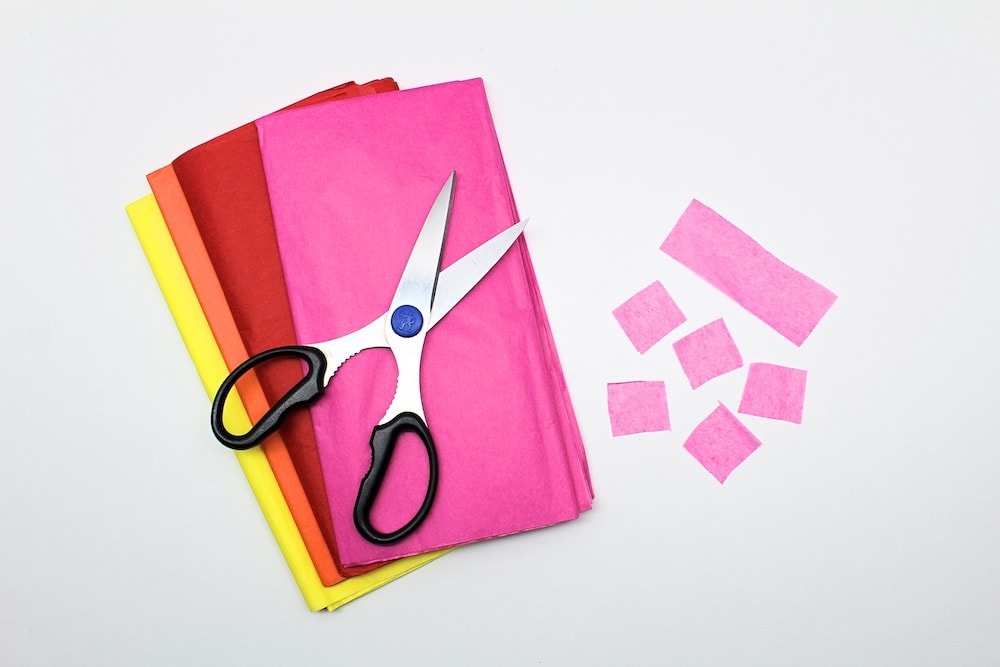
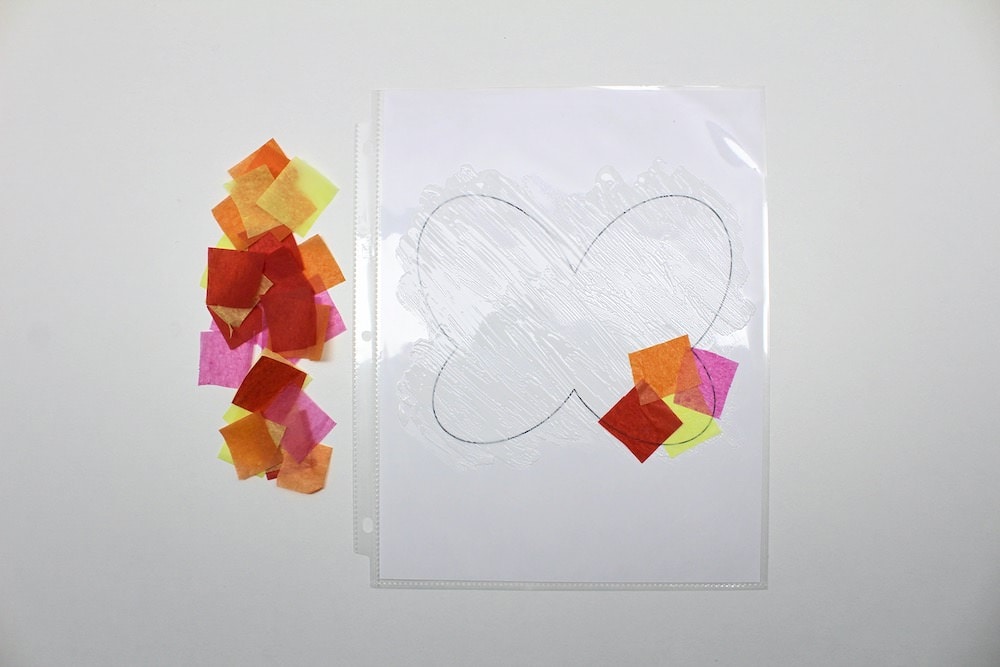
2. Cut Tissue Paper Squares
Choose a few colors of tissue paper, then use scissors to cut the tissue paper into small squares.
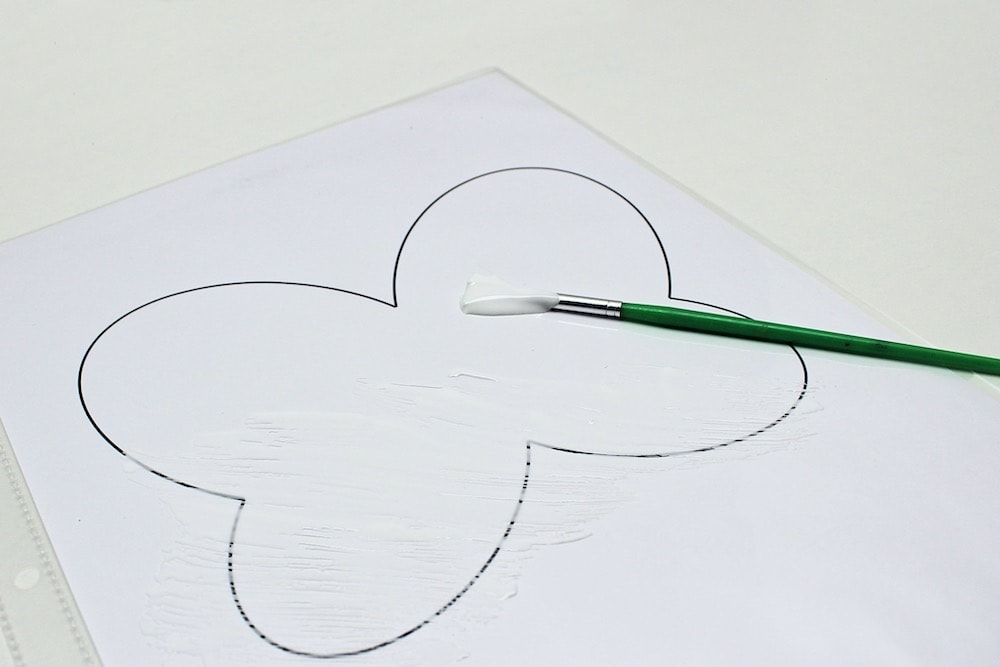
3. Place Template in Sheet Protector
Place the first page of the template (with the butterfly wings) inside the sheet protector.
4. Spread Mod Podge on Sheet Protector
Use a paintbrush to cover one side of the sheet protector with Mod Podge. You don’t need to cover absolutely everything, but do make sure to cover everything around the butterfly wings, using the template inside the sheet protector as a guide.
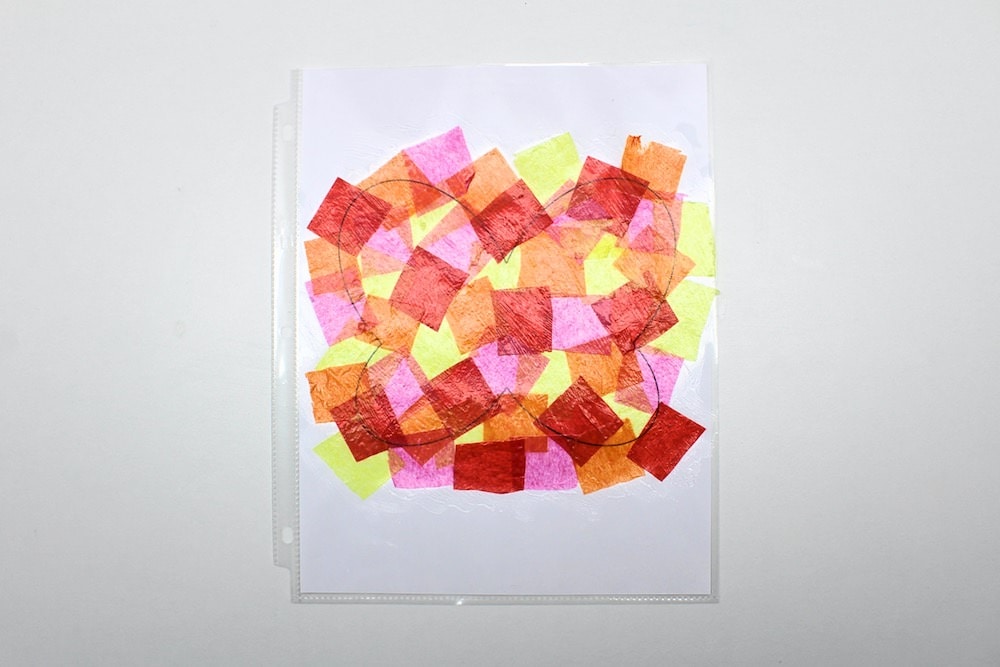
5. Place Tissue Paper on Mod Podge
Gently press the squares of tissue paper onto the Mod Podge. Continue until the entire surface of the butterfly wings (plus a little extra) is covered in tissue paper squares.
As you cover up the template, keep your Mod Podge handy and add some as needed to help the tissue paper stick.
6. Cover with Mod Podge
As mentioned above, you should expect to add Mod Podge throughout the whole process of adding the tissue paper squares.
Once you’re done, add an additional layer of Mod Podge to make sure all the tissue paper is covered with it.

7. Let Mod Podge Dry
Let your handiwork rest until all the Mod Podge has finished drying.
8. Cut Template
While you’re waiting for the Mod Podge to dry, grab the black cardstock with the butterfly’s body and cut along the lines. They may be a little hard to see on the black cardstock, but they should still be visible enough to allow you to cut out the butterfly’s body.
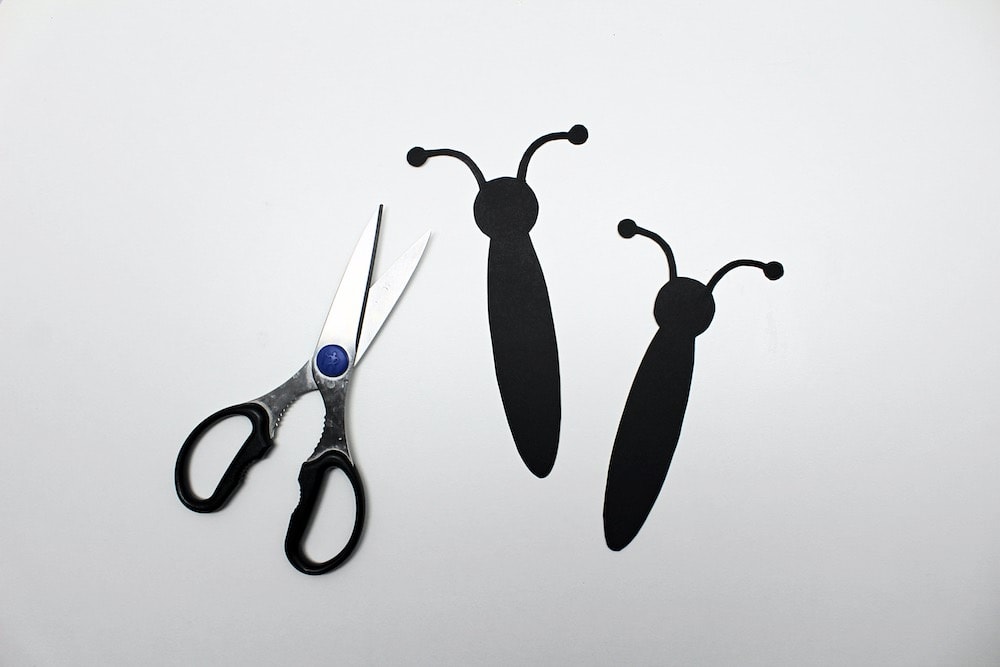
Be careful when you get to the antennae—they’re thinner than the rest of the design and may be a little tricky to cut!
9. Cut Butterfly Wings
Once the Mod Podge is completely dry, grab firm hold of the sheet protector to prevent the template from moving, and use scissors to cut along the lines of the butterfly wings.
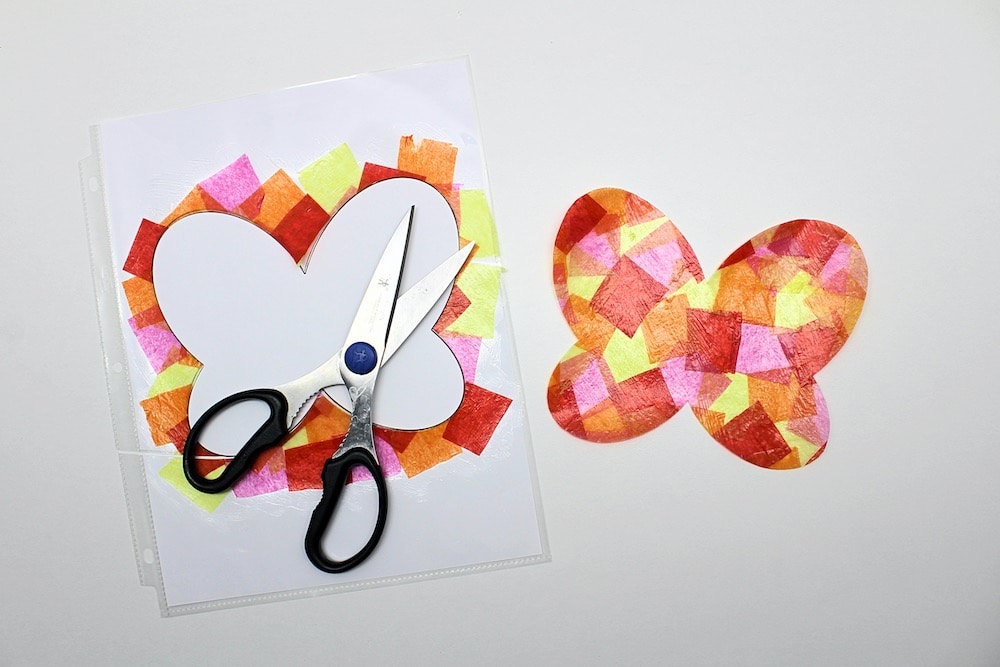
As you cut, it may get a little harder to hold the template in place. If you’re concerned about that, feel free to trace along the lines with a pencil before you start cutting. That way, if the template moves, you can simply keep cutting along the pencil-drawn lines.
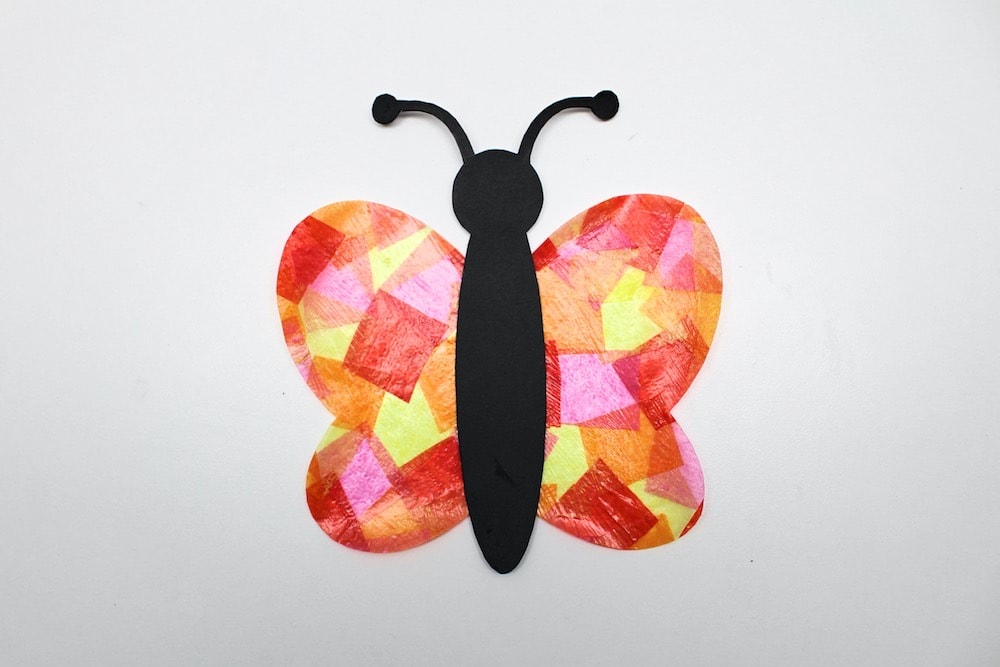
10. Glue Butterfly Body
Cover one butterfly body with glue and press the wings on top of it. Then, cover the other butterfly body with glue and press it on top so that the two bodies are facing each other and the wings are pressed in between them.
11. Let Glue Dry
Let your suncatcher rest for a bit to give the school glue a chance to dry.
12. Hang on Window
Once the glue is dry, use adhesive tape to stick the suncatcher to your window.
If you have it (I didn’t), you can use double-sided tape.
If not, use regular tape and fold it onto itself so that it forms a loop. (The sticky side of the tape should be on the outside of the loop.) Then, press the loop onto as many parts of the butterfly wings and body as needed, and press the butterfly against a window.
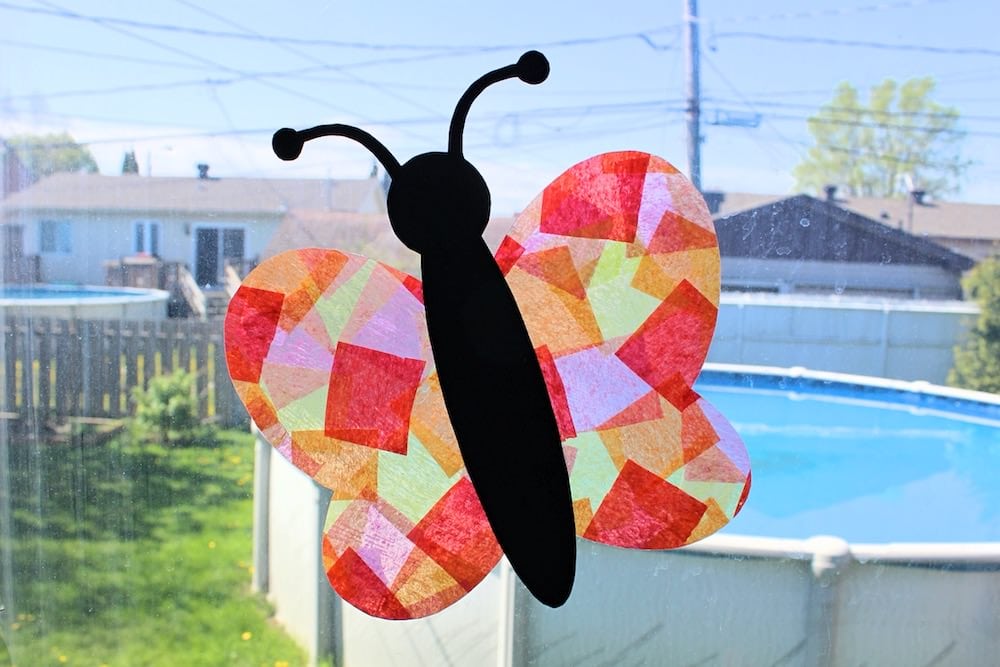
Isn’t it just gorgeous? We may have to pick out some more tissue paper colors and create some friends for our butterfly!
Related Butterfly Crafts
Looking for some more fun butterfly crafts to do at home this summer? Check out this article:
Great Butterfly
Where do I get the free butterfly printable? I put my email address in and have received nothing.
You should receive an email with a confirmation button, and you should be redirected right to the download when you press it. If you have checked your Spam folder and the email is not there, you can either try with a different email or write to me directly to let me know, and I’ll sort it out for you: sacha(at)thecraftathomefamily(dot)com
Butterflies are a lovely idea for spring. I’ve made other suncatchers before using clear adhesive contact paper with little ones who still make a lot of mess with glue or modge podge
That is a great idea! Crafting with contact paper is so fun!
We love this activity, the girls wanted to make these to share to our neighbors.
I’m so happy to hear you enjoyed it!!