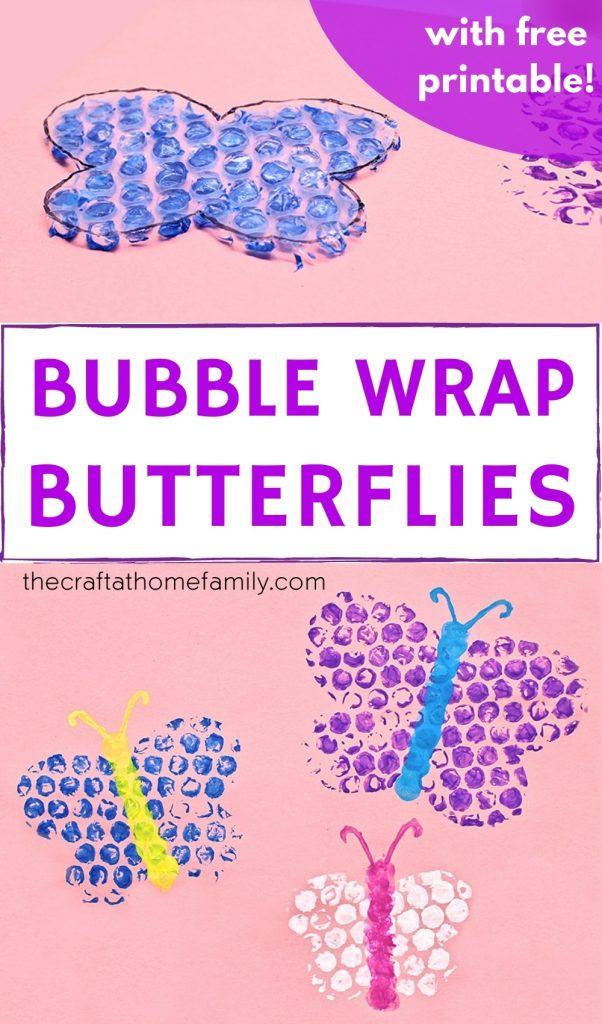
Looking for a fun new way to paint? Try using bubble wrap to make these cute butterfly prints with your kids! The included template makes this project super easy to set up, and you probably already have all the materials you need at home. Plus, the butterfly stamps can be cleaned and reused, so you can make them once and use them as many times as you like!
JUMP TO…
If your kids are like mine, they love painting with anything that’s not a paintbrush—it’s so much fun exploring the different textures that household objects can create on paper!
Bubble wrap is one of the coolest materials you can use to make prints at home. And if you decide to give this project a try, you can easily keep your child busy while you set it up by giving them some bubble wrap to pop!
If you’re looking for another fun summer-themed painting project, you can also check out these Puffy Paint Ice Cream Cones.
Get the “easy button” for summer!
Skip the planning and simplify summer break with this set of 280 activity cards that your child can pull out of a jar whenever they’re bored.
Required Materials
Here’s what you’ll need to create easy homemade butterfly stamps using bubble wrap:
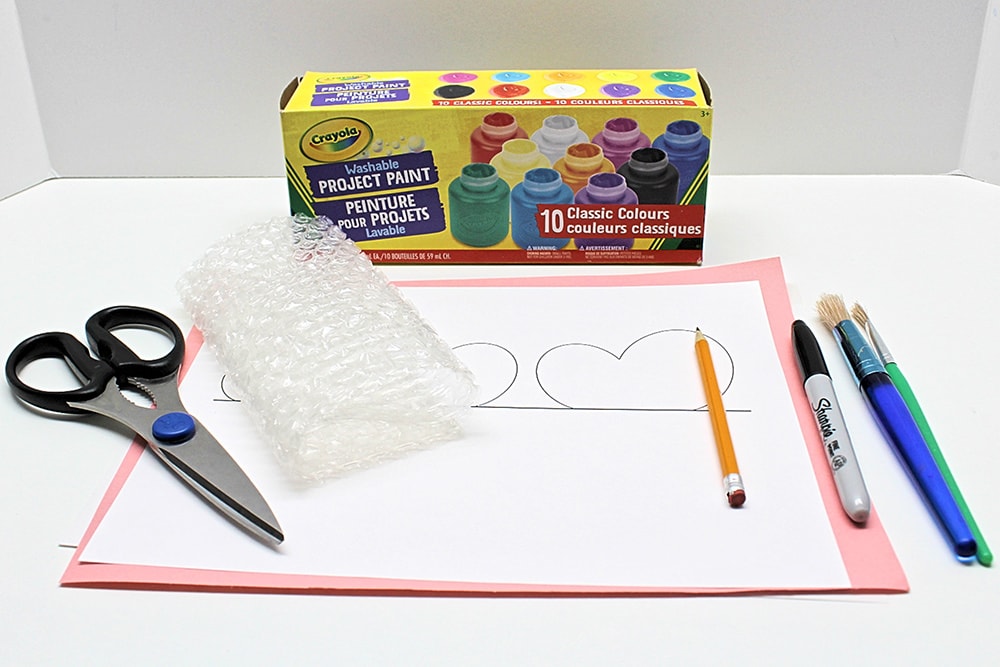
- Construction paper or regular printer paper
- My free butterfly printable (which you can download using the form at the bottom of this article) or any other butterfly design of your choosing
- Scissors
- Pencil (if you’re drawing your own butterfly design)
- Bubble wrap (we had some lying around the house)
- Permanent marker
- Paper plates, ceramic plates or paintbrushes (for applying the paint to the bubble wrap)
- Washable kids’ paint
How to Make Bubble Wrap Butterflies (Step-by-Step)
1. Print & Fold Template
Start by printing the template and folding it along the line in the middle so that the butterfly wings are visible. If you’d rather design your own butterfly, simply fold a piece of printer paper down the middle and draw one of the wings using a pencil.
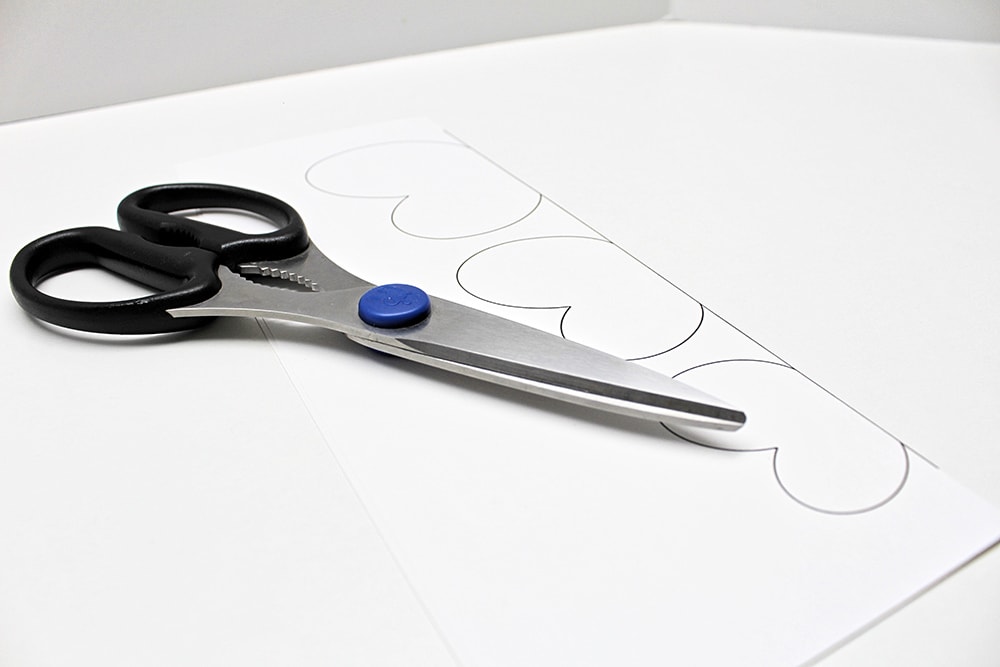
2. Cut Template
Leaving the paper folded, cut out the butterfly wings. Once they’re cut, unfold them to reveal your butterflies.
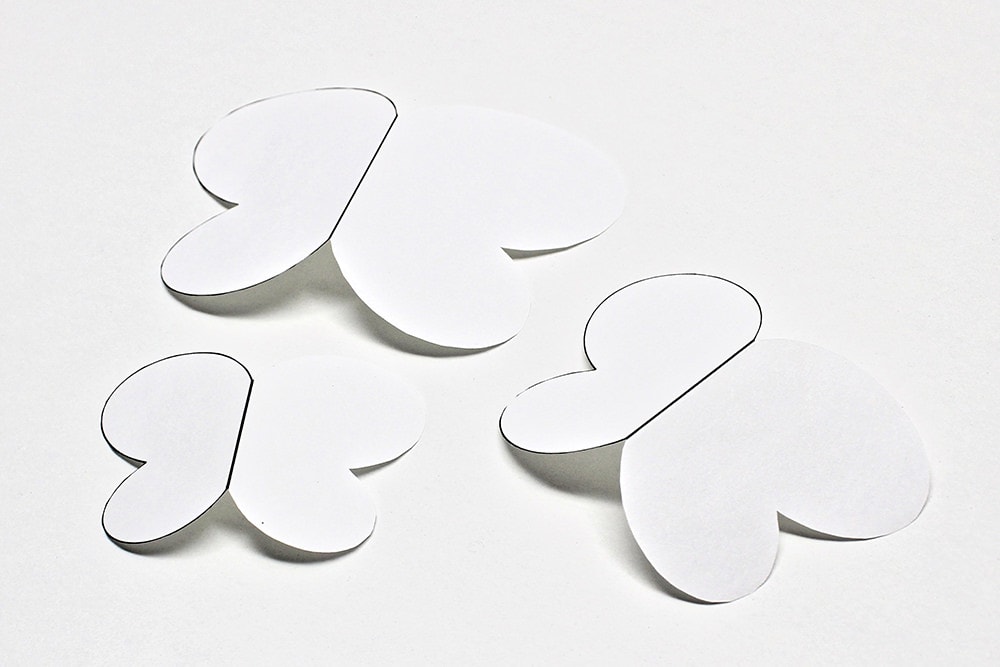
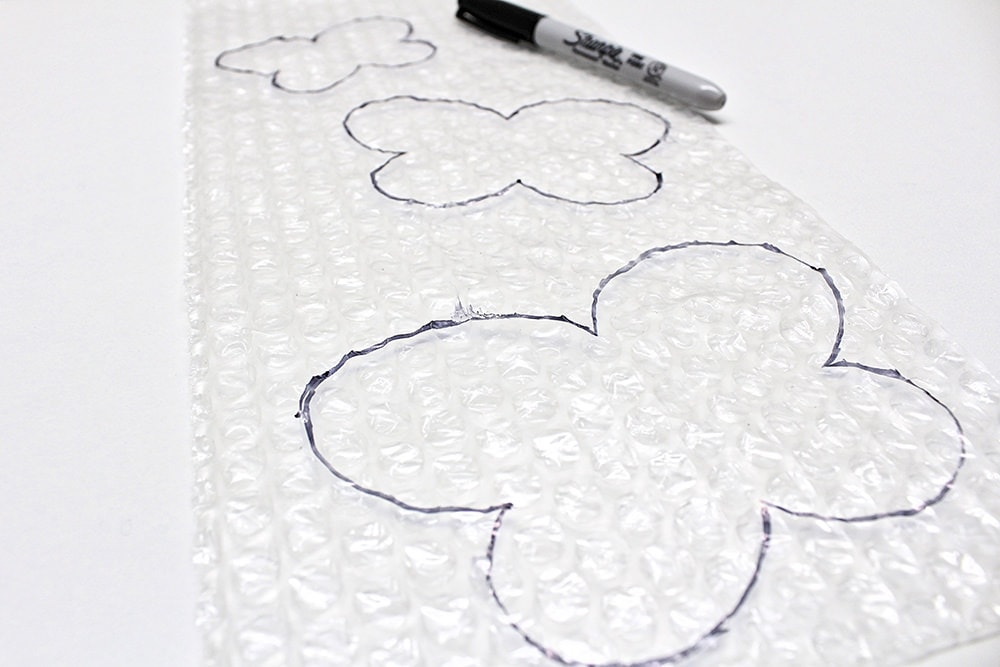
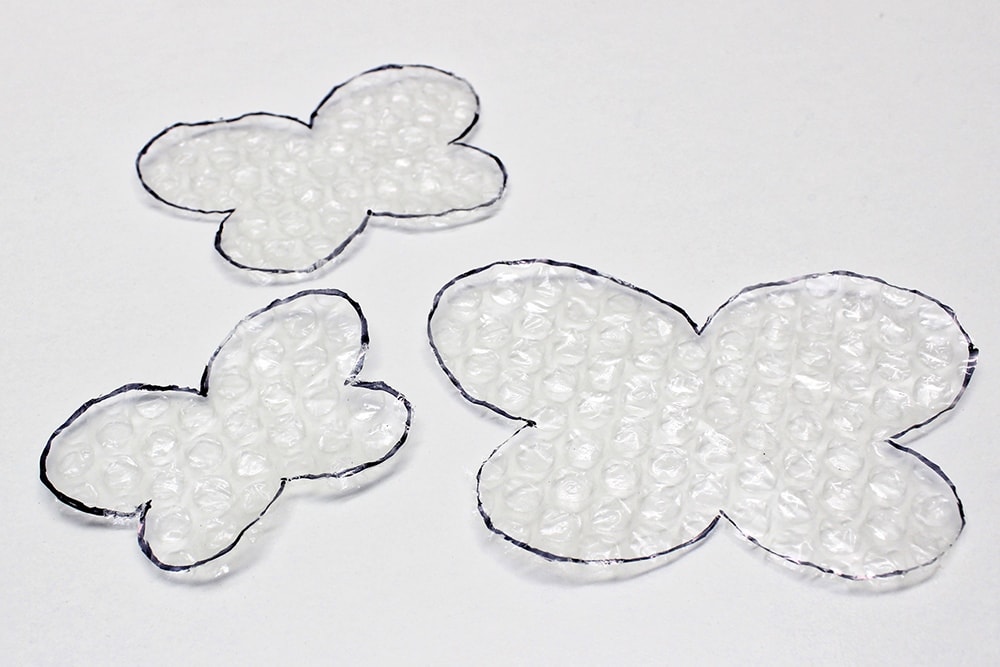
3. Trace & Cut Butterflies
Press the butterflies onto the flat side of the bubble wrap and trace them using a permanent marker. Then, cut the bubble wrap along the lines to obtain butterfly-shaped bubble wrap stamps.
4. Add Paint
Now that the prep work is done, you can start painting.
During my first attempt, I used a paintbrush to paint the bubble wrap before pressing it onto the construction paper. It looked OK, but the excess paint between the bubbles did spill out onto the paper, so the design didn’t look as neat.
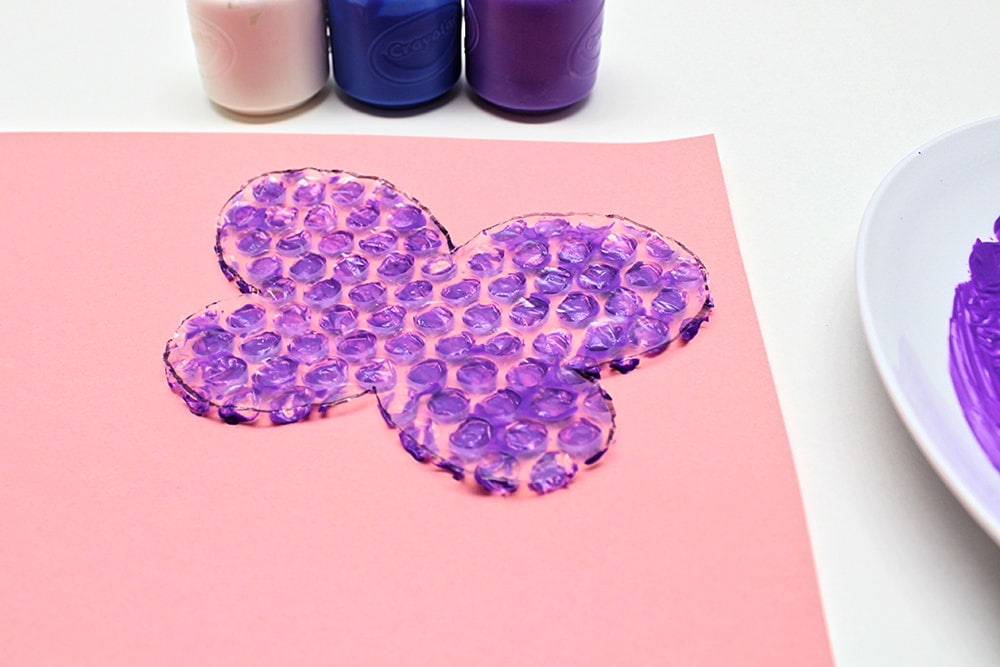
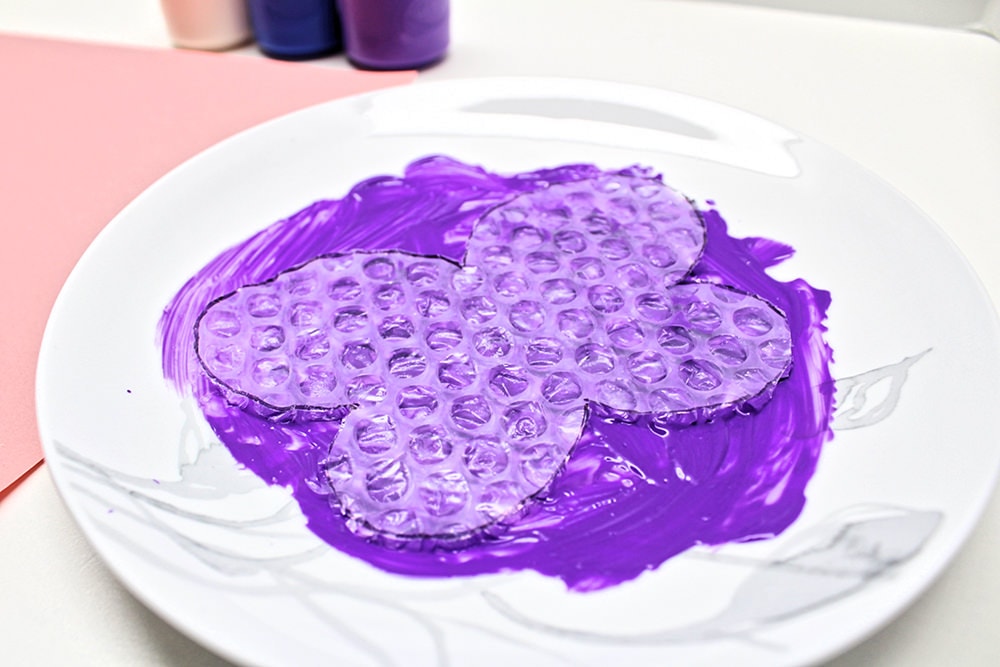
For my second attempt, I decided to spread some paint on a plate (I used ceramic so it wouldn’t be absorbed) and gently press the butterfly into it with the textured side of the bubble wrap facing down. That made the print look a lot neater since the paint only came in contact with the bubbles.
5. Create Prints
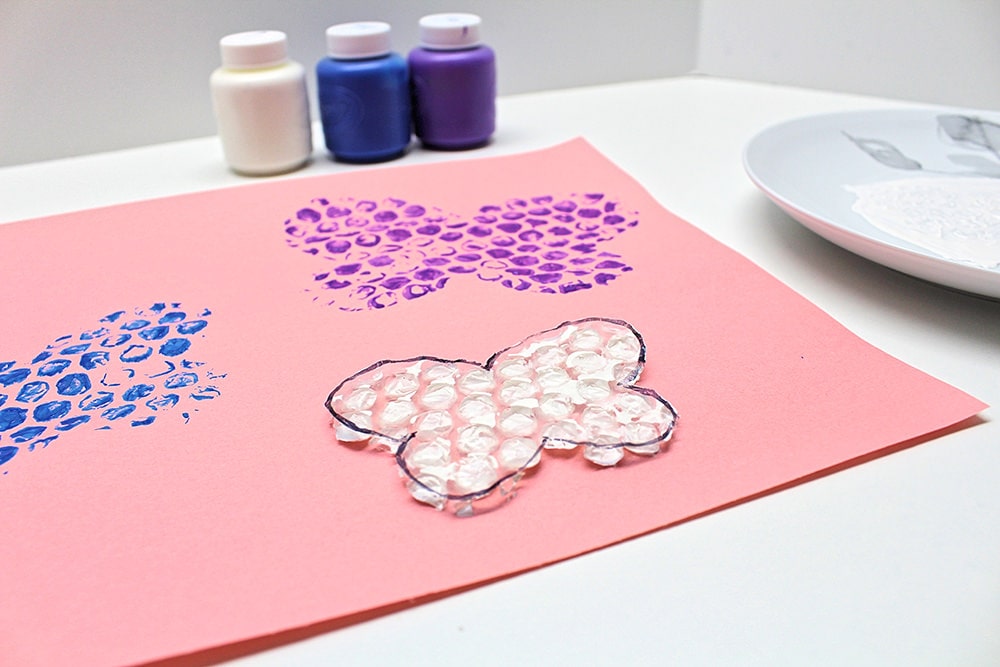
Once the butterfly is covered in paint, carefully press it onto the paper and peel it off to reveal an imprint.
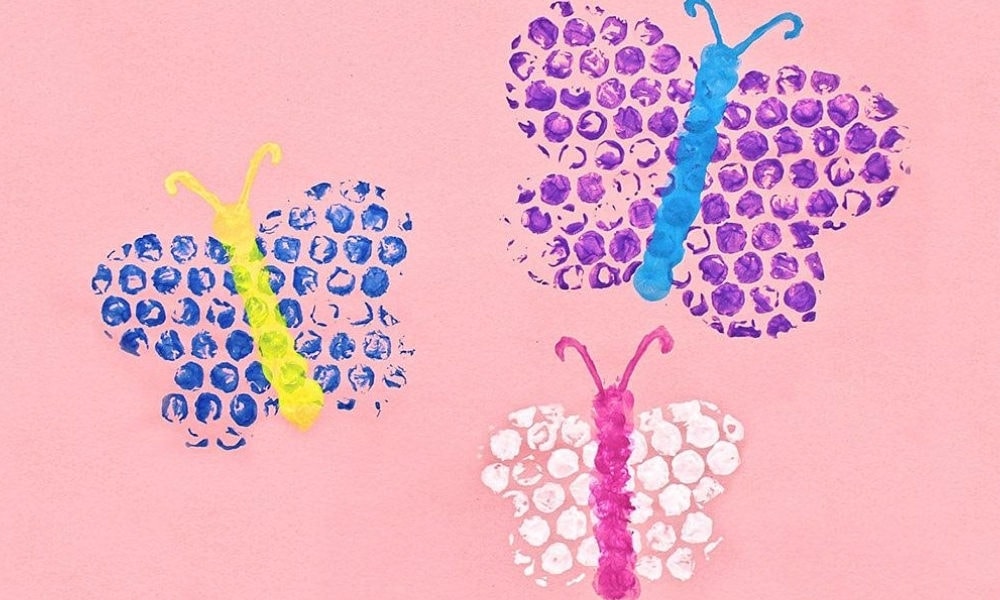
Make as many butterfly prints as you want! I used all three stamps and chose a different color of paint for each, but you can use whichever size, arrangement and color you like!
Once you’re done stamping butterflies, you can leave them as is or add details. I found that the prettiest way to do so was to create the body with thumbprints and add antennae using a small paintbrush.
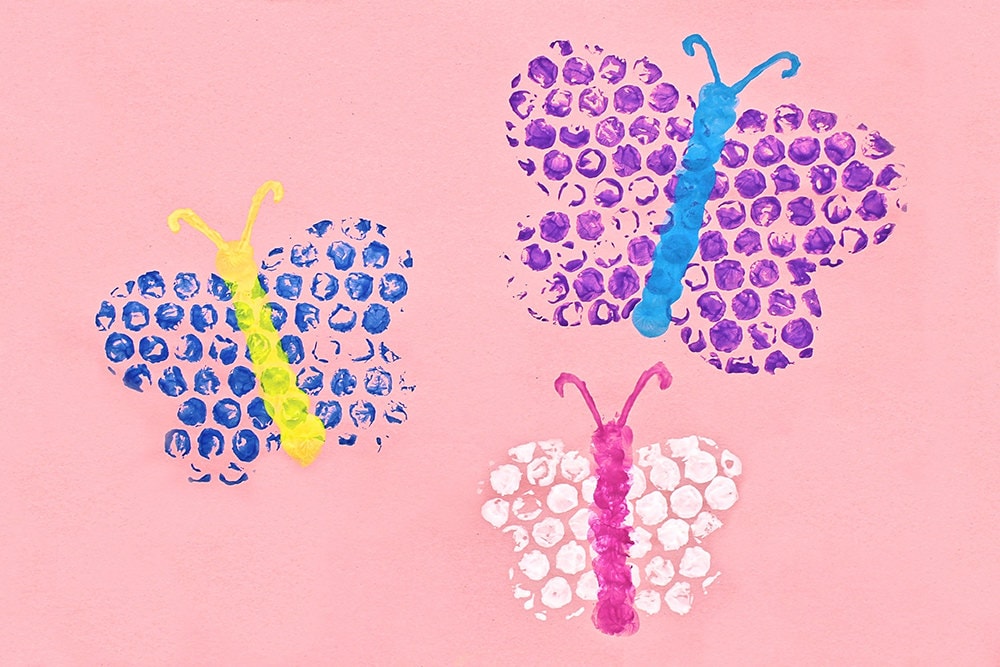
And voilà! So pretty, and you can make as many as you want because if you use washable paint, you can gently rinse it off and reuse the bubble wrap stamps. We’ve used them several times now and the kids love them!
Related Summer Crafts
Looking for more summer-themed crafts that you can do at home with your kids? Check out this article:
Step 3 says to press the butterflies on the flat side of bubble wrap, trace, and cut.
Step 4 says to add paint. How do you get the bubble effect if you’re putting paint on the flat side?
Hi Pam!
For step 3, you’ll want to trace the butterfly shape onto the flat side of the bubble wrap because it would be quite difficult to trace anything on the textured side. You can then cut along the lines you traced.
Once you get to step 4, however, you’ll want to pour some paint onto a plate and press the TEXTURED side of the butterfly stamp into the paint—so the paint will be on the textured side rather than the flat side, and the bubble effect will be created once you press the stamp onto paper.
I’ve edited the wording of the article to make things clearer.
I hope that helps!
Sacha