
This gorgeous starry night sensory bottle is made using small stars that glow in the dark when charged under a light source! It’s the perfect night-time calm-down bottle to help kids fall asleep, and the glow from the stars will fade on its own as they doze off!

JUMP TO…
We can’t get enough of sensory bottles. They’re so beautiful, and there are so many fun ways to customize them!
We’ve been making them for over a year now and we have a ton of glitter-filled calm-down bottles. But since we want to make our bottles unique, we’ve also experimented with various combinations of water, glue, baby oil, corn syrup and hair gel to observe the difference in how they behave.
We’ve filled our bottles with pom-poms, straws, water beads, magnetic chips, loom bands, seashells and pretty much anything else you can think of, and we now have a huge collection of one-of-a-kind bottles sitting on a shelf in our kitchen whenever they’re not in use!
This starry night sensory bottle is one of my four-year-old’s favorites. It’s made using stars that glow in the dark for a while after they’ve been exposed to light, so she loves to keep it on a shelf in her bedroom while she falls asleep.
And since the stars only glow for a finite amount of time before they need to be recharged, the light fades on its own as she dozes off! She loves it when we alternate this sensory bottle with these cute DIY fairy bottles at bedtime.

Get hundreds of pages of activities!
Get access to all our paid printables, as well as monthly activity planners, for just $5/month. (New printables added twice per month!)
Required Materials
Here’s what you’ll need to make you very own starry night sensory bottle using glow-in-the-dark stars:

- Empty bottle (I love these ones, but you can use whichever ones you like as long as the opening is big enough for the stars to fit)
- Clear hair gel or sports gel (whatever’s cheaper, as long as it’s not too watered down)
- Tap water
- Liquid food coloring
- Glow-in-the-dark paint (we buy ours from the dollar store around Halloween, but you can just skip it if you can’t find any)
- Fine glitter
- Chopstick (for stirring)
- Glow-in-the-dark stars
Note: For safety reasons, I highly recommend sticking with plastic bottles rather than glass if you have young children. The ones I linked to are made of plastic and in my experience, they don’t break easily when dropped.
For the glitter, I used silver, two shades of purple and two shades of blue:

Grab our 12 best sensory recipes!

By submitting your email address, you are agreeing to the terms of our Privacy Policy. You can unsubscribe at any time.
How to Make a Starry Night Sensory Bottle (Step-by-Step)
1. Add Hair Gel to Bottle
Start by squirting some hair or sports gel into the bottle until it’s about a fifth full. You can get away with filling it more than that if you’re using a smaller bottle, but don’t fill it too much or you’ll have a hard time mixing everything together!

2. Add Water, Glow-in-the-Dark Paint, Food Coloring and Fine Glitter
Pour in a couple tablespoons of tap water, then add a squirt of glow-in-the-dark paint, a couple drops of purple food coloring and some fine glitter.

Because the gel is so thick, the tap water helps the paint, food coloring and glitter spread more evenly throughout. But be careful not to add too much water or the stars won’t stay in position once the bottle is finished!
3. Mix with Chopstick
Use the chopstick to mix everything until it’s well combined.

The color should be darker than what’s pictured—I only added one drop of food coloring and ended up having to add more later to achieve the right color.
It’s a lot harder to mix once you’ve added more hair gel, so I really recommend adding enough food coloring right from the start. But if ever it turns out that you didn’t add enough, no need to worry! Just check out my troubleshooting notes below to find out how to fix it.
4. Repeat Previous Steps
Repeat the previous steps several times, adding approximately the same quantity of hair gel each time.
The reason you have to fill the bottle in small increments is that the thickness of the hair gel makes it almost impossible to mix the other ingredients into a large quantity of gel. If you were to fill the bottle all the way to the top before trying to mix in the paint, food coloring and glitter, you’d have a very hard time getting them all the way to the bottom.

5. Position Glow-in-the-Dark Stars
Leave a tiny bit of room at the top of the bottle so it doesn’t overflow, then start adding glow-in-the-dark stars.
Here are the ones we used:
They’re meant to be placed on your child’s bedroom ceiling, but they glow very nicely inside the bottle when they’ve been exposed to light!
Because the hair gel is so thick, you’ll have to manually position each star by pushing it down with the chopstick. Once you’re done, they should stay where they are due to the thickness of the gel. (If your stars aren’t staying in place, read my troubleshooting notes below.)

I highly recommend starting at the bottom and working your way up to avoid displacing previously-positioned stars when pushing down new ones. I placed mine in rows and alternated small and medium stars to create a pattern.

6. Seal Bottle
Once you’ve positioned all the stars, seal the bottle and you’re done! The stars will glow under black light, but they will also glow on their own for a while if you leave them under a light source to charge. This bottle looks so pretty sitting on a shelf in the dark!

If your child loves this project, you can also try this Slow Motion Sensory Bottle and use glow-in-the-dark beads to create a matching set!
Charging the Glow-in-the-Dark Stars
The stars will glow under black light, but they will also glow on their own for a while if you leave them under a light source to charge.
They will recharge just fine if the bottle is placed near a window. Don’t leave it out in direct sunlight and forget it there all day—I did this accidentally and was very surprised to see that the sun bleached all of the color out of the bottle!
The bottle we made last year is still just as dark as when we first made it, so the color fading was completely avoidable. Lesson learned!
Troubleshooting
My Stars Are too Big to Fit Through the Bottle Opening!
Unfortunately, you won’t be able to complete this project unless you choose a bottle with a wide enough neck. I highly recommend testing whether the stars fit before you start filling the bottle with hair gel.
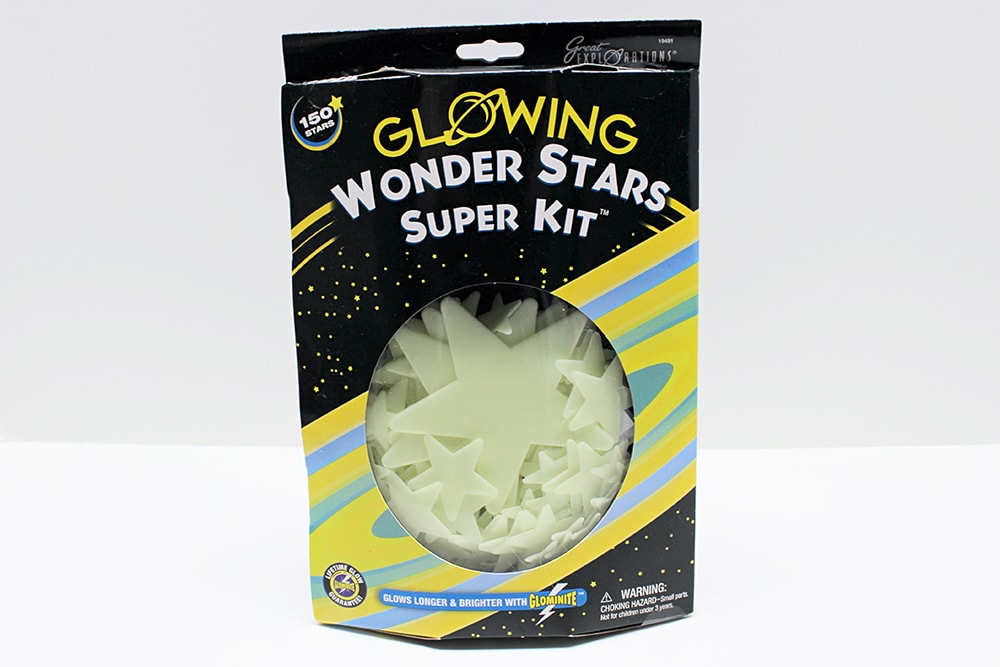
Here are the exact products I used, which I know are the right size for this project:

- Light up your nights with the wonder stars Super kit from Great Explorations.
- This kit comes with 150 glow-in-the-dark stars and adhesive putty. Plus a constellation chart to help create the constellations in the night sky.
- Create a whole galaxy on the walls and ceiling of any room.
The package of stars we bought actually contained four different sizes, but only the two smallest sizes fit through the opening of the bottle. That wasn’t a problem for us since we were able to use the bigger ones to make a matching starry night sensory bag and still have plenty leftover for other projects!
I Need to Add More Food Coloring!
Because the gel is so thick, it can be hard to get the food coloring all the way to the bottom once the bottle is full. For this reason, I recommend using a minimum of two to three drops of coloring every time you add hair gel. This will ensure that you end up with a color that is nice and vibrant!
When I was creating the bottle pictured in this article, I made the mistake of only adding one drop of food coloring per squirt of hair gel. That’s why the color appears so light in the first few pictures.
If you make the same mistake that I did, just wait until the bottle is about three quarters full, then add several more drops of food coloring and shake the bottle vigorously until everything is well combined. This is pretty much the only way to get the color to go all the way to the bottom if you didn’t add enough to begin with.

If you think you’ll need to do this, keep in mind that it won’t work unless there’s still some empty room at the top. So make sure you’re happy with the color before filling the bottle completely, or you may end up having to remove some of your hair gel mixture! (Tip: Instead of wasting any ingredients you have remove, use them to make a sensory bag!)
My Stars Keep Moving Around!
If your stars are moving around, you probably added too much water to the hair or sports gel. It could be that the gel you used wasn’t as thick as mine and needed to be diluted less, or even not at all.
If this happens, you’ll have to dump out some of the contents of the bottle and replace it with undiluted hair gel. Depending on the quantity you’re throwing out, you can also add a bit more food coloring, glow-in-the-dark paint and glitter to avoid lightening the color too much.
I recommend leaving some empty room at the top of the bottle and shaking it vigorously to combine the ingredients. This is pretty much the only way to get the ingredients from the top all the way to the bottom, and you’ll want the extra hair gel to be spread evenly throughout. If the mixture is only thicker at the top, the stars nearer to the bottom will continue to move out of position.
Once you’ve combined the ingredients well by shaking the bottle, top it off with some more gel, food coloring, glow-in-the-dark paint and glitter. Stir these ingredients using a chopstick and start positioning your stars, checking to see if they stay in place.
Don’t want to throw out part of the mixture? Not a problem! Just reuse it by throwing it into a freezer bag and using it to make a Starry Night Sensory Bag!
Related Sensory Bottle Articles
Do you love sensory bottles as much as we do? If so, you may be interested in this article:
- The ULTIMATE Guide on Homemade Sensory Bottles
- Sparkly Winter Sensory Bottle
- Halloween Jack-o’-Lantern Sensory Bottle
- Simple Pom-Pom Sensory Bottle
- How to Replace Glitter Glue in Sensory Bottles
- Easy Santa Claus Sensory Bottle
I also recommend trying these super-simple DIY fairy jars made using glow stick liquid. Our kids love them and the light also fades as they fall asleep. We bought a large pack of glow sticks from Amazon specifically for the purpose of making them, and we keep it on hand for whenever the kids request them!
Join my mailing list using the form below to receive 12 of the most popular sensory recipes on my site in PDF format! You’ll be the first to know when I publish new recipes, and you’ll also gain receive to lots of free printable activities for your kids.
Grab our 12 best sensory recipes!
By submitting your email address, you are agreeing to the terms of our Privacy Policy. You can unsubscribe at any time.
My kids would love this activity! Always looking for things to keep them busy! Thanks for sharing!