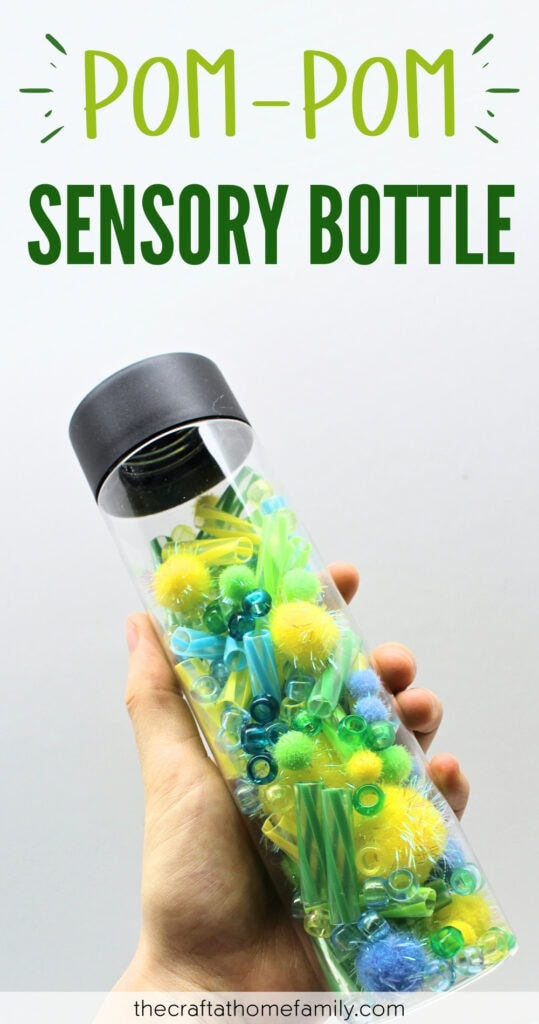
You’ll need only a few dollar-store supplies to make this simple pom-pom sensory bottle that makes fun sounds when you shake it. This easy project only takes a few minutes to complete, and children will love to use it as a musical instrument!
JUMP TO…
Have I ever mentioned just how crazy I am about sensory bottles?
I’m not sure what it is about them that I love so much. They’re definitely fun to make… and fun to play with!
But if I had to pick a reason, it would probably be the fact that there are SO MANY ways to customize them and make them unique.
Sensory bottles can be magnetic. They can glow in the dark. They can be turned into sensory toys, or used as a way to teach children how to spell. They can flow as slowly or as quickly as you want, and they can combine colors in novel ways.
And, in the case of this particular bottle, they can even produce fun sounds that children can use to make music—and all you’ll need to make it are a few dollar-store supplies!
(P.S. Want to learn more about making your own sensory bottles? Check out our detailed step-by-step guide for making sensory bottles at home!)

Get hundreds of pages of activities!
Get access to all our paid printables, as well as monthly activity planners, for just $5/month. (New printables added twice per month!)
Required Materials
Here’s what you’ll need to make this easy pom-pom sensory bottle at home:
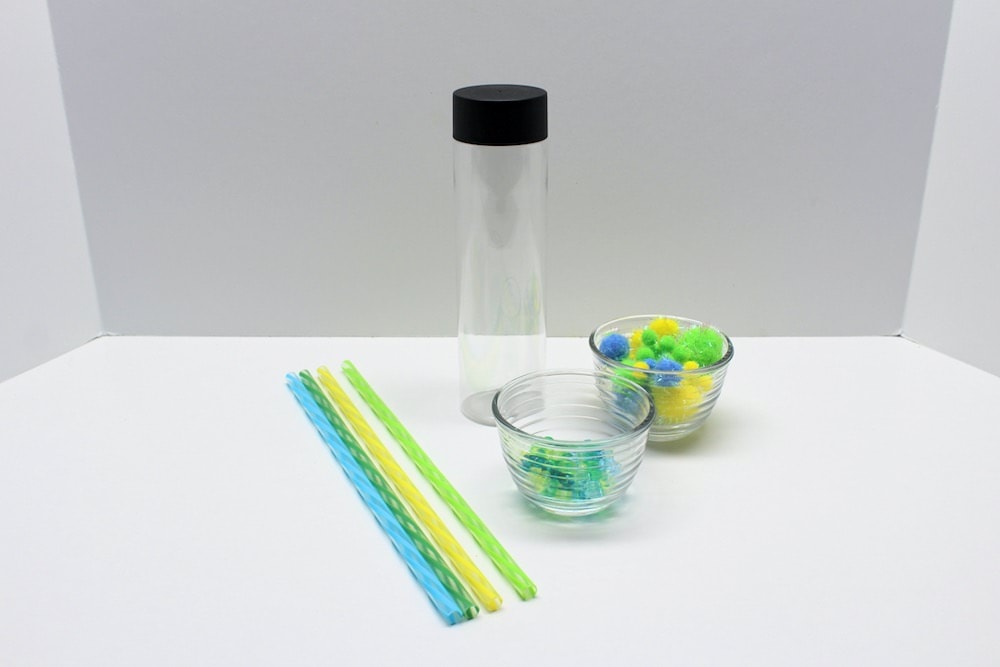
- Clear plastic bottle (I love these ones, but you can use any bottle you have on hand—including an empty water bottle from the recycling!)
- Glitter pom-poms
- Reusable plastic straws (we got ours at the dollar store)
- Plastic beads of any kind (if you have any leftover, use them to make this Slow-Falling Bead Sensory Bottle as well!
- Hot glue or strong glue (optional)
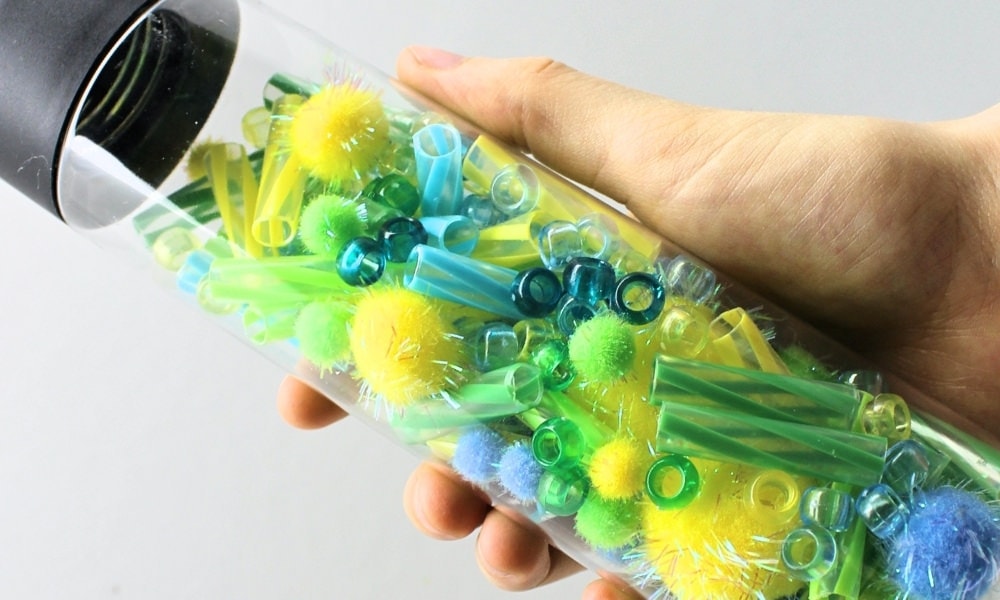
Note: We chose to coordinate the colors of the straws, pom-poms and beads using a blue, green and yellow colors scheme. However, feel free to use whichever colors your like!
Grab our 12 best sensory recipes!

By submitting your email address, you are agreeing to the terms of our Privacy Policy. You can unsubscribe at any time.
How to Make a Musical Pom-Pom Sensory Bottle (Step-by-Step)
1. Cut Straws
Start by cutting the plastic straws using a pair of sharp scissors.
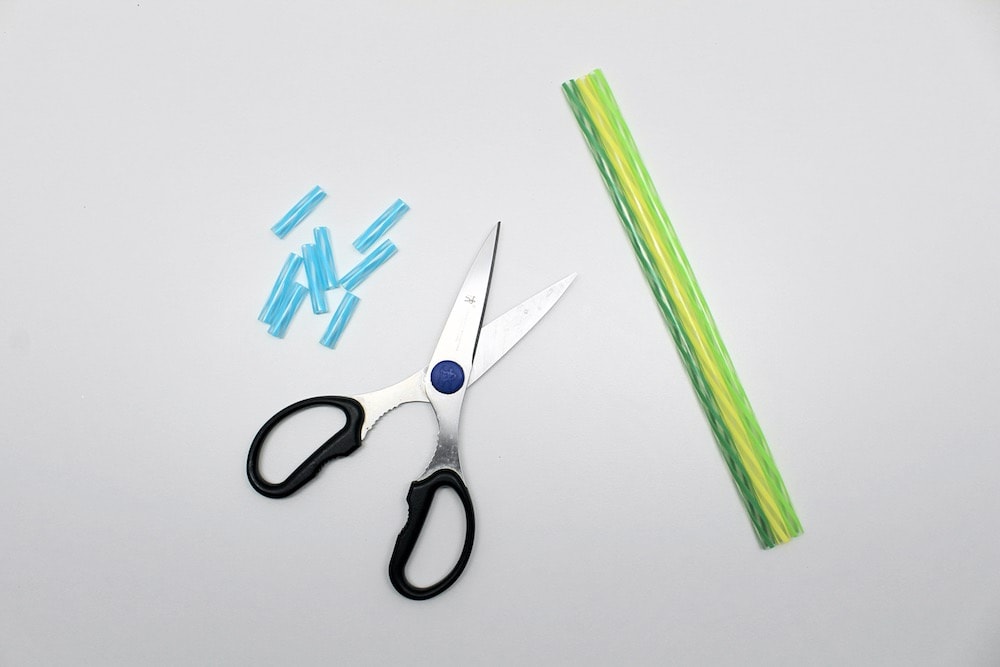
We chose to use reusable straws rather than single-use ones because we wanted them to be sturdier and hold their shape better. However, this did make them more difficult to cut, so I wouldn’t recommend letting a young child complete this step if your straws are also on the thicker side.
If your child really wants to do the whole project on their own, consider prepping the straws in advance before handing over the materials!
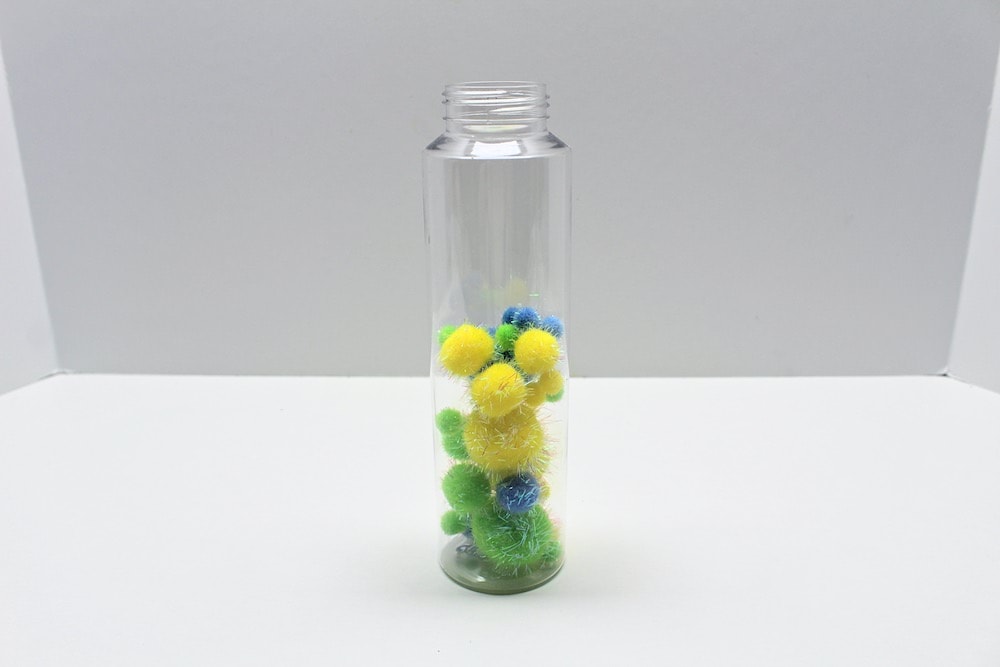
2. Add Pom-Poms to Bottle
Pour some glitter pom-poms of various sizes and colors into an empty plastic bottle. (You can also use regular pom-poms, but I liked the look and texture of the glitter ones!)
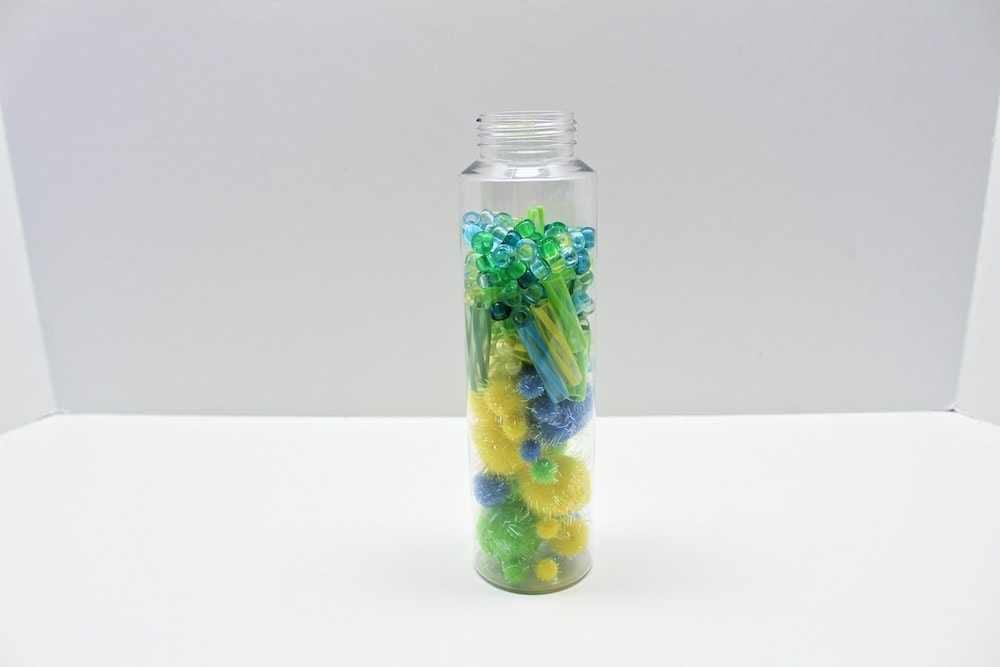
3. Add Straws to Bottle
After you’ve added the pom-poms, pour the pieces of straw into the bottle as well. They’ll probably just sit on top of the pom-poms, but that’s perfectly fine for now—we’ll be addressing that during a later step.

4. Add Beads to Bottle
Pour some beads into the bottle. We used translucent pony beads, but feel free to use whichever sort of beads you have at home.
5. Seal & Shake Bottle
Once the pom-poms, straws and beads have been added, cap the bottle and shake it vigorously to combine all the items and stop the straws and beads from resting on top of the pom-poms.
Note: I don’t usually bother to seal our sensory bottles with glue, especially if they don’t contain any liquid. However, if you’re worried that your child will try to open the bottle and put the beads in their mouth, you can absolutely seal the bottle to ensure their safety!
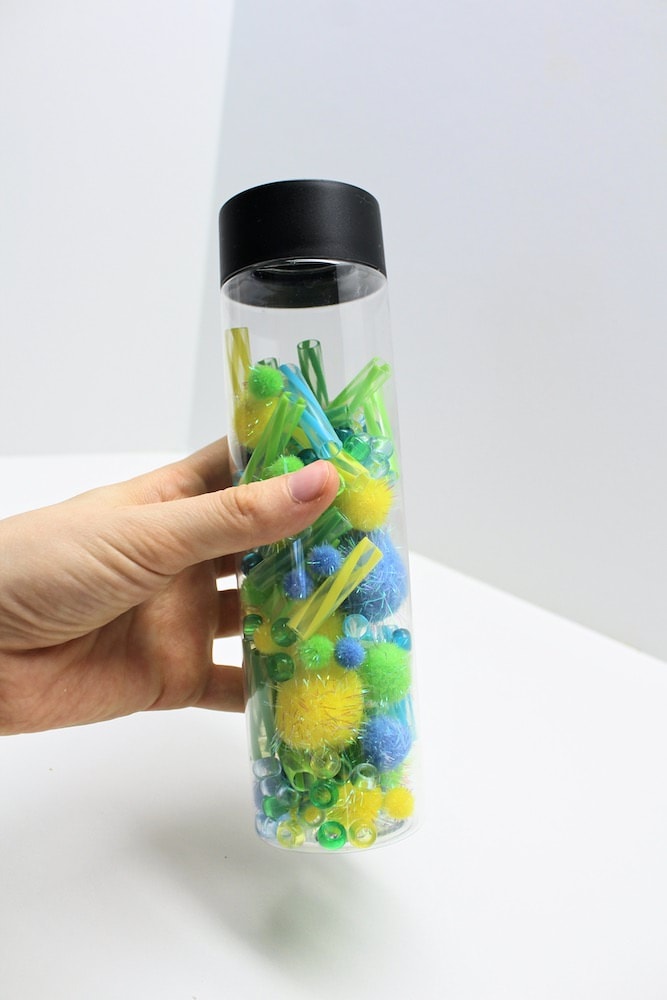
And that’s all there is to it! Our kids love to shake this bottle and use it as a rain stick or musical instrument.
Related Sensory Bottles Ideas
Love sensory bottles as much as we do? Check out these articles:
- Starry Night Sensory Bottle (with Glow-in-the-Dark Stars!)
- DIY Santa Sensory Bottle
- Frozen-Inspired Winter Sensory Bottle
- Jack-o’-Lantern Halloween Sensory Bottle
- Slow-Falling Bead Sensory Bottle
Join my mailing list using the form below to receive 12 of the most popular sensory recipes on my site in PDF format! You’ll be the first to know when I publish new recipes, and you’ll also gain receive to lots of free printable activities for your kids.
Grab our 12 best sensory recipes!
By submitting your email address, you are agreeing to the terms of our Privacy Policy. You can unsubscribe at any time.
Only your name will be made public. Please note that by submitting your comment, you are agreeing to the terms of our Privacy Policy.