
This gorgeous starry night sensory bag is made using glow-in-the-dark stars that shine when charged under a light source. It’s the perfect DIY toy to help baby calm down before bedtime, and it only takes a few minutes to make!
JUMP TO…
If you read my blog, you may have seen the article I wrote a few days ago about Starry Night Sensory Bottles.
We’ve made two of them so far, and my four-year-old likes to leave one sitting on a shelf in her bedroom as she goes to sleep. She loves to look up at the stars in the dark, and since their glow slowly fades as she dozes off, we don’t have to worry that they’ll keep her awake all night.
Because our eldest loved this project so much, I decided to adapt it so that our one-year-old could enjoy it too! And since the required materials are virtually identical, making a matching set should only take up a few extra minutes of your time.
If you’re looking for something else to make at bedtime, you can also try these DIY Fairy Glow Jars. They are so magical!

Get hundreds of pages of activities!
Get access to all our paid printables, as well as monthly activity planners, for just $5/month. (New printables added twice per month!)
Required Materials
Here’s what you’ll need to make you very own starry night sensory bag using glow-in-the-dark stars:

- Gallon-sized freezer bags (we buy ours at Costco when they go on sale)
- Gorilla Tape (optional)
- Clear hair gel or sports gel (whatever’s cheaper, as long as it’s not too watered down)
- Tap water
- Liquid food coloring
- Glow-in-the-dark paint (we buy ours from the dollar store around Halloween, but you can just skip it if you can’t find any)
- Fine glitter
- Glow-in-the-dark stars
Note About Prepping Bags
I always prep my sensory bags in advance by double-bagging them and taping the seams shut. This doesn’t make them completely leak-proof, but it does make them last a lot longer and minimizes the mess from any leaks that may occur.
We love sensory bags, but we hate when they leak, and freezer bags tend to be pretty weak at the seams. I like to prep several bags in advance so I always have some ready to go whenever we want to make new sensory bags!
Grab our 12 best sensory recipes!

By submitting your email address, you are agreeing to the terms of our Privacy Policy. You can unsubscribe at any time.
How to Make a Starry Night Sensory Bag (Step-by-Step)
1. Add Hair Gel to Bag
Start by squirting some hair or sports gel into the bag. I used about two thirds of the bottle.
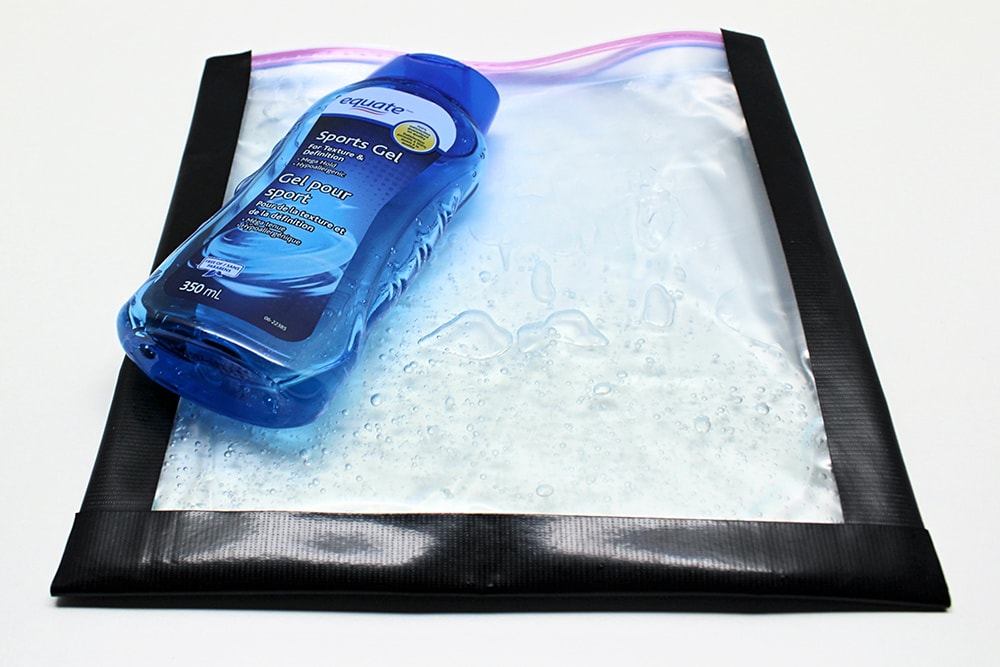
Whether or not you decide to prep your bag with Gorilla tape, I highly recommend double-bagging to minimize leaks. Just make sure to squirt the gel into the inside bag because it’s a huge pain trying to clean the bags if you accidentally pour something in between them. I speak from personal experience.
2. Dilute Gel with Water (Optional)
If you like, you can add some tap water to dilute the gel and increase the quantity of liquid in the bag.I can’t really give you an exact quantity—just start with a few tablespoons and seal the bag to test the texture by pressing down on it.
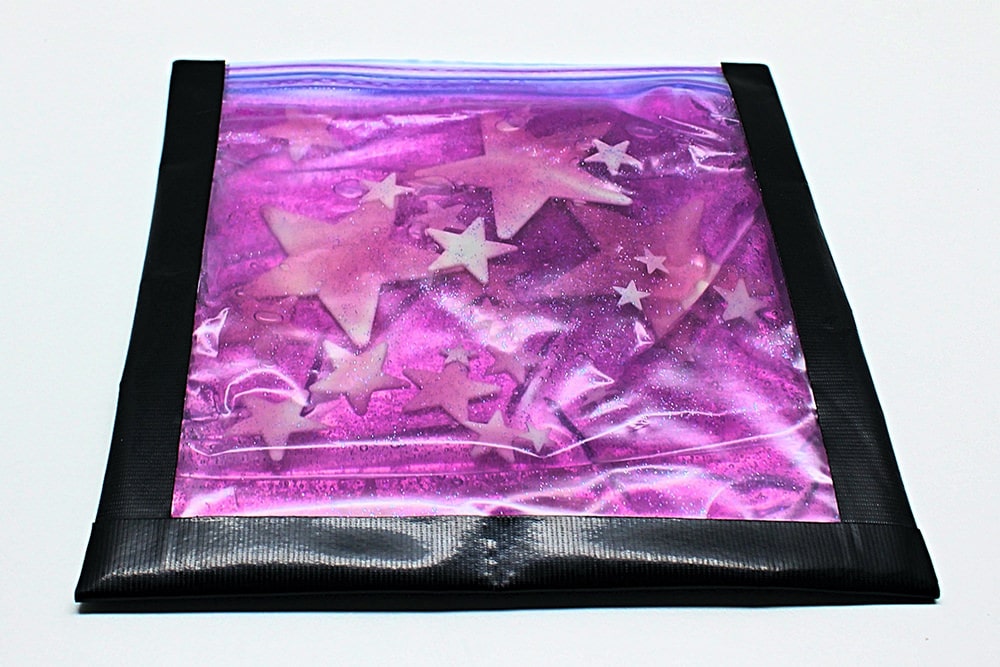
3. Add Food Coloring, Glow-in-the-Dark Paint and Fine Glitter
Once you’re happy with the way the bag feels, open it up and add some liquid food coloring, a squirt of glow-in-the-dark paint and some fine glitter.
Here are the colors I used:

You really don’t need to add a lot of glitter; a couple shakes of each colors should be plenty enough. I used the same colors to make our matching nighttime sensory bottle and made them both at the same time to avoid having to take out all the materials twice!
4. Combine Ingredients
Seal up the bag and squish everything around to combine all the ingredients.

5. Add Glow-in-the-Dark Stars
Once everything is evenly combined, open up the bag one last time to add the glow-in-the-dark stars.
They’re meant to be placed on your child’s bedroom ceiling, but they glow very nicely inside the bag when they’ve been exposed to light! We used these ones:
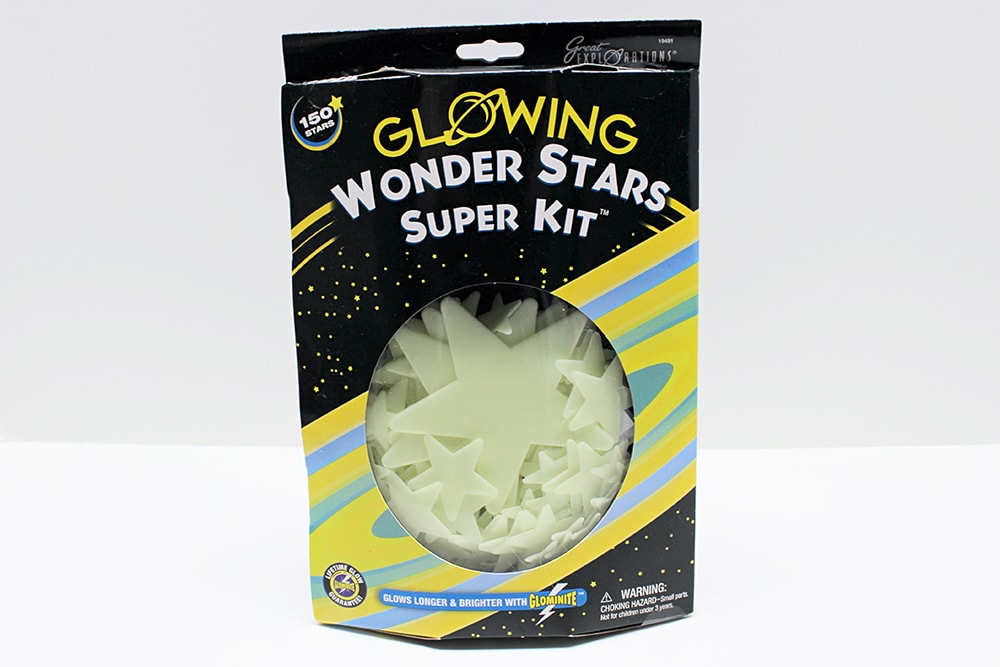
We have found that these stars glow really nicely and don’t take long to recharge. The package contained four different sizes of stars, and we saved the larger ones for this bag since they didn’t fit through the opening of our sensory bottle.
6. Seal Bag
Once you’re happy with the number of stars you’ve added, seal up the bag for the final time, making sure to push out as much air as possible from both bags! I always tape ours up using Gorilla tape to help prevent leaks.

Charging the Glow-in-the-Dark Stars
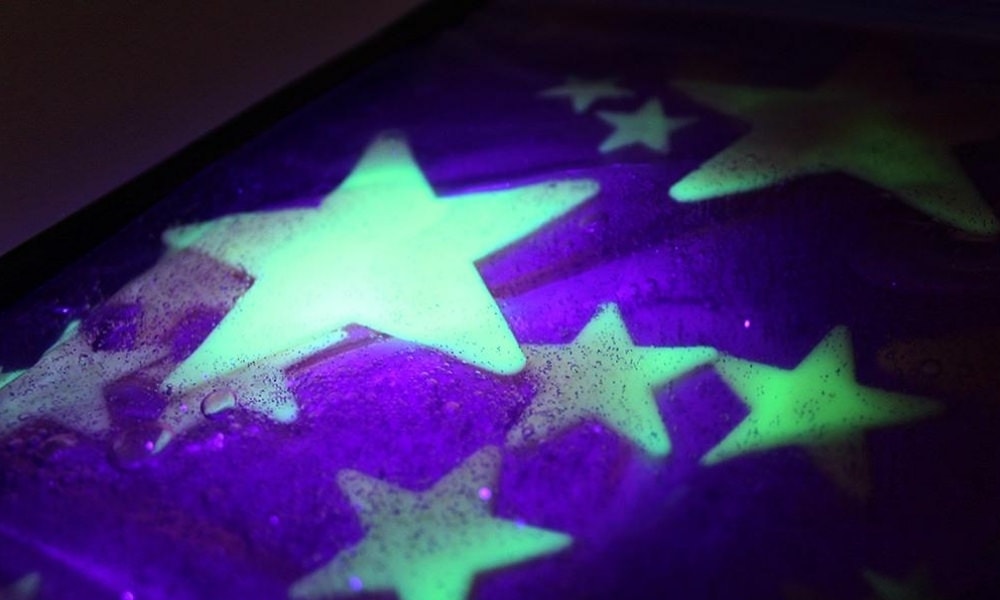
The stars will glow under black light, but they will also glow on their own for a while if you leave them under a light source to charge.
I recommend leaving the bag near a window for a little bit when you want to recharge the stars. I made the mistake of leaving ours in direct sunlight and forgetting it there all day, and I was surprised to see that the sun bleached all the color out of it!
The bag we made last year is still the same color as the first day we made it, so the color fading was completely avoidable. I won’t make the same mistake again!
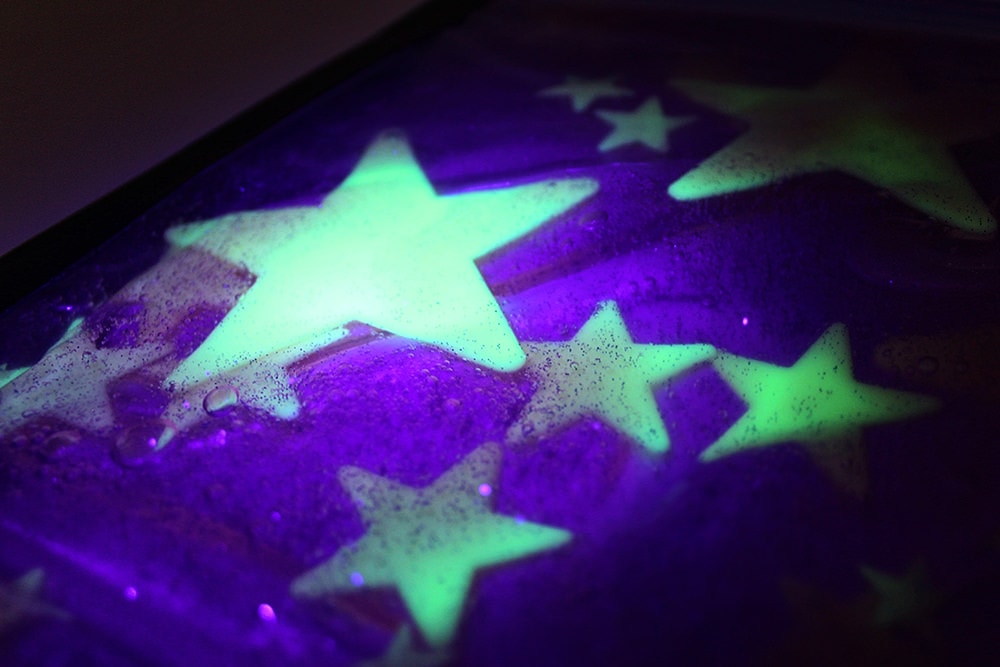
Doesn’t it look so cool? It makes a great wind-down toy for baby to play with in a dark bedroom as you do calming activities before bed!
We also like to place our matching glow-in-the-dark sensory bottle on a shelf at bedtime. The glow from the stars slowly fades and disappears, so it helps reassure children as they fall asleep without keeping them awake for too long! (These DIY glow stick fairy bottles are a great way to do that too.)
Related Sensory Bag Articles
Sensory bags are such a great way for babies to safely experiment with new things without the risk of choking! If you love them as much as we do, check out these articles:
- Surprise Water Bead Sensory Bag
- Melted Snowman Sensory Bag
- Easy Pom-Pom Rainbow Sensory Bag (with Free Pattern!)
- Simple Shape Matching Sensory Bag
- Halloween Googly Eye Sensory Bag
Join my mailing list using the form below to receive 12 of the most popular sensory recipes on my site in PDF format! You’ll be the first to know when I publish new recipes, and you’ll also gain receive to lots of free printable activities for your kids.
Grab our 12 best sensory recipes!
By submitting your email address, you are agreeing to the terms of our Privacy Policy. You can unsubscribe at any time.
This is so great. I will do this with my daughter.
I hope she loves it! It’s so cool seeing the stars glow in the dark!