
Not only are sensory bottles lots of fun for kids, but they are also a great way to stimulate your child’s senses, as well as a useful tool for helping kids manage their emotions. This guide will tell you everything you need to know about making your own sensory bottles at home!
JUMP TO…
These days, play dough and slime are a staple in our home… but it was just a few years ago that our kids were too young to play with things that they might put in their mouths.
If you’re in the same boat, and you want to try sensory play, but you don’t think your baby or toddler is old enough to be trusted with “big kid” sensory materials, then sensory bags and bottles are a great place to start.
Sensory bottles, in particular, are great for younger kids. They are super versatile, and because their contents are safely secured within a sealed bottle, they allow kids to safely explore different items that might normally be off-limits.
They are also great for emotional regulation and can help toddlers and preschoolers manage their feelings more effectively. There is something really soothing about watching glitter slowly fall inside a bottle, and our kids often ask for them when they’re upset.
We have made A LOT of sensory bottles over the years. And as we experimented with different sensory bottle ideas to see which ones worked best, we picked up a lot of useful tips and tricks.
So I gathered them all up inside this article to help you skip the learning curve and go straight to making your very own sensory bottles at home!

Get hundreds of pages of activities!
Get access to all our paid printables, as well as monthly activity planners, for just $5/month. (New printables added twice per month!)
What Are Sensory Bottles?
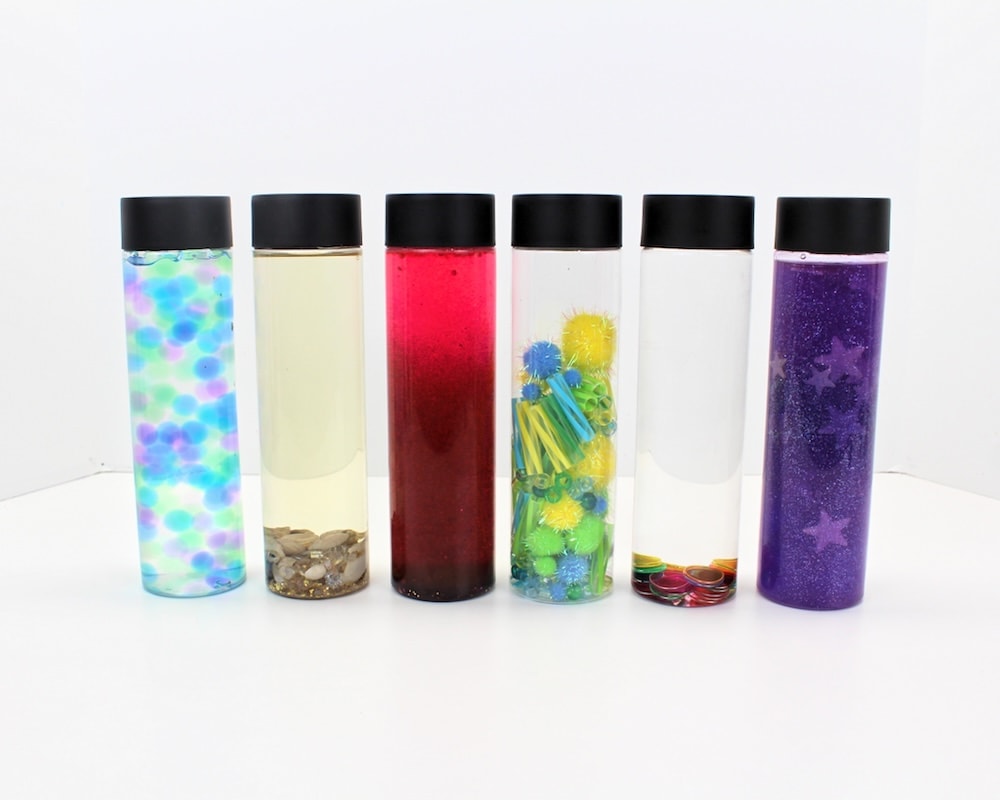
Sensory bottles are bottles that contain a variety of different materials designed to stimulate your child’s senses. You may know them as “discovery bottles”, “sensory jars”, “calm down jars” or “glitter bottles” (though not all of them contain glitter).
Why Should I Make Them?
There are lots of great reasons to make sensory bottles for your little ones! Here are some of my favorites:
- They provide lots of rich sensory input for kids
- They are portable and mess-free
- Since all the fillers are contained inside the bottle, they are free of choking hazards, which makes them safe for younger kids (but our older kids love them too!)
- They can be used as a calming tool when children are upset
Grab our 12 best sensory recipes!

By submitting your email address, you are agreeing to the terms of our Privacy Policy. You can unsubscribe at any time.
How to Make a DIY Sensory Bottle
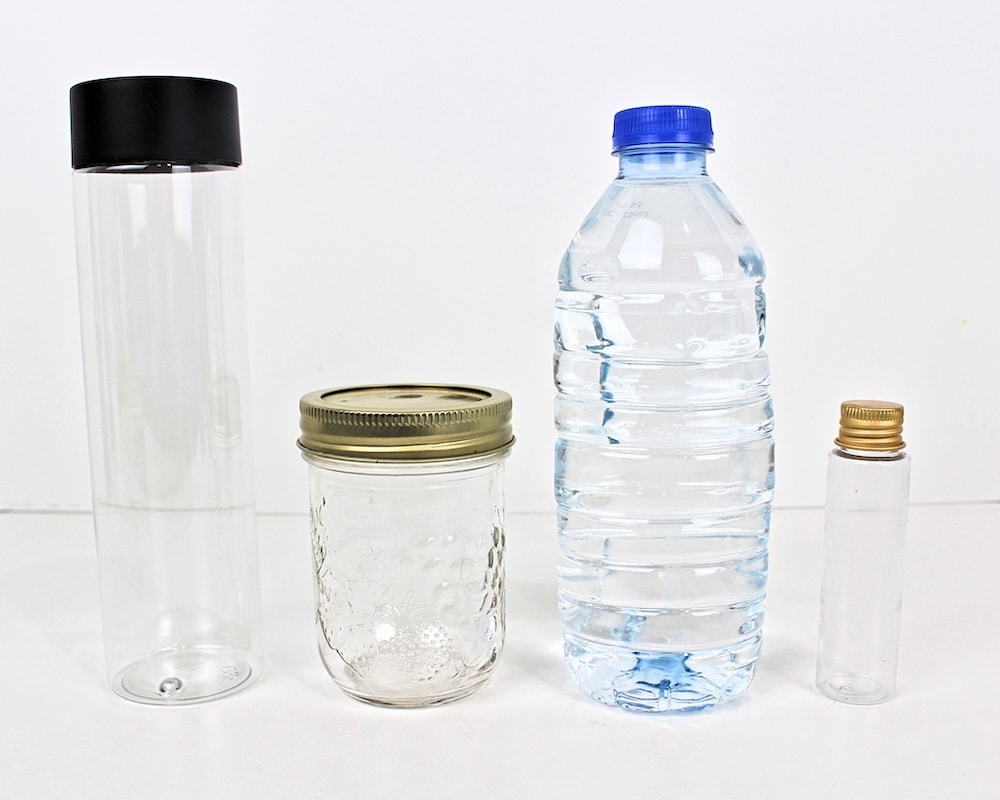
1. Choose Your Bottle
When making sensory bottles, I like to use these juice bottles from Amazon.
I like them because they are made of plastic (I don’t like using glass for items that will be manipulated by children), and because they are surprisingly sturdy. Our kids have dropped them quite a few times and the bottles usually come out unscathed.
I also like that all my sensory bottles have a consistent look and size, but this is just a personal preference.

- LEAK PROOF- Unlike our competitors, our empty plastic bottles are leakproof by design, including a slip that helps seal the bottle when closed
- WIDE MOUTH- Allows for fruit or craft supplies to fit into these reusable water bottles. Our clear water bottle mouth is 40% bigger than a normal…
That being said, you don’t need to buy a specific type of bottle in order to make homemade sensory bottles. Any sturdy, clear (and ideally plastic) bottle or container that you happen to have at home will work just fine.
This includes:
- Empty juice bottles
- Empty water bottles (VOSS bottles and sparkling ICE bottles are especially popular)
- Mason jars (but you’ll want to be careful with those if your kids are still young, as they are made of glass, and therefore breakable)
- Empty craft bottles
- Empty spice containers (these make great miniature glitter jars!)
Just make sure that the neck of the bottle is big enough to let objects pass through, and remove any labels that obstruct your view of the contents of the bottle. (Goo Gone is great for removing sticky residue if you’re having trouble getting it off with water.)
2. Choose Your Base
Before you start adding glitter or small objects to your sensory bottle, you’ll need to fill your bottle with some sort of base.
During this step, fill the bottle most of the way, but leave a little bit of room at the top. This will allow you to add additional fillers and adjust the flow of the liquid if needed. (I’ll go over that in step 4.)
Here are the most popular options:
- Air: While most sensory bottles are filled with a liquid base, some of them are better without. This is especially true of sensory bottles that contain objects that make a noise when you shake them (for instance, rice or beads).
- Water: This is one of the most basic liquid bases that can be used to fill homemade sensory bottles. It allows glitter and small objects to move around in liquid, but does not help suspend them or slow down the speed at which they fall.
- Clear liquid glue or glitter glue (diluted with water): Filling sensory bottles with glue helps glitter stay suspended for longer. Since undiluted glue is a little too thick on its own, you’ll need to dilute it with warm water. Feel free to play around with the quantities—the more glue you add, the longer the glitter will stay suspended. I typically use about ⅓ glue and ⅔ water.
- Glycerin (diluted with water): Like glue, glycerin will help glitter stay suspended for longer, and it will create a swirling effect as it falls. The glitter will fall more slowly than in bottles filled with water, but faster than in bottles with glue. Start with about ¼ glycerin and ¾ water, and experiment with the ratio until you’re happy with how fast the glitter falls.
- Tonic water: Tonic water will behave in the same way as water, but it glows under black light!
- Baby oil (or mineral oil, which is essentially unscented baby oil): Baby oil behaves similarly to water, in that it allows objects to flow, but does not slow them down. I like to use baby oil when creating sensory bottles that include metallic fillers, such as paper clips or magnetic bingo chips, because it prevents them from rusting. Mineral and baby oil work well for this because unlike cooking oil, they are clear in color.
- Oil & water: This one is really fun because the two substances don’t mix. Shaking the bottle will be cause lots of tiny bubbles to form, and those bubbles will slowly dissipate as the oil and water separate into two distinct layers. Adding food coloring to the water will make it look even cooler! (You can also add candy coloring to the oil, but the color tends to bleed into the water over time. If you want to avoid this, use vegetable oil, which is naturally yellow.)
- Clear hand soap and/or clear dish soap: This is perfect for sensory bottles that contain heavier items like alphabet beads, and will make them fall slowly to the bottom of the bottle. (I don’t recommend this for glitter jars as the glitter may take several hours to fall, but feel free to add several types of items with different weights and see how they fall at different speeds!) More hand soap will make the items fall more slowly, while more dish soap will make them fall more quickly. Experiment with the ratio to find what you like best.
- Light corn syrup: Like hand soap, corn syrup will significantly slow down falling objects. My favorite use for corn syrup is this color-mixing sensory bottle, but you can also use it for heavy items that are falling too quickly in other liquid bases.
- Clear hair gel or sports gel: Because it is so thick, hair gel will keep items suspended indefinitely unless it is heavily diluted with water. This makes it perfect for sensory bottles where you need the items to stay suspended in a particular location instead of moving around, like this glow-in-the-dark bottle.

If you choose a liquid sensory bottle base, you can add a touch of color by stirring in a few drops of liquid food coloring or liquid watercolor paint. You won’t need much, so start with just a few drops and add more as needed to avoid making the liquid too dark.
(Note: If you are using oil, you’ll need to use oil-based candy coloring instead.)
You can also stir in a few squirts of glow-in-the-dark paint if you want the bottle to glow in the dark. But know that it won’t glow as brightly as tonic water, so that’s what you should stick with if you’re looking to create a sensory bottle that glows brightly under black light.
3. Choose Your Fillers
Once you have chosen a liquid base—or decided to go without—and filled the bottle most of the way, it’s time to add your fillers!

There are SO many options you can try that I couldn’t possibly list them all, but I’ve listed some common fillers below to help you get started:
- Fine or chunky glitter (this works best in bottles that contain water, glue, glycerin or oil, as hand soap and corn syrup will slow it down too much—using a mixture of fine and chunky glitter is visually interesting because they fall at different speeds!)
- Sequins
- Loom bands (these will work best in water or oil because they weigh so little)
- Water beads (fill the bottle with water to keep them hydrated—but you’ll want to be very careful when handling these and make sure that none of them fall on the ground, as they are extremely dangerous when ingested)
- Pom-poms
- Any type of bead, including perler beads, pony beads, alphabet beads or any other type of bead you happen to have on hand (place them inside empty bottles to create sensory bottles that make fun noises when shaken, or use a combination of hand soap and dish soap to create slow-falling bead sensory bottles!)
- Seashells
- Sand (regular or colored—skip the liquid fillers when you’re using this)
- Sprinkles
- Magnetic chips (these are great for making magnetic exploration bottles—make sure you fill them with baby oil or mineral oil to prevent rust!)
- Paper clips (these also work great in magnetic exploration bottles)
- Natural items like rocks, pinecones, sticks and leaves
- Buttons
- Googly eyes (these are perfect for Halloween-themed sensory bottles!)
- Rice (add some other items in the rice to create an I Spy bottle!)
- Dried beans or chickpeas (for added fun, dye the chickpeas before you place them in the bottle)
- Dry pasta (you can dye pasta, too!)
- Small toys or LEGO
- Feathers
- Mini erasers
- Pipe cleaners (cut into pieces)
- Shredded paper
- Glow-in-the-dark stars (we used them in this starry night sensory bottle that is perfect for helping little ones wind down at bedtime)
- Cotton balls (these don’t move around much, but they’re great for creating galaxy jars!)
- Seasonal items like leaf sequins, conversation hearts, iridescent snowflakes or jingle bells
Those are just a few of the possibilities, but feel free to get creative and make use of whichever items you happen to have on hand!

4. Finish Filling Bottle
Once you have added your sensory bottle fillers, you’ll need to finish filling the bottle and adjust the flow of the liquid. (Unless you’ve chosen to skip the liquid filler—if that is the case, skip this section and scroll down to the next one.)
With the bottle mostly filled, close the lid tightly and shake the bottle around. Then, place it on a flat surface and observe what happens.

Did you make a glitter jar? If the glitter is falling too quickly, add more glue or glycerin; if it’s falling too slowly, add more water.
Did you create a slow-falling bead bottle? If the beads are falling too quickly, add more hand soap; if they’re falling too slowly, and more dish soap.
If you adjust the quantities and find that the liquid is still not flowing the way you like, you can dump out small quantities of liquid and replace them with water, glue or whatever else it is that you’re using to adjust the flow.
Keep adjusting the quantities until you’re 100% happy with how the glitter or other items fall before moving on to the next step.
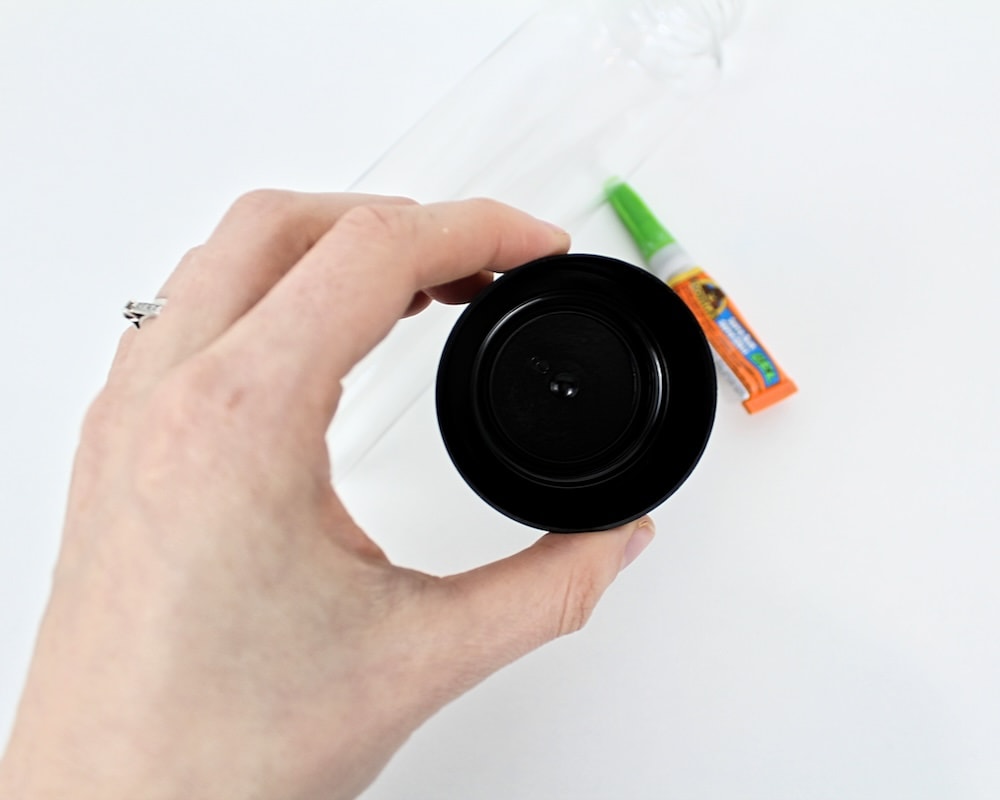
5. Glue Bottle Lid
When the liquid is flowing exactly the way you want it to, it’s time to seal the bottle! Use a hot glue gun or Gorilla super glue to secure the lid.
If your bottle contains liquid, you’ll probably need to repeat this process every few months, as the glue will weaken over time. Test the seal periodically by gently twisting the lid as if you are trying to open the bottle—if it gives even a little bit, that is your cue to add more glue.
Once you have applied the glue and given it enough time to dry, your sensory bottle is ready to play with! Our kids love shaking the bottles and watching objects move around inside.
Sensory bottles can also have a calming effect, and they are a great way to help kids manage big emotions. Try offering them to your kids when they are upset, and encourage them to shake the liquid around and watch the glitter fall.
Related Sensory Bottle Ideas
Looking for more fun sensory bottle ideas to make at home? Check out these articles:
- Musical Pom-Pom Sensory Bottle
- Frozen-Inspired Winter Sensory Bottle
- DIY Santa Sensory Bottle
- Easy Jack-o’-Lantern Sensory Bottle
Join my mailing list using the form below to receive 12 of the most popular sensory recipes on my site in PDF format! You’ll be the first to know when I publish new recipes, and you’ll also gain receive to lots of free printable activities for your kids.
Grab our 12 best sensory recipes!
By submitting your email address, you are agreeing to the terms of our Privacy Policy. You can unsubscribe at any time.
Only your name will be made public. Please note that by submitting your comment, you are agreeing to the terms of our Privacy Policy.