Looking for a fun taste-safe activity to set up for your little one? This easy oatmeal play dough recipe is perfect for babies and toddlers, and it’s made from 3 edible ingredients that you probably already have at home!

JUMP TO…
Homemade play dough has been a staple in our house ever since my eldest was a toddler. Not only is it cheap and easy to make, but it has a much better texture and lasts way longer than the store-bought kind.
Making my own play dough also means that I am in control of the ingredients—which allows me to make taste-safe versions that are appropriate for my younger kids, too.
There are lots of ways to make taste-safe play dough, but this simple recipe is one of my new favorites. It only requires 3 ingredients, and because it doesn’t contain any salt, it is perfect for kids with sensitive skin.
For added fun, try pairing it with these rainbow dyed oats or this 5-minute oatmeal sensory bin!
GRAB OUR 12 BEST SENSORY RECIPES!
Subscribe to our email newsletter to receive 12 of our most popular sensory recipes in PDF format as a welcome gift:

Already a subscriber? Don’t worry, you won’t be subscribed twice. By submitting your email address, you are agreeing to the terms of our Privacy Policy. You can unsubscribe at any time.
Required Ingredients
Here’s what you’ll need to make your own taste-safe oat play dough at home:

- ½ cup quick oats
- ½ cup water
- Food coloring or a natural dye of your choice (this is optional—I didn’t use any)
- ¼ cup + 1 tbsp cornstarch (I highly recommend buying this in bulk if you do a lot of sensory play activities)
How to Make Oatmeal Play Dough (Step-by-Step)
1. Combine Water & Oats
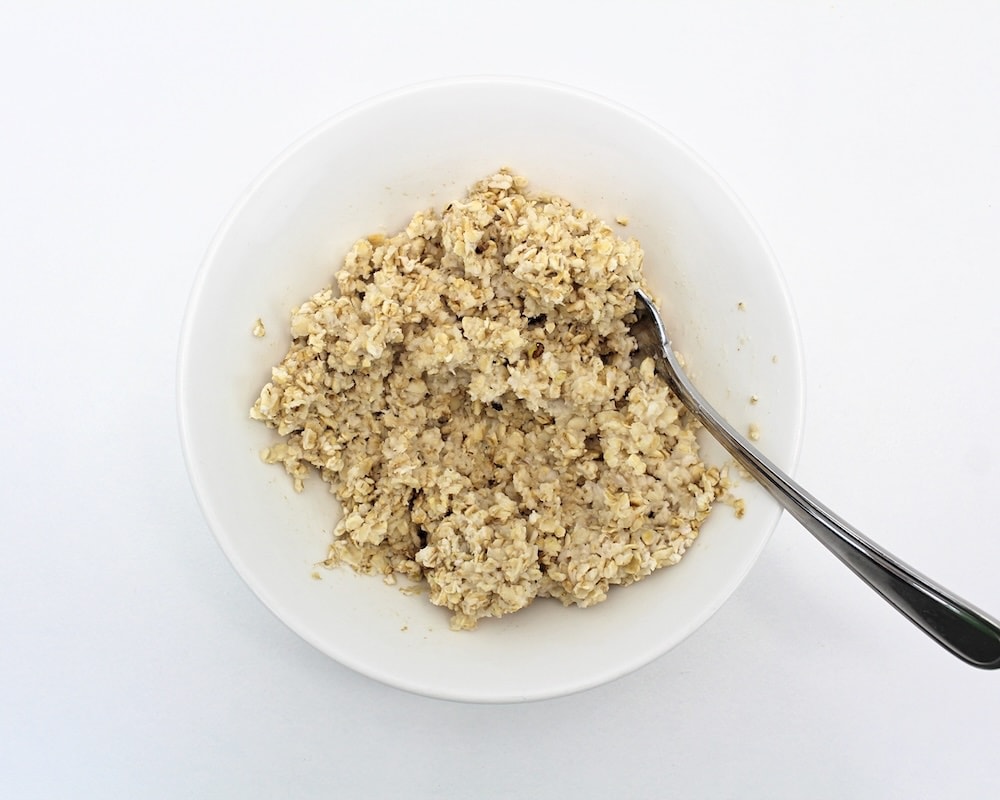
Start by pouring ½ cup of quick oats into a microwave-safe bowl and adding ½ cup of water.

If you want the dough to be colored, you’ll need to add the food coloring (or natural dye) to the water before you stir it into the oats. I decided to skip this and let the color of the oats shine through.
2. Cook & Let Cool
Cook the oatmeal in the microwave on high for 60 seconds. It will be very hot, so you’ll need to let it cool before you move on to the next step. I sped up that process by placing the bowl in the freezer for a few minutes.

Note: If you don’t have a microwave on hand, you can also just boil the water before you add it to the oats.
3. Add Cornstarch
Add ¼ cup of cornstarch to the cooled oatmeal and work it in with your hands. Oatmeal is pretty compact, so you won’t be able to use a spoon for this.
4. Knead Dough
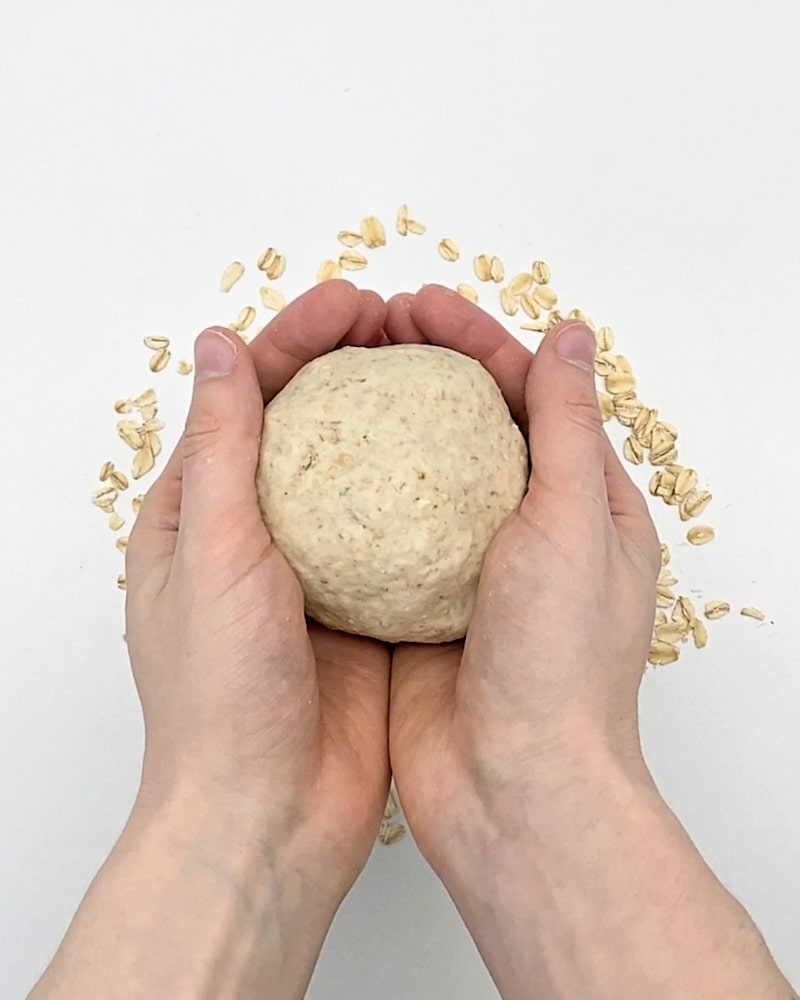
Keep kneading the oatmeal-and-cornstarch mixture with your hands until the ingredients are fully combined. You’ll end up with a smooth, elastic dough that feels slightly sticky.

When that happens, add another tablespoon of cornstarch and knead it into the dough. This is usually enough to get rid of the stickiness, but you can always add more cornstarch if needed.
Once you’re satisfied with the texture of the dough, it’s time to play! Give the dough to your child and feel free to offer them a rolling pin, some cookie cutters or any other toys that they like to use with play dough.

Play Dough FAQs
This play dough is made from edible ingredients, but it doesn’t taste very good and it’s not meant to be eaten as a snack. Think of this recipe as a “taste-safe”—meaning that it won’t harm younger kids if they decide to sneak a few bites.
Personally, I actually prefer taste-safe recipes like this one, which doesn’t taste good, because it makes my kids less likely to actively want to eat them.
I really recommend using quick oats for this recipe because a) they cook faster, and b) they break down more easily, which makes the play dough’s texture a lot smoother.
You won’t get the same results with rolled oats, so I really recommend sticking with quick oats for this recipe. But you can definitely add a handful of rolled oats to the finished play dough to give it some extra texture!
Because it is edible, this play dough won’t last as long as traditional, salt-based play dough. (This play dough recipe is our favorite!)
That being said, if the play dough is still usable after your child is done playing with it, you can store it for future use by placing it in a sealed sandwich bag or airtight container and keeping it in the fridge for up to 5 days.
I found that it got a little sticky due to condensation, but when I added some extra cornstarch and kneaded it into the dough, it felt good as new. Just keep adding small amounts and kneading them in until you’re satisfied with how the play dough feels.
Related Taste-Safe Play Dough Recipes
- Edible Peanut Butter Play Dough
- Easy Baby Cereal & Applesauce Play Dough
- 2-Ingredient Pudding Play Dough
- Edible Marshmallow Play Dough
- 3-Ingredient Frosting Play Dough
If you’ve tried this Edible Oatmeal Play Dough or any other recipe on my website, please let me know how it went in the comments below. Also, please leave a 🌟 star rating when you can. Thanks in advance!

Edible Oatmeal Play Dough
Ingredients
- ½ cup quick oats
- ½ cup water
- ¼ cup + 1 tbsp cornstarch more as needed
Instructions
- In a microwave-safe bowl, combine the oats and water.
- Cook in the microwave for 60 seconds on high. Let cool for 5-10 minutes. (You can place the bowl in the freezer to speed up the process.)
- Add ¼ cup of cornstarch to the cooled oatmeal and work it in with your hands. Once the ingredients are fully combined, add an additional tablespoon of cornstarch and knead that in as well. If the dough still feels sticky, keep working in small quantities of cornstarch until you are satisfied with the texture. Use immediately.
Video
Notes
Nutrition
Join my mailing list using the form below to receive 12 of the most popular sensory recipes on my site in PDF format! You’ll be the first to know when I publish new recipes, and you’ll also gain access to my free printables library, which is filled with lots of printable activities for kids.
GRAB OUR 12 BEST SENSORY RECIPES!
Subscribe to our email newsletter to receive 12 of our most popular sensory recipes in PDF format as a welcome gift:

Already a subscriber? Don’t worry, you won’t be subscribed twice. By submitting your email address, you are agreeing to the terms of our Privacy Policy. You can unsubscribe at any time.

Only your name will be made public. Please note that by submitting your comment, you are agreeing to the terms of our Privacy Policy.