
Looking for a cute DIY Mother’s Day card to make with your kids? Use empty toilet paper rolls to create this adorable tulip stamped card for Mom, Auntie or Grandma. This homemade card may look fancy, but it’s actually made using recycled materials… and it’s simple enough for toddlers and preschoolers to make!

JUMP TO…
Is there anything better than receiving a sweet homemade card from your kids on Mother’s Day morning?
Knowing that your little one gave you something they created themselves is a great feeling, which is why last year, I shared these 50+ Adorable Kid-Made Mother’s Day Card Ideas.
That list is a great starting point if you’re not sure what kind of card to make this year. But of course, there are SO many ways to craft DIY Mother’s Day cards that I couldn’t possibly list them all. Which is why this year, I wanted to share this adorable tulip card idea.
While this card may look fancy, it’s actually really easy to make. And it uses very simple supplies… including recycled toilet paper rolls!
Plus, because the flowers are made using homemade toilet paper roll stamps, this craft is appropriate for younger children, too. So if you are looking for a Mother’s Day craft that a toddler can help make, this easy card with toilet roll stamped flowers would be a fun one to try!
P.S. Has Mother’s Day already come and gone in your part of the world? Skip the card and use these DIY toilet paper roll stamps to make a cute spring art project with tulips instead!

Get hundreds of pages of activities!
Get access to all our paid printables, as well as monthly activity planners, for just $5/month. (New printables added twice per month!)
Required Materials
Here’s what you’ll need to make your own DIY Mother’s Day card with toilet paper roll stamped tulips:

- US Letter sized cardstock (I used a speckled off-white one that came with this set of colorful cardstock, but you can use white, beige or any other color you prefer)
- Optional: My free Mother’s Day card template, which you can download using the form below (there’s another form at the bottom of the article if you’d rather keep reading)
- Optional: Pen or marker (if not using the template)
- 2 toilet paper rolls (or a single paper towel roll cut into 2 halves)
- Washable kids’ paint in green and one or more other colors of your choice
- Paint palette or plate
- Water
- Paintbrush
How to Make a Tulip Card with Toilet Roll Stamped Flowers (Step-by-Step)
1. Write Message on Front of Card
The first step required to make this DIY Mother’s Day card is to add the words “Happy Mother’s Day” (or another message of your choice) to the front of the card.

There are two ways to do this:
- Download and print out the template in this article (you can request it using one of the provided sign-up forms) on a sheet of US Letter sized cardstock, then fold the cardstock so that the printed words appear on the front of the card
- Fold a sheet of cardstock in half and use a pen or marker to write the message on the front of the card yourself
Either way, don’t forget to fold the card in half (either after printing or before writing your handwritten greeting) as this will be required during the next steps.
2. Fold Cardboard Tubes
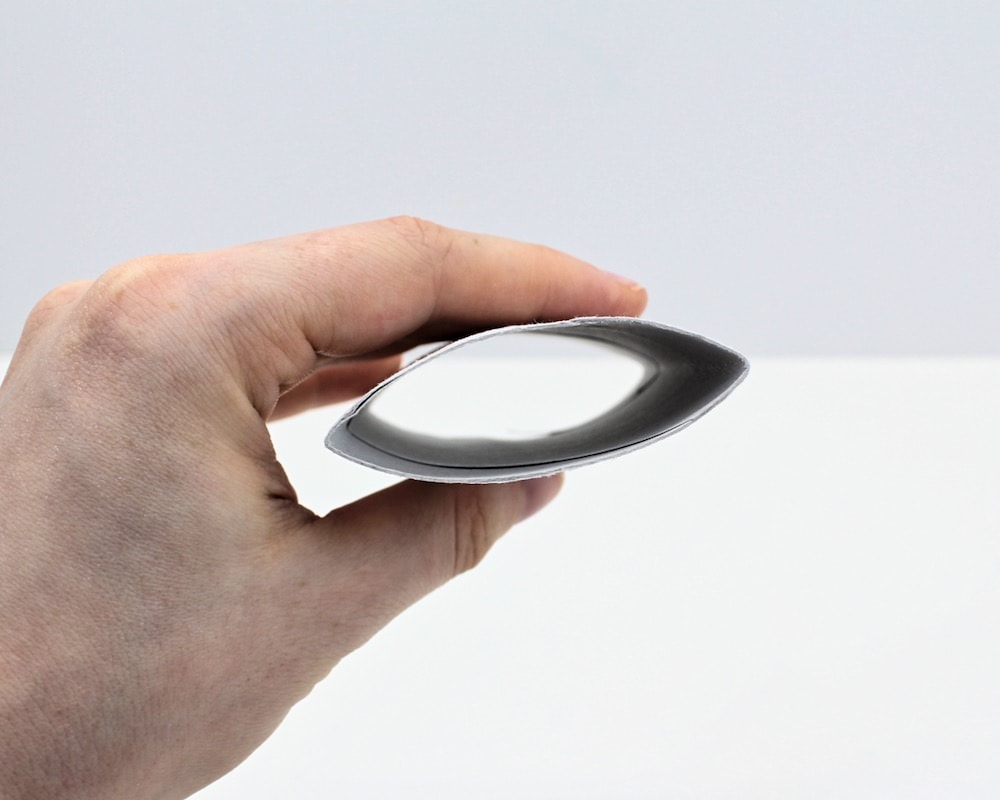
The next step is to grab two empty toilet paper rolls (or one empty paper towel roll that has been cut into two halves) and bend them into shape in order to create DIY stamps.
You’ll need two types of stamps: one for the tulips, and one for the grass and leaves.
To create the tulip stamp, simply fold one side of the toilet paper roll in order to create a teardrop shape. Each tulip will be made up of three teardrop shapes layered one on top of the other.

The grass and leaf stamp is even simpler to create—simply flatten the toilet paper roll or paper towel roll between your fingers so that it is folded in half, and it will be ready to use!
3. Dip Tulip Stamps in Paint
Pour a bit of paint onto a flat paint palette or small plate and press your paper roll tulip stamp into the paint, moving it around as needed until the teardrop shape is completely covered with paint.

I decided to use pink, but feel free to use purple, red, yellow or any other color you feel is appropriate for a tulip. You can even use two different colors to create a colorful tulip garden (as long as you clean any excess paint off your homemade stamp in between painting the tulips).
4. Press Stamp to Cardstock
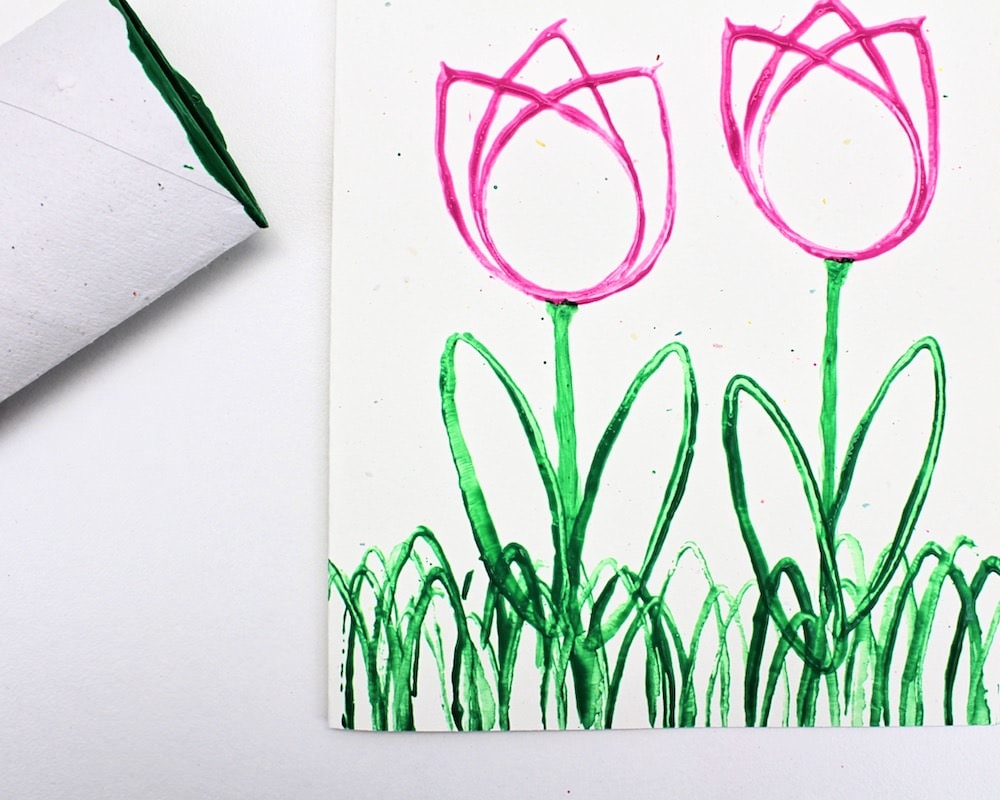
Use the teardrop stamp to create one or two tulips (whichever you prefer). I personally thought two side-by-side tulips looked better than one.

Each tulip is made up of three different teardrops: one in the middle and one on each side. I recommend starting with the middle stamp before adding the two others.
5. Add Grass, Stems and Leaves
Once you have created the tulips, it’s time to add the greenery.
For the grass, simply use the folded roll of toilet paper to stamp the bottom edge of the card with green paint.
Only part of the toilet paper roll should touch the card. I made sure to protect my work surface with parchment paper to make the cleanup easier since the other half of the paint-covered design ended up on the table.

Once I had added the grass, I used a paintbrush to paint green lines between the tulips and the grass.

Finally, using the same stamp that was used for the grass, I created a leaf on either side of each tulip stem. This time, the entire edge of the toilet paper roll touched the card.
6. Create Watercolor Effect (Optional)
Now comes the cool part. You can skip this step if you want, but it requires minimal effort and makes this homemade Mother’s Day card look SO much fancier, so I highly recommend you try it.
To turn this simple tulip card into a watercolor card, simply wait a few minutes until the paint has had a chance to dry a little, but not completely. Then, grab a paintbrush, dip it in water and, staying within the lines, use the water to gently spread around some of the color from the partially dried paint.
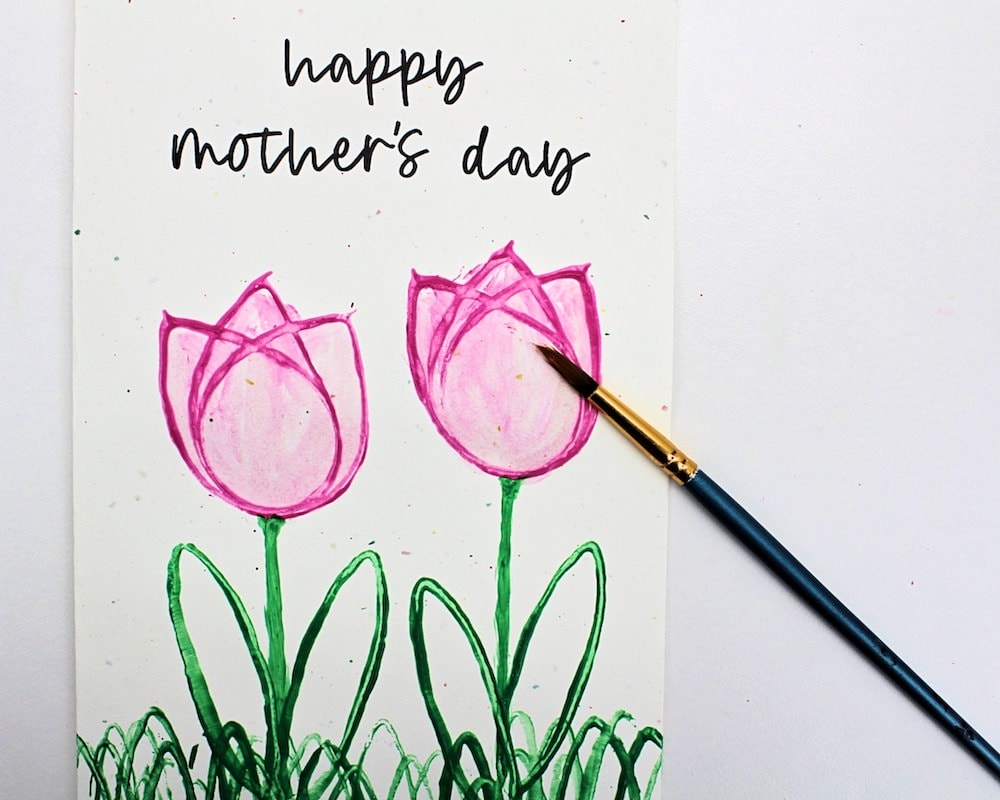
I started with the tulips before doing the same thing to the grass and leaves. Make sure you don’t add too much water or it could soak through the card—a tiny bit should be sufficient.
7. Let Dry
When you have finished decorating the front of your card with flower stamps and water, set it aside until the design is fully dry.
Once everything is done drying, open up the card to write a personalized message inside. Then, place it inside an envelope to give to Mom or Grandma on Mother’s Day. Such a cute spring-themed Mother’s Day craft!

Related DIY Card Ideas for Mom
Looking for more handmade cards that kids can make for Mom? Check out these articles:
- Free Printable Mother’s Day Card to Color
- 50+ Cutest Mother’s Day Card Ideas for Kids
- DIY Button Cards
- Scratch-Off Ladybug Card (with Free Template!)
Only your name will be made public. Please note that by submitting your comment, you are agreeing to the terms of our Privacy Policy.