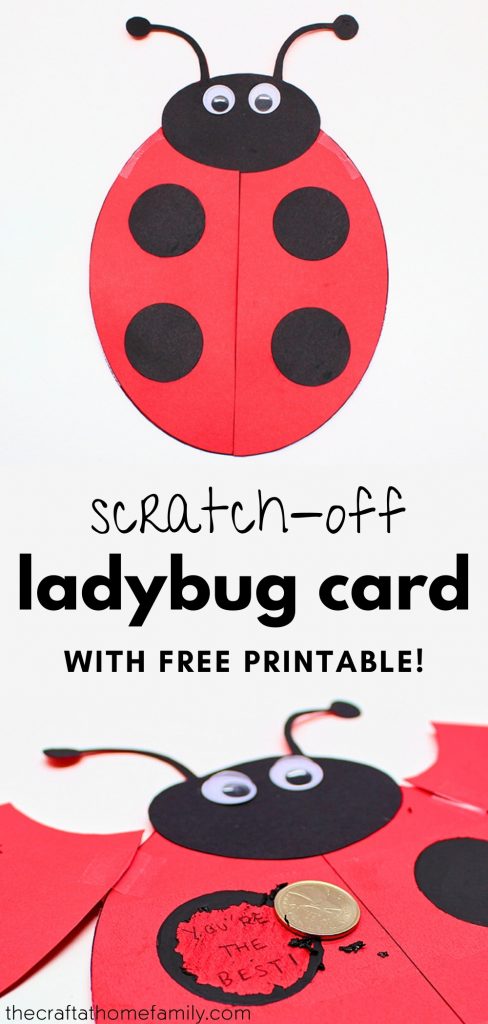
This adorable ladybug card contains fun secret messages that can be scratched off with a coin, and it even comes with a free ladybug template that you can use to speed things up! Perfect for Mother’s Day or for ladybug lovers!
JUMP TO…
Have you ever made your own scratch-off cards? They’re really fun, really simple to make, and you probably already have all the materials you need lying around the house!
You can use them however you like, but they make really fun gifts and cards. And with Mother’s Day coming up, I thought they would be the perfect addition to this cute ladybug card—though of course, you could use the card for any occasion!

Get hundreds of pages of activities!
Get access to all our paid printables, as well as monthly activity planners, for just $5/month. (New printables added twice per month!)
Required Materials
Here’s what you’ll need to make an adorable scratch-off ladybug card for Mother’s Day:
- 3 sheets of colored cardstock (two red and one black)
- My free ladybug printable, which you can download using the form at the bottom of this article
- Scissors
- Googly eyes
- White school glue
- Clear adhesive tape
- Pen or pencil (for writing your secret messages)
- Clear packing tape (I’ve found it to be cheapest at the dollar store)
- Coin of your choice (to scratch off the paint and reveal the secret messages)
- Dish soap (I’ve linked to the one I used, but whatever brand you use to do your dishes should work just fine)
- Black acrylic paint
- Paintbrush
- Small container (for mixing the paint)
Note: The clear adhesive tape isn’t pictured because I had originally planned on using packing tape, but realized partway through the project that certain steps work better with regular adhesive tape.
How to Make a Scratch-Off Ladybug Card (Step-by-Step)
1. Print Template
Start by printing the template on cardstock. Print the first two pages on red cardstock and the last page on black cardstock.
If you print them all at once, make sure you place the sheets of cardstock in the correct order—a lot of printers print documents in reverse page order!
The black lines will be a little harder to see on black cardstock, but they should be visible under adequate lighting.
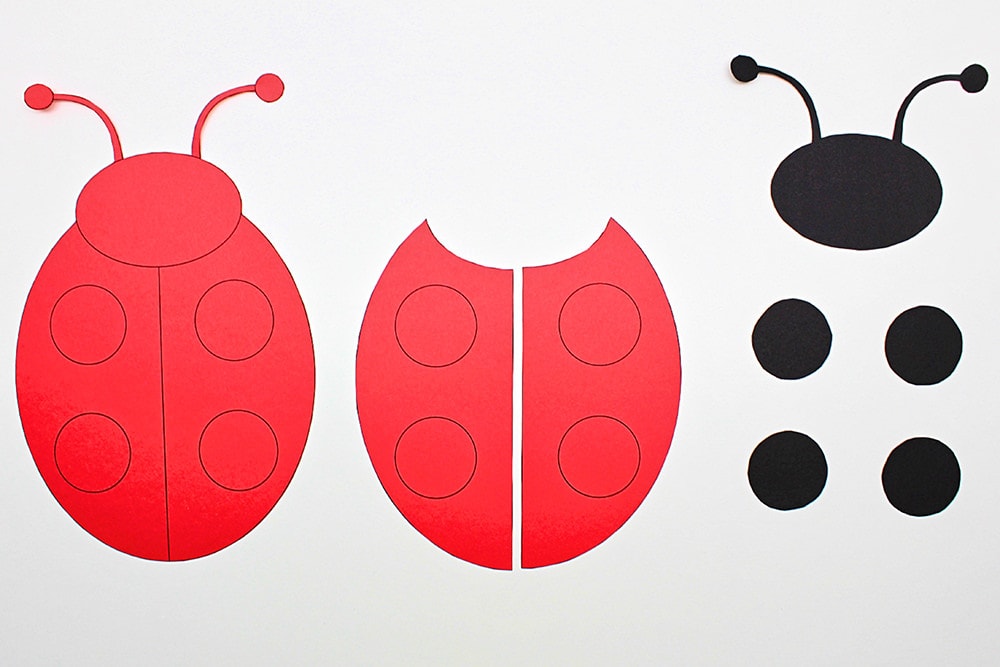
2. Cut Template
Cut out the patterns with scissors as pictured below. The antennae are a little tricky to cut, so be careful!
Once you finish cutting, you should be left with one entire red ladybug, two red ladybug wings, four black dots and one black ladybug head.
3. Glue Template
Next, glue the black cutouts onto the corresponding red shapes, as pictured below. The black head should be glued onto the red ladybug head, and the black dots should be glued onto the two separate wings.
Don’t glue the dots onto the ladybug body—you’ll be writing your scratch-off messages in the printed dots, so you’ll need the backdrop to stay red in order for the messages to be legible!
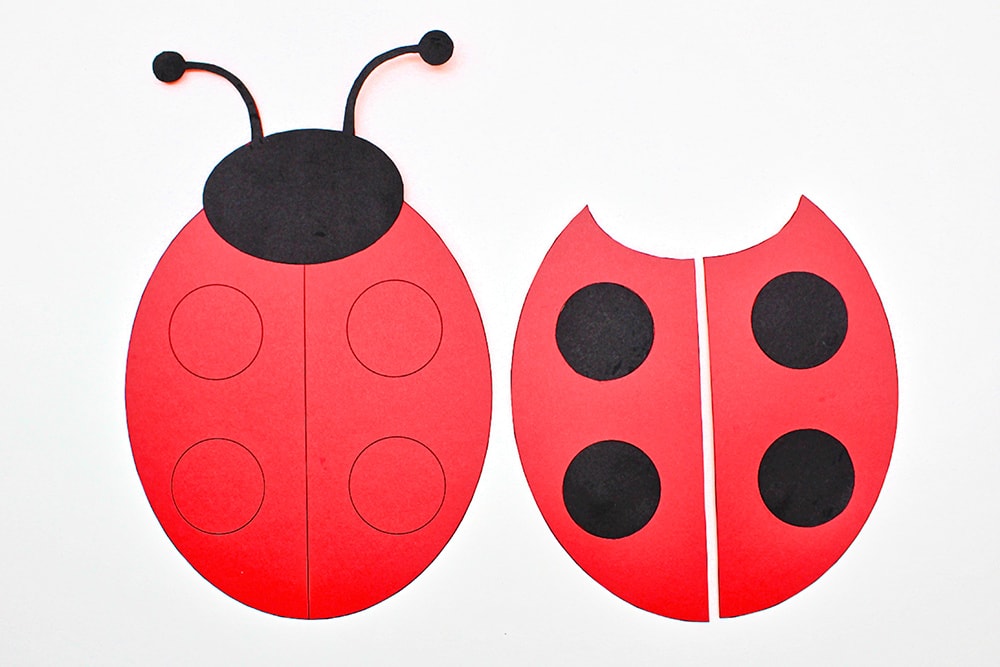
The lines on the black cardstock won’t be very visible, but if you prefer, you can turn the pieces face down and glue them on that way to hide the printed lines completely. The design is symmetrical, so it won’t make a difference whether you glue them right-side up or face down.
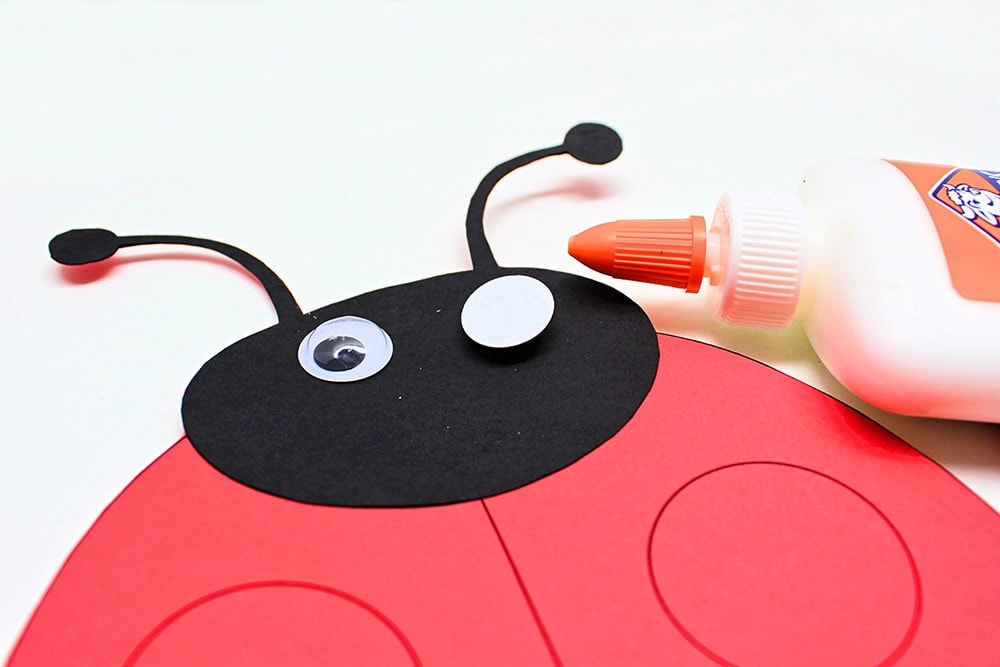
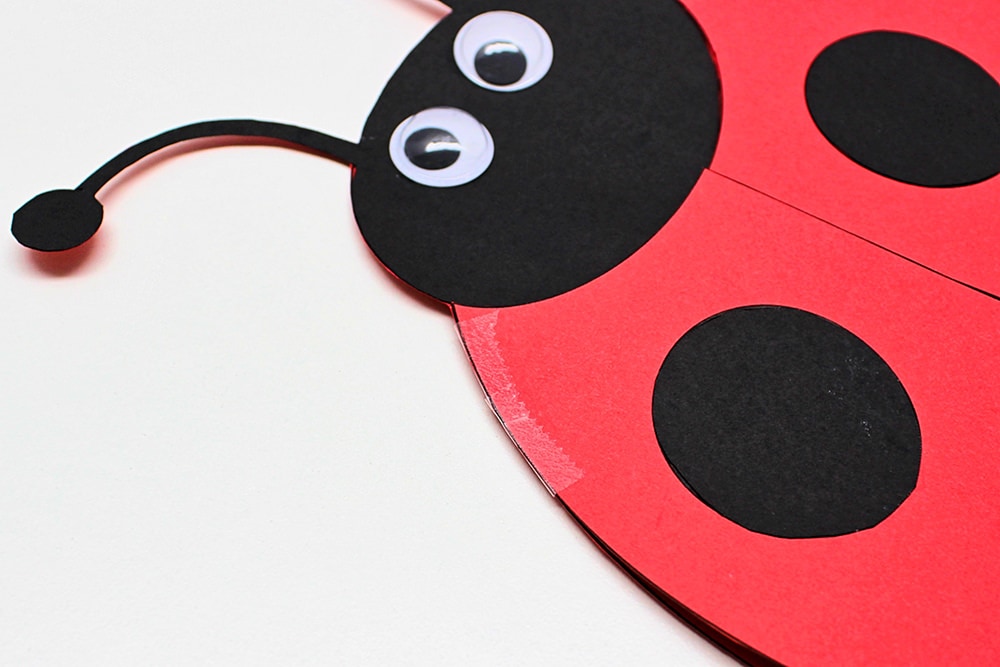
4. Add Googly Eyes
Once the black cutouts are glued on, add two googly eyes to the head. The ones I used were about 15 mm in diameter, but you can use whichever size you think looks best. Some googly eyes are self-adhesive, but mine weren’t, so I had to use glue.
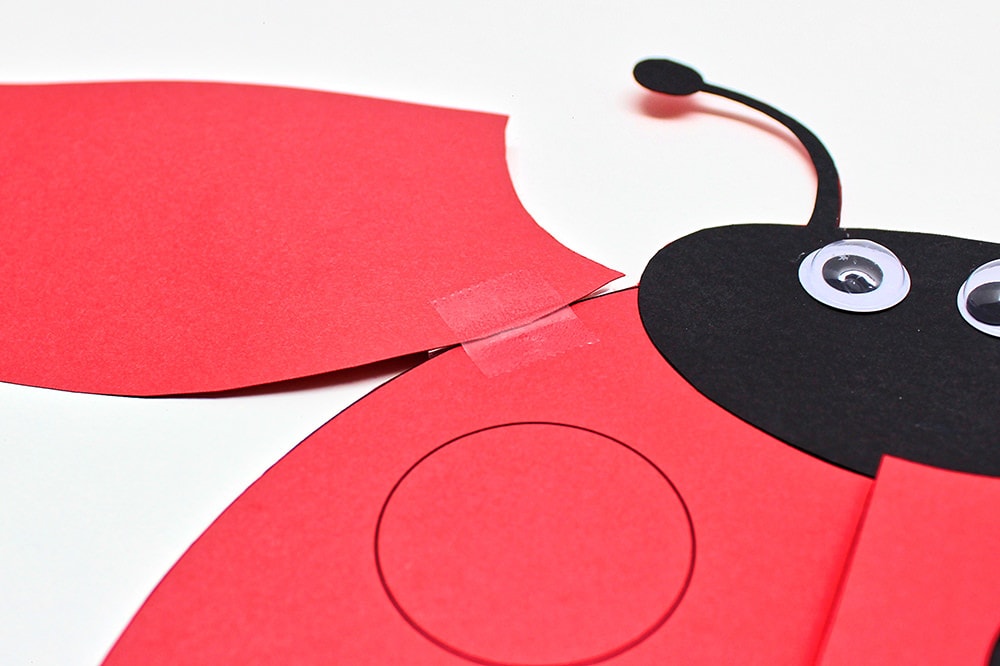
5. Assemble Card
The next step is to tape the wings onto the ladybug’s body.
I was going to use packing tape to do this, since it’s required for one of the subsequent steps, but it turned out to be too wide and the wings wouldn’t open properly. I ended up using two pieces of adhesive tape instead.
Just place the wings on top of the body, black dots facing up, then stick them to the body by placing two pieces of adhesive tape at the very top of the wings (as pictured below).
Open the wings, then place one piece of adhesive tape on the inside of the wings, between the two pieces of tape on the outside of the card.
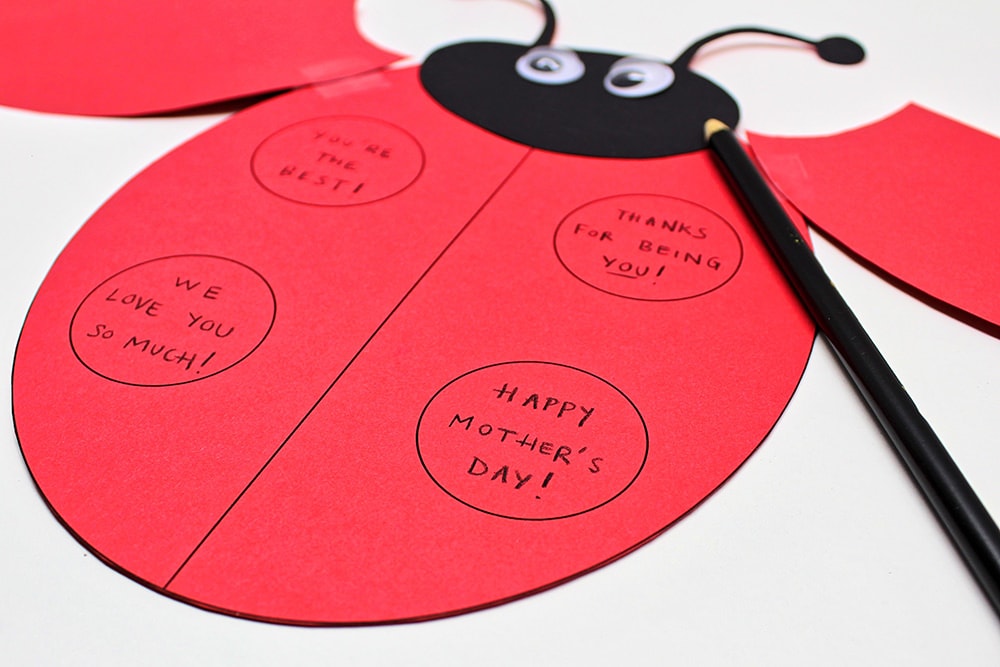
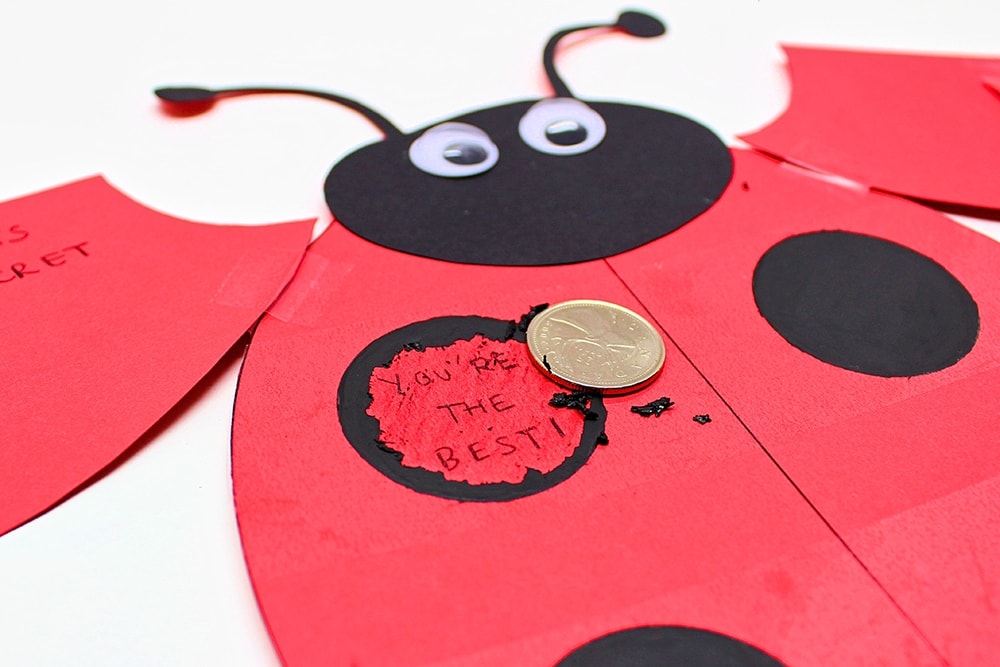
6. Write Messages
Now is the time to write your scratch-off messages! You can write whatever you like as long as you keep the writing inside the dots on the ladybug’s body.
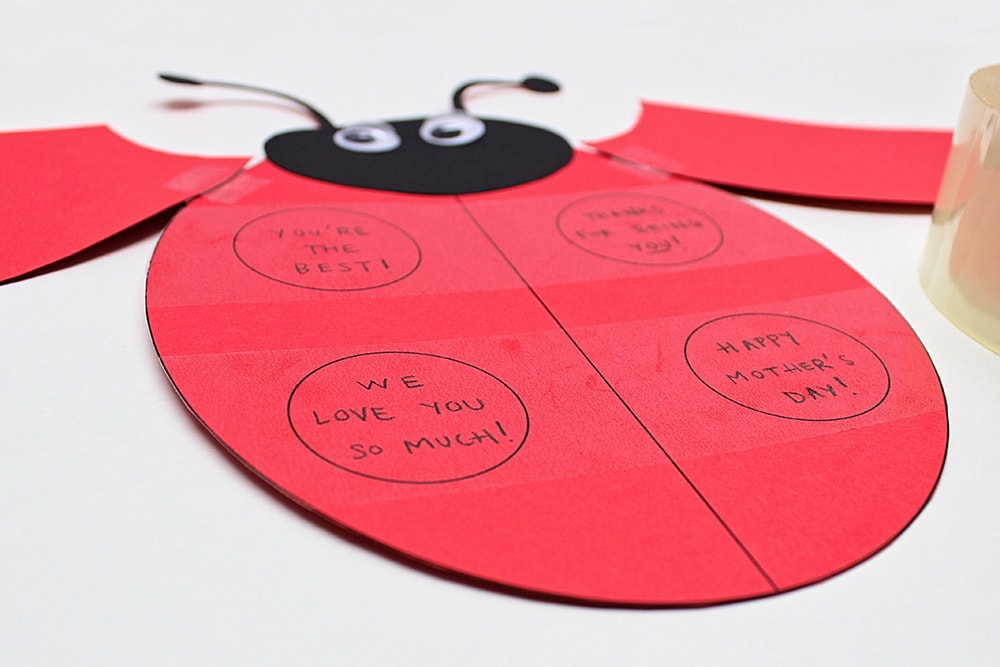
7. Cover Messages with Tape
Once you’re happy with your messages, cover them with packing tape. I placed two strips of packing tape horizontally across the ladybug’s body and they covered the four dots perfectly.
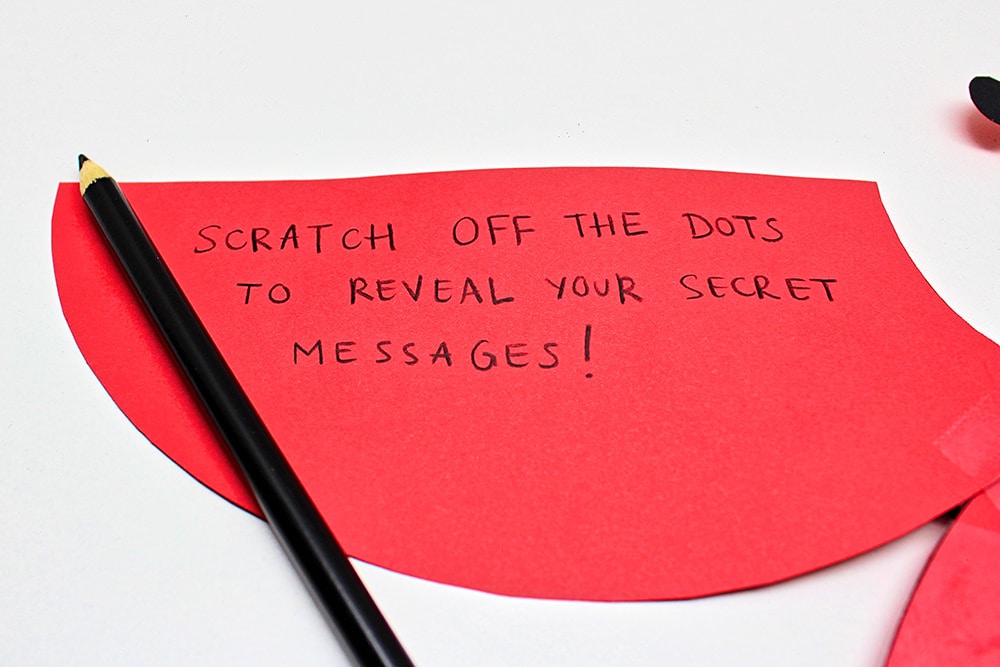
8. Write Reveal Message
Keeping the card open, write a sentence on the left wing inviting the card’s recipient to reveal the scratch-off messages.
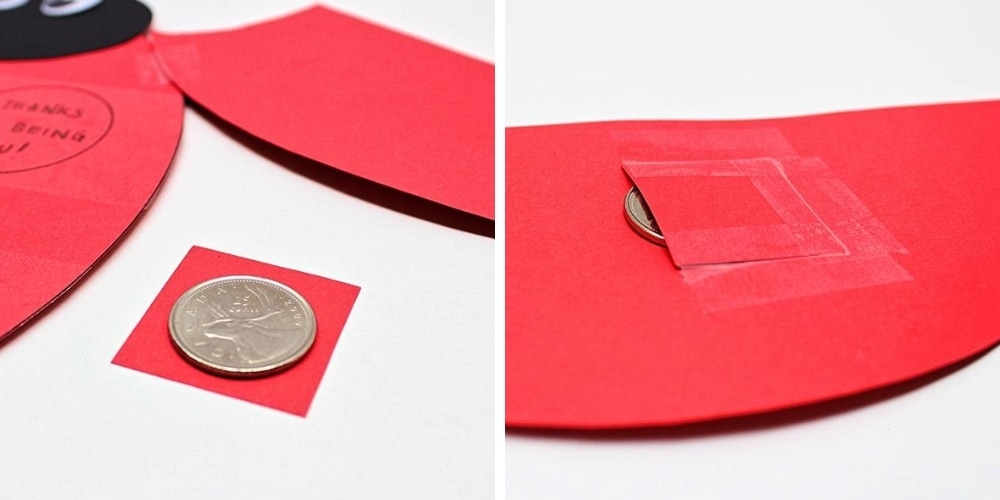
9. Add Coin Pouch (Optional)
This step is optional, but on the right wing, I decided to add a little pouch containing a coin. I thought this would make it easier for the recipient of the card to read the secret messages if they don’t happen to be carrying a coin.
I didn’t include this in the template because I figured you might be using a different currency and your coins might not be the same size as mine. But even without a template, it’s pretty simple to do.
Just use the scraps of red cardstock to cut a small square a little larger than your coin, then tape it to the right wing using three pieces of adhesive tape. Insert the coin into the pouch, leaving a little bit sticking out so it won’t be too difficult to pull out.
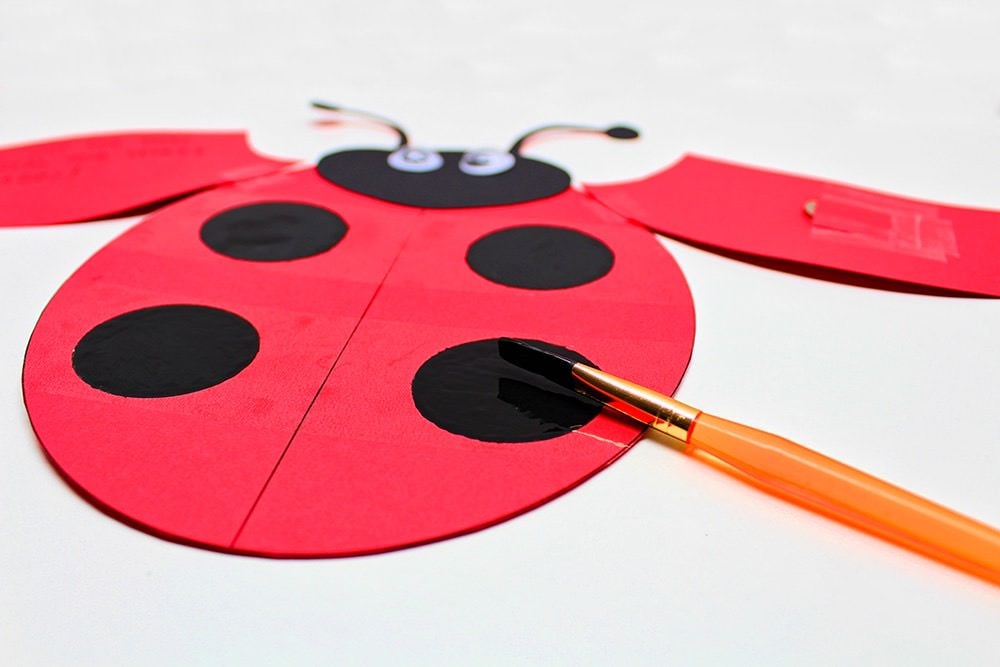
10. Paint Scratch-Offs
Now is the time to create the scratch-off dots! Just mix equal parts dish soap and black acrylic paint in a small container, then use the mixture to paint over your secret messages, staying within the printed lines to create four black dots on the ladybug’s body.
I found that one layer of paint provided sufficient coverage, but if that’s not the case for you, just wait until the first layer dries and add another layer on top. You can repeat this as many times as you need in order for the dots to be properly covered.
Make sure not to close the card at any point during this process or you’ll end up with black paint on the inside of the wings, and since the wings aren’t covered in clear packing tape, you won’t be able to scratch any of it off!
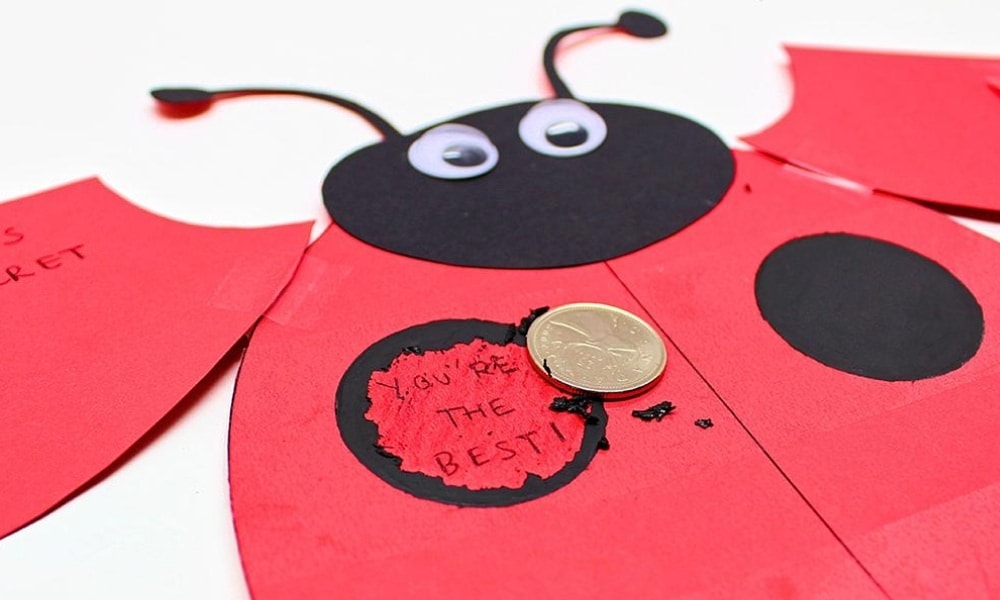
11. Let Dry
Once the paint has dried completely, the card is ready! Close the wings and give it to the recipient. When they open the card, they’ll be able to remove the coin from the right-wing pouch and scratch off the paint to reveal the secret messages you’ve written!
The ladybug is pretty cute in itself, but the scratch-off dots really add a fun twist! Wouldn’t you agree?
Related Homemade Cards
Looking for more fun ideas of DIY cards you can make at home? Check out these articles:
- Scratch-Off Car Card (with Free Printable!)
- Marbled Shaving Cream Shirt & Tie Card (with Free Printable!)
- Button Rainbow Card (with Free Printable!)
This looks like a fun card to make!I have a suggestion.Instead of taping the wings on what if you would use brads to attach the wings? This way you could make the wings moveable.
Yes, you could absolutely do that instead of using tape!