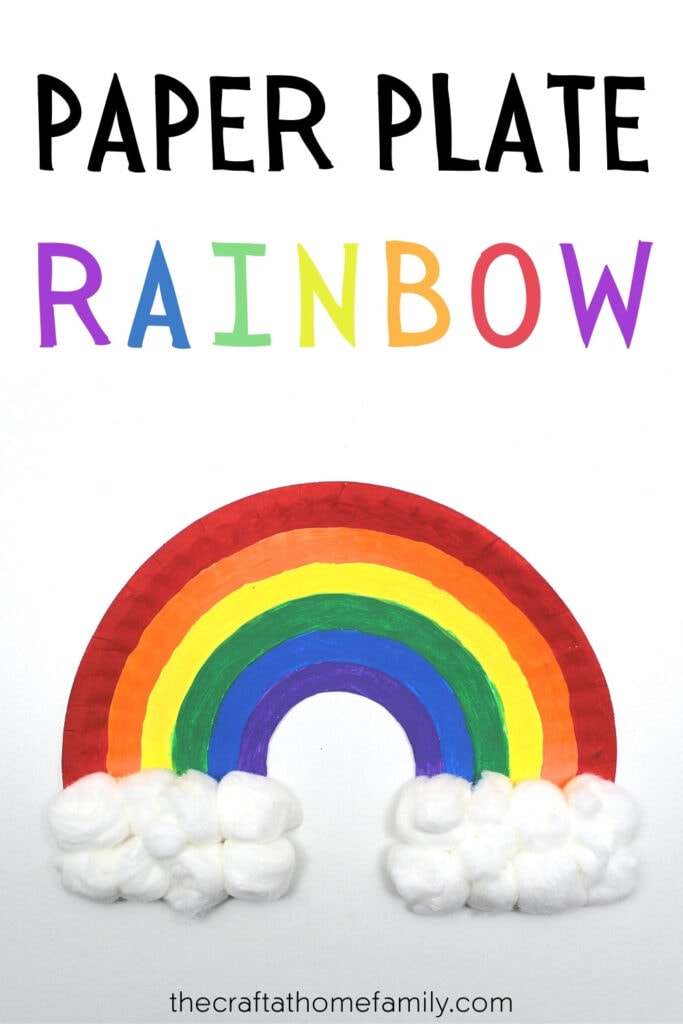
Turn a paper plate into a colourful rainbow with this easy summer craft that’s perfect for preschoolers! This project is so cute, and because it only requires a few basic supplies, you probably already have everything you need to make it!
This post may contain affiliate links, which means I may receive a commission, at no extra cost to you, if you make a purchase through a link. As an Amazon Associate, I earn from qualifying purchases. Please see my full disclosure for further information.
JUMP TO…
I’m not quite sure why, but lately, our five-year-old’s favourite craft supply has been paper plates.
She takes them out first thing in the morning and uses them throughout the day. She particularly loves painting them, using her safety scissors to cut them into pieces, and glueing things to them to create paper plate faces and animals.
She’s been using them so much that the stack of 100 paper plates we had in our craft cupboard has been whittled down to almost nothing in a matter of days, and I’ve had to order a pack of 300 from Amazon to replenish our stock.
So I figured the next craft we made together had to include paper plates—and because she’s been enjoying painting, cutting and glueing so much, this simple craft features all three!
Related: Button Rainbow Craft
Required Materials
Here’s what you’ll need to turn a paper plate into a colourful rainbow:
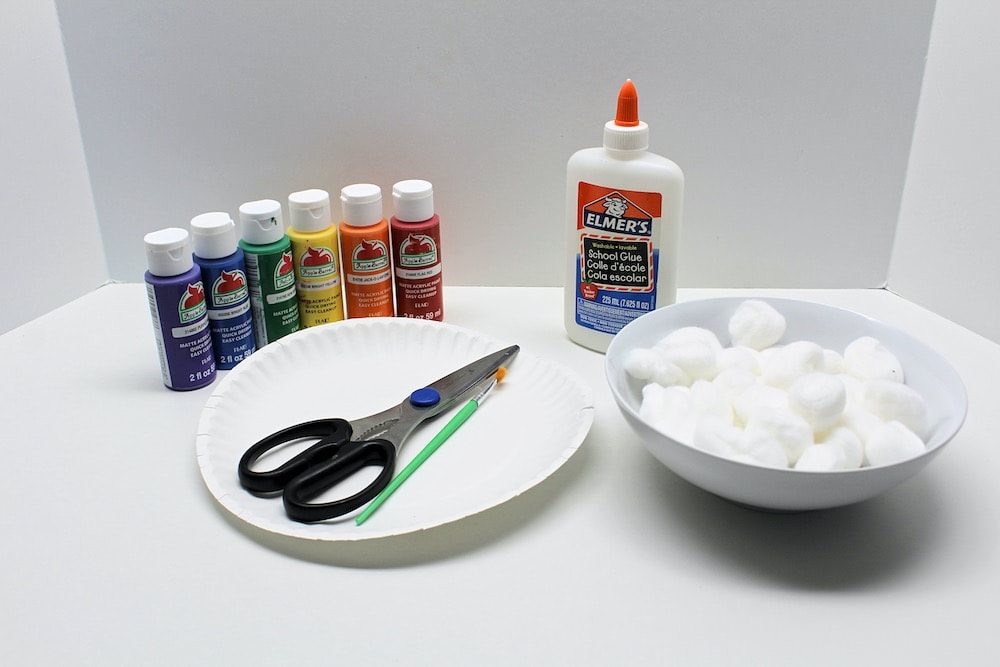
- Paper plate
- Pencil
- Scissors
- Paint (acrylic or washable)
- Paintbrush
- Liquid school glue
- Cotton balls (we bought ours at the dollar store)
How to Make a Paper Plate Rainbow (Step-by-Step)
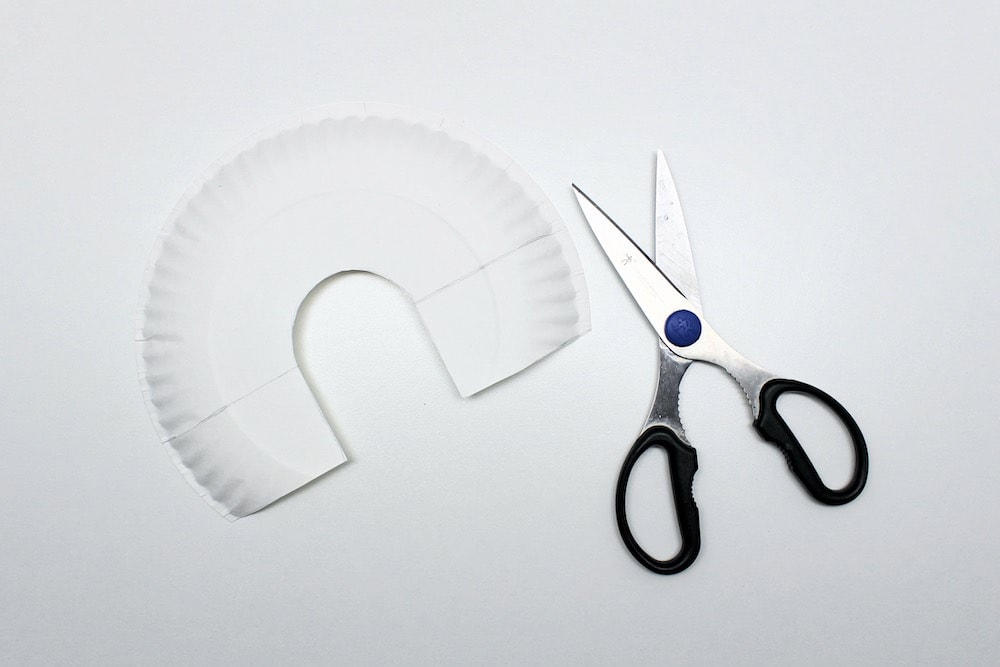
1. Draw Cut Marks
Start by turning over your paper plate and drawing lines on the back of it to make it easier to cut. As pictured below, you’ll need to draw:

- One line straight across the middle
- One line parallel to the first about halfway between the middle and the edge of the plate
- A semi-circle in the middle of the plate
- Two lines connecting the semi-circle to the second line
2. Cut Paper Plate
Use scissors to cut along the second line, the connecting lines and the outer edge of the semi-circle, as pictured below:
3. Paint Rainbow
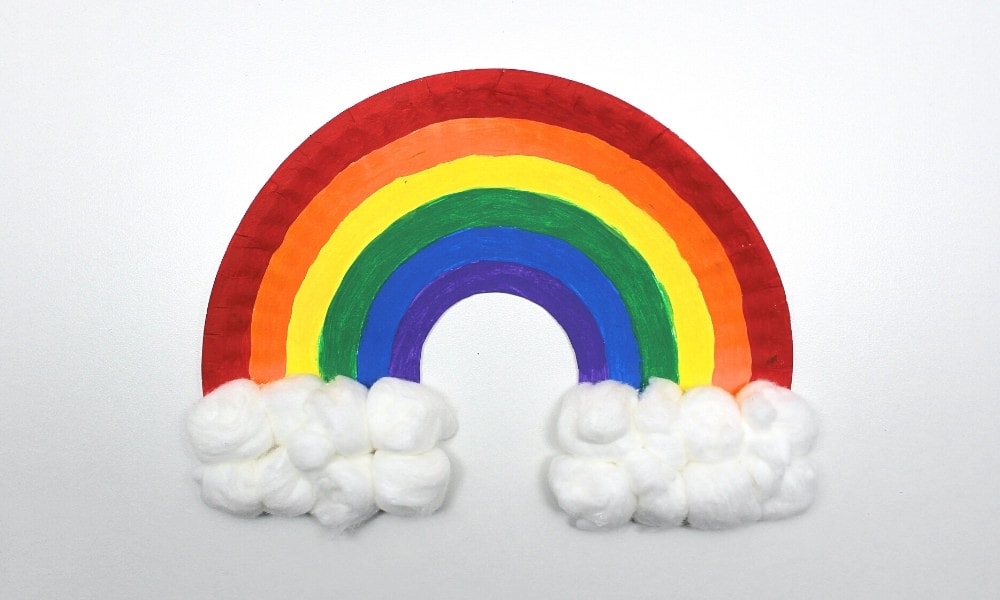
Use a paintbrush and some acrylic or washable paint to create a rainbow along the inner and outer edges of the paper plate. We started with purple and followed it up with blue, green, yellow, orange and red.
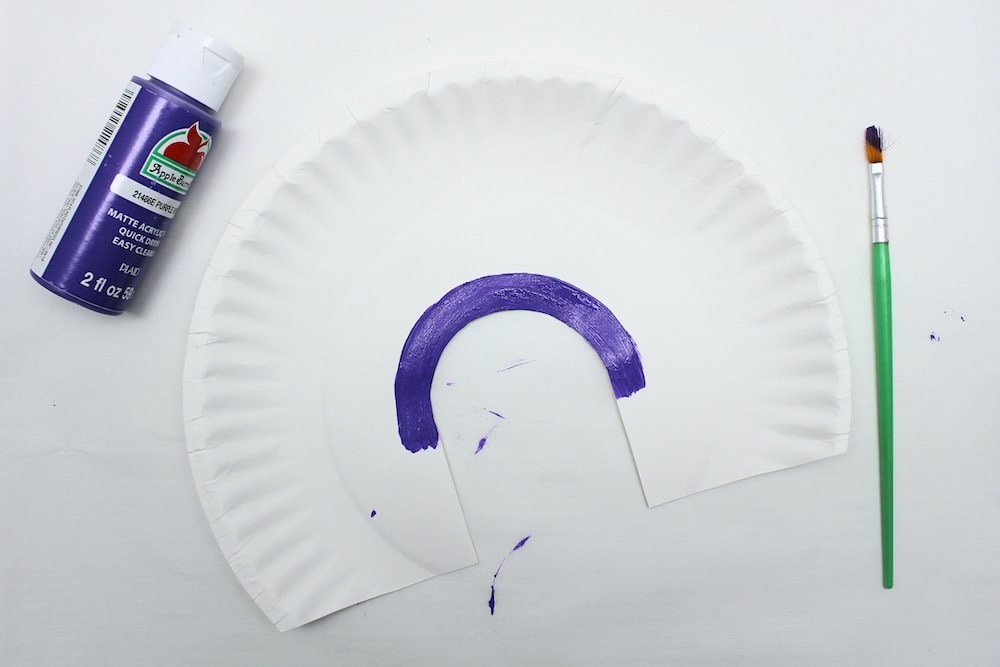
For best results, start with the inner edge and try to divide the lower section of the rainbow into six equal sections so that the various colours appear proportional to each other.
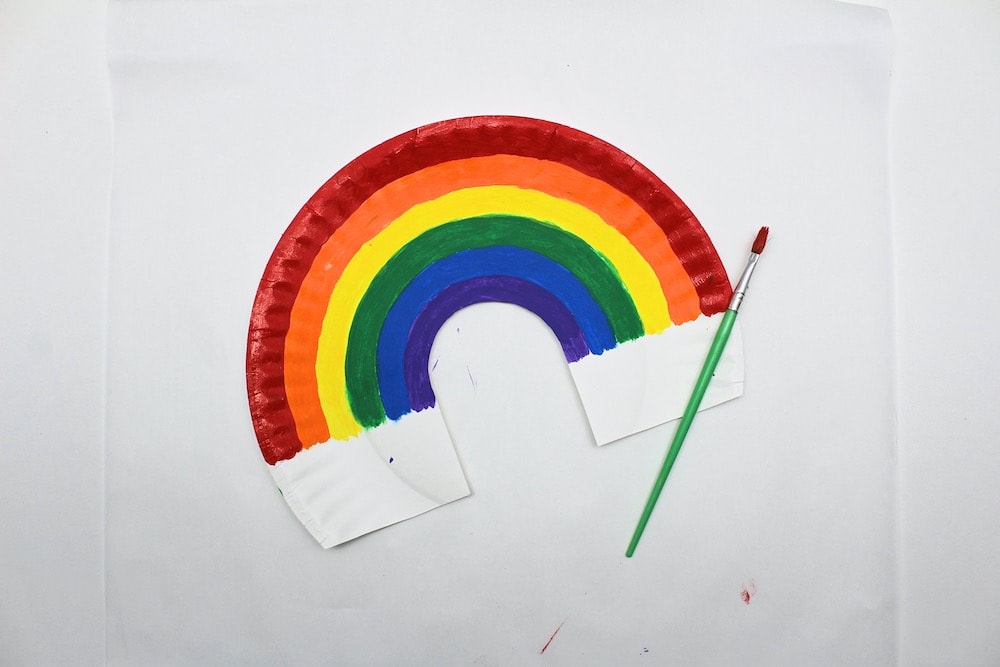
Note: You can paint the entire plate if you wish, but we stopped at the middle point since the bottom was going to be covered with cotton balls anyway.
4. Let Paint Dry
Let the paint dry completely before moving on to the next step.
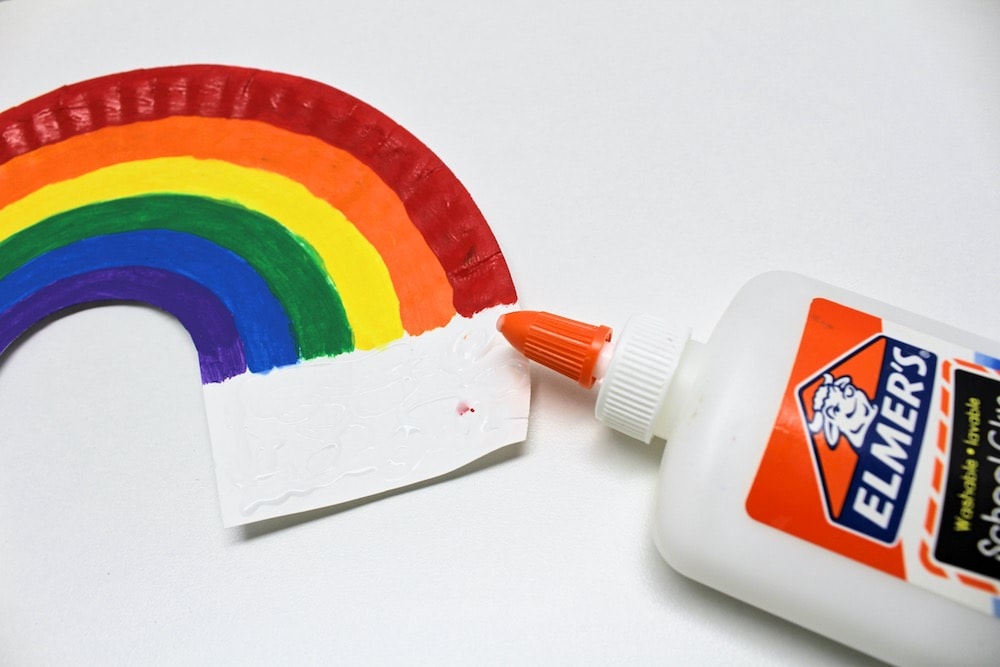
5. Glue Cotton Balls
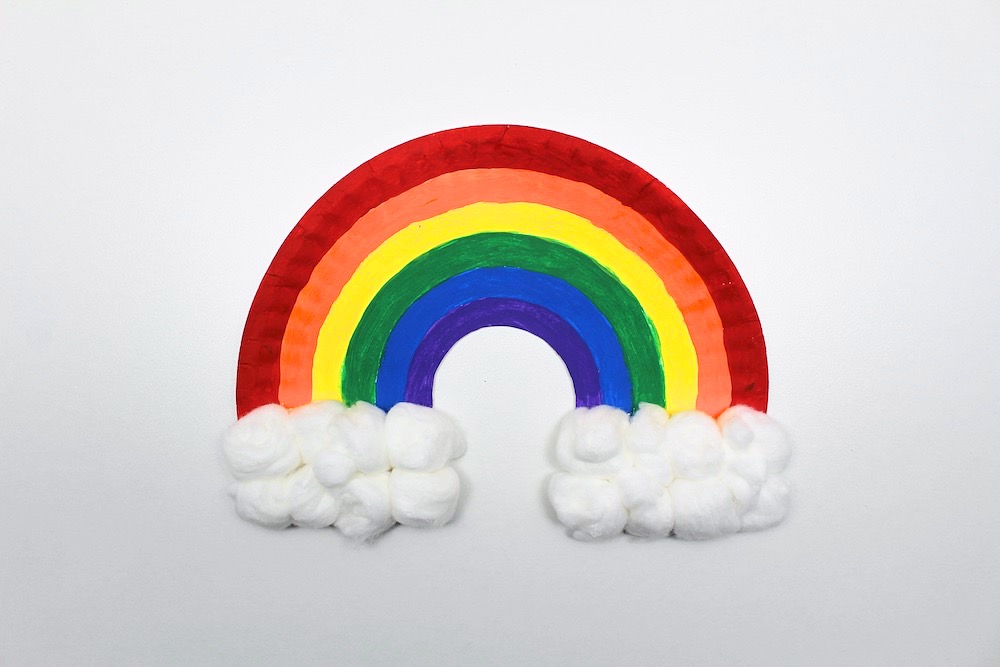
Once the paint is dry, spread liquid school glue onto the bottom edges of the paper plate and press cotton balls into it to create clouds at the base of the rainbow. We used eight cotton balls on each side (sixteen in total) to make the clouds look nice and fluffy!
When you’re done adding the cotton balls, simply let the glue dry and you’re done! Doesn’t it look so cute?!
Related Preschool Crafts
Looking for more fun crafts to do with your preschooler? Check out these articles:
You can also join my mailing list to receive fun craft and activity ideas right in your inbox! You’ll gain access to my free printables library and to exclusive bonuses that may never be available on my site!
Only your name will be made public. Please note that by submitting your comment, you are agreeing to the terms of our Privacy Policy.