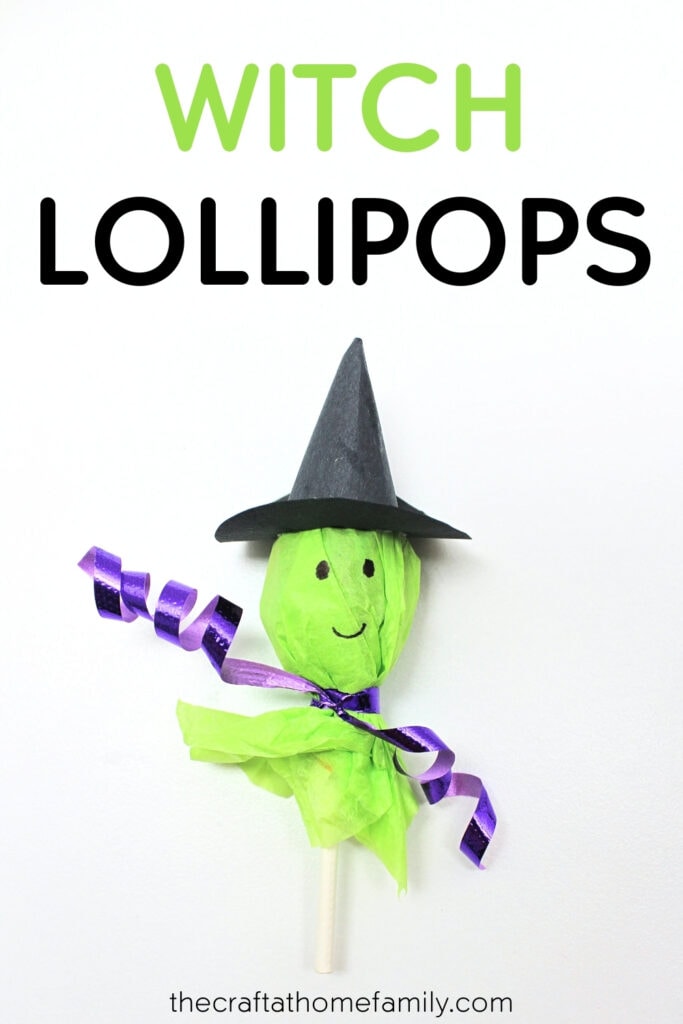
This adorable lollipop witch craft is the perfect way to extend the fun after the trick-or-treating is done! Simply grab some tissue paper, ribbon and construction paper, and you’ll be well on your way to making this easy Halloween craft that kids are sure to love.

JUMP TO…
Welcome to article number 6 of 7 in this series of Halloween lollipop crafts! I can’t believe we’re only missing one more craft to complete the set.
I love all of the lollipop we’ve been making, but the witch is one of my favorites. It looks so friendly and cute!
That being said, the hat can be a little tricky to make. So if you’re crafting with young kids, I recommend making that part for them.
You can also try a simpler project like lollipop ghosts or jack-o’-lantern lollipops—our five-year-old had a blast with them!
But if your kids are older or you don’t mind helping them, consider giving this project a try. You may even feel inspired to create a complete set of Halloween lollipops like we did!

Get hundreds of pages of activities!
Get access to all our paid printables, as well as monthly activity planners, for just $5/month. (New printables added twice per month!)
Required Materials
Here are the supplies you’ll need to turn a lollipop into a witch for Halloween:
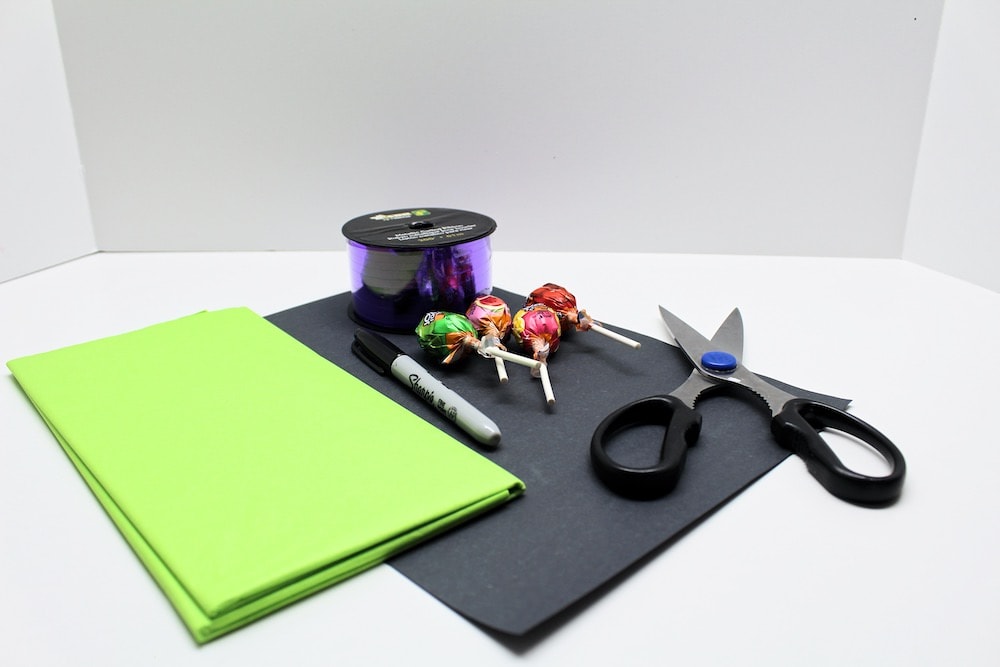
- Spherical lollipop like Dum Dums or Jolly Ranchers
- Green tissue paper
- Purple curling ribbon
- Black construction paper
- Pencil (optional)
- Scissors
- Adhesive tape
- Black permanent marker (I recommend using an ultra fine point marker)
How to Make a Lollipop Witch (Step-by-Step)
1. Cut Tissue Paper
Use scissors to cut two squares of green tissue paper. The sides of the squares should be about 4-6 inches in length.
Don’t worry about making the squares perfect. They’ll be folded over anyway, so no one will know the difference.
Since they didn’t have to be perfect, I chose to cut both squares at the same time by layering the tissue paper.
2. Secure Tissue Paper
Place a downward-facing lollipop in the center of the tissue paper squares.
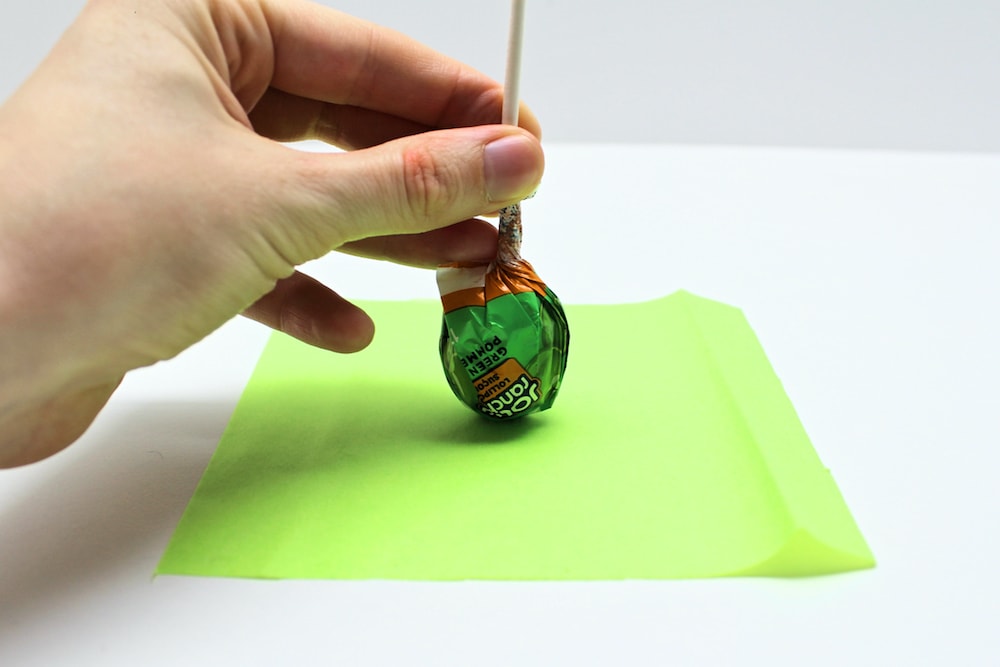
Holding the lollipop in place, bunch up the tissue paper and use purple curling ribbon to secure it. Try to make sure one of the stretches of tissue paper doesn’t have too many wrinkles—this will make it easier to draw a face during the next step.

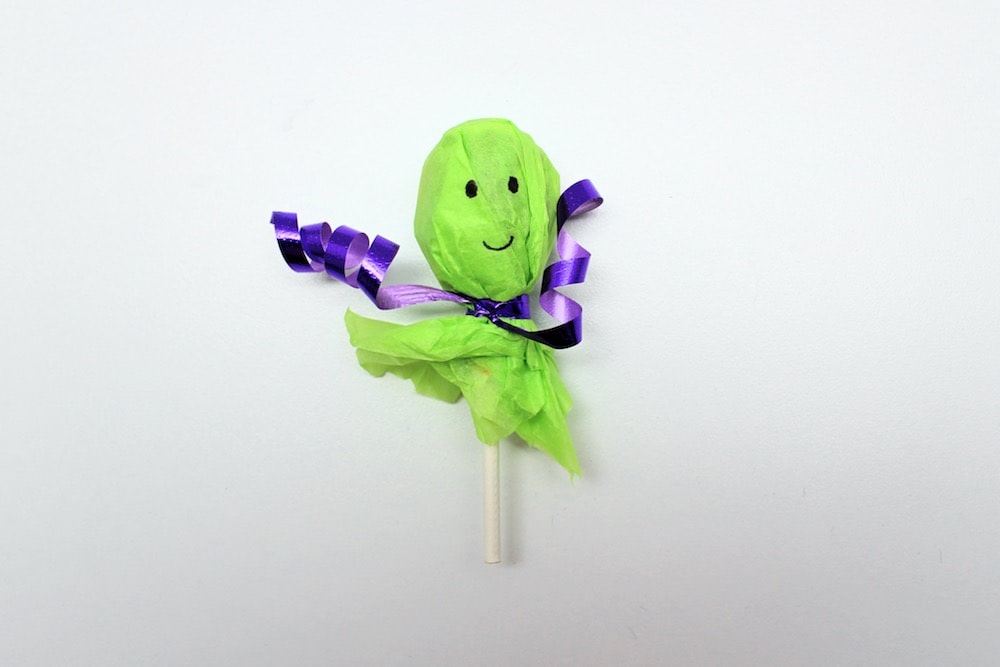
Once the tissue paper is secured, you can use the scissors to curl the ribbon if you wish.
3. Draw Face
Use a permanent marker to draw the vampire’s eyes and mouth. I recommend using an ultra fine point marker to allow for more precision.
4. Create Witch’s Hat
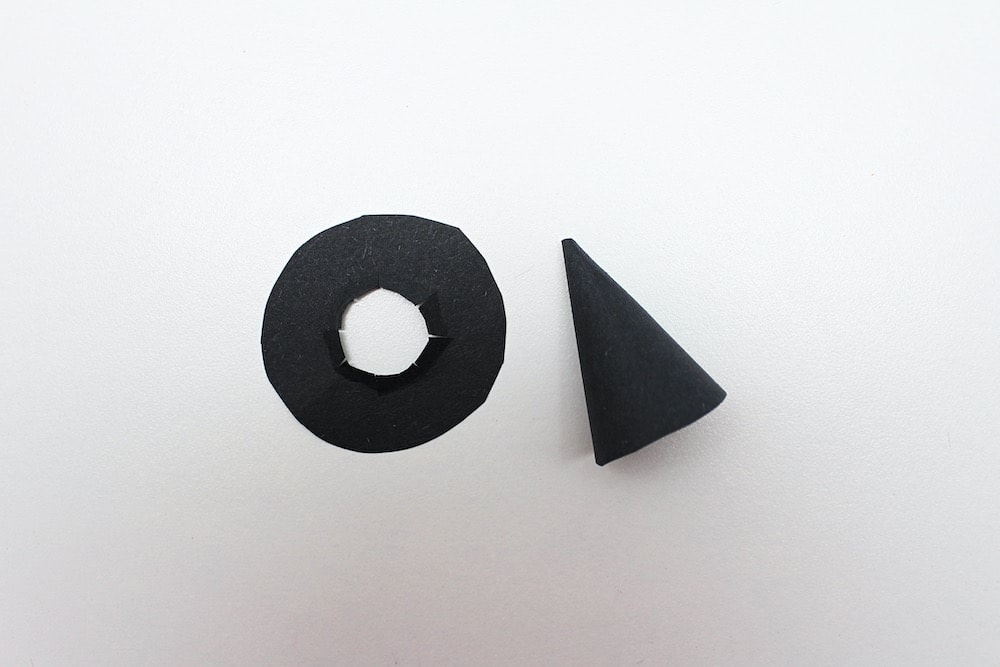
Use a pencil to trace a circle (for the base of the hat) and a part-circle on black construction paper.
For the part-circle, you can start by tracing a larger circle than the first, then cutting it in half and removing a sliver equivalent to about ⅛ of the full circle (or ¼ of the half-circle), as pictured below.

5. Assemble Witch’s Hat
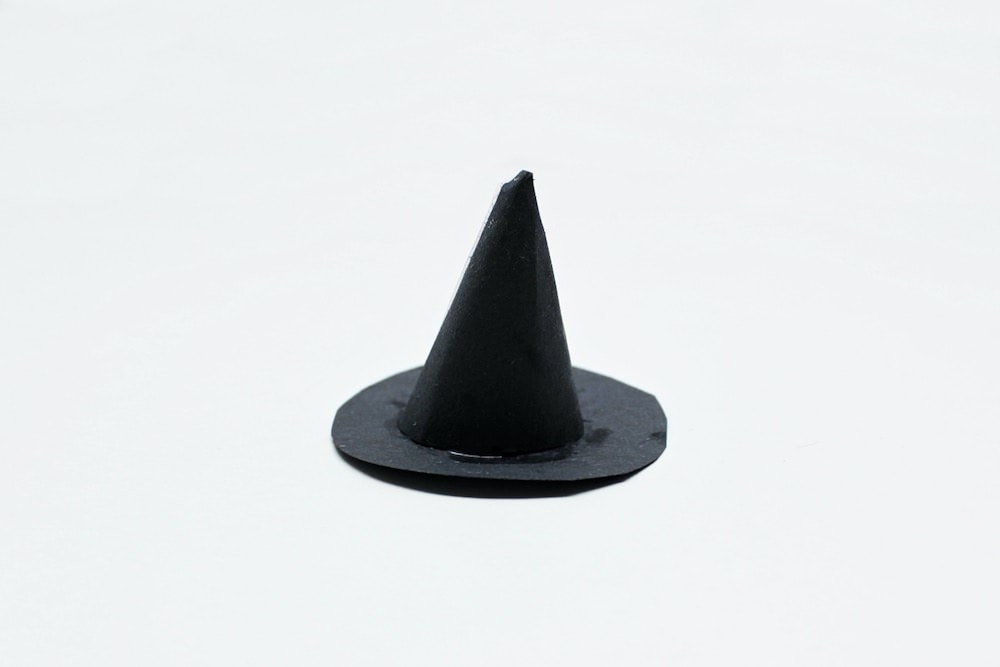
Use a small piece of adhesive tape to roll the part-circle into a cone and hold it in place.
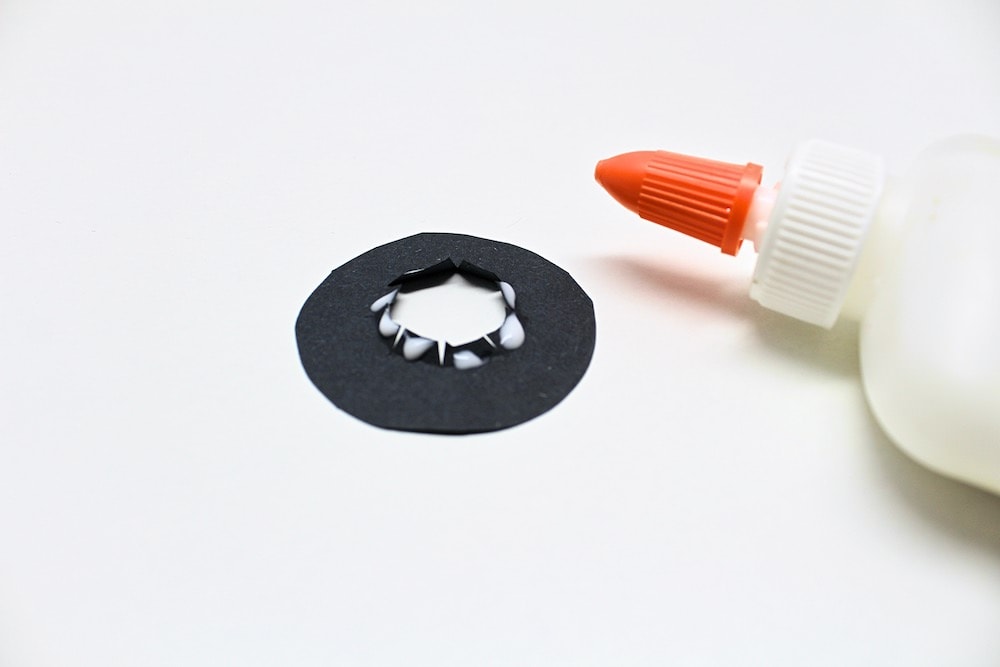
Then, trace a smaller circle inside the base of the hat, cut it out with scissors, and make small incisions on the inside edges of that circle.
Bend the edges inward. Then, use school glue to glue those edges to the inside of the construction paper cone.
Once the glue dries, the witch’s hat will be ready!
6. Glue Hat to Witch’s Head
Once the hat is done drying, use more school glue to glue the rim of the hat on top of the witch’s head.
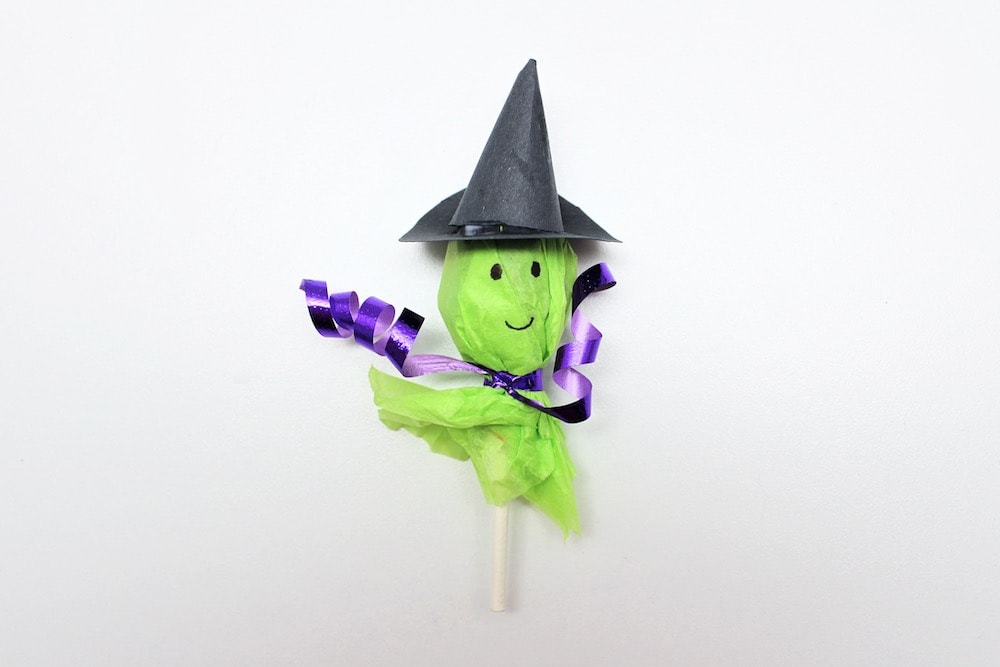
Let the glue dry, and you’re done! The witch was perhaps our second favorite of this series, after the monster lollipops.
Related Halloween Lollipop Crafts
Looking for more fun ways to decorate your lollipops for Halloween? Check out these articles:
- Ghost Lollipop Craft
- Pumpkin Lollipop Craft
- Monster Lollipop Craft
- Vampire Lollipop Craft
- Spider Lollipop Craft
- Bat Lollipop Craft
Only your name will be made public. Please note that by submitting your comment, you are agreeing to the terms of our Privacy Policy.