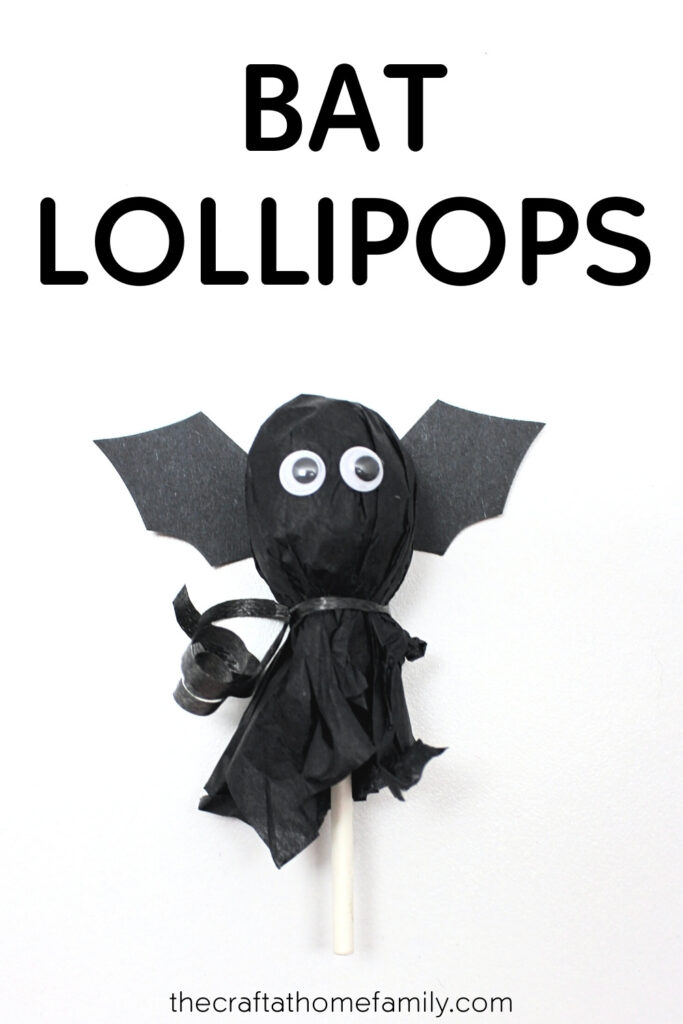
Turning lollipops into spooky Halloween bats is surprisingly easy, and you probably already have all the supplies you need at home. What an adorable Halloween craft for kids to make while they’re waiting to go trick-or-treating!

JUMP TO…
Welcome to the last article in this 7-part series of Halloween lollipop crafts!
Would you ever have imagined that there could be this many fun and creative ways to decorate lollipops? Because I certainly hadn’t.
But since these crafts were so fun to make, somehow once I got going, the ideas just kept flowing. And I’m so excited that I got to share all of them with you over the course of the last few days!
We’ve already spoken about how to turn a lollipop into a ghost, a jack-o’-lantern, a monster, a vampire, a spider and a witch.
The last possibility we’ll be discussing is how to turn a lollipop into a bat. Though of course, I’m sure there are many other ways to decorate lollipops that I haven’t thought of—and if you think of one, I’d love for you to share it in the comments below!
So without further ado, let’s find out how you can make lollipop bats with your kids for Halloween!

Get hundreds of pages of activities!
Get access to all our paid printables, as well as monthly activity planners, for just $5/month. (New printables added twice per month!)
Required Materials
Here are the supplies you’ll need to turn a lollipop into a bat for Halloween:
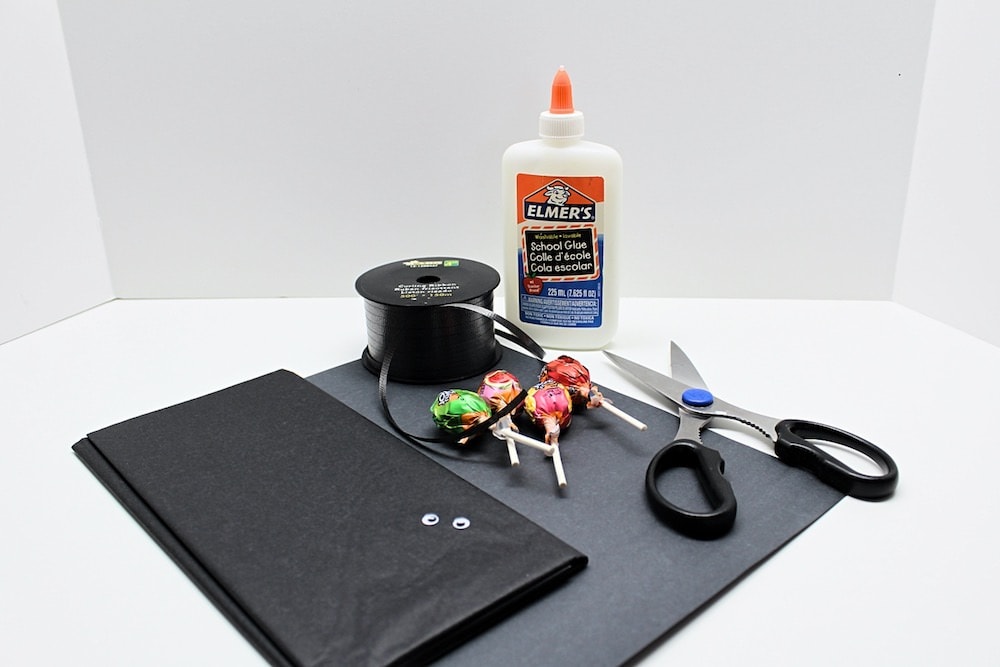
- Spherical lollipop like Dum Dums or Jolly Ranchers
- Black tissue paper
- Black curling ribbon
- Black construction paper
- Pencil (optional)
- Scissors
- Googly eye
- Liquid school glue
How to Make a Lollipop Bats (Step-by-Step)
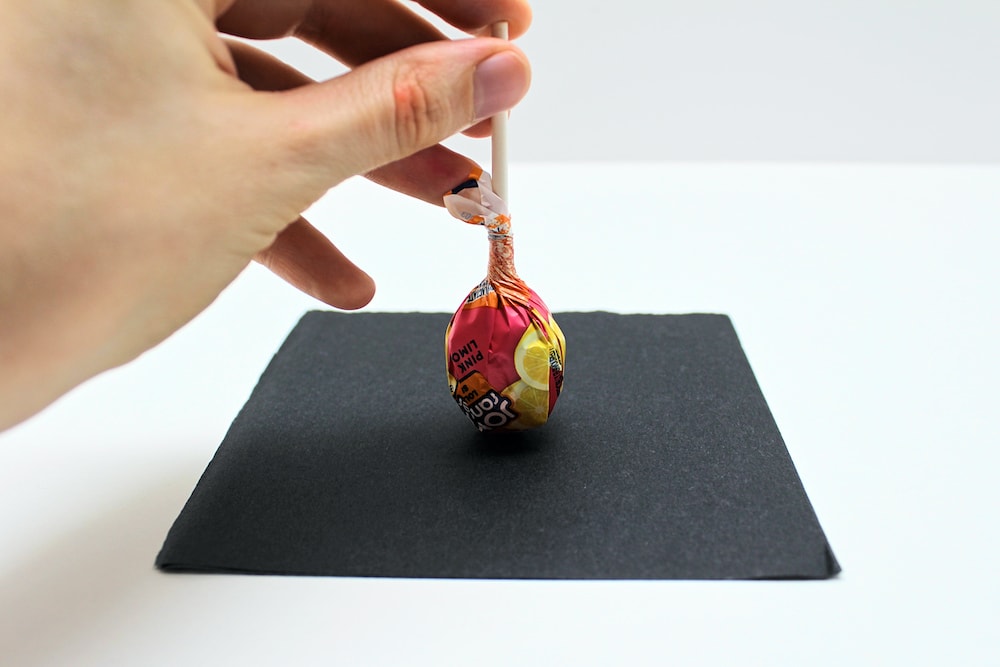
1. Cut Tissue Paper
Use scissors to cut two squares of black tissue paper. The sides of the squares should be about 4-6 inches in length.
Don’t worry about making the squares perfect. They’ll be folded over anyway, so no one will know the difference.
Since they didn’t have to be perfect, I chose to cut both squares at the same time by layering the tissue paper.
2. Secure Tissue Paper
Place a downward-facing lollipop in the center of the tissue paper squares.
Holding the lollipop in place, bunch up the tissue paper around it and use black curling ribbon to secure it.
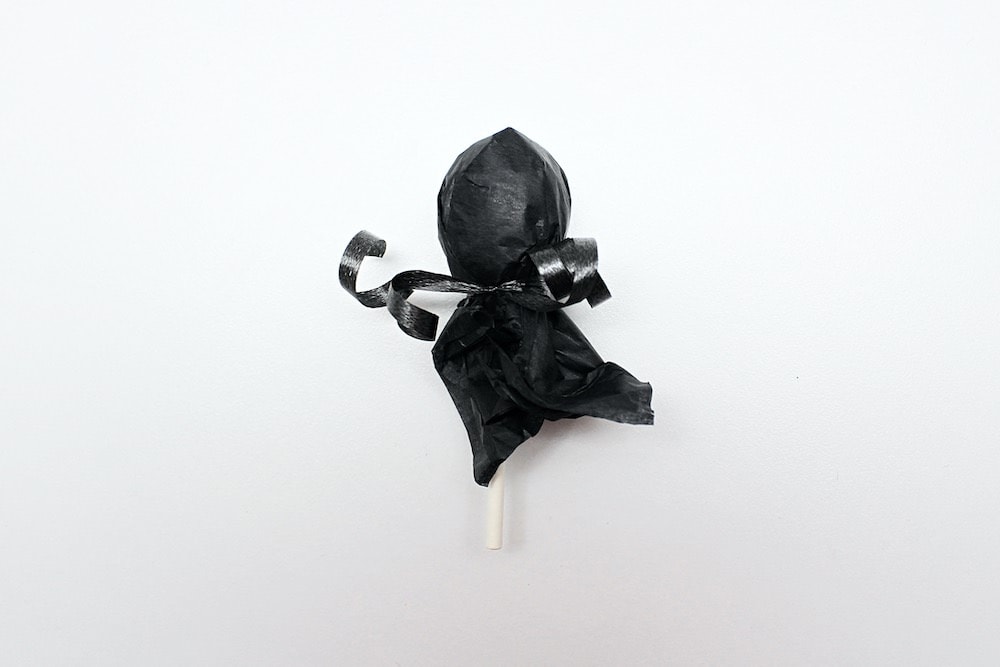
Once the tissue paper is secured, you can use the scissors to curl the ribbon if you wish.
3. Trace Bat Wings
Fold a piece of black construction in half. Then, use a pencil to trace the shape of a bat wing along the folded edge. (You can start cutting right away if you’re feeling up to it, but I prefer to have an idea of what I’ll be cutting first.)
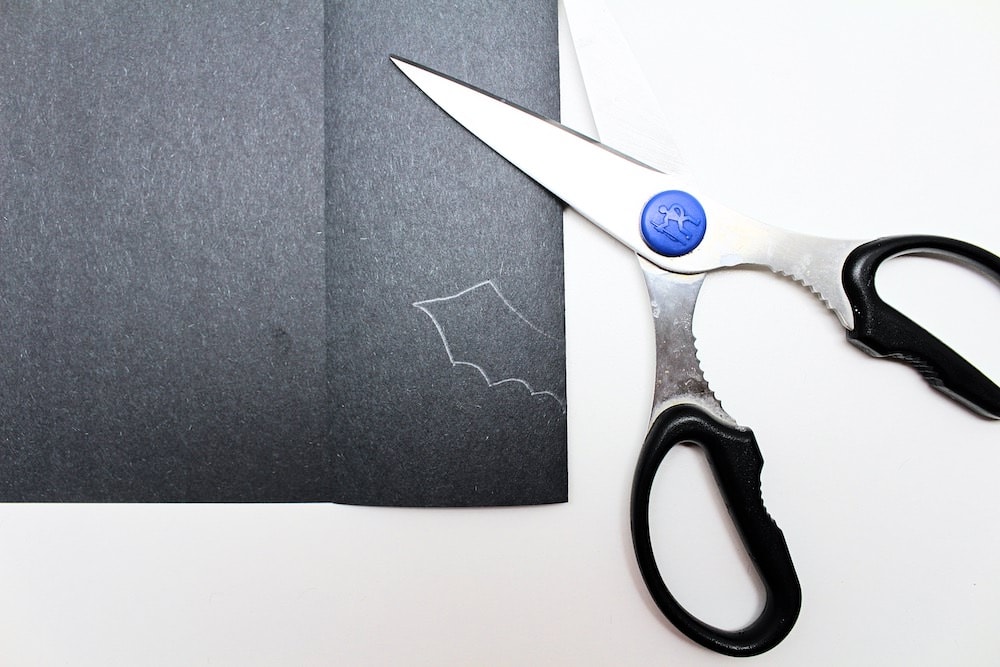
4. Cut Bat Wings
Once you’re happy with the shape of the bat wing, use scissors to cut around it. When you unfold the construction paper, you should end up with two identical bat wings attached at the middle.
5. Glue Bat Wings & Eyes
Using liquid school glue, glue the bat wings to the back of the lollipop and two googly eyes to its front.
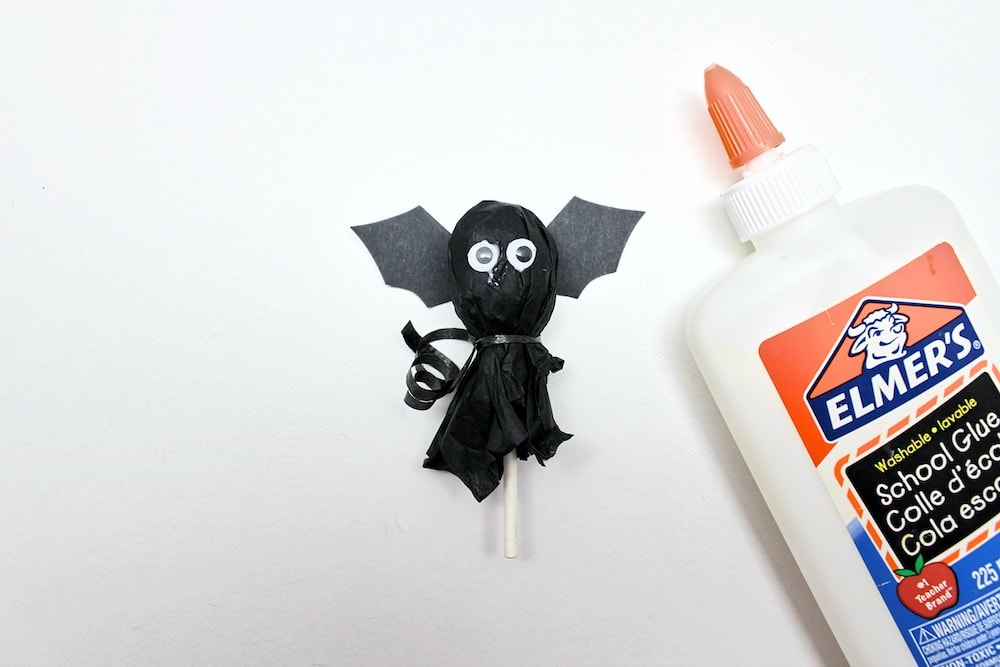
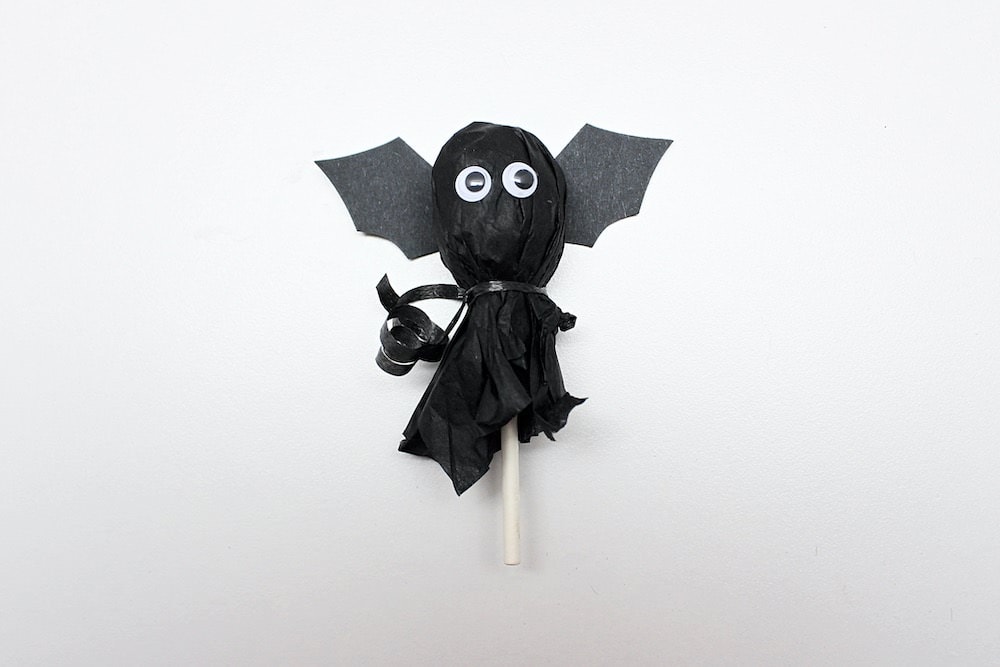
Let the glue dry and you’re done! This one is so simple, but it turned out really cute.
And as this is the last in our series of seven, make sure you check out the other six lollipop craft ideas that go along with this one!
Related Halloween Lollipop Crafts
Looking for more fun ways to decorate your lollipops for Halloween? Check out these articles:
- Ghost Lollipop Craft
- Pumpkin Lollipop Craft
- Monster Lollipop Craft
- Vampire Lollipop Craft
- Spider Lollipop Craft
- Witch Lollipop Craft
Only your name will be made public. Please note that by submitting your comment, you are agreeing to the terms of our Privacy Policy.