Looking for a way to extend the fun after trick-or-treating is over? Kids will LOVE these adorable Halloween monster lollipops—such a fun project, and they can even customize them however they like!
JUMP TO…
Welcome to article number 3 of 7 in this series of Halloween lollipop crafts!
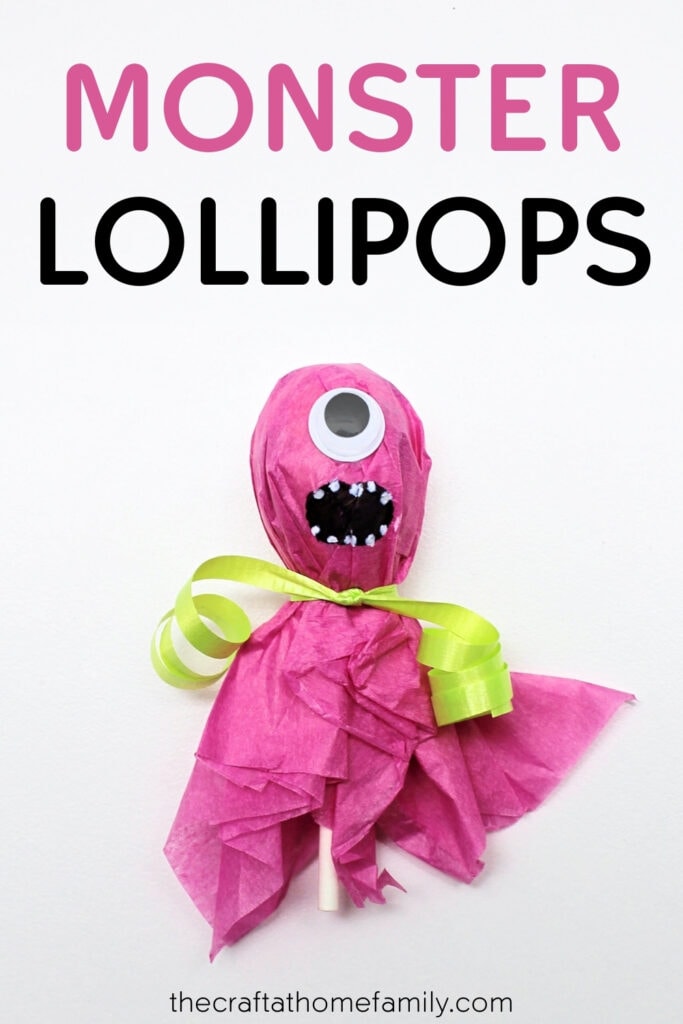
I’ll admit that I’m particular excited about this one. I hadn’t originally planned on making a monster-themed lollipop, but the idea popped into my head as I was finishing up the first set of lollipops and I couldn’t help but make one of these, too.
I’m really glad I did. This one turned to be my favorite. I just love the combination of the bright colors, the large mouth, the tiny teeth, and the single eye. And I love that there are so many ways to customize it and make it your own!
Below are the instructions to make it, and I really hope you’ll have as much fun with it as I did! (If your little one is a fan of monsters, you can also check out this Free Build a Monster Printable.)
Related: 7 Cutest Halloween Lollipop Crafts for Kids

Get hundreds of pages of activities!
Get access to all our paid printables, as well as monthly activity planners, for just $5/month. (New printables added twice per month!)
Required Materials
Here are the supplies you’ll need to turn a lollipop into a monster for Halloween:
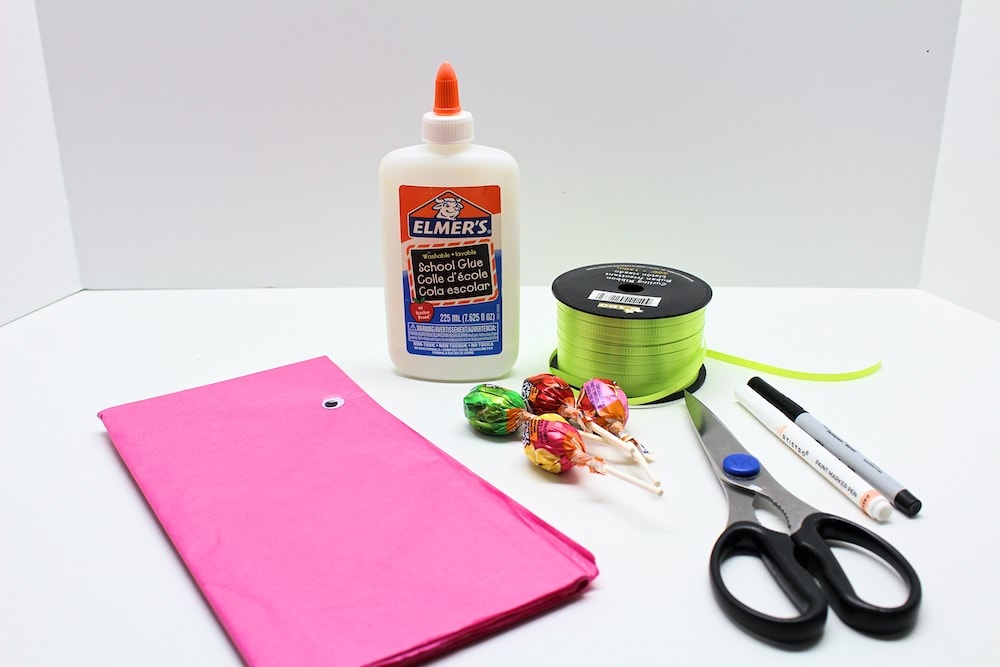
- Spherical lollipop like Dum Dums or Jolly Ranchers
- Pink tissue paper (or any other color of your choice)
- Green curling ribbon (or any other color of your choice)
- Scissors
- Black permanent marker (I recommend using an ultra fine point marker)
- Googly eye
- Liquid school glue
- White acrylic paint pen OR white acrylic paint and fine-tip paintbrush
How to Make a Lollipop Monster (Step-by-Step)
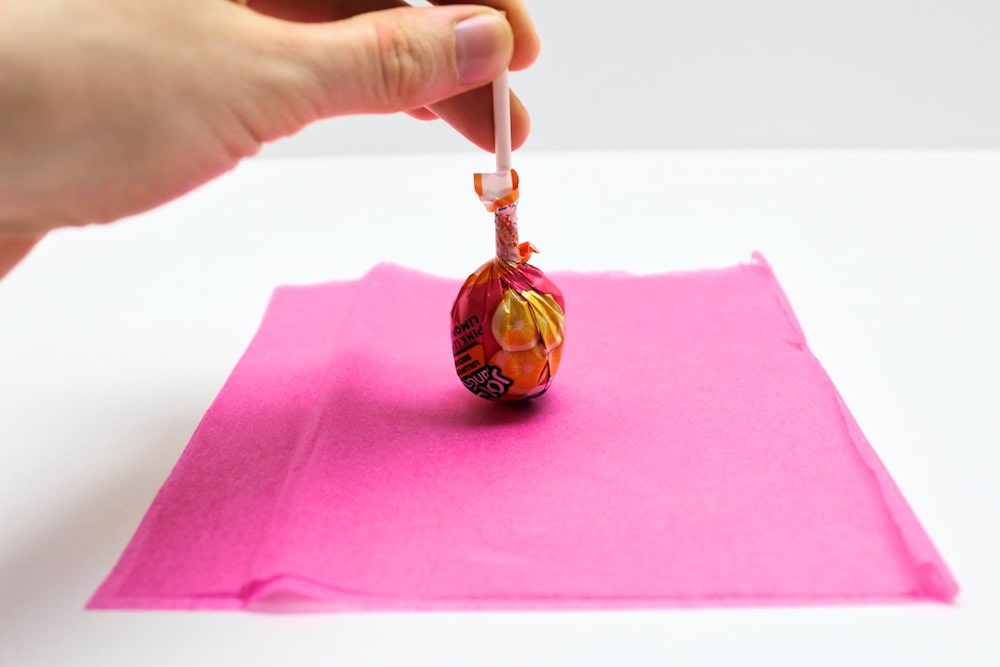
1. Cut Tissue Paper
Use scissors to cut two squares of colorful tissue paper (I chose pink). The sides of the squares should be about 4-6 inches in length.
Don’t worry about making the squares perfect. They’ll be folded over anyway, so no one will know the difference.
Since they didn’t have to be perfect, I chose to cut both squares at the same time by layering the tissue paper.
2. Secure Tissue Paper
Place a downward-facing lollipop in the center of the tissue paper squares.
Holding the lollipop in place, bunch up the tissue paper and use colorful curling ribbon to secure it (I chose green).
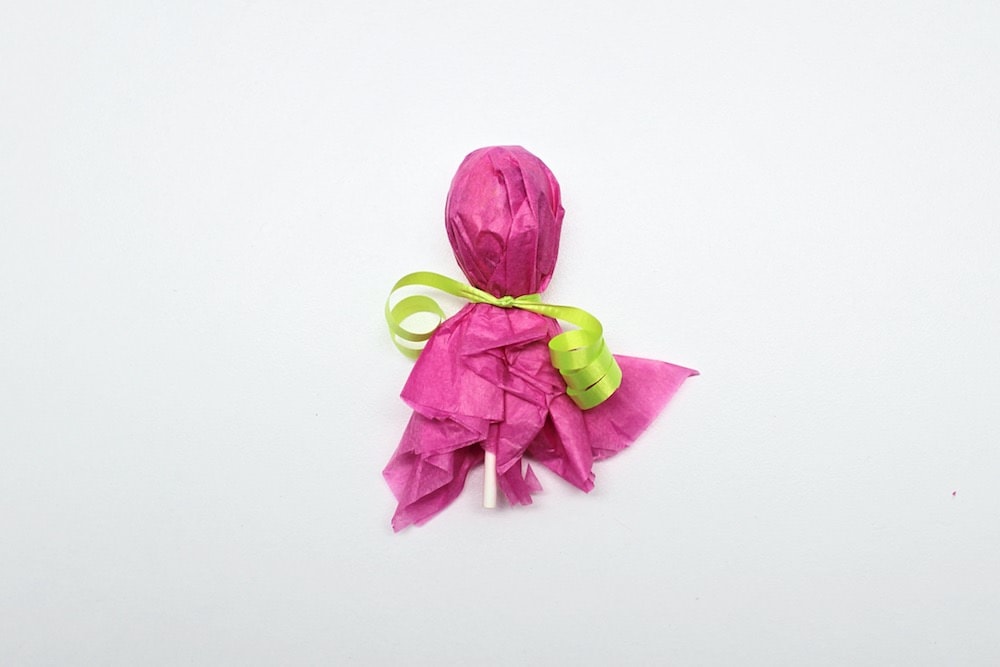
Once the tissue paper is secured, you can use the scissors to curl the ribbon if you wish.
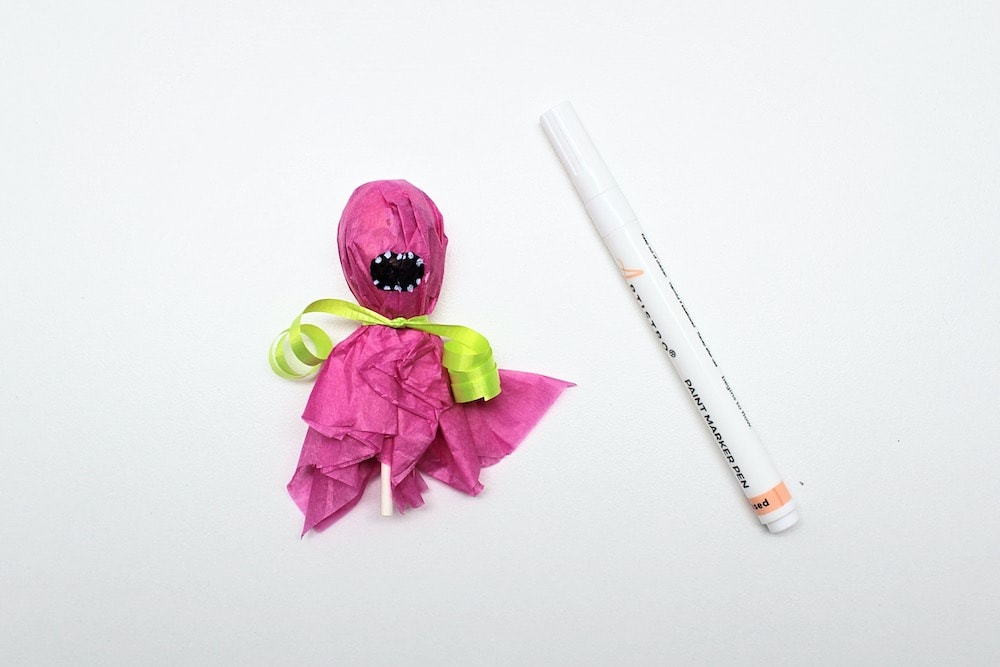
3. Draw Mouth
Use a permanent marker to draw a large black mouth for the monster. I recommend using an ultra fine point marker for this as it will allow you more control over the shape of the mouth.

4. Add Teeth
Using a white acrylic paint pen, or a fine-tip paintbrush and white acrylic paint, add small white dots on the inside edge of the black mouth to create the monster’s teeth.
I personally love acrylic paint pens. Like markers, they allow you to make extremely precise strokes; but unlike markers, they’re filled with acrylic paint, so they can cover up darker colors just like paint does.
They’re really quite handy for writing on dark-colored labels and creating peg doll facial features.
However, I realize that they’re not exactly a standard craft supply and that most people probably don’t have acrylic paint pens at home. So if that’s the case for you, you can simply use regular acrylic paint to create the monster’s white teeth.
5. Add Googly Eye
Use school glue to glue a googly eye (or multiple googly eyes) in the middle of the monster’s face. We only used one because we liked the way it looked, but feel free to use more if you prefer.
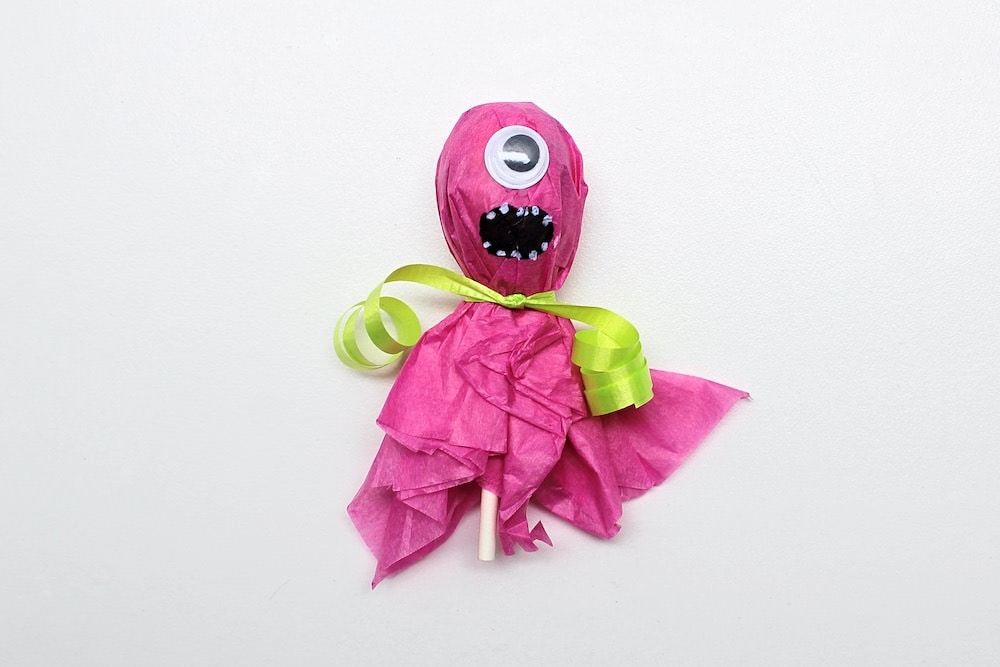
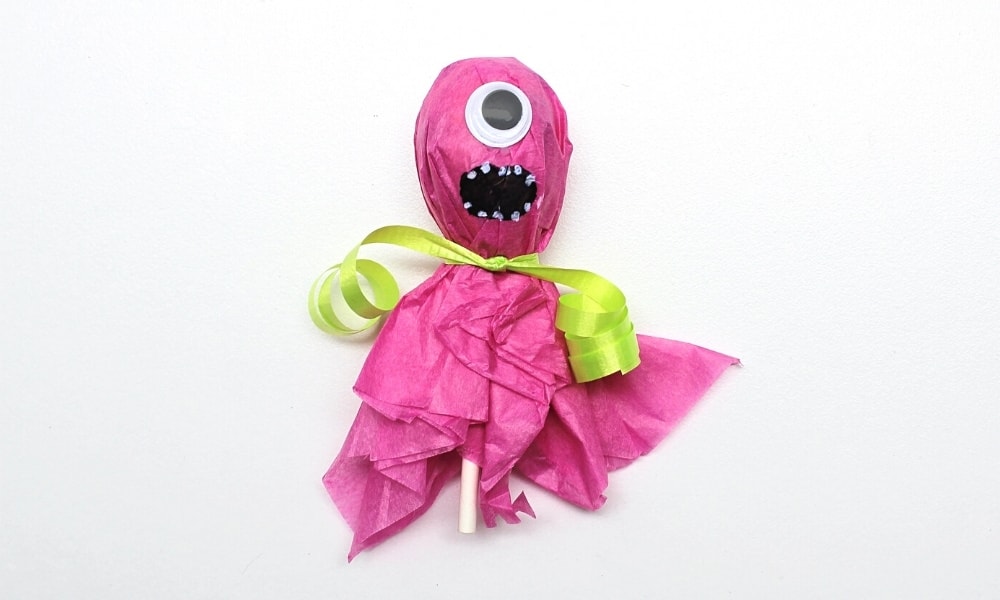
Once the glue dries, your monster lollipop is done! This craft is definitely my favorite of the entire series.
Related Halloween Lollipop Crafts
Looking for more fun ways to decorate your lollipops for Halloween? Check out these articles:
- Ghost Lollipop Craft
- Pumpkin Lollipop Craft
- Vampire Lollipop Craft
- Spider Lollipop Craft
- Witch Lollipop Craft
- Bat Lollipop Craft
Only your name will be made public. Please note that by submitting your comment, you are agreeing to the terms of our Privacy Policy.