
Looking for a fun new way to dye eggs for Easter? Grab some Ziploc bags and use them to dye Easter eggs with rice! These cute rice dyed Easter eggs are a great activity for kids because they are simple to make and mess-free, which means less cleanup for Mom and Dad.
JUMP TO…
Does your family usually dye eggs for Easter? We used to just get the plastic ones from the dollar store and paint them with washable kids’ paint, but we started dyeing real eggs a few years ago and it’s been a lot of fun experimenting with different ways to color the eggs.
(Thankfully we all like to eat devilled eggs, so the dyed eggs never go to waste.)
Last year, we tried dyeing eggs with Kool-Aid, whipped cream and bleeding tissue paper. They all turned out great!
This year, we wanted to try something new. And when I found out that you could use rice to dye Easter eggs, I was really curious—especially since unlike some of the other Easter egg dyeing ideas I’ve seen, this one was mess-free.
We always have lots of rice in our pantry, so we decided to give it a go. And as it turns out, making rice dyed Easter eggs in bags is as fun as it sounds!
Plus, once we were done coloring the eggs, we were able to extend the fun by using the colored rice for other activities.
So if you’ve been looking for a fun new way to dye Easter eggs, why not give these DIY rice dyed Easter eggs a try?

Get hundreds of pages of activities!
Get access to all our paid printables, as well as monthly activity planners, for just $5/month. (New printables added twice per month!)
Required Supplies
Here’s what you’ll need to make your own mess-free speckled rice Easter eggs at home:

- Hard boiled eggs
- Uncooked rice (we used ½ cup of dry rice per color)
- Small Ziploc bags
- White vinegar (optional)
- Liquid food coloring (you can also use gel food coloring, but you’ll need to adjust the quantities)
- Latex or nitrile gloves (or another material you prefer—they’ll be used to prevent the food coloring from staining your skin when you pick up the eggs)
How to Dye Easter Eggs with Rice and Food Coloring (Step-by-Step)
1. Pour Rice into Ziploc Bag
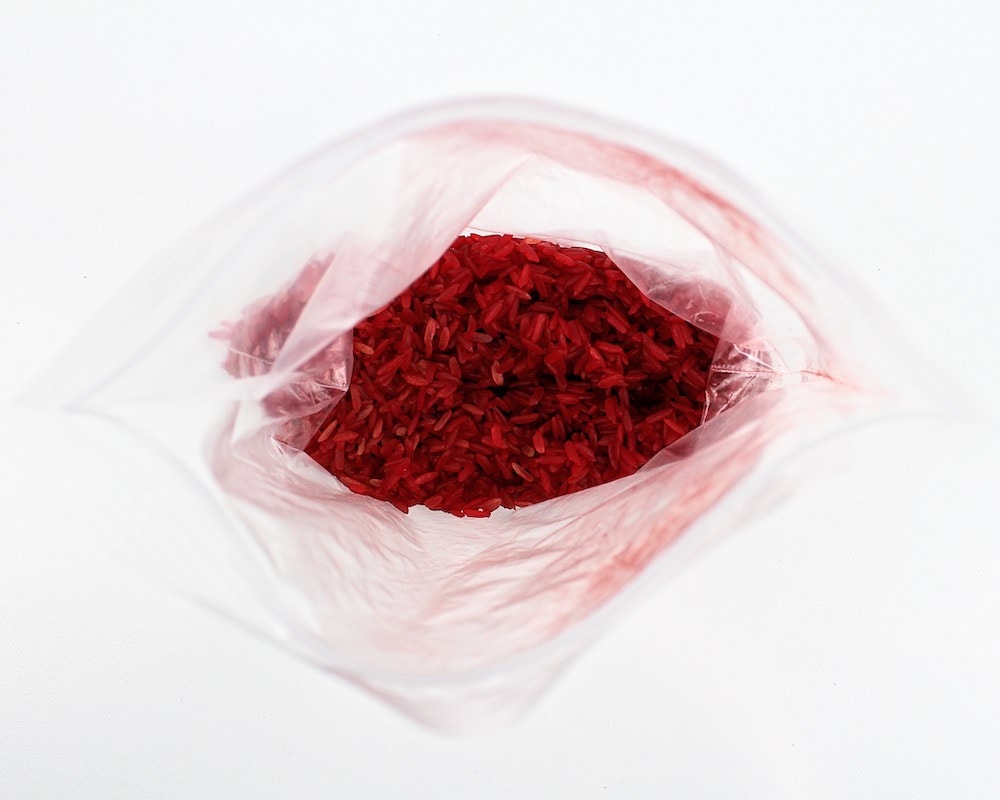
Start by pouring ½ cup of uncooked rice into a zip-top sandwich bag. If you’re planning on using multiple colors, take out multiple bags and pour ½ cup of rice into each.

2. Add Food Coloring
Add 10-20 drops of liquid food coloring to the bag of dry rice. I added 15 drops per bag, but 20 probably would have produced more vibrant results, especially for the lighter colors. (If you’re using gel food coloring, you’ll need to add less since the color is more concentrated.)

To make the color brighter as it transfers to the eggs, you can also add a little bit of white vinegar. I don’t recommend adding more than ⅛ teaspoon per bag—if you add too much, the rice will get too “wet” and the eggs won’t look the same.
Note: Feel free to mix two colors of food coloring to create a new shade.
3. Shake Rice
Seal the Ziploc bag and shake the rice around in order to spread out the food coloring.
You actually have several options when completing this step. The more you spread out the color, the lighter the color of the eggs will be, so feel free to experiment and see what you prefer.
To make pastel-colured eggs, keep shaking the rice until the color is evenly spread throughout. (This is what we did.)
For darker eggs, don’t spread the color too evenly. This will allow it to be more concentrated and will give a more speckled look to your rice dyed eggs.
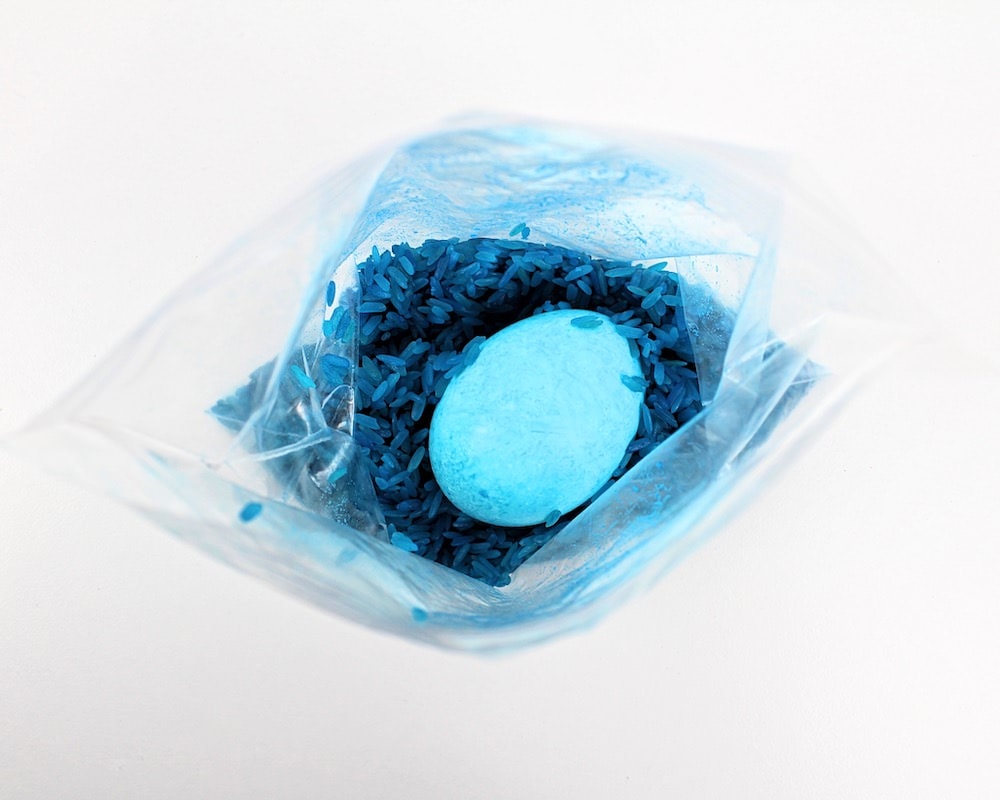
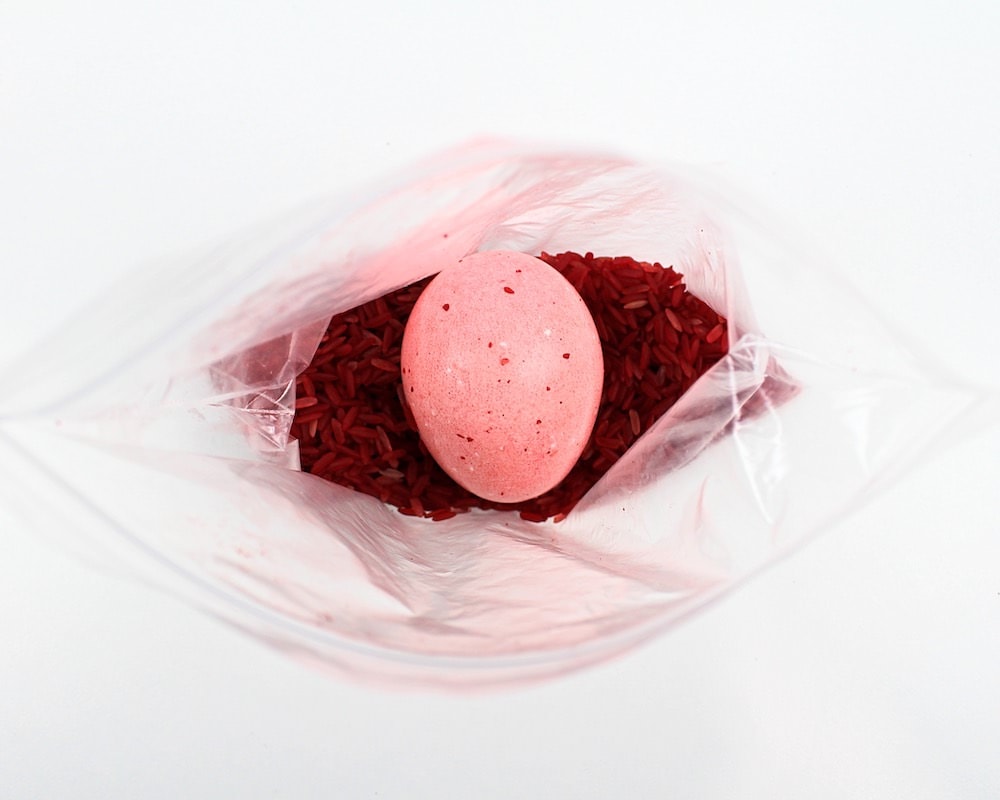
4. Add & Shake Hard Boiled Egg
Once you’ve done shaking the rice to spread the color around, open the bag and gently drop an egg onto the rice.

Then, seal up the bag again and start shaking.
This was definitely the best part, and one I highly recommend you let the kids do. (They can actually do most of the steps themselves, as this project is quite simple and very kid-friendly.)
I loved that because the egg and food coloring were inside a sealed Ziploc bag, coloring the eggs with rice was mess-free. I don’t mind messy activities, but it’s always nice to have a no-mess option for days when there isn’t much time for the cleanup.
Keep shaking the egg until it has the desired hue.
You can always add more food coloring if the color is too light, but if you do, I recommend removing the egg first (wear gloves to avoid staining your hands) to prevent the food coloring from falling directly onto the egg and creating a blotch of color.
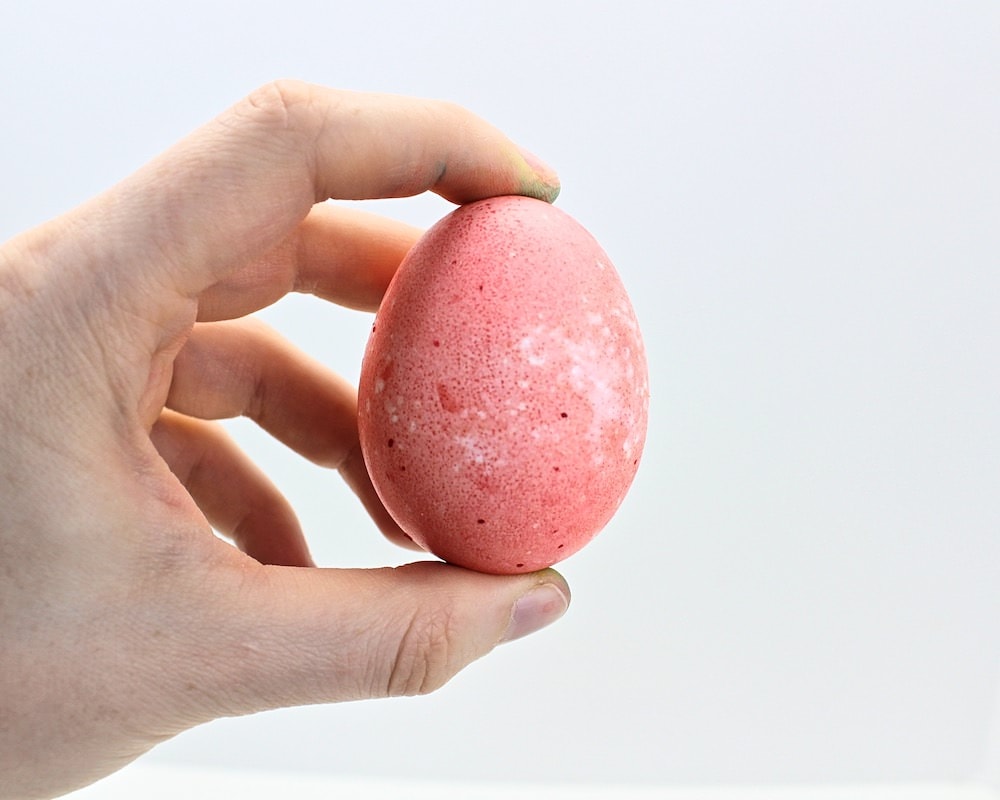
5. Let Egg Dry
Repeat the previous step as many times as you like, using as many colors as you like. You may need to add a few more drops of food coloring in between eggs if you’re reusing the same rice to dye several Easter eggs.

Once you’re happy with how each egg looks, put on some latex or nitrile gloves to avoid staining your hands and carefully remove the egg. Then, place it on a ceramic plate and let it rest undisturbed until the food coloring is fully dry. This shouldn’t take long.
When the rice shake Easter eggs have fully dried, they will be ready to display. How easy was that?!
What About the Colored Rice?
My kids enjoyed helping me dye Easter eggs in rice, but the leftover colored rice was probably their favorite part of this project.
After we were done decorating the eggs, I made sure to leave the rice bags open in order to let the rice dry completely. (This worked fine because there wasn’t a lot of rice, but you can also pour it onto a baking sheet to dry if you want to speed things up.)
Then, I used the dry rice to create a rainbow rice sensory bin.
My kids had so much fun scooping and pouring the rice, and when they were done playing with it, we simply poured the rice right back into a Ziploc bag in preparation for next time. They played with the rice for days after the eggs were done, which was an awesome bonus!
If sensory bins aren’t your thing or you have older kids who don’t play with them anymore, you can also use the rice for crafts. This Rainbow Rice Bunny Craft is perfect for Easter, but there are lots of other possibilities as well. Use your imagination!

Speckled Rice Dyed Easter Eggs
Equipment
- 6 sandwich bags
- latex or nitrile gloves optional
Ingredients
- 6 hard boiled eggs
- 3 cups uncooked rice divided
- liquid food coloring as needed
- ¾ tsp white vinegar optional
Instructions
- Pour ½ cup of uncooked rice into a sandwich bag.
- Pour 10-20 drops of liquid food coloring into the bag of rice, along with up to ⅛ teaspoon of white vinegar (optional). Seal the bag and shake the rice around the spread out the food coloring more evenly.
- Place an egg in the bag, seal it up again and gently shake the bag around until the egg is fully covered with food coloring.
- Unseal the bag, carefully remove the egg (wearing gloves if desired to prevent the food coloring from staining skin) and place it on a plate to dry.
- Repeat the previous steps with as many colors and eggs as you wish. If reusing the same bag of rice to dye multiple eggs, add a few more drops of coloring in between eggs to keep the color vibrant.
Notes
Related Easter Egg Dyeing Activities
Looking for more fun ways to color Easter eggs with your kids? Check out these articles:
- How to Dye Easter Eggs with Cool Whip
- How to Dye Easter Eggs with Kool-Aid
- How to Dye Easter Eggs with Tissue Paper
Only your name will be made public. Please note that by submitting your comment, you are agreeing to the terms of our Privacy Policy.