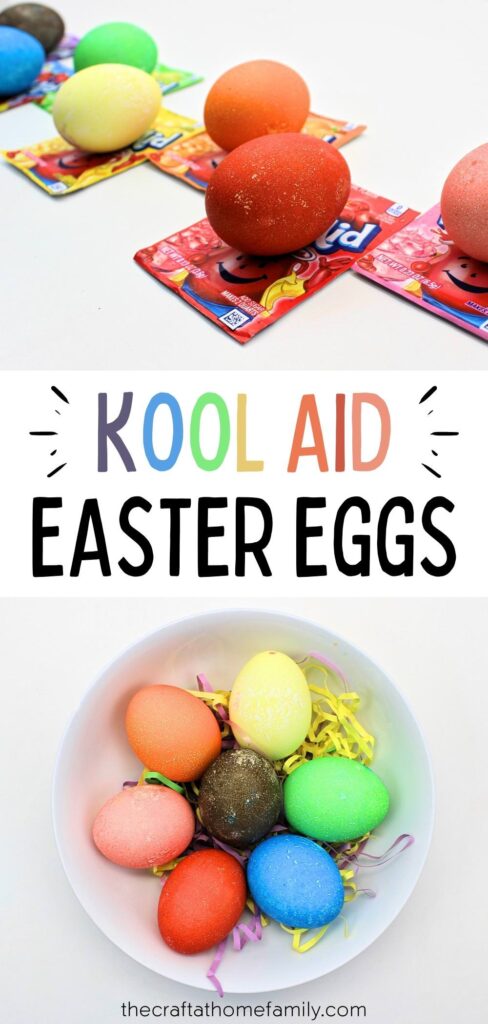
Looking for an easy way to dye boiled eggs that’s also totally safe to eat? Not only are these vibrant colored Easter eggs beautiful and easy to make, but all you’ll need to make them are unsweetened Kool-Aid packets and water!
JUMP TO…
Would you believe me if I said I’d never dyed Easter eggs until recently?
Sure, I’ve bought plastic eggs from the dollar store and decorated them with the kids. But I’m not a huge fan of omelettes or scrambled eggs, so the effort of blowing out all those eggs has just never seemed worth it.
I do, however, like devilled eggs—and so do the kids. So much so, in fact, that we usually have to cook at the very least a full dozen if we want to feed them to our family of six for supper. Which is why I started looking food-based ways to color boiled eggs.
Dyeing eggs with food coloring, of course, seemed like an obvious choice. But it got me thinking—what can you use to dye eggs instead of food coloring?
And as it turns out, there are actually a few different ways to dye eggs without food coloring!
Some of these methods include using natural dyes like beetroots, cabbage, onion skins and turmeric. But perhaps the easiest food dye you can use for coloring Easter eggs is regular old Kool-Aid powder!
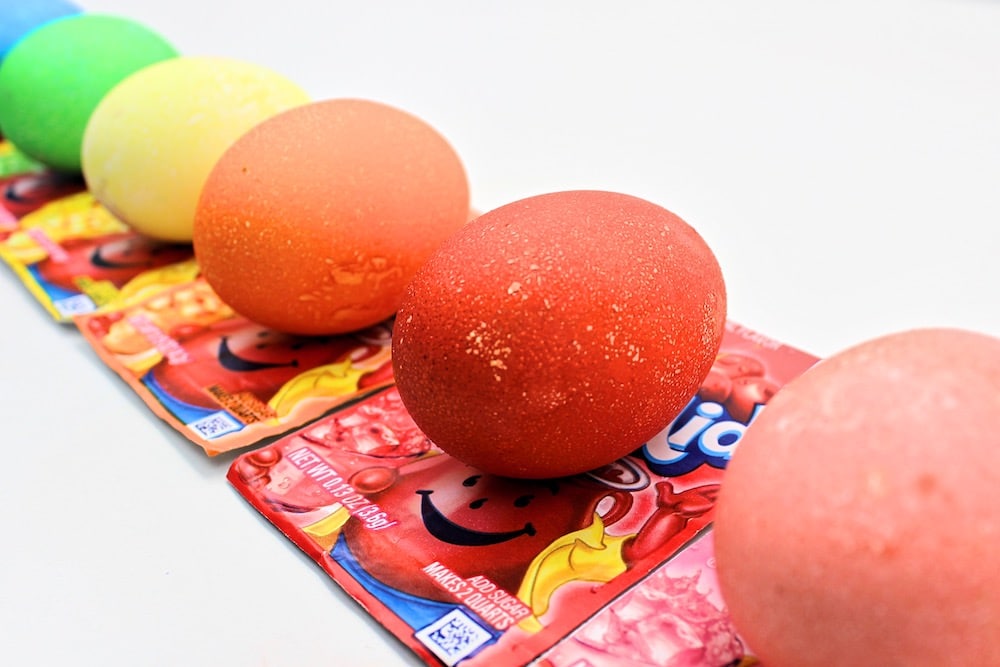
Dyeing boiled eggs with Kool-Aid is SO easy, and the colors turned out really vibrant. So if you’re looking for a fun new way to dye Easter eggs that won’t render them inedible, you should definitely give this method a try!

Get hundreds of pages of activities!
Get access to all our paid printables, as well as monthly activity planners, for just $5/month. (New printables added twice per month!)
Required Ingredients
Here’s what you’ll need to make your very own Kool-Aid Easter eggs at home:
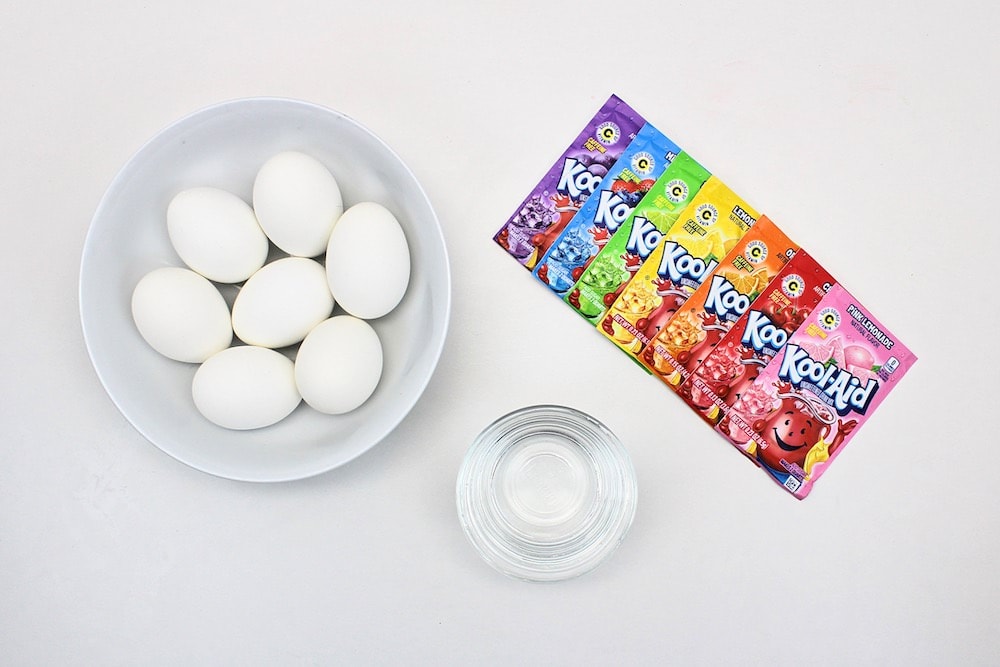
- Hard-boiled eggs
- Unsweetened Kool-Aid powder
- Water
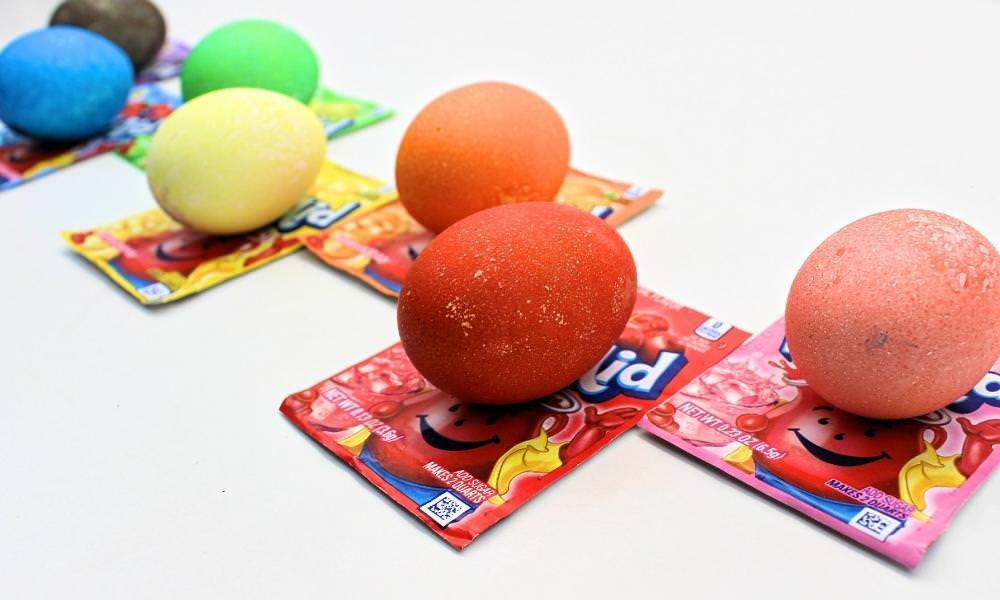
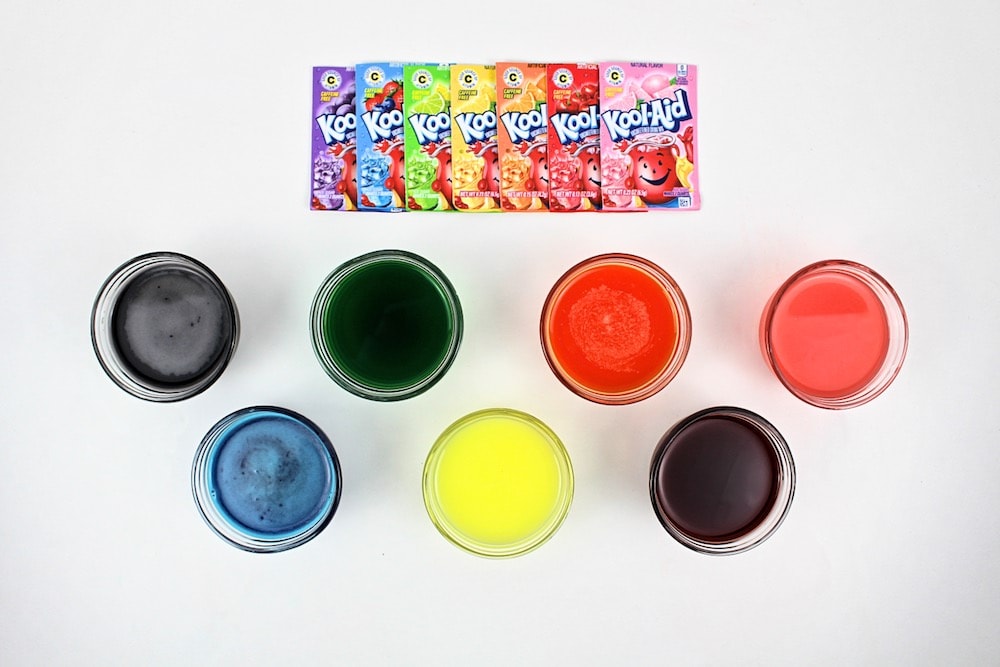
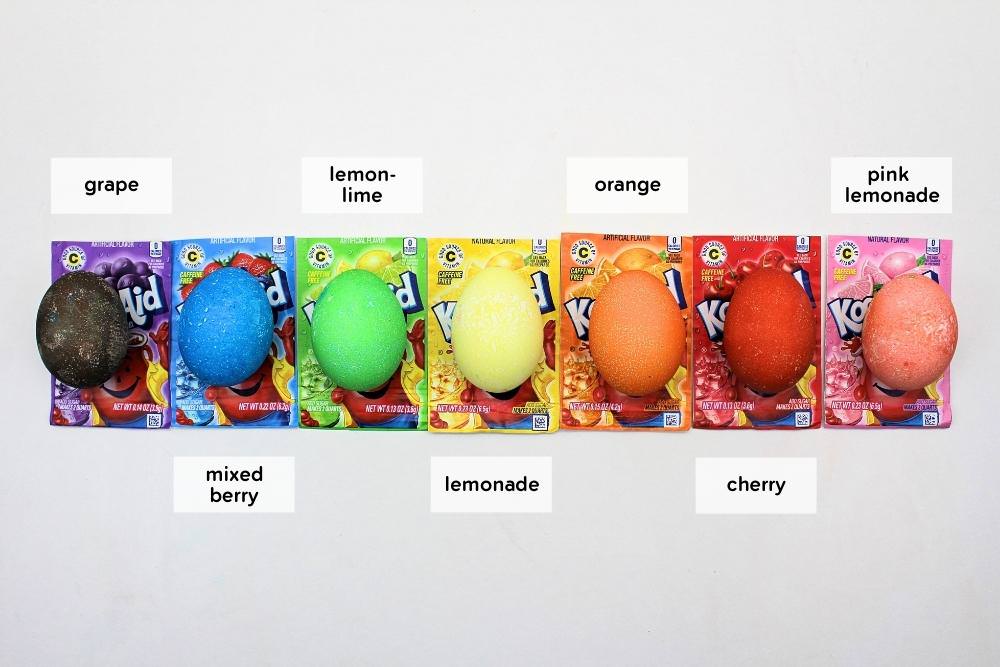
So simple, right? To create a wide range of colors, I chose to use seven different flavors of Kool-Aid: grape, mixed berry, lemon-lime, lemonade, orange, cherry and pink lemonade.
If you don’t buy Kool-Aid very often, make sure to use the same ones I did or double-check the color of the different flavors online before you make your purchase. I found out the hard way that the color of Kool-Aid packets doesn’t always match the color of the actual Kool-Aid.
(Tip: Don’t buy Strawberry-Kiwi and Tropical Punch unless you’re looking to dye your Easter eggs several different shades of red. The packets may be green and blue, but the powder is not!)
How to Make Kool-Aid Dyed Easter Eggs (Step-by-Step)
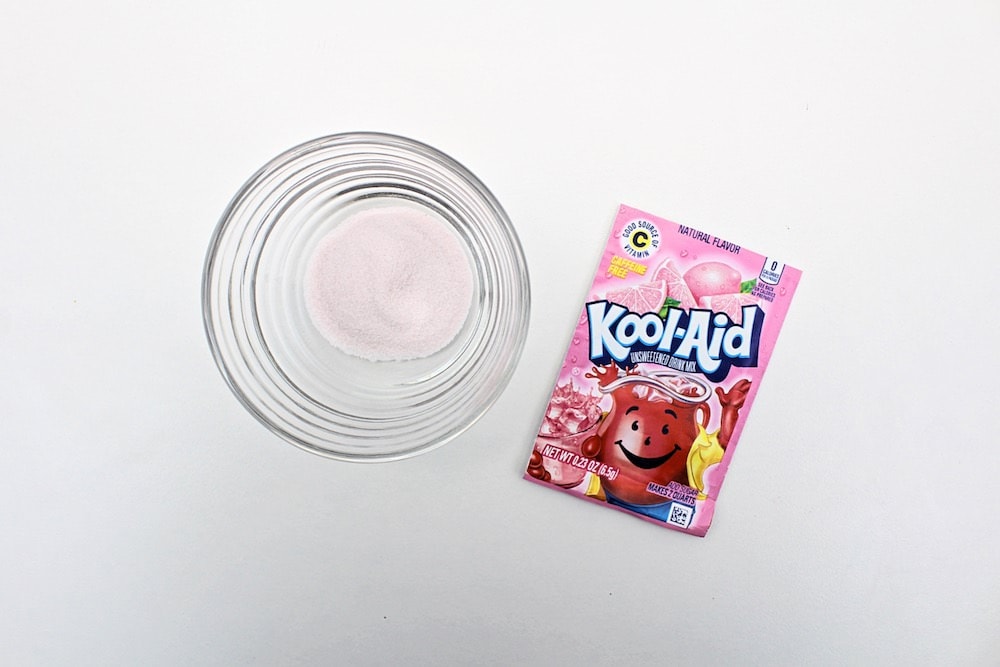
1. Place Kool-Powder in Bowl
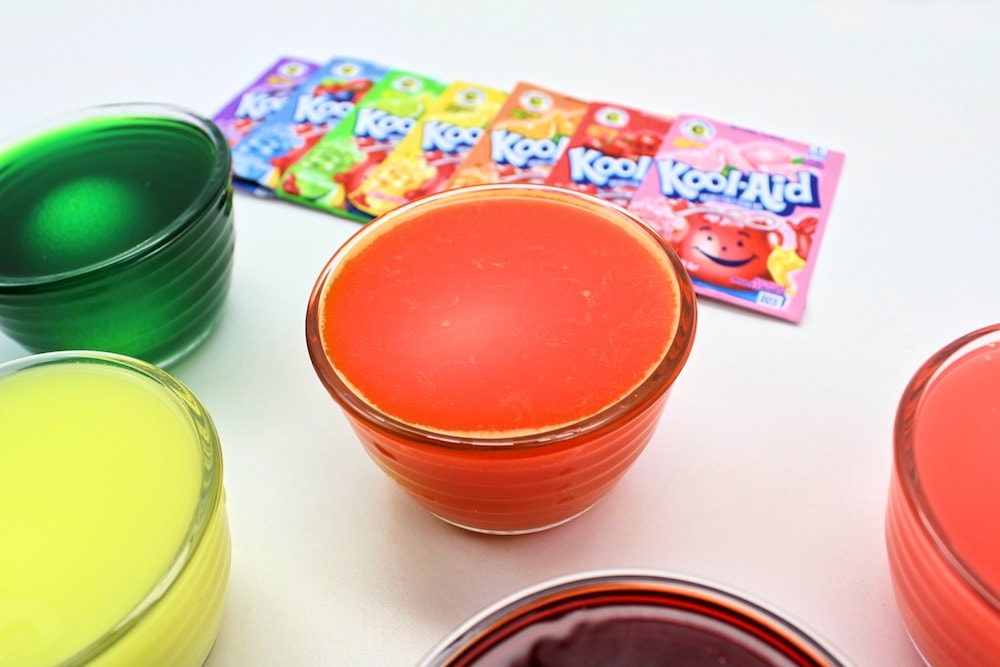
Start by pouring an entire packet of unsweetened Kool-Aid powder into a small bowl or container. Repeat this step for each of the different colors you’re planning on making.
You’ll want to make sure the bowl or container you’re using is large enough to hold ½ cup of liquid plus one hard boiled egg. To test this, you can place one of the hard boiled eggs in the bowl and cover it with ½ cup of water before you start opening the Kool-Aid packets.
If the bowl is large enough, dry and wash it before pouring the powder in; if not, replace it with a larger bowl or container and repeat this process to make sure the one you’ve replaced it with is the right size.
2. Add Water
Add ½ cup of water to each bowl and stir for a few seconds, until the powder is completely dissolved.
3. Add Eggs
Gently drop a hard boiled egg into each bowl.
4. Let Eggs Soak
Let the eggs soak in the Kool-Aid mixture for about 5-10 minutes. This will allow the shell of the eggs to absorb the color from the Kool-Aid.
5. Remove Eggs from Liquid
After 5 to 10 minutes of soaking, use a spoon to gently remove each egg from the Kool-Aid.
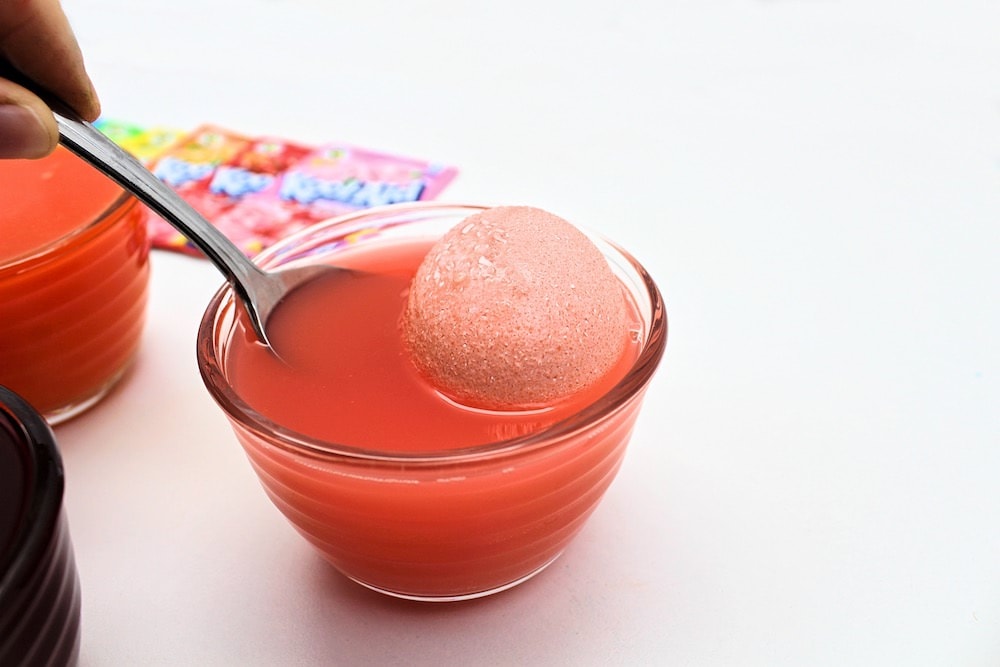
By now, the shell of each egg should have taken on the color of the Kool-Aid. The shells will have flecks of white, and that’s totally normal—do not try to rub in the color or get rid of the speckles as it will ruin the dye job. (Again, I found this out the hard way.)
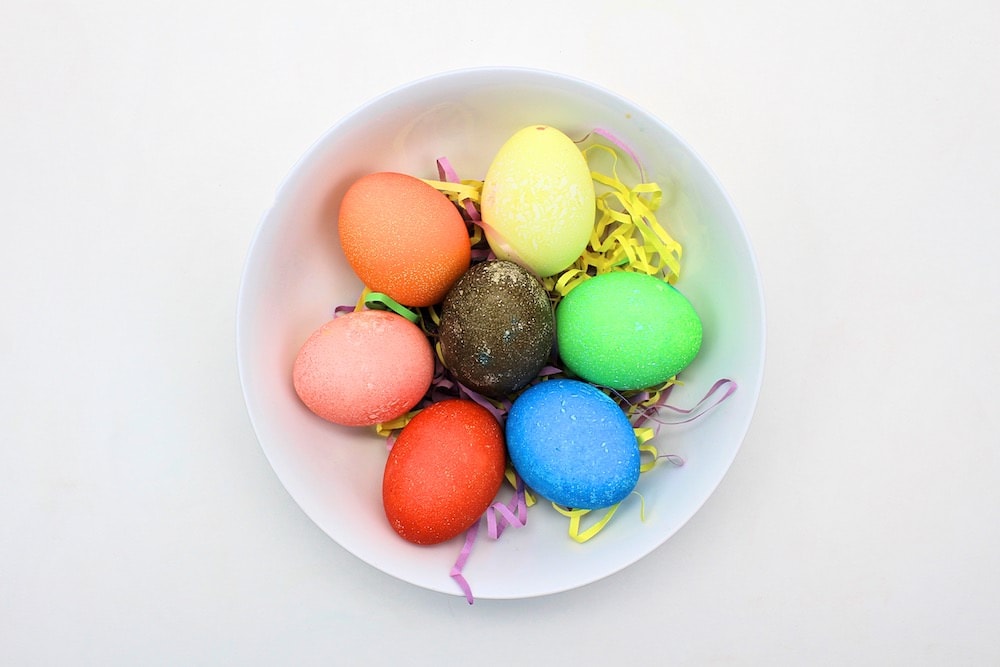
6. Let Eggs Dry
Place the colorful eggs on a non-porous surface like a ceramic plate or a metal drying rack, and let them sit undisturbed until they’re completely dry.
To prevent smearing, try not to touch the eggs with your fingers and don’t use paper towels, which will soak up the Kool-Aid and make the dye look patchy.
You’ll also want to make sure that different-colored eggs are placed far enough apart that they won’t come into contact while they’re drying. If they do, they’ll likely leave smudges, which would be a shame considering how gorgeous and vibrant the colors are when allowed to set properly!
Once the eggs are done drying, you’ll be able to manipulate them without staining your fingers. At that point, feel free to do whatever you like with them! We enjoyed looking at them for a while, then cracked them open and used them to make devilled eggs for supper.
Can You Eat Kool-Aid Dyed Easter Eggs?
One of the things I love about Kool-Aid dyed Easter eggs—besides how easy they are to make and how vibrant the colors are—is that they’re 100% edible. No need to worry about blowing out the eggs beforehand since the eggs remain totally fit for consumption even after they’ve been dyed.
Also, we do so many crafts around here that I have no idea where to store them anymore. So I love that this is the kind of project that I can do with my kids and then simply eat for supper!
That being said, if you’d like to hold on to these Kool-Aid Easter eggs, feel free to blow them out before you dye them. The Kool-Aid powder will give them a slight fruity scent, but because it’s unsweetened, it shouldn’t attract insects or make the eggs feel sticky.
Just be aware that if you do choose to go this route, you won’t be able to simply let the eggs rest in the Kool-Aid mixture. Hollow eggs float, so you’ll have to weigh them down or press down on them to keep them submerged while they absorb the dye.
Personally, I recommend saving yourself the headache and simply using hard boiled eggs that you’re planning on eating once you’re done!
Do Kool-Aid Dyed Eggs Taste Like Kool-Aid?
Not at all! While the Kool-Aid changes the color of the egg shell, the flavor doesn’t permeate through.
We did find that the dye was visible in some places, but based on where it we saw it, I suspect that it only came into contact with the egg whites when we cracked the egg shells.
At any rate, we used the eggs to make devilled eggs and they tasted exactly the same as they usually do!
Do You Need Vinegar to Dye Eggs with Kool-Aid?
If you’ve already dyed Easter eggs, you may have first soaked them in vinegar to prepare the shells for dyeing and create brighter colors.
But when dyeing eggs with Kool-Aid, you can skip this step. Kool-Aid powder is already acidic and does a good job breaking down the oils on the shell and prepping it to be dyed.
(Kool-Aid is so acidic, in fact, that when we tried using it to color an Erupting Snow Volcano, it caused the baking soda to start fizzing… before we added the vinegar!)
Can You Combine Two Types of Kool-Aid to Create New Colors?
Absolutely! Some flavors of Kool-Aid make better dye than others. In particular, light colors like Lemonade and Pink Lemonade create lighter tones, and you may prefer more vibrant colors when dyeing eggs.
To remedy this, add a bit of powder from a different flavor of Kool-Aid to darken the color. For instance, you can add some Orange-flavored powder to Lemonade in order to create a darker shade of yellow, or a bit of Strawberry-flavored powder to Pink Lemonade in order to create a darker shade of pink.
You can also try mixing Grape and Strawberry to create a lighter shade of purple, since Grape on its own produces a very dark shade of purple that’s almost black. Have fun experimenting however you like to create new and unique colors of dye!
Kool Aid Dyed Easter Eggs
Ingredients
- 7 hard boiled eggs
- 1 packet Grape Kool-Aid unsweetened
- 1 packet Mixed Berry Kool-Aid unsweetened
- 1 packet Lemon-Lime Kool-Aid unsweetened
- 1 packet Lemonade Kool-Aid unsweetened
- 1 packet Orange Kool-Aid unsweetened
- 1 packet Cherry Kool-Aid unsweetened
- 1 packet Pink Lemonade Kool-Aid unsweetened
- 3 ½ cups water
Instructions
- Pour each packet of Kool-Aid powder into a small bowl or container.
- Add ½ cup of water to each bowl and stir for a few seconds, until the powder is completely dissolved.
- Gently drop a hard boiled egg into each bowl and let the eggs soak in Kool-Aid for about 5-10 minutes.
- Use a spoon to gently remove each egg from the Kool-Aid and set it down to dry on a non-porous surface like a ceramic plate or metal drying rack. To prevent smearing, do not touch the eggs with your fingers and make sure to place different-colored eggs far enough apart that they won't come into contact while they're drying.
- Once the eggs are completely dry to the touch, they're ready to be used however you like!
Related Easter Egg Dyeing Techniques
Looking for more fun ways to dye Easter eggs? Check out these articles:
Only your name will be made public. Please note that by submitting your comment, you are agreeing to the terms of our Privacy Policy.