Who knew you could use tissue paper to create gorgeous, vibrantly dyed Easter eggs to display in your home? If you’re looking for a cool new way to decorate hollowed out eggs, dyeing them with tissue paper is both fun and easy enough for kids to do!
JUMP TO…
If this isn’t your first time on my site, you may have seen my articles about dyeing Easter eggs with Kool-Aid and decorating them with Cool Whip.
Both projects were lots of fun. But because they require hard boiled eggs, they’re meant to be eaten afterwards and you can’t really keep them.
Not that that’s necessarily a bad thing—we make so many crafts around here that we can’t possibly keep them all. But it is nice, once in a while, to be able to put some of those crafts on display.
So while dyeing Easter eggs with household ingredients was pretty cool, I’ve also been on the lookout for alternative Easter egg dyes that would allow us to preserve the eggs. And when I found out that you could color eggs using tissue paper, I was definitely intrigued!
Related: Bleeding Tissue Paper Bookmarks

Get hundreds of pages of activities!
Get access to all our paid printables, as well as monthly activity planners, for just $5/month. (New printables added twice per month!)
Required Materials
Here’s what you’ll need to create vibrant colored Easter eggs using tissue paper:
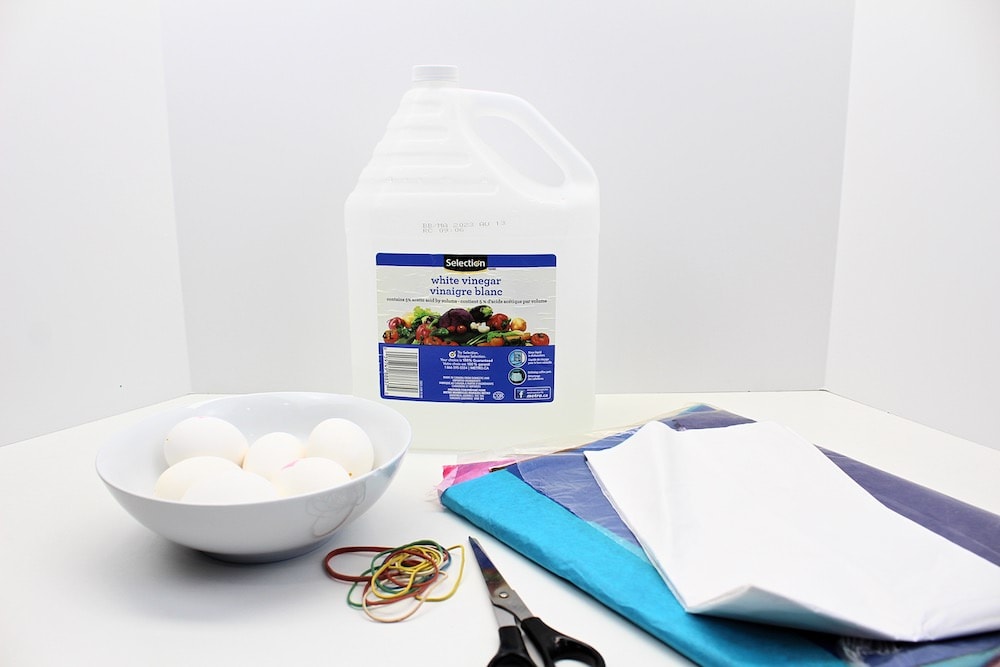
- Eggs
- Bleeding art tissue paper (make sure it’s labeled as “bleeding art” tissue paper because regular tissue paper won’t work)
- White tissue paper (regular)
- Scissors
- Elastics
- White vinegar or water
Note: This isn’t mandatory, but I also recommend wearing latex or nitrile gloves when dipping the eggs to prevent your hands from getting stained.
How to Dye Easter Eggs with Tissue Paper (Step-by-Step)
1. Hollow Out Eggs
The first step to dyeing eggs using tissue paper is to blow out the inside of the eggs to make them hollow.
Unlike with some of the previous Easter egg dyeing methods I’ve shared, eggs that have been dyed with tissue paper are not edible. The chemicals from the tissue paper may permeate through the shells and into the eggs, making them unsafe for consumption.
Blowing out the eggs before dyeing will not only reduce food waste (since you’ll be able to use the insides for cooking), but it will also allow you to keep the eggs after they’ve been dyed.
(Note: Never hollowed out eggs before? Click here for detailed instructions.)
2. Cut Tissue Paper Squares
Grab a few complementary colors of bleeding art tissue paper and cut them into squares.
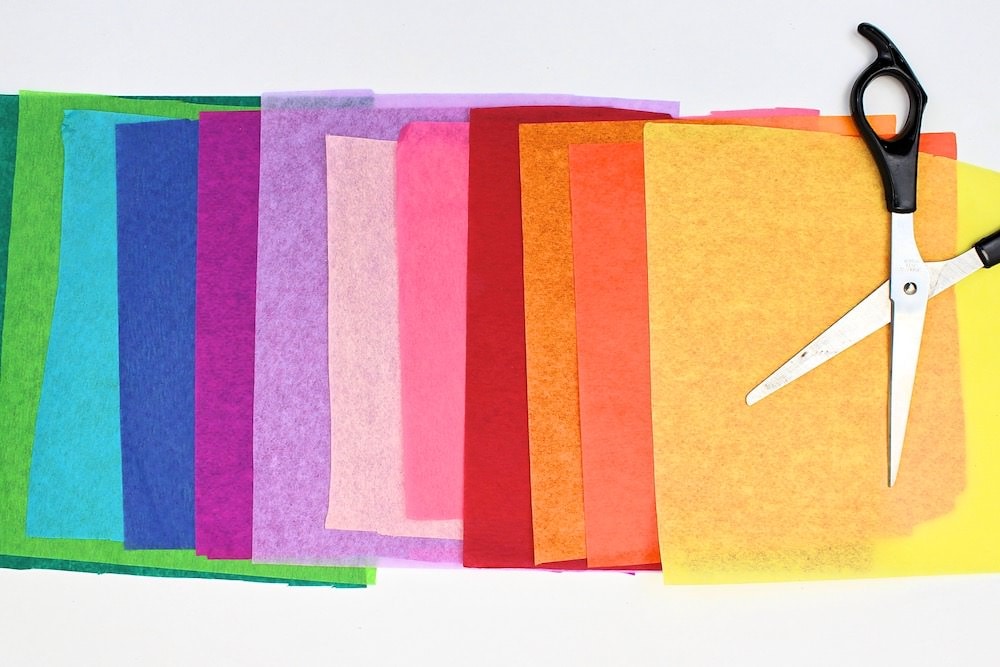
I cut mine into squares approximately 4×4 inches in size, but in retrospect, I probably should have cut some of the darker colors into smaller squares to create multi-toned eggs. I’ll explain how to do this below.
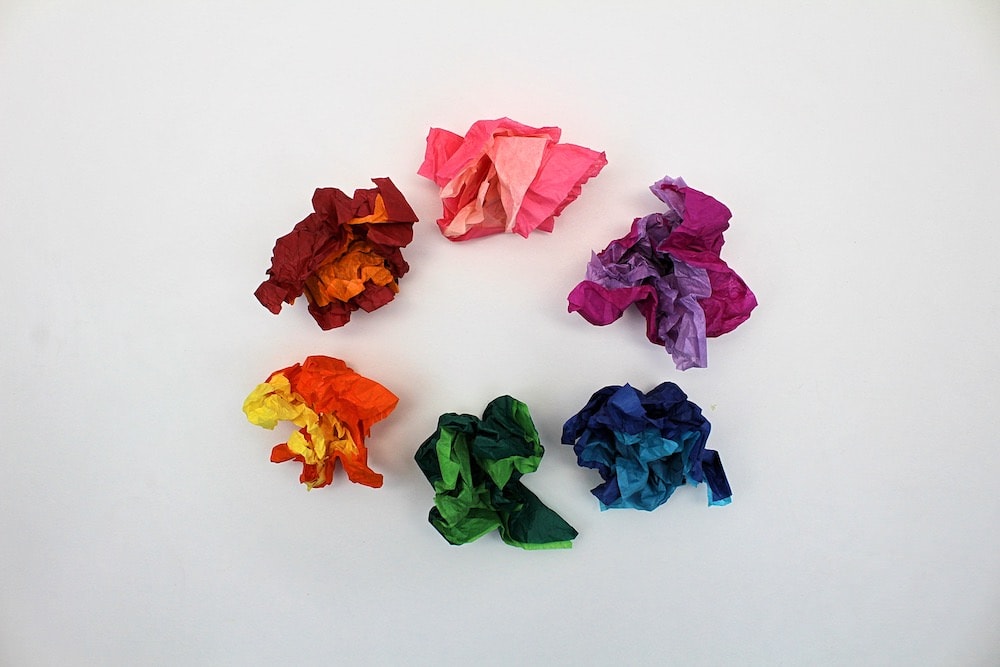
3. Crumple Tissue Paper Squares
Grab the tissue paper squares you cut during the previous step and crumple them with your hands.
4. Wrap Eggs with Colored Tissue Paper
Grab a couple complementary colors of crumpled tissue paper and use them to wrap up the eggs, then secure them with a few small elastics.
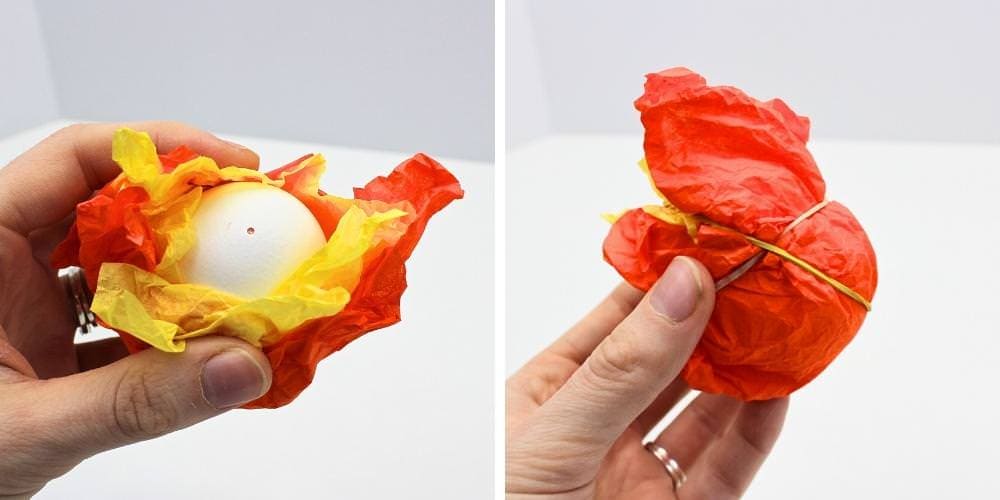
I layered one light color and one dark color on top of each other, covering the entire egg with both. In hindsight, I wouldn’t recommend doing this as you couldn’t tell there were two colors at all once the eggs were dyed.
Instead, I recommend using smaller squares of different-colored tissue paper to cover different parts of the egg. The elastics will hold them in place and you’ll end up with pretty multi-colored Easter eggs that look like they’ve been tie-dyed!
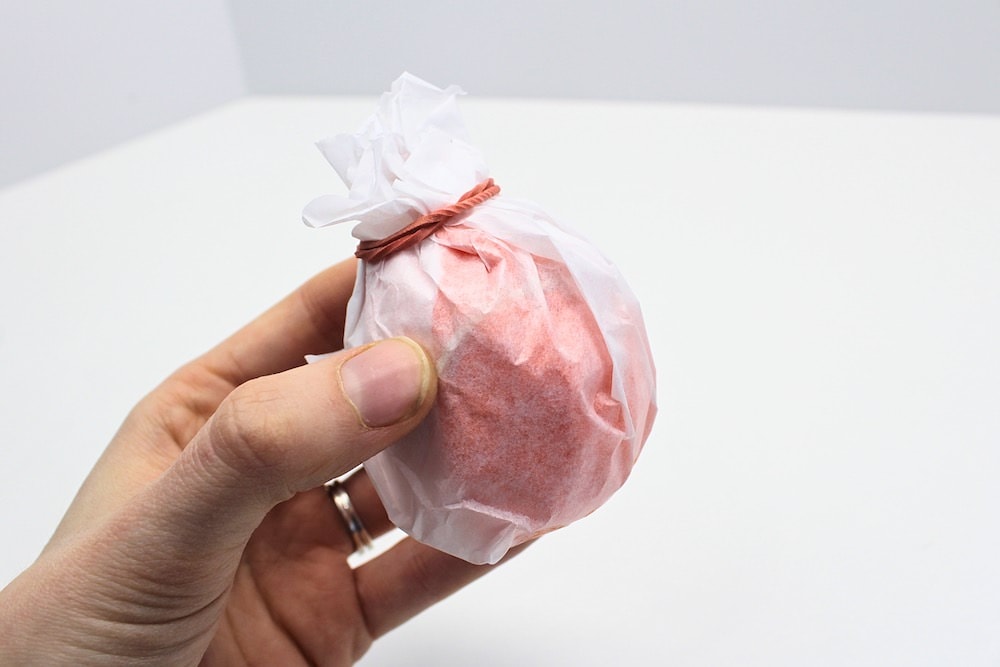
5. Wrap Eggs with White Tissue Paper
Grab large squares of regular white tissue paper and use them to wrap up each egg completely, covering up all the colored tissue paper. Then, use a small elastic to tie up the end.
6. Dip Eggs in Vinegar
Gently dip each egg in vinegar, slowly rotating it so that all the tissue paper is wet.
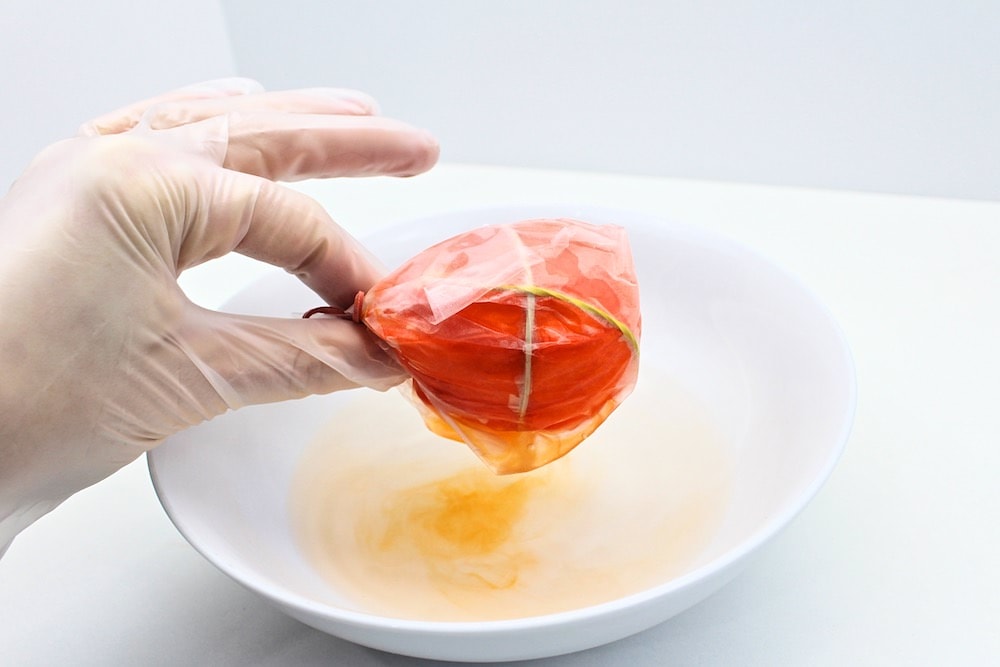
Note: Vinegar will yield the brightest colors, but you can always use water if you’re not a fan of the smell. You can also dilute the vinegar with water to cut costs, but because the eggs are covered with tissue paper, this won’t produce the same results as soaking the eggs in vinegar before dyeing them would.
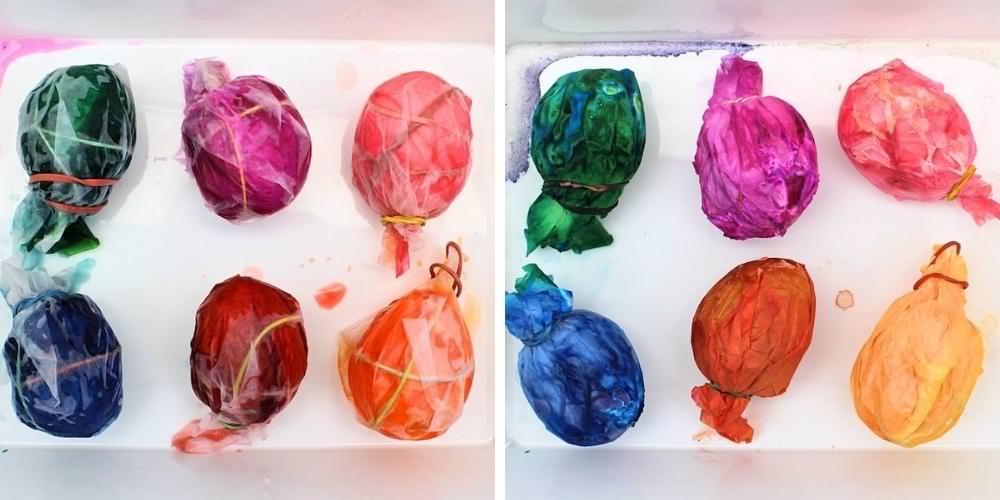
7. Let Dry
Place the eggs on a ceramic plate or plastic tray and let them rest undisturbed until the tissue paper is completely dry. This can actually take quite a while (up to 48 hours), so make sure the plate or tray you’re using isn’t one you’ll be needing in the next couple of days.
8. Unwrap Eggs
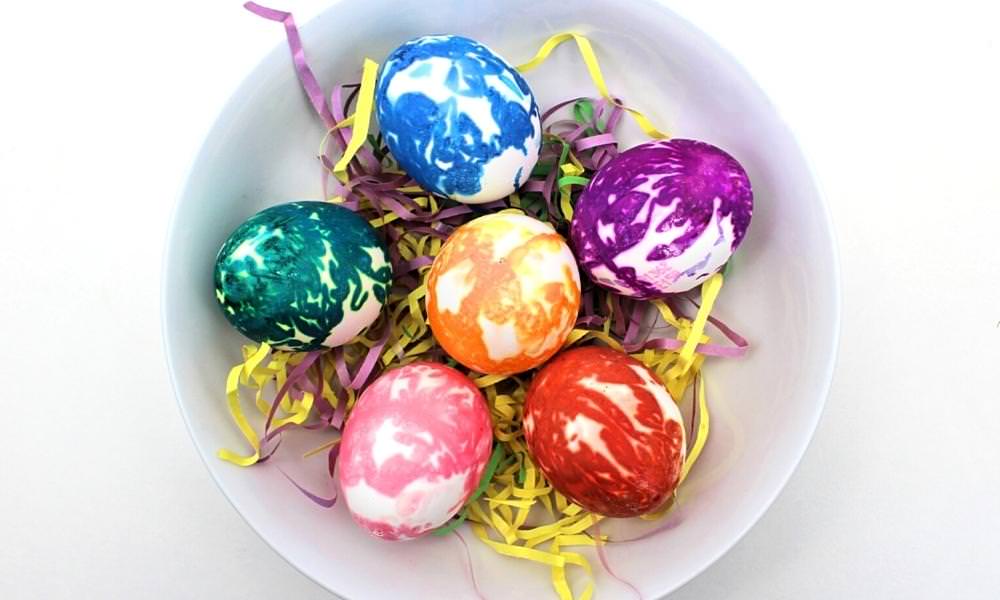
Once the tissue paper is completely dry to the touch, carefully unwrap each egg and remove the elastics holding the tissue paper in place.
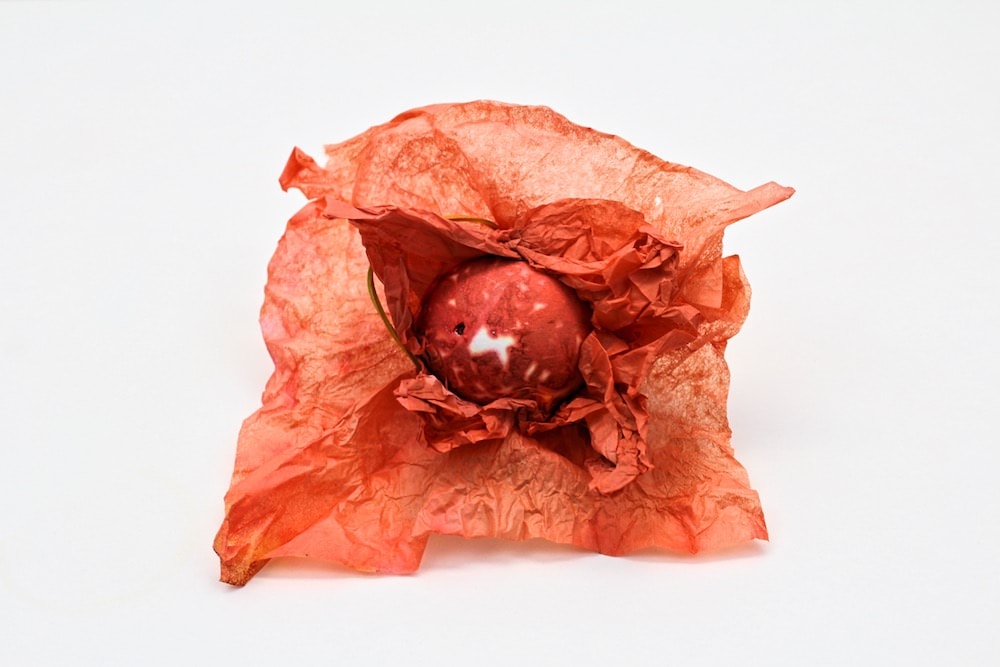
Aren’t they just gorgeous? The colors are so vibrant, and I love the crinkled look created by the crumpled tissue paper!
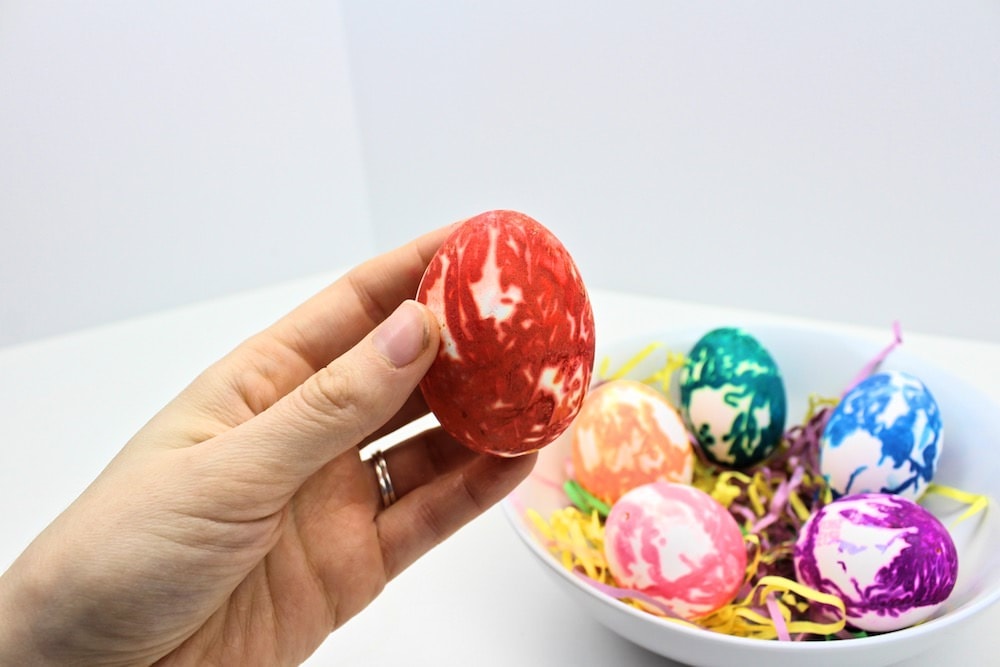
There are actually several other methods you can use to dye Easter eggs with tissue paper, and this project was so fun that we’re planning on trying all of them eventually. How awesome is bleeding tissue paper?!
Related Easter Egg Dyeing Techniques
Looking for more fun ways to dye Easter eggs? Check out these articles:
Only your name will be made public. Please note that by submitting your comment, you are agreeing to the terms of our Privacy Policy.