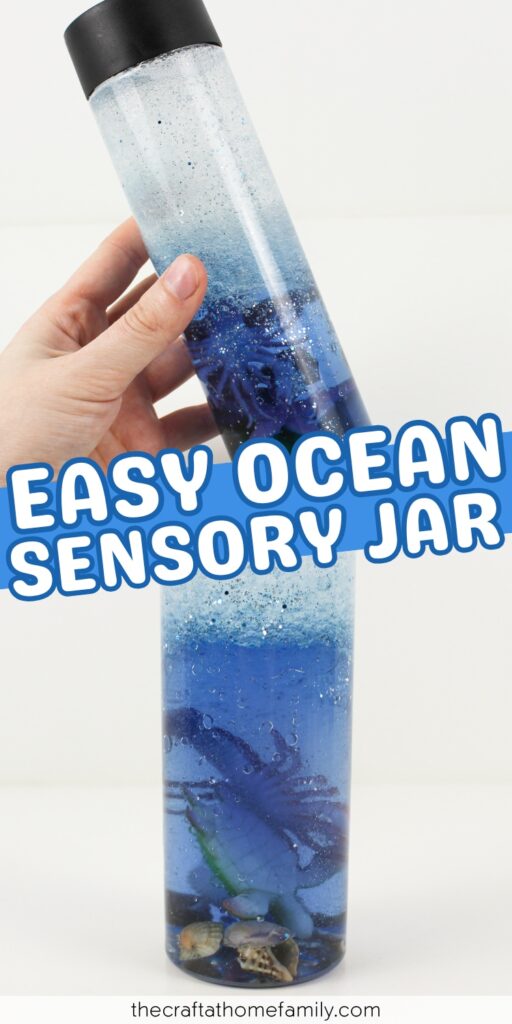
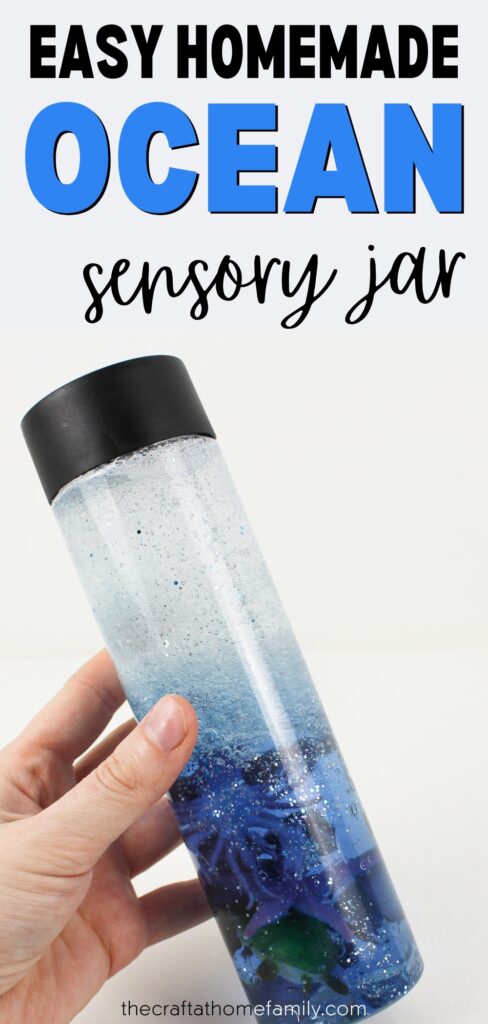
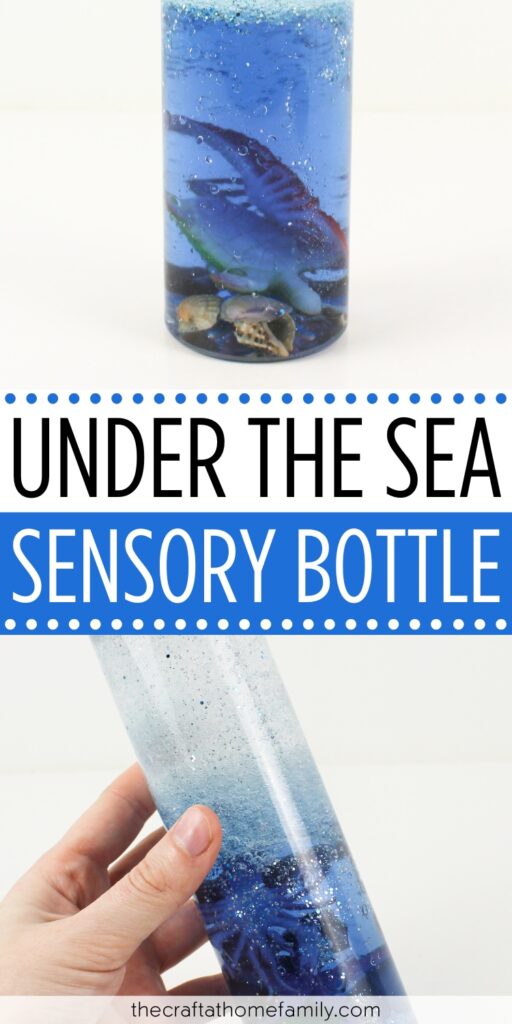
Looking for a cool new sensory bottle idea to try at home? This ocean sensory bottle is easy to make, fun for kids, and has a neat bubbly effect that is mesmerizing to look at. Make it for fun, or use it as a DIY calming tool for your little one!

JUMP TO…
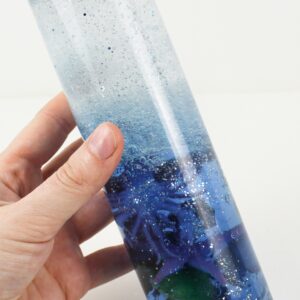
Love sensory bottles? If so, you’ll definitely want to add this gorgeous ocean-themed one to your list! It couldn’t be simpler to make, and the combination of colored water and oil creates a cool effect that is reminiscent of a wave crashing on the beach.
Homemade sensory bottles are a great tool for sensory exploration and emotional regulation, and they’re also lots of fun to make and use! My kids love helping me create new bottles for them to explore.
Why You’ll Love This Project
- Easy to make: This sensory bottle only takes a few minutes to make, and your little one should be able to help with every step of the process!
- Safe for small children: Sensory bottles are a great way to allow toddler use their senses and explore the world around them without the risk of choking on small objects.
- Cool effect: Because oil and water don’t mix, using both inside this sensory bottle creates a neat bubbly effect every time you shake it! It’s both fun and mesmerizing to look at, and can even be used as a tool to help kids regulate their emotions.
Looking for more homemade sensory bottle ideas? Check out this Pom-Pom Sensory Bottle, this Slow Falling Bead Sensory Bottle, or read our comprehensive guide to find out everything there is to know about How to Make a Sensory Bottle!

Get hundreds of pages of activities!
Get access to all our paid printables, as well as monthly activity planners, for just $5/month. (New printables added twice per month!)
Required Materials
- Clear plastic bottle: I always use these juice bottles because I love that they give my homemade sensory bottle a consistent look, but you can simply use an empty bottle from the recycling as long as the neck if the bottle is wide enough to accommodate the ocean toys. (VOSS water bottles are a popular choice!)
- Water: Tap water is fine—it just needs to be clear rather than cloudy.
- Food coloring: You’ll need to use light blue or dark blue. Liquid food coloring is best for this project since it mixes so well with water, but you can also use liquid watercolor paint, or a tiny bit of gel food coloring.
- Seashells: I got mine from the dollar store, but you can also buy bags of small mixed seashells from Amazon. Make sure they’re not too big, or you may not be able to fit them through the neck of the bottle.
- Ocean toys: Any small plastic toys can work—just make sure they’re small enough to fit through the neck of the plastic bottle. There are lots of sets available on Amazon. I used a starfish, a lobster and a turtle, but you can choose any ocean-themed item you like, including plastic coral.
- Glitter: This is optional, but I liked the way it looked. I used a combination of fine glitter and chunky glitter, but you can just use whatever you have on hand. For this bottle, you’ll want to stick with ocean colors like blue, turquoise and white.
- Baby oil: I bought mine at Walmart, but any brand will do. I chose to use baby oil because it’s clear and I prefer the look of that for this particular project, but you can use vegetable oil if you’d prefer for it to have a yellow tinge. (The color will temporarily mix will the blue of the water when you shake the bottle, which creates a really cool effect!)
The full supply list and instructions can be found in the how-to card.
Grab our 12 best sensory recipes!

By submitting your email address, you are agreeing to the terms of our Privacy Policy. You can unsubscribe at any time.
How to Make an Ocean Sensory Bottle (Step-by-Step)
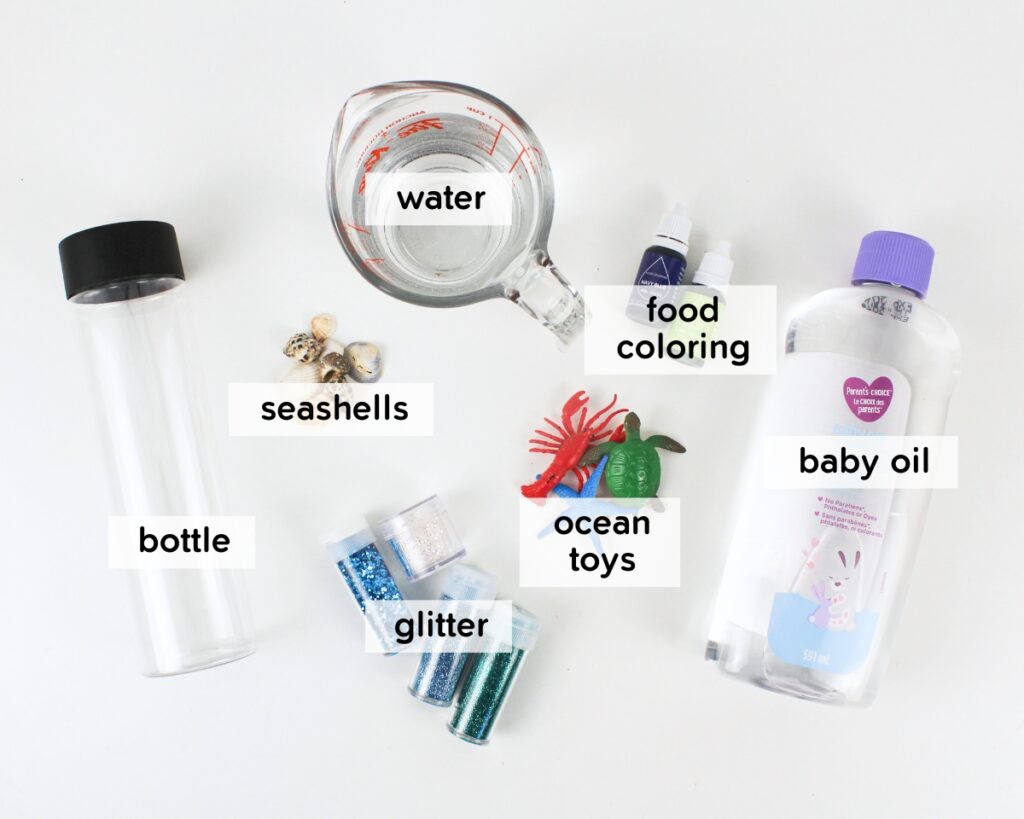
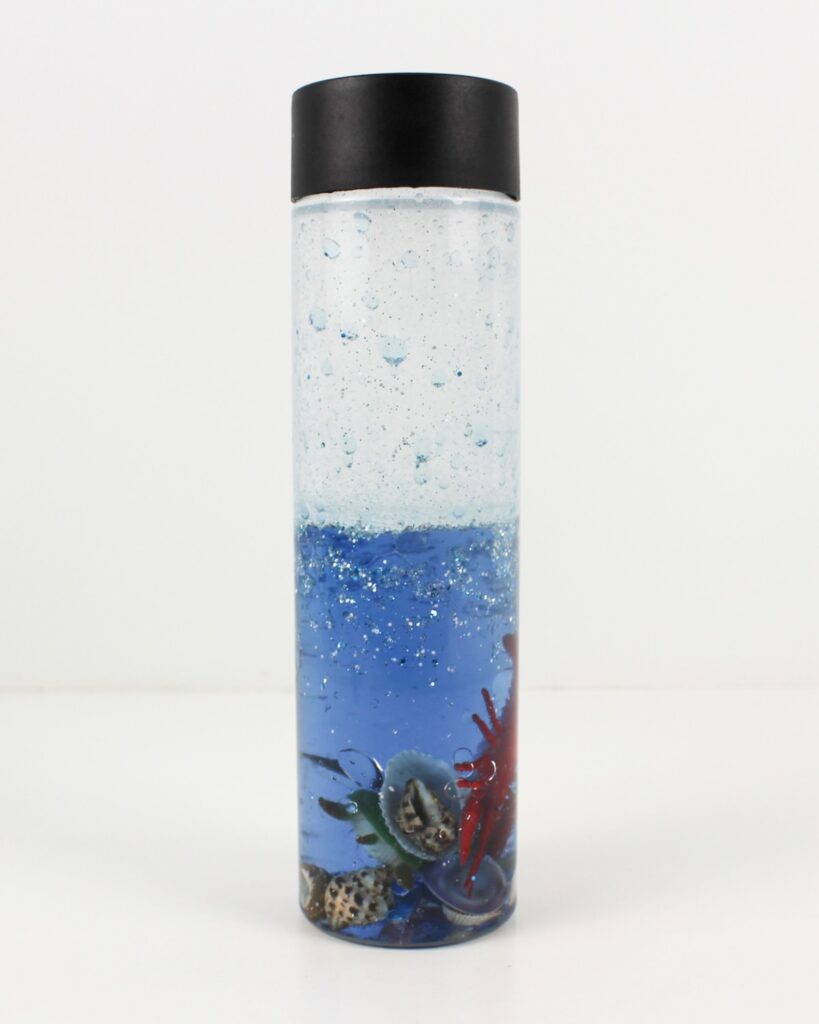
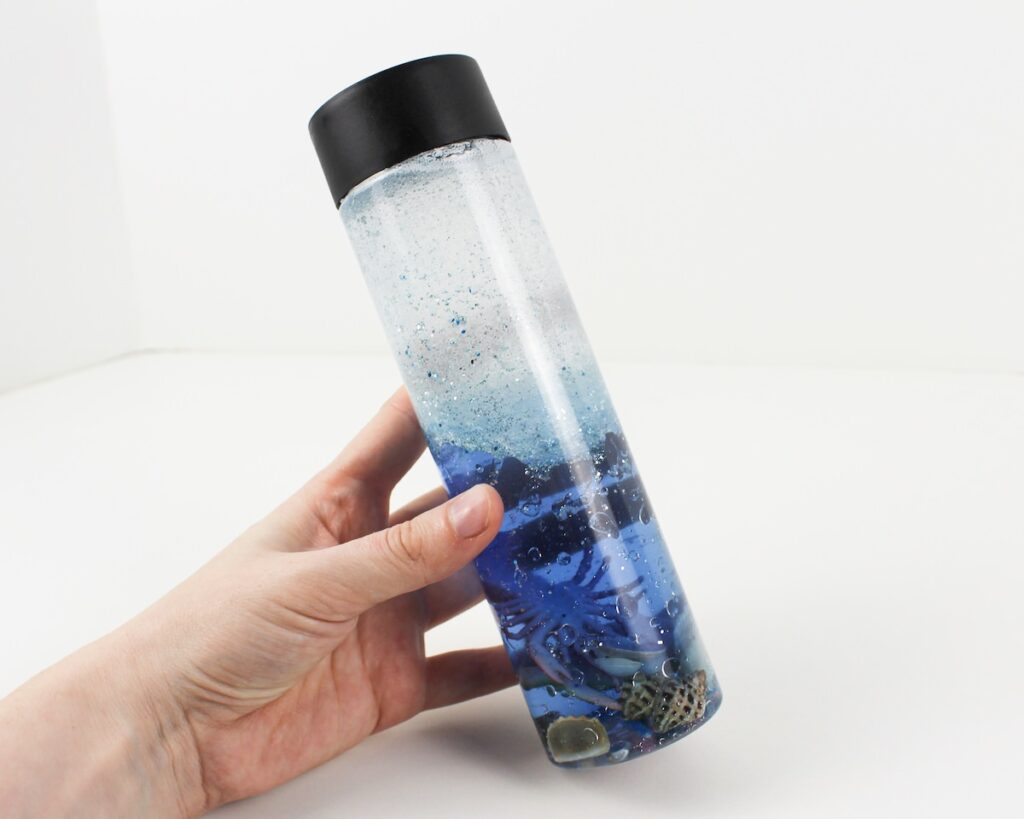
Step 1: Add coloring to water. Measure out enough water to fill half of the plastic bottle, then stir in a small amount of blue food coloring. (I used a single drop of dark blue food coloring for 200 ml of water.)
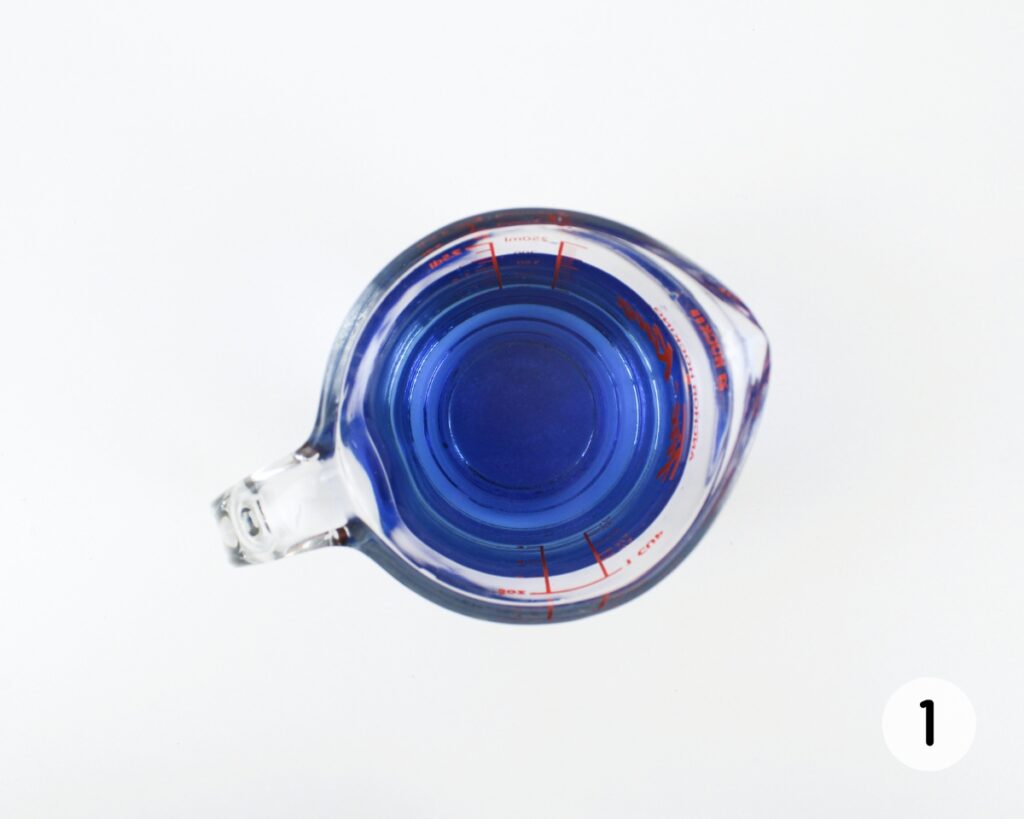
Step 2: Add water to bottle. Pour the colored water into your bottle, filling it halfway.
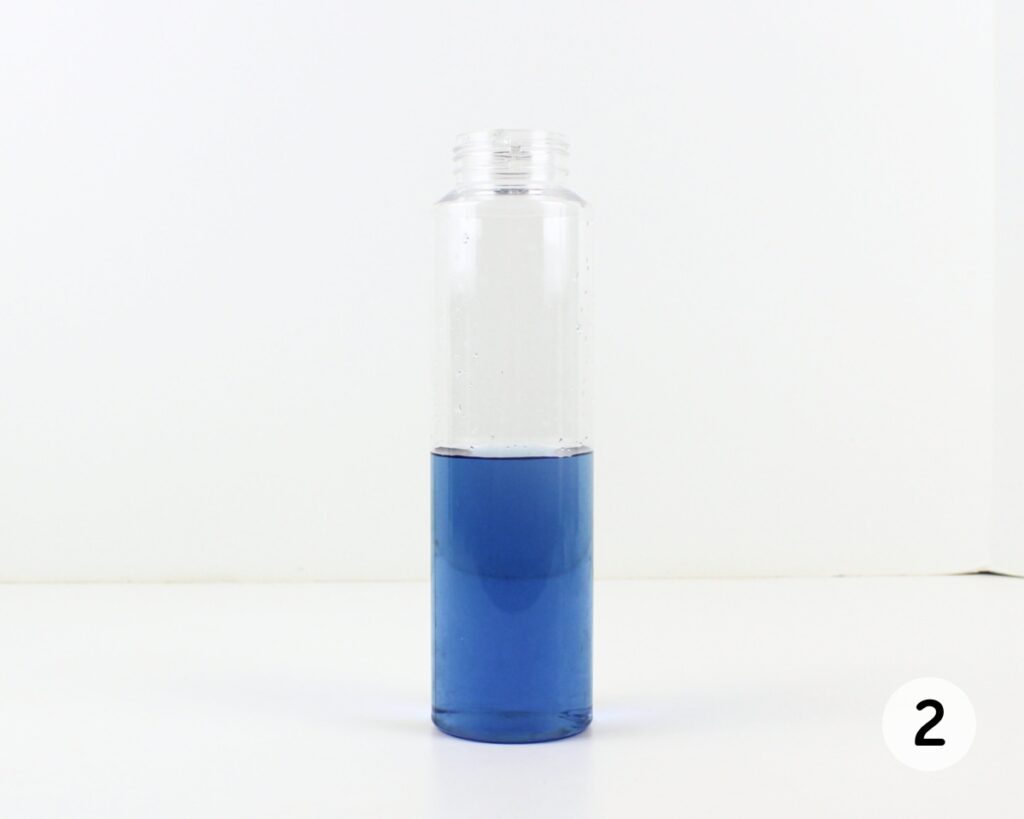
Step 3: Add ocean toys and seashells. Push some small plastic ocean toys and seashells through the neck of the bottle and into the water. If desired, you can also add a small amount of fine and/or chunky glitter.
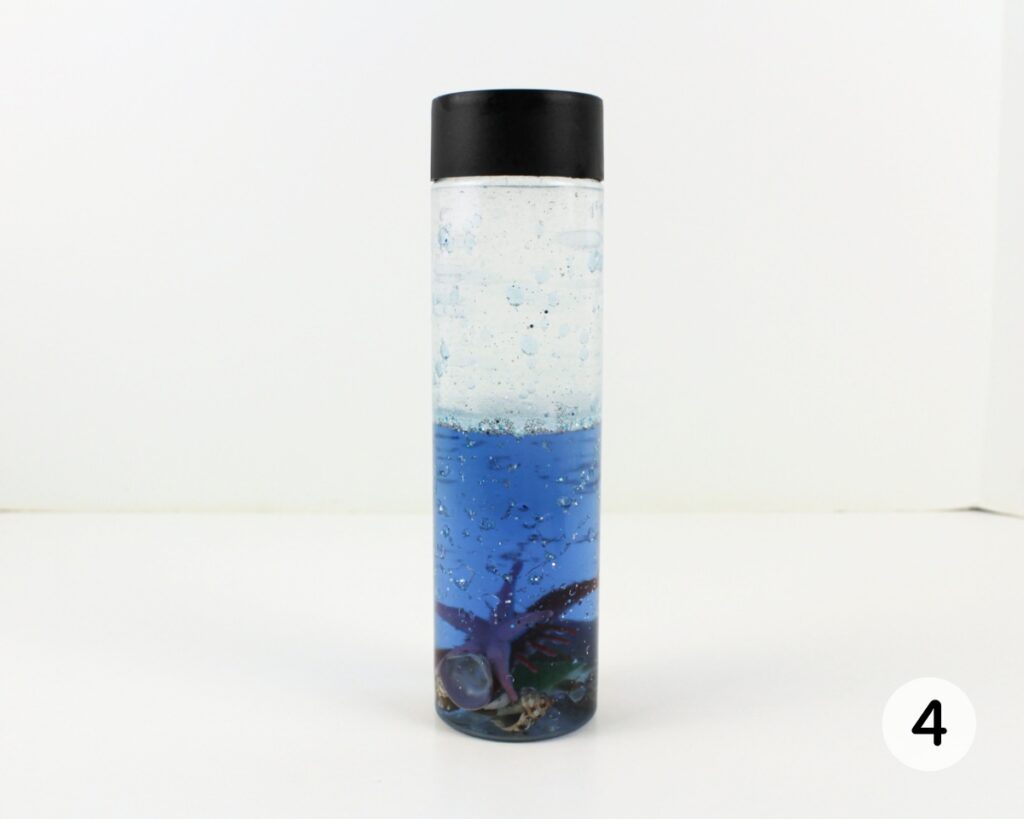
Step 4: Add oil to bottle. Add enough baby oil to fill the bottle right up to the top. Then, seal the bottle by putting the lid back on, and shake the bottle as often as you wish to see bubbles form and disperse!
This bottle was super simple to make, but the final result was so cool! Since water and oil don’t mix, shaking the bottle causes lots of bubbles to appear as the oil floats back to the top and separates from the water, which is perfect for the ocean theme.
Helpful Tips
- Remove sticky residue: If you are using a recycled bottle and you’re having trouble removing the sticky residue from the label, try using Goo Gone to get it off.
- Don’t use too much coloring: Make sure to add the coloring to the water one drop at a time, and wait until it has fully dispersed before deciding whether to add more. A single drop will probably be sufficient, as the color needs to be light enough for the seashells and ocean toys to be visible. If you accidentally make use too much, you can dump out some of the colored water and add more in order to dilute the color.
- Choose the right sizes: Make sure that the neck of the bottle you’re using isn’t too narrow, and that the ocean toys and seashells you’re using aren’t too big to fit through it.
- Seal the bottle with glue: Worried that your child will try to open the bottle? Place some hot glue or super glue on the inside of the lid before sealing the bottle to make it harder to open. (You’ll need to replace the glue periodically, as it will weaken over time due to contact with liquid.)
Frequently Asked Questions
Have a question that wasn’t answered here? Let me know in the comments and I’ll be happy to help!
More DIY Sensory Bottles


If you have tried this Ocean Sensory Bottle or any other project on my website, please let me know how it went in the comments below. I can’t wait to hear from you!
Ocean Sensory Bottle
Materials
- 1 clear plastic bottle recycled or new
- water as needed
- 1 drop blue food coloring or as needed
- 8-10 small seashells or as needed
- 3-5 small plastic ocean toys (ocean animals, coral, etc.)
- blue, turquoise or white glitter (fine or chunky) optional, as needed
- baby oil as needed
Instructions
- Measure out enough water to fill half of the plastic bottle, then stir in one drop of blue food coloring. You can add more food coloring if needed to give the water an ocean-like color, but make sure it doesn't get too dark. (One drop will likely be sufficient.)
- Pour the colored water into the bottle, filling it halfway.
- Push some small plastic ocean toys and seashells through the neck of the bottle and into the water. If desired, you can also add a small amount of fine and/or chunky glitter.
- Add enough baby oil to fill the bottle right up to the top. Then, seal the bottle by putting the lid back on, and shake the bottle as often as you wish in order to see bubbles form and disperse!
Video
Notes
- Don’t use too much coloring: When adding food coloring to the water, make sure not to add too much, as this will obscure the seashells and ocean toys and make them difficult to see. If you accidentally add too much, dump out some of the colored water and replace it with more water to lighten the color.
- Choose the right sizes: Make sure that the neck of the bottle you’re using isn’t too narrow, and that the ocean toys and seashells you’re using aren’t too big to fit through it.
Grab our 12 best sensory recipes!
By submitting your email address, you are agreeing to the terms of our Privacy Policy. You can unsubscribe at any time.
Only your name will be made public. Please note that by submitting your comment, you are agreeing to the terms of our Privacy Policy.