
This mess-free Earth Day painting activity is the perfect way to involve your baby or toddler in all your Earth Day celebrations… without any of the cleanup! Download our free template and use it to make this cute smush-painted Earth craft with your child.
JUMP TO…
Have you ever tried no-mess painting in a bag?
We do a lot of sensory activities around here, but some of them can get pretty messy… and I don’t know about you, but there are days where I just don’t feel up to cleaning up that mess.
If that’s the kind of day you’re having, this simple painting activity is the perfect solution. Smush painting is so much fun, and it allows babies, toddlers and preschoolers to paint without splatter or mess—which makes it fun for Mom and Dad, too!
Since Earth Day is just around the corner, I thought it would be fun to do some mess-free Earth painting. But of course, you can adapt this however you like if you’re looking for easy activities for your toddler (or even for your kindergartener).
Whether or not you’re looking for a fun way to say “Happy Earth Day”, you should definitely add this no-mess baby painting to your activity list!
(And if you’re looking for more simple Earth Day activities that don’t require lots of advance prep or parental involvement, check out these free Earth Day coloring pages.)
Related: No-Mess Painting in a Bag for Babies & Toddlers

Get hundreds of pages of activities!
Get access to all our paid printables, as well as monthly activity planners, for just $5/month. (New printables added twice per month!)
Required Materials
Here’s what you’ll need to set up this mess-free Earth painting activity for your child:
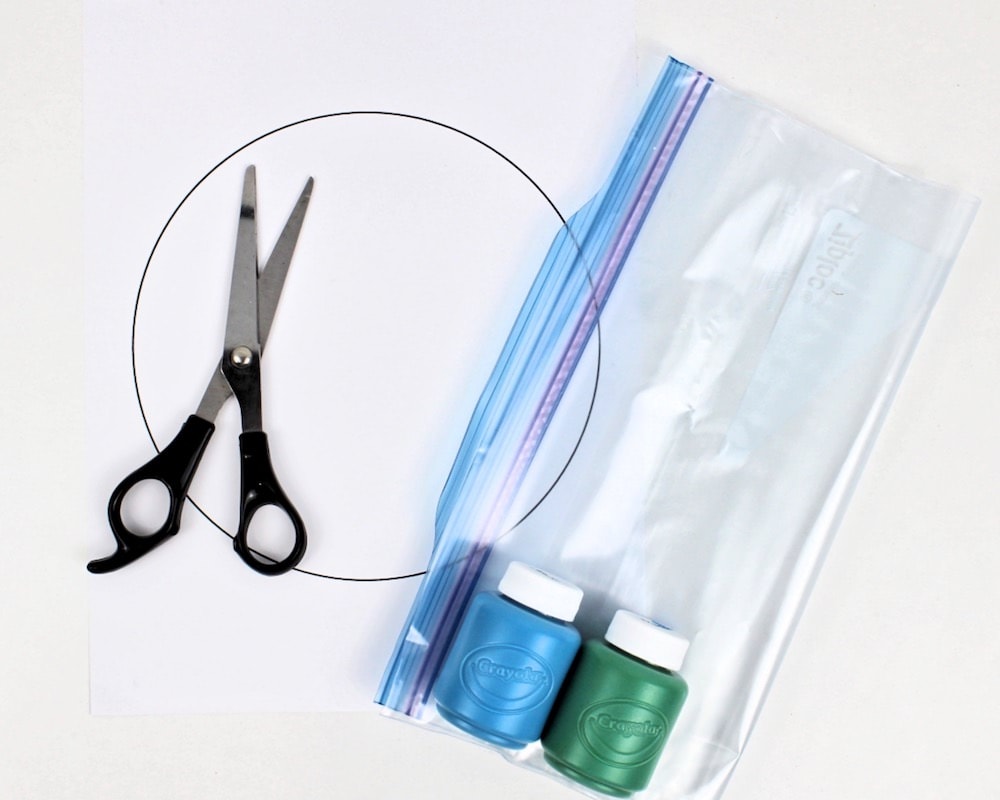
- My free round Earth template, which you can download using the form below (you can also just draw a circle yourself if you prefer, but the template is there to make things easier)
- US Letter-sized cardstock (we used white, but you can use another color if you don’t mind the background being colored—bonus points if it’s recycled!)
- Gallon-sized freezer bag
- Washable kids’ paint in green and blue
- Scissors
Note: Regular printer paper won’t work for this project as it’s not sturdy enough to withstand the paint. I tested this activity with regular paper and it ended up tearing. But if you can’t find cardstock, you can try using a paper plate instead.
How to Do Mess-Free Earth Day Painting (Step-by-Step)
1. Print Template
Once you have downloaded the circle template, print it on a sheet of white US Letter-sized cardstock (8.5 x 11 inches).
If you would rather forgo the template, you can simply draw a circle on a blank sheet of cardstock.
2. Place Template in Bag
Grab the sheet of cardstock with the printed template and place it inside a gallon-sized freezer bag. (You can use a Ziploc bag or any other brand of your choice, as long it’s gallon-sized.)
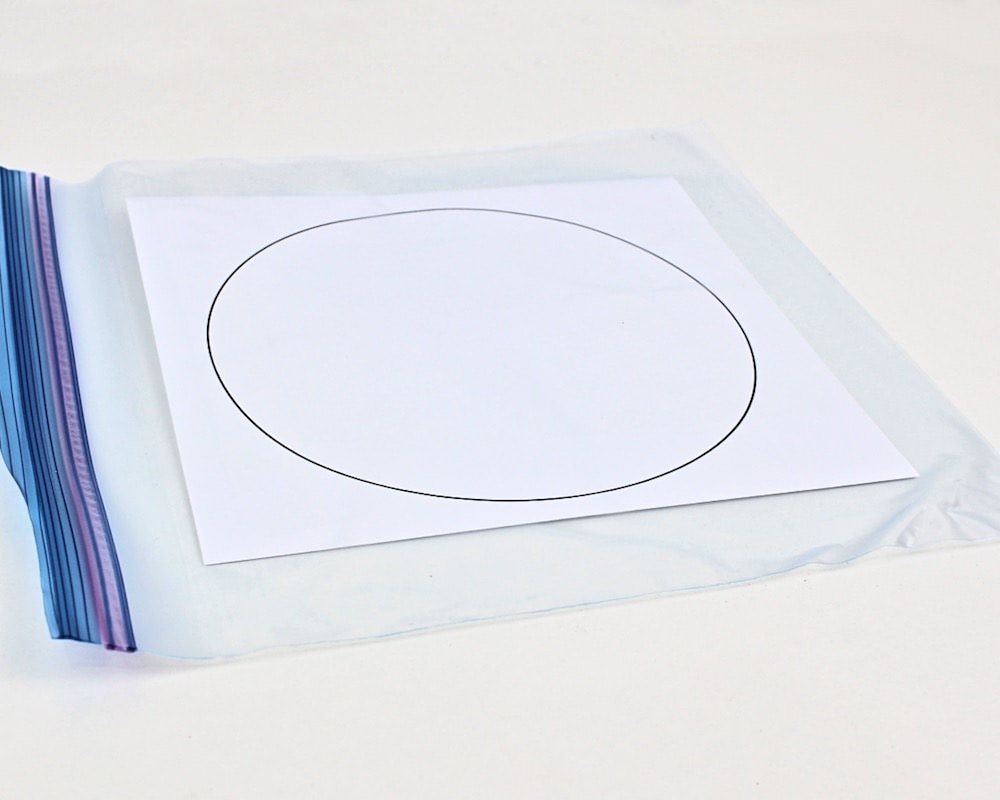
Note: The sheet of cardstock will likely be a bit too big to fit completely inside the bag. In order to make it fit, you can either fold over the edges or use scissors to cut them off completely.
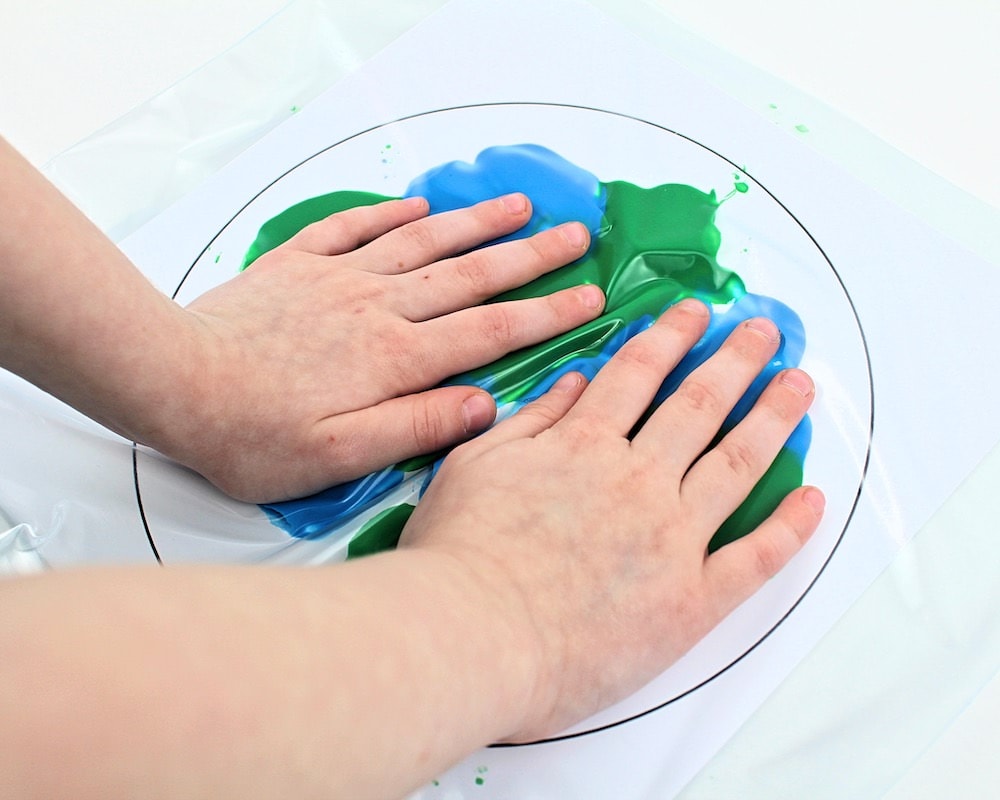
3. Add Paint to Bag
Open up the bag and squeeze some dots of blue and green paint onto the template.
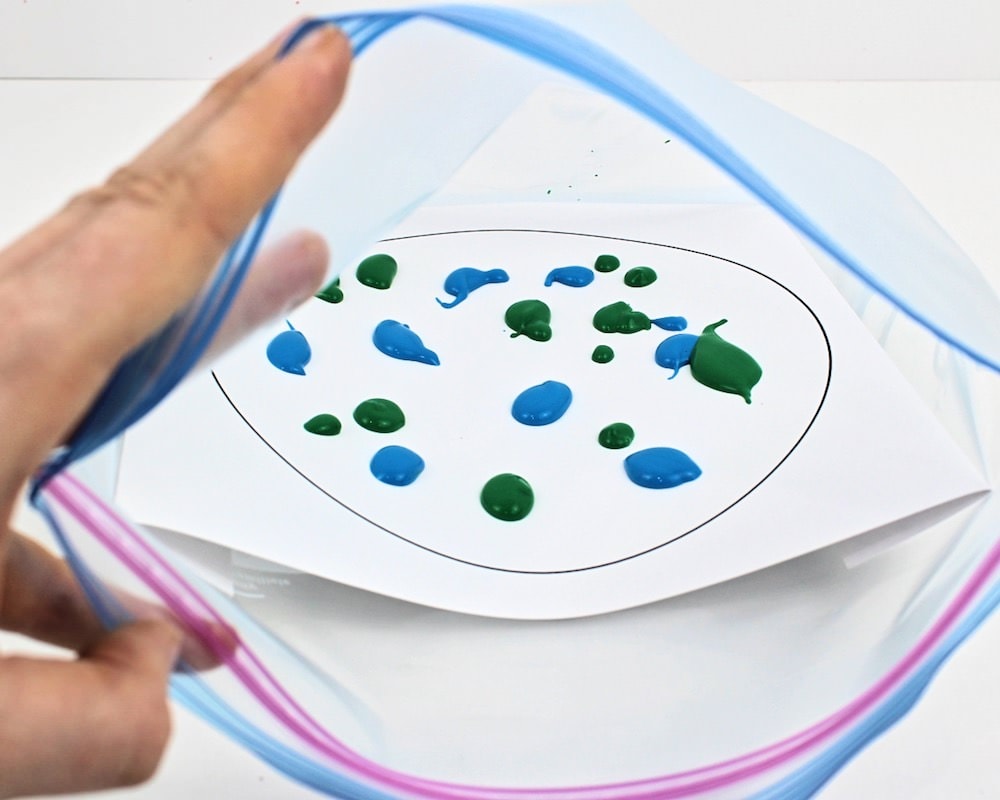
This project isn’t meant to result in a realistic painting of the Earth, so it doesn’t really matter where you add the dots. They can be placed anywhere since your child won’t be trying to recreate actual continents.
But for best results, I recommend using generous quantities of both colors and making sure that dots of both colors are placed next to each other. This will help the colors mix better and create a prettier pattern.
4. Seal Bag
Once you have added enough paint, close and seal the freezer bag, making sure to remove all the air.
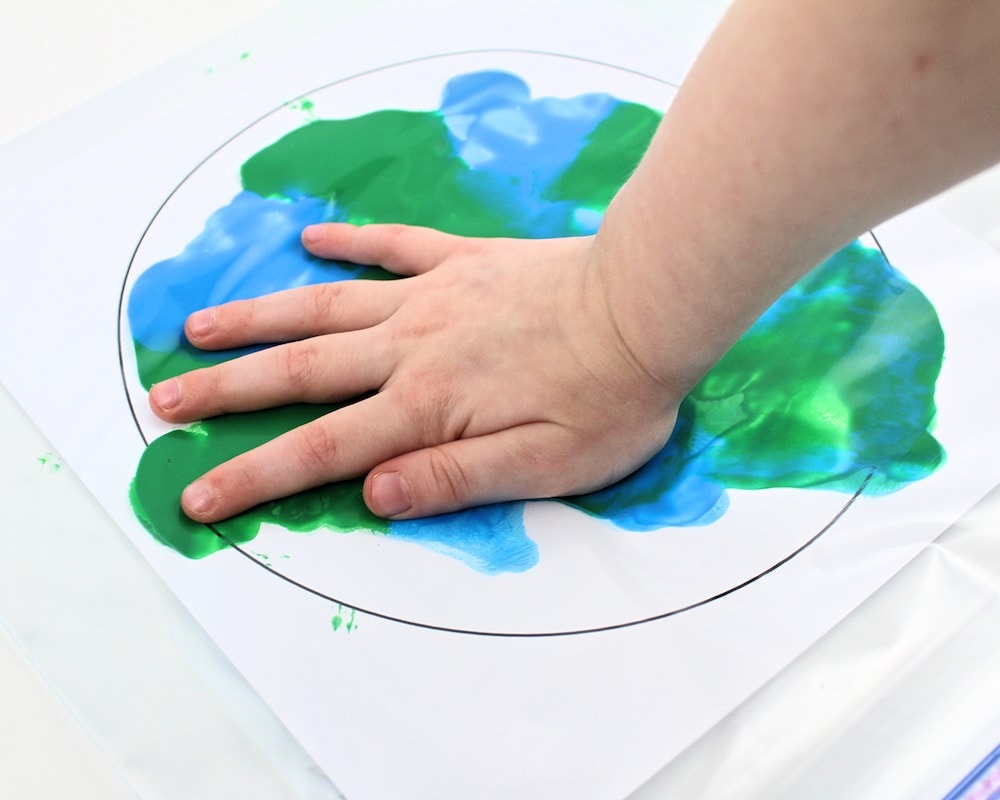
5. Paint Planet Earth
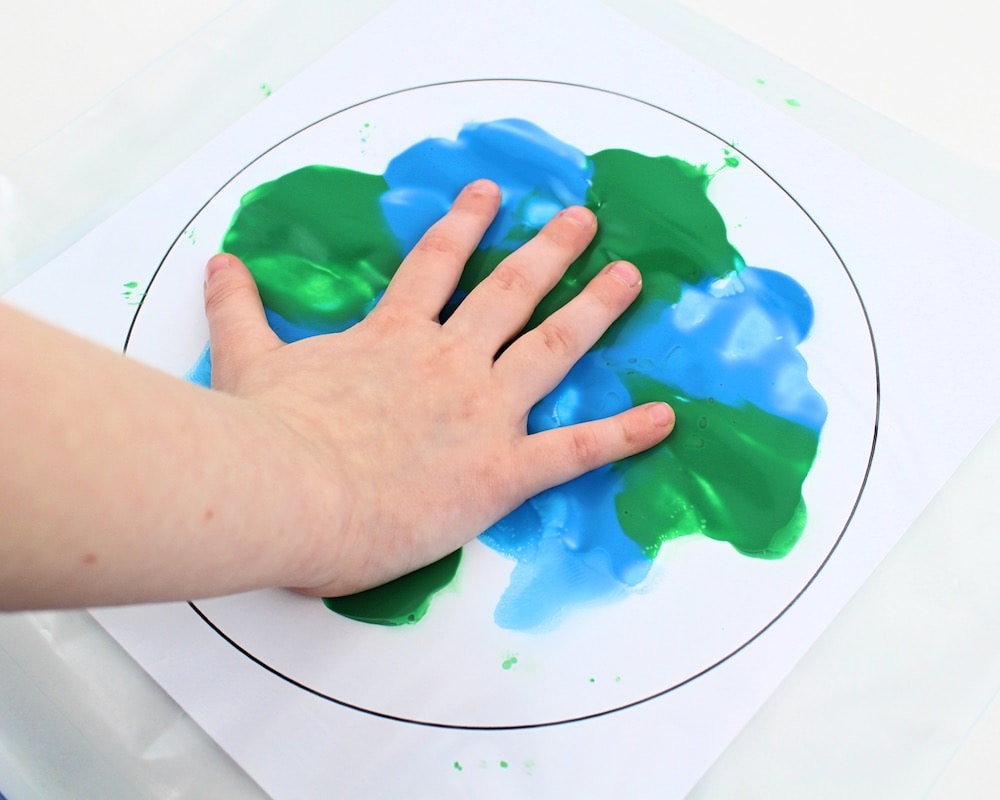
Now comes the fun part! Give the sealed bag to your child and let them smush the paint around inside the bag in order to cover the template with paint.
This no-mess activity is perfect for younger kids—especially babies and toddlers who have a tendency to put everything in their mouths.
(Of course, you can always try edible paint as well. But this activity has all the fun of finger painting without any of the mess, so what’s not to love?)
6. Let Paint Dry
When your child is done smushing the paint around the template, it’s time to let their artwork dry.
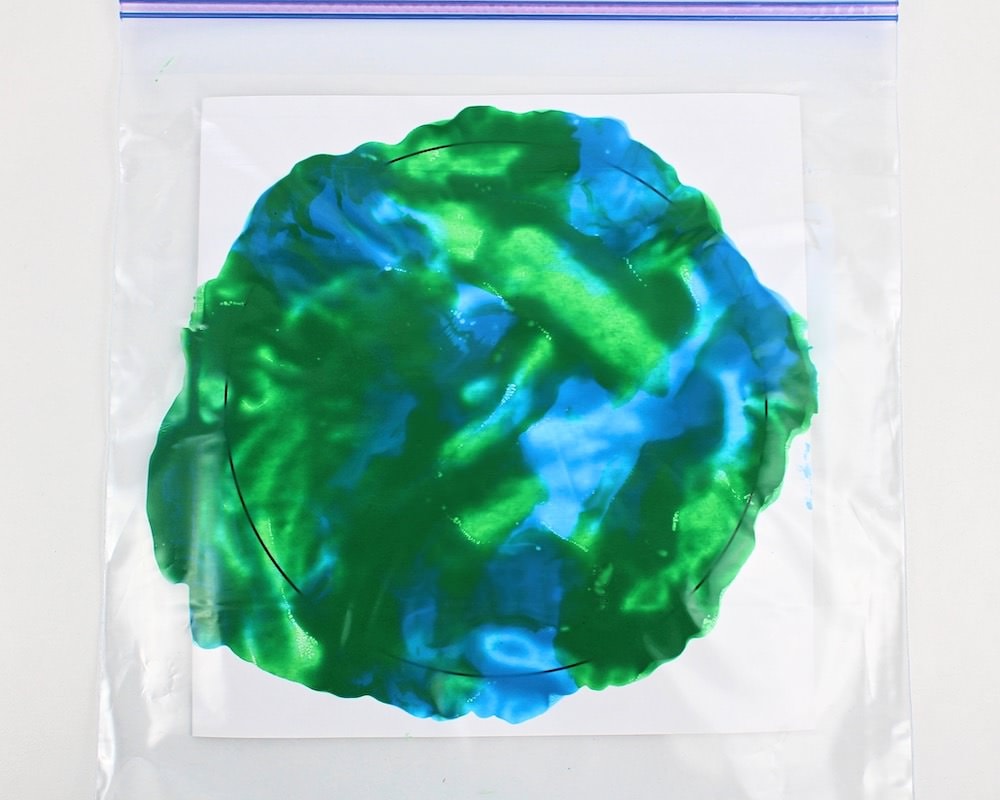
To do this, simply open up the bag and gently peel it off of the template. Then, carefully remove the sheet of cardstock from the bag (this is the step where the project fails if you use regular printer paper) and lay it flat to let the paint dry.
Note: If you used a paper plate instead of cardstock, you can skip the next step and display your child’s artwork as soon as the paint has dried!
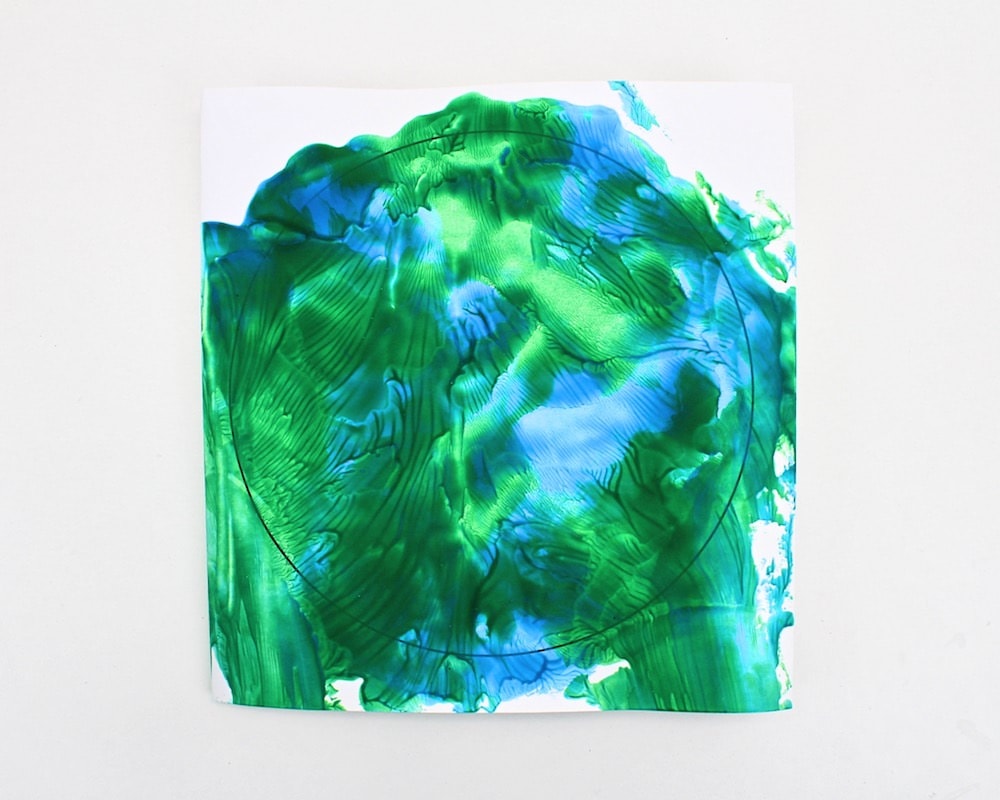
7. Cut Template
Once the paint is fully dry, use scissors to cut along the edges of the circle.
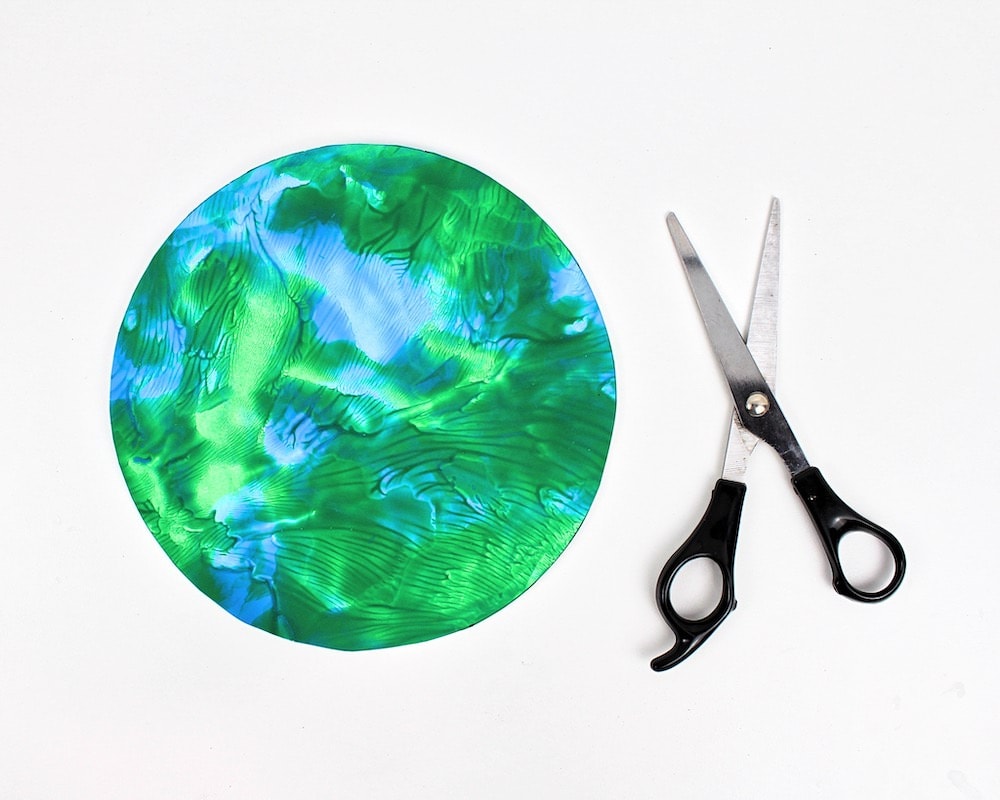
Your no-mess art project is now ready to display!
I really love how this one turned out, and my three-year-old had a blast helping me make it. This activity is such a fun way to involve your baby or toddler in making crafts for Earth Day without having to worry about the cleanup!

Related Earth Day Crafts
Looking for more fun craft ideas to make for Earth Day? Check out this article:
- Easy Earth Day Suncatcher
- Paper Plate Earth Craft with Crumpled Tissue Paper
- Earth Day Coffee Filter Painting
- Marbled Shaving Cream Earth
Only your name will be made public. Please note that by submitting your comment, you are agreeing to the terms of our Privacy Policy.