Looking for an easy snow day activity to entertain your little ones? Grab some snow and turn it into an erupting snow volcano! This awesome winter science experiment is perfect for toddlers, preschoolers and school-aged children, and you can choose to do it both indoors and outdoors!
JUMP TO…
While I’m not a big fan of the cold, I have to admit that snow creates lots of fun play possibilities for kids.
One of our time-tested favorites is to bring the snow indoors in a large bin. It requires pretty much no prep work on my part, and the kids love scooping it up and painting it with colored water.
But we’ve done that so many times that lately, we’ve been looking for new snow activities to try. And what could be cooler than making a DIY volcano out of snow?
Our five-year-old loves science, so naturally, she was really excited about this volcano activity. But one of the great things about this project is that it’s also suitable for younger kids like toddlers or preschoolers!
It also works both as an indoor activity and an outdoor activity, which makes it easy to fit into your busy schedule.
So if your kids are having a snow day and you’re in need of a quick activity idea to keep them entertained, consider giving this one a try!
Related: Fizzing Baking Soda Paint Volcano Craft (with Free Template!)

Get hundreds of pages of activities!
Get access to all our paid printables, as well as monthly activity planners, for just $5/month. (New printables added twice per month!)
Required Supplies
Here’s what you’ll need to make a colorful snow volcano using real snow:

- Fresh snow
- Small container or bowl
- Baking soda
- Red and yellow food coloring or liquid watercolors
- Dish soap (optional, but recommended)
- White vinegar
Note: This fun erupting volcano experiment for kids can be carried out both indoors and outdoors. To do this activity indoors, you’ll also need a large bin to hold all the snow.
How to Make a Snow Volcano (Step-by-Step)
1. Gather Snow (Optional)
If you’ve chosen to make your homemade snow volcano indoors, start by gathering some snow from outside and placing in a large bin. If you’re planning on making your volcano outdoors, you can skip this step.
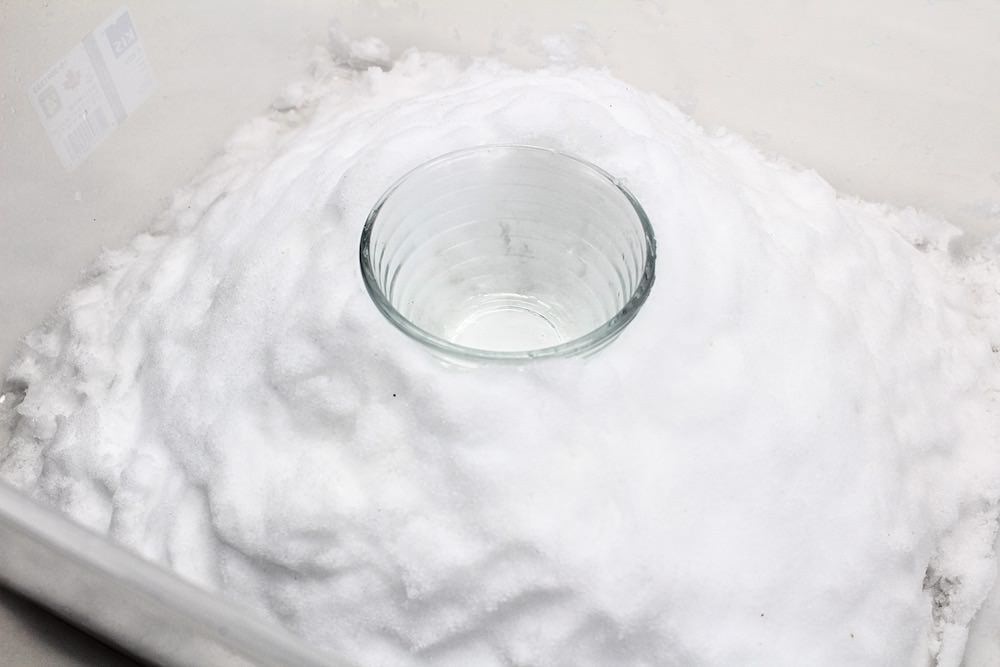
2. Create Mound of Snow
Use your hands to create a mound of packed snow. This will become the base of your volcano. (Note: Don’t do like me—protect your hands with gloves. Snow is cold indoors, too.)
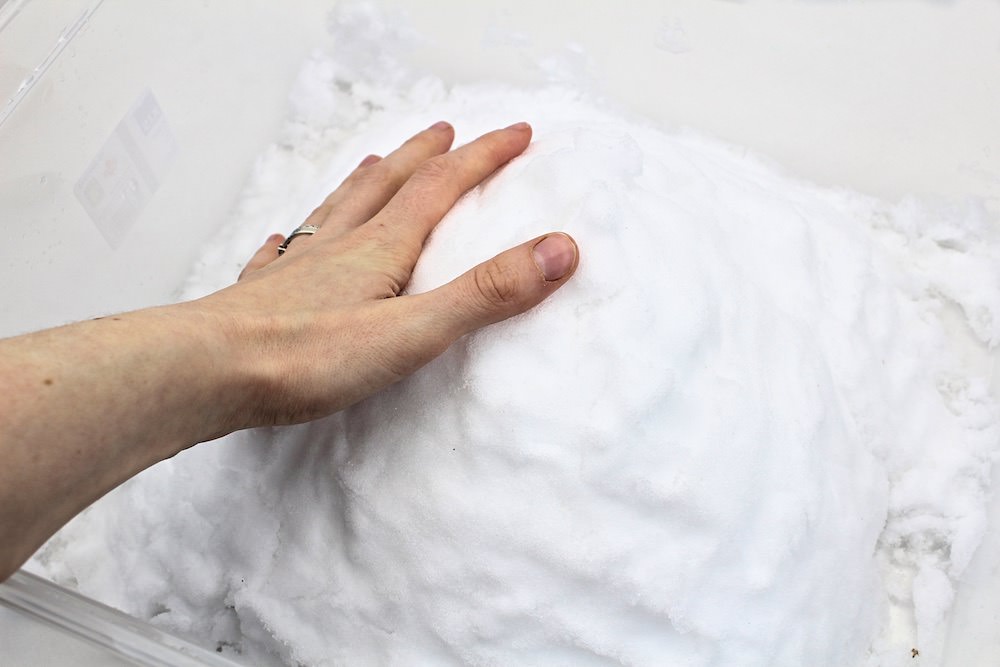
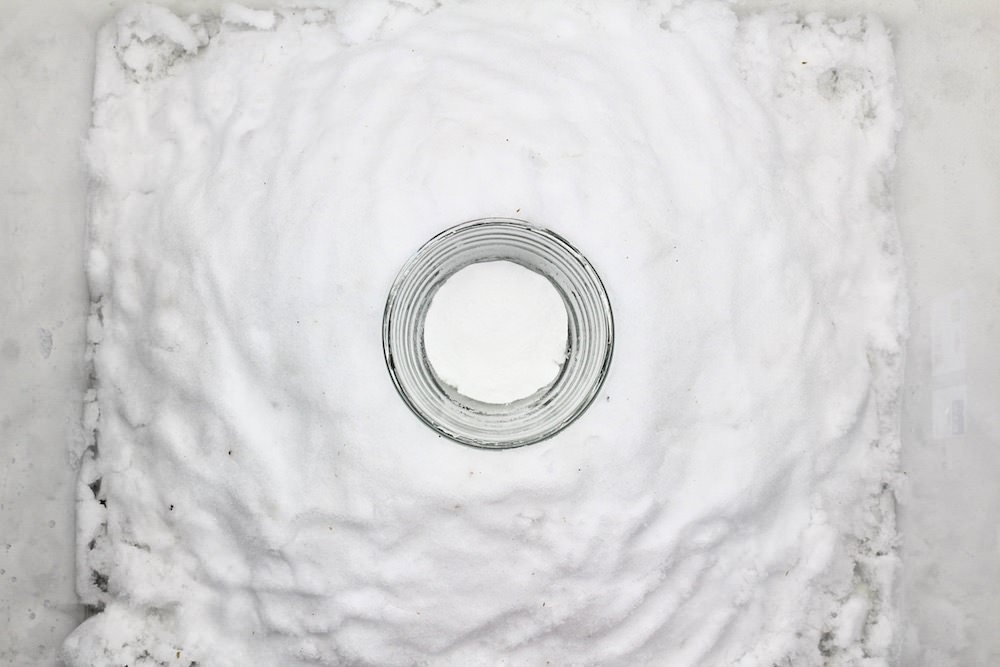
3. Insert Container
Grab a small bowl or container and gently press it into the snow. Keep pressing down until the edges of the container are level with the top of the snow mound. If needed, reshape the snow with your hands until it looks like a mountain again.
Note: The first time we tried this project, we decided to skip the container and just pour the baking soda directly into the snow. The results was that when we added the vinegar, everything sunk downward into the snow instead of spilling upward. Much to our kids’ disappointment, the reaction was barely visible. So make sure you don’t skip this step.
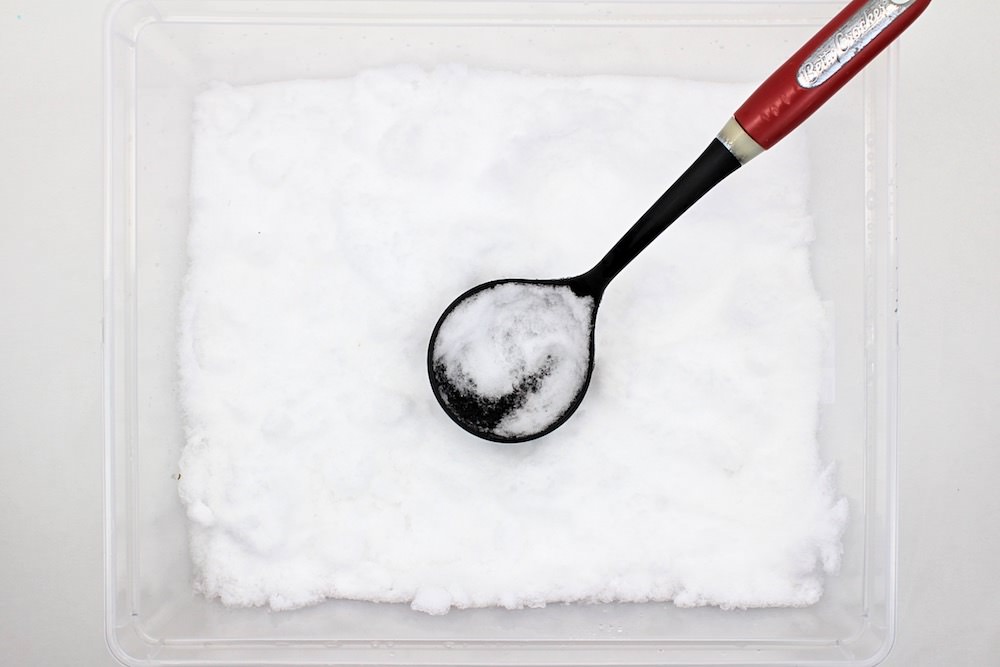
4. Add Baking Soda
Pour a bit of baking soda into the container.
You don’t need much—a couple teaspoons will do.
There’s no point adding more than that, because the baking soda at the bottom will simply become trapped underneath when the vinegar is added. And because it won’t come into contact with the vinegar, it won’t start fizzing.
If you want to create a stronger chemical reaction, add more vinegar instead of adding more baking soda.
5. Add Coloring
Add a few drops of red and yellow food coloring or liquid watercolor paint to the baking soda. The color won’t look as bright when the volcano eruption is happening, so make sure you add extra coloring if you want the explosion to look nice and vibrant.
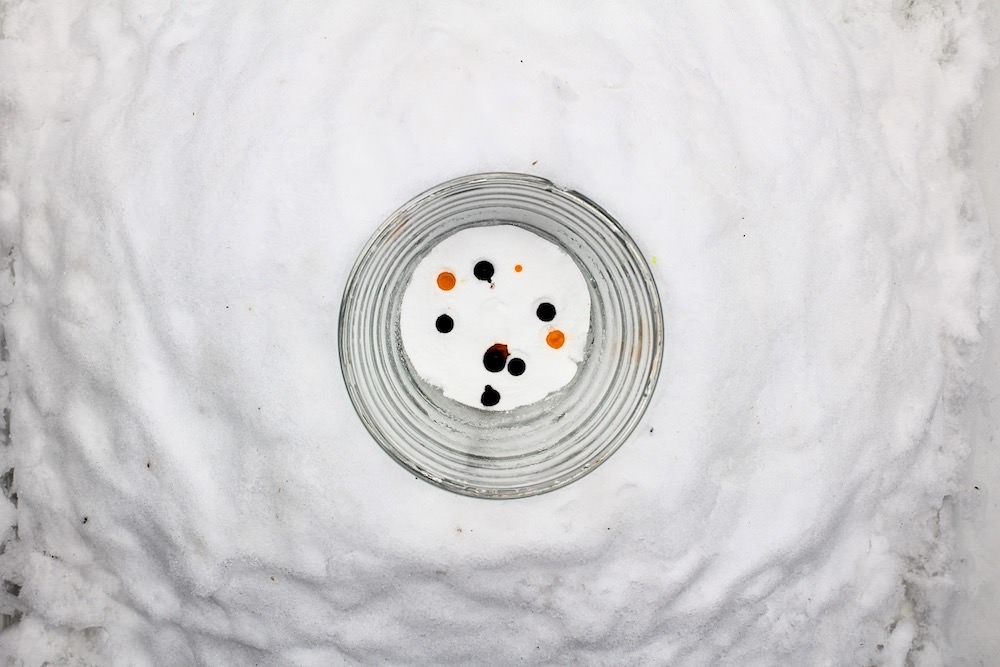
6. Add Dish Soap (Optional)
If you’ve decided to use dish soap, now is a good time to add it. Once again, you don’t need much—a few drops or a small squirt should suffice.
You can skip this step if you’d rather just use baking soda and vinegar. But while adding dish soap isn’t mandatory, I highly recommend it.
When we tried this experiment without the dish soap, the result was pretty underwhelming because the explosion only lasted a couple seconds. Adding dish soap will make the reaction last a lot longer and will make the “lava” more bubbly.
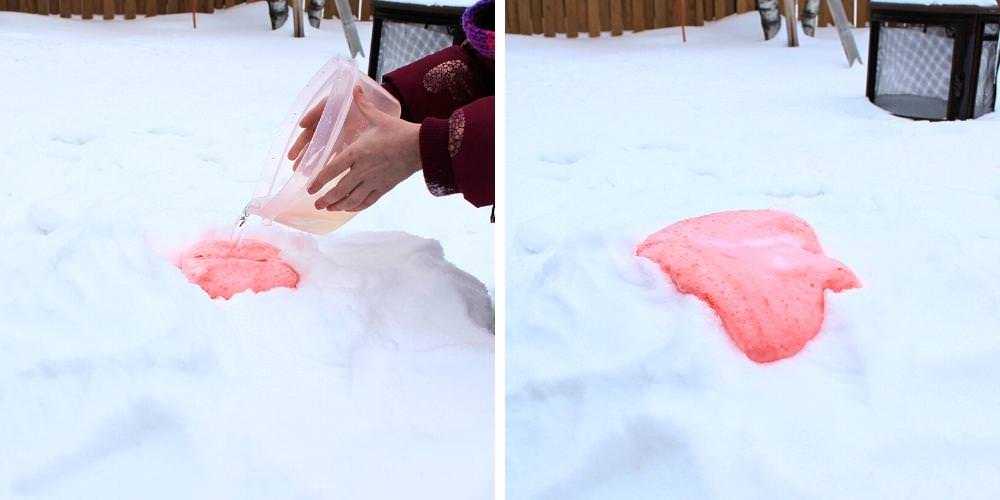
7. Add Vinegar
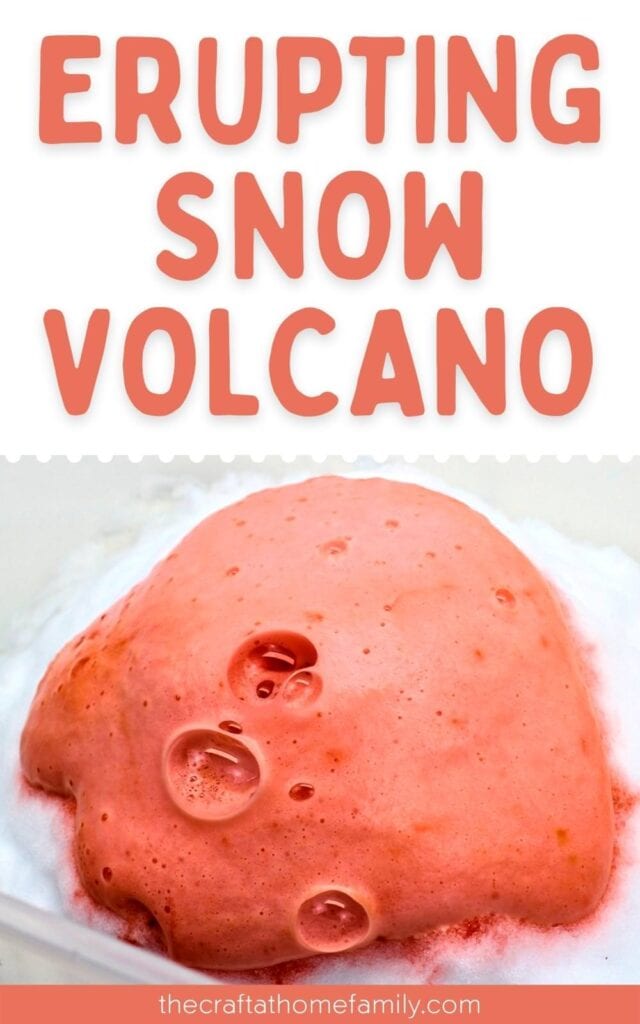
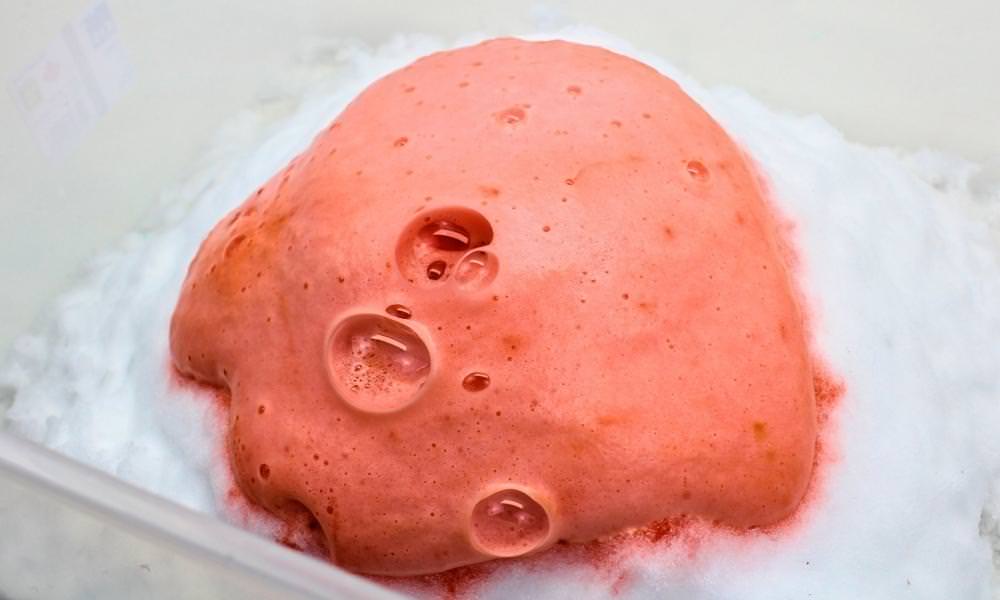
When all the previous steps have been completed, quickly pour some vinegar into the container (we used about ½ cup) and watch the reaction take place!
The food coloring will turn the vinegar a reddish orange color as it bubbles and spills over onto the snow like a lava.
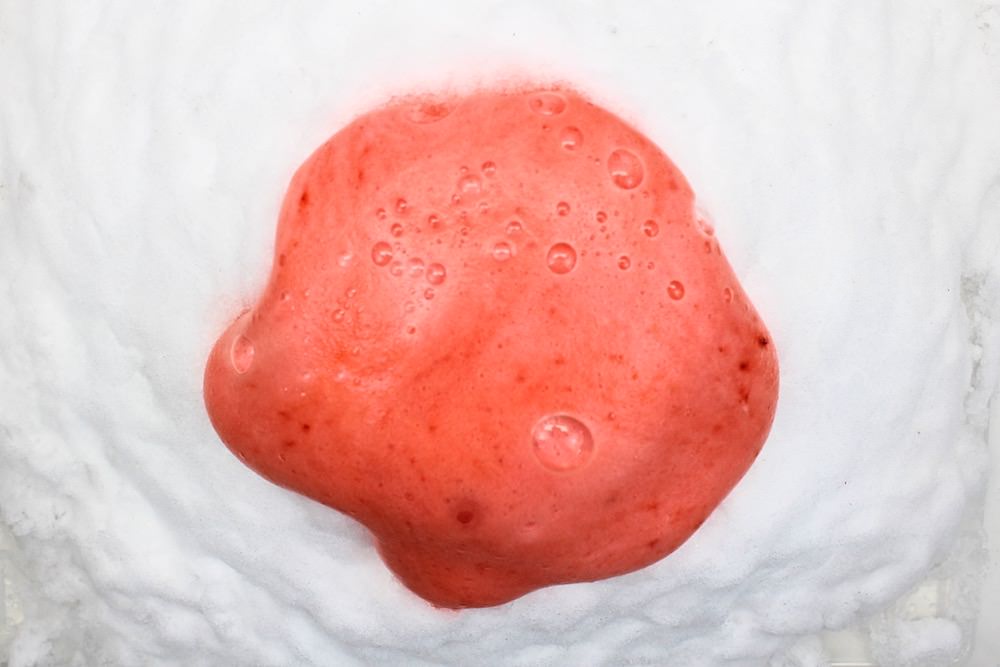
Our kids loved this winter science experiment so much that they asked to do it multiple times, both indoors and outdoors.
I’m pretty sure our neighbors are wondering why the snow in our backyard is covered in red spots, but at least the kids had fun and they got to do this cool volcano experiment outdoors!
How to Make a Giant Snow Volcano Outdoors
The snow volcano we made indoors was relatively small because we didn’t want it to spill over everywhere, but if you’d prefer to make a big snow volcano outside, you won’t have to worry about that.
To turn your snow volcano project into an outdoor activity, you’ll need all the same ingredients and supplies. Simply create a large mound of snow with your hands and press a container into it.
For the best reaction, use a wide, shallow container rather than a deep, narrow one, and cover its base with baking soda. Then, when comes the time to pour the vinegar, try to cover as much of the baking soda as possible in one go.
What Kind of Vinegar Should You Use to Make a Snow Volcano?
White vinegar will produce to best results because it’s more acidic than other types of vinegar like apple cider vinegar. This means it will react more quickly and foam more. (And as a bonus, it’s also the least expensive type of vinegar!)
How Much Baking Soda Do You Put in a Snow Volcano?
You don’t need to put much. We only used about 1 or 2 teaspoons, and that was plenty enough for the reaction to occur. Just make sure the container you use isn’t too narrow so that you’re able to sprinkle the baking soda onto the entire bottom of the container.
Does the Amount of Baking Soda Change the Eruption?
I’ve found that if I try to add too much baking soda, some of it becomes trapped underneath and doesn’t react. For a stronger reaction, use the same quantity of baking soda and increase the amount of vinegar instead.
What Does Dish Soap Do in a Snow Volcano?
As mentioned above, baking soda isn’t necessary to do this project, but it makes the reaction last longer and look more bubbly. We thought the experiment looked a lot cooler when we used to dish soap.
Related Winter Activities
Looking for more fun things to do with your kids this winter? Check out these articles:
- 2-Ingredient Fake Snow (That’s Actually Cold!)
- Melted Snowman Sensory Bag
- Color-Changing Snowflake Window Clings (with Free Template!)
- 39 Coolest Winter Sensory Bin Ideas
Only your name will be made public. Please note that by submitting your comment, you are agreeing to the terms of our Privacy Policy.