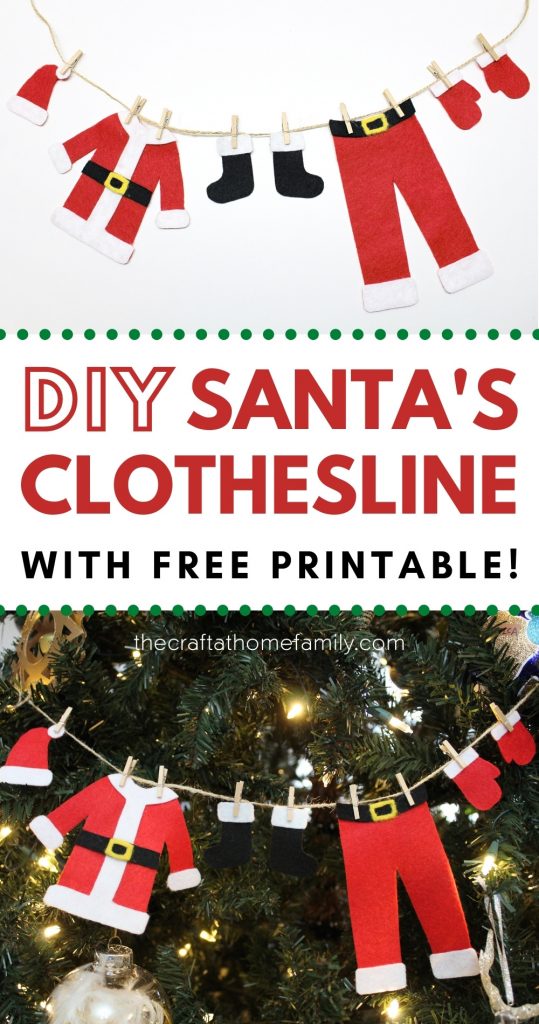
This DIY Santa’s clothesline made from red and white felt is both beautiful and simple to make! It doesn’t require any sewing and would look great as a homemade Christmas tree garland, or even as a DIY decoration for your mantle. And because we’ve included a free printable template, you don’t even have to worry about coming up with your own design!

JUMP TO…
Looking for the printable? Enter your email address in the sign-up form!
Ever since we made our DIY Felt Board a few weeks ago, I’ve been feeling inspired to come up more projects involving felt. And since Christmas is less than a week away, making a Santa’s clothesline for our tree seemed like a pretty obvious choice!
I suppose I could have knitted or sewn it. But with Baby #4 due just a few days before Christmas, we haven’t exactly had a lot of free time lately! So I decided to make this projects no-sew, and I even created a cute little template for it.
I have to say I’m quite pleased with how it turned out!
So if you’d like to make your DIY Santa’s clothesline the easy way, scroll down to find out how—and make sure to request the free printable by entering your email address in the form at the bottom of this article!
(P.S. Love Christmas crafts? Check out this Free Build a Santa Template as well!)

Get hundreds of pages of activities!
Get access to all our paid printables, as well as monthly activity planners, for just $5/month. (New printables added twice per month!)
How to Use a Felt Template
Some parts of the template involve small shapes that may be a little difficult to cut… if you don’t know the right way to do it. So before I dive into the instructions for this particular project, I wanted to give you a few tips on cutting felt!
There are actually a few different methods you can use, but below are the ones that will work best for this project. I tested both of them with great results, so feel free to choose the method that works best for you. You could even try out both methods to see which one you prefer!
Method 1: Freezer Paper
What Is Freezer Paper?
The first method you can use to transfer the pattern to felt involves freezer paper. Freezer paper has a waxy side that will temporarily adhere to felt if it’s exposed to enough heat, and a paper side that you can use to trace or print the design.
How to Cut Felt Using Freezer Paper
You can buy freezer paper in rolls and cut it down to whatever size you like, though I had a little trouble finding it here in Canada. If you buy a roll, simply print the template on regular printer paper, then place the freezer paper on top of it and use a marker or pen to trace the design.
The second option is to buy freezer paper in pre-cut, Letter-sized sheets. That way, you can simply print the template right onto the freezer paper and you won’t need to spend any time tracing it. I had no trouble finding pre-cut sheets on Amazon.ca, so this is the method I used!

Whether you trace the design or print it, make sure it appears on the paper side of the freezer paper (not the wax side) and cut around it to make things easier. Then, press the waxy side onto the felt and iron the freezer paper to it. The heat will help it adhere.
Once the freezer paper has been ironed onto the felt, use a pair of sharp scissors (I recommend using sewing scissors) to cut along the lines of the template.
Then, simply peel off the freezer paper to reveal your felt shape. And since freezer paper can be reused, you can even save the template for future use to avoid having to print it again!
Note: If the instructions above aren’t clear enough for you and you’d prefer to see a picture of each step, click here to find out more about using freezer paper to cut felt.
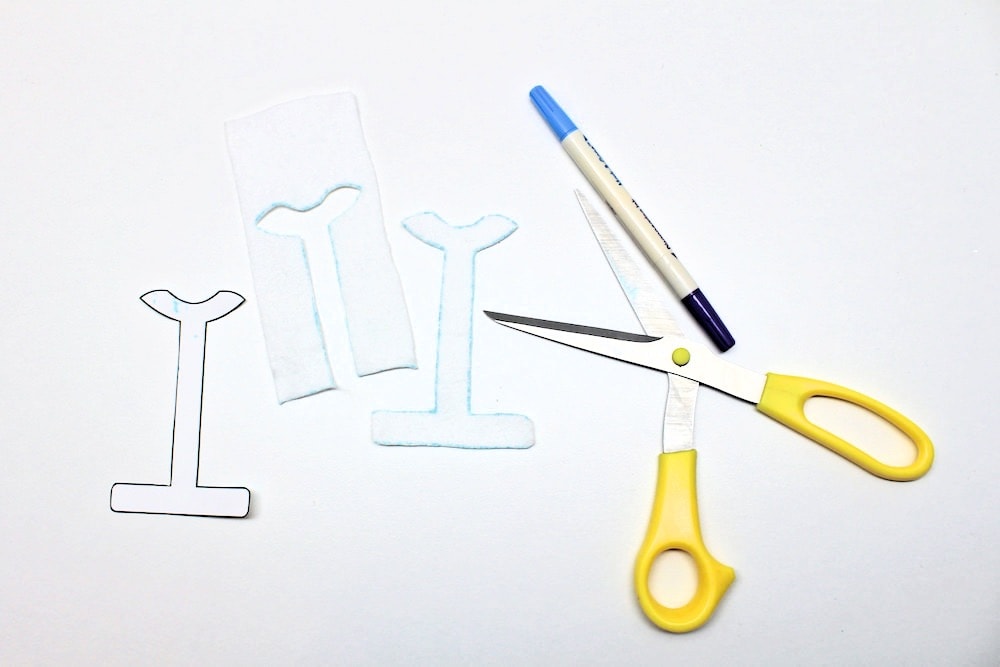
Method 2: Fabric Marking Pen
This method is a little less fancy, but it works just as well. Since I was testing both, I used freezer paper to cut the shapes on the first page of the template and used this method for the second page.
If you want to keep things simple or you’re having trouble finding freezer paper, all you’ll need to transfer the template is a fabric marking pen. This is a special type of pen that is used to mark fabric for sewing projects—and the reason it’s used is that those markings will eventually vanish!
The pen I bought has two sides: purple and blue. The purple ink is air-soluble and eventually disappears on its own, while the blue side is water-soluble and washes off instantly when wet. I chose to use the blue side, but you’re free to use whichever you like!
For this method, simply print the template on regular printer paper and use scissors to cut out all the shapes. Then, press the paper onto the felt and use your marking pen to trace all the lines.
All you’ll have left to do is to cut the felt along those lines and remove the blue ink using tap water (or wait for them to disappear on their own if you used the purple side)!
Note: Fabric marking pens won’t show on dark fabric, but you can simply use white chalk.
Like this project?
Get the templates to create the accompanying garlands:
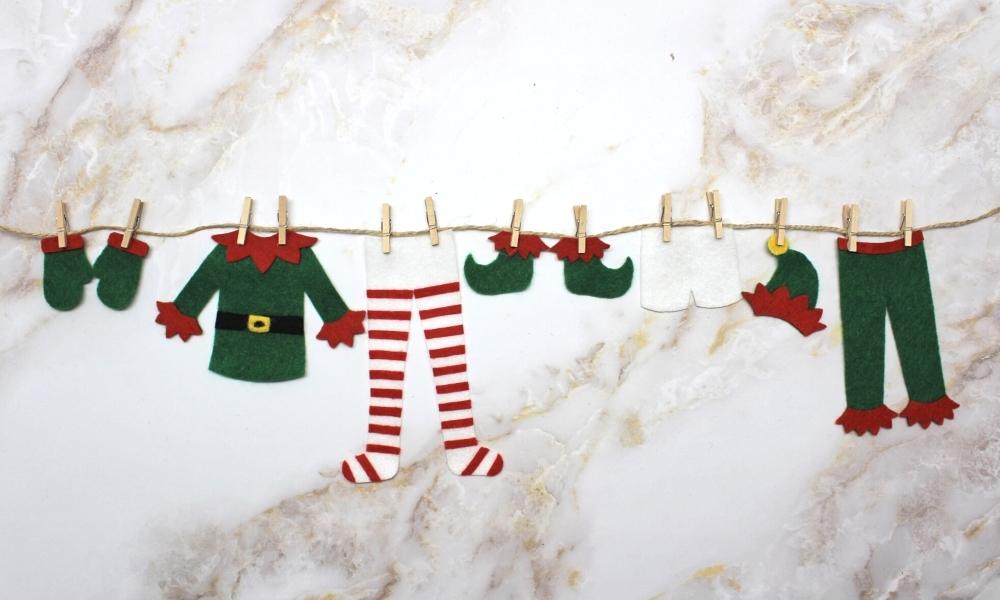
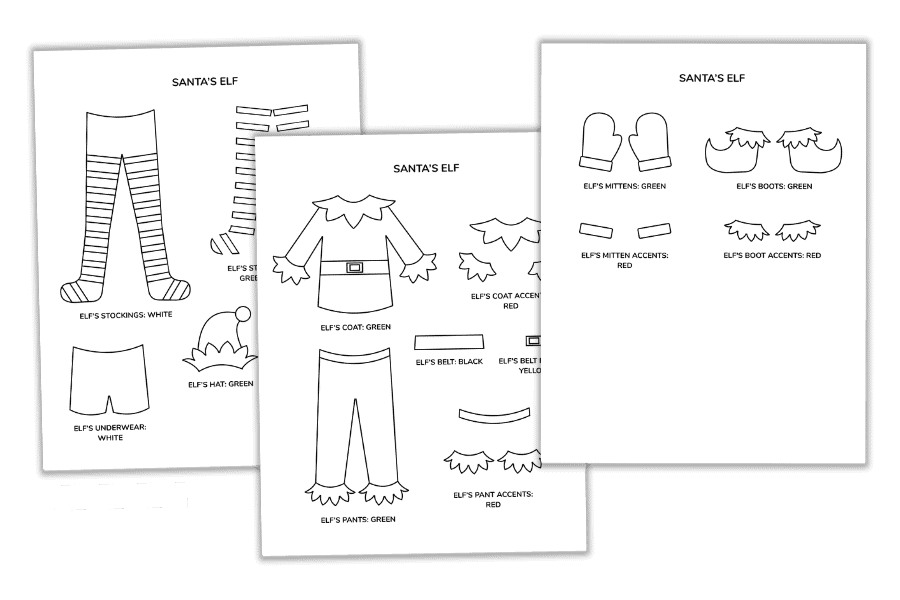
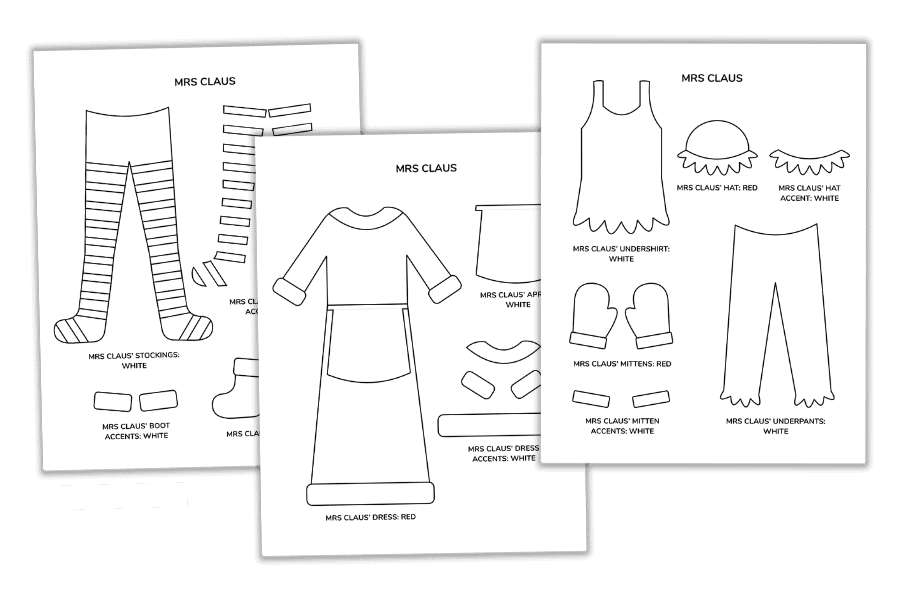
Santa’s Elf Clothesline Garland
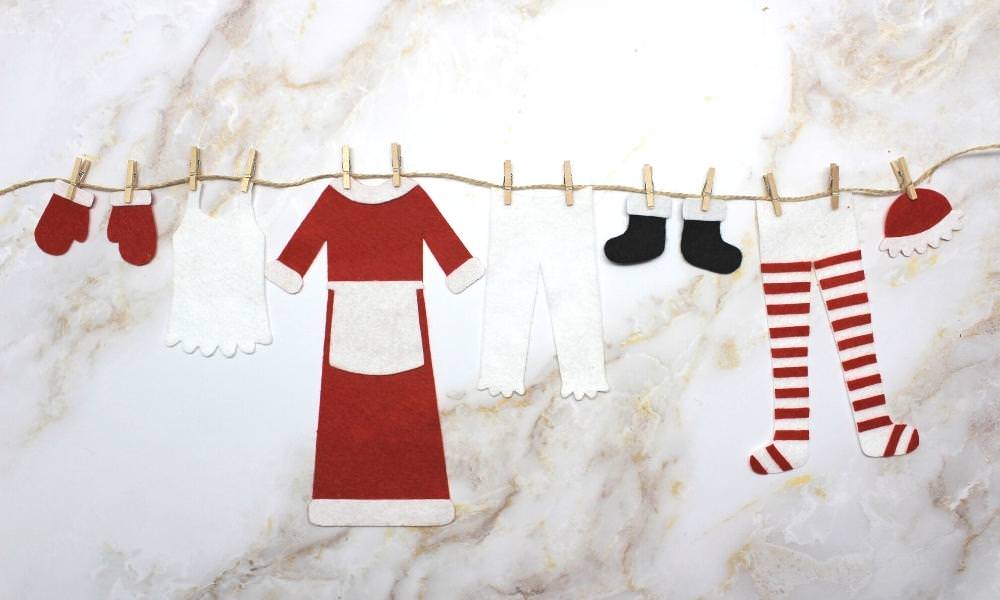
Mrs Claus Clothesline Garland
…or get the whole set (including the extended Santa’s clothesline template with socks and undergarments)!
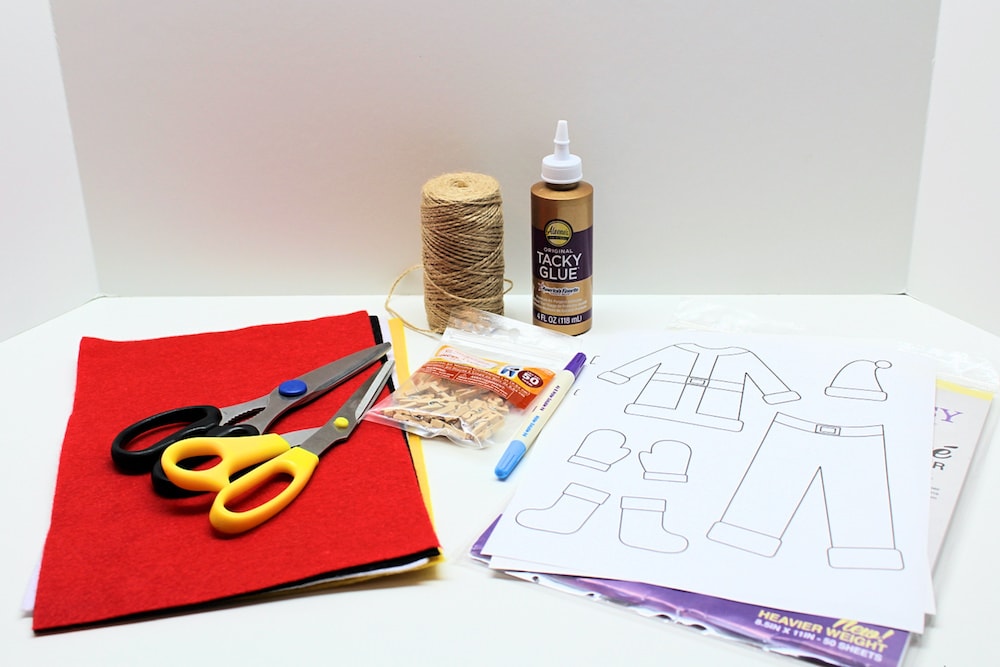
Required Materials
Here’s what you’ll need to create your very own DIY Santa’s clothesline using felt:
- My free Santa’s clothesline template, which you can download using the form below (there’s another form at the bottom of the article if you’d rather keep reading)
- Freezer paper and iron (if using Method 1 as described above)
- Fabric marking pen (if using Method 2 as described above)
- Felt in red, white, black and yellow
- Sharp scissors (sewing scissors will work best)
- Tacky glue
- Twine
- Miniature clothespins
Note: When working with felt, it’s best to avoid regular white school glue as it tends to soak through the felt and leave dark patches. If you don’t have any tacky glue and are wondering whether something else could work, click here to find out more about glueing felt.
How to Make a No-Sew Clothesline Garland (Step-by-Step)
1. Print Template
Start by downloading and printing my free Santa’s clothing template. If you’re using Method 1, print it on freezer paper; if you’re using Method 2, print it on regular printer paper.
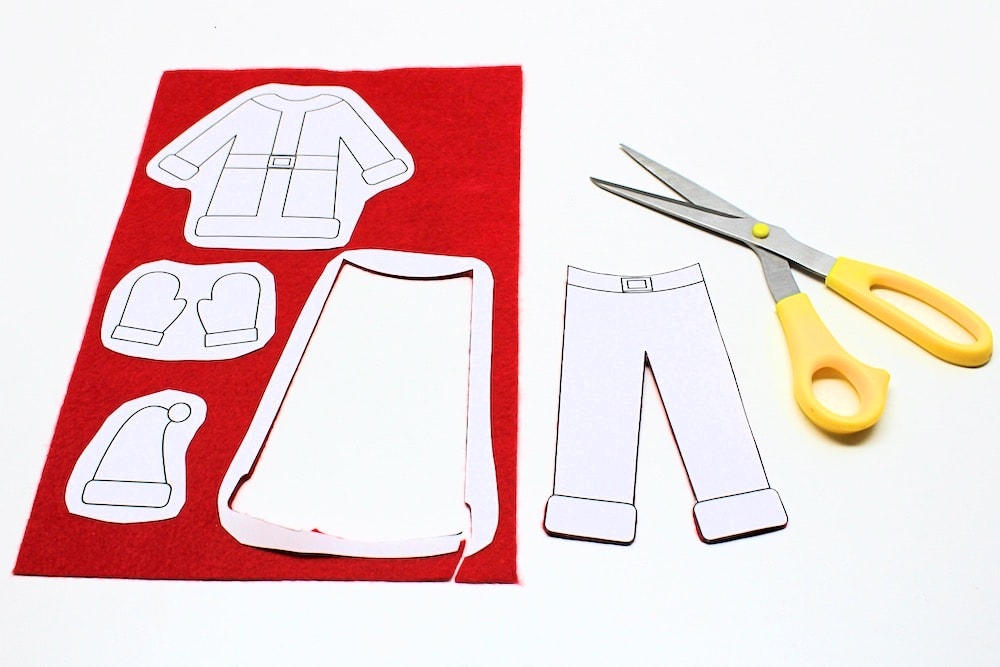
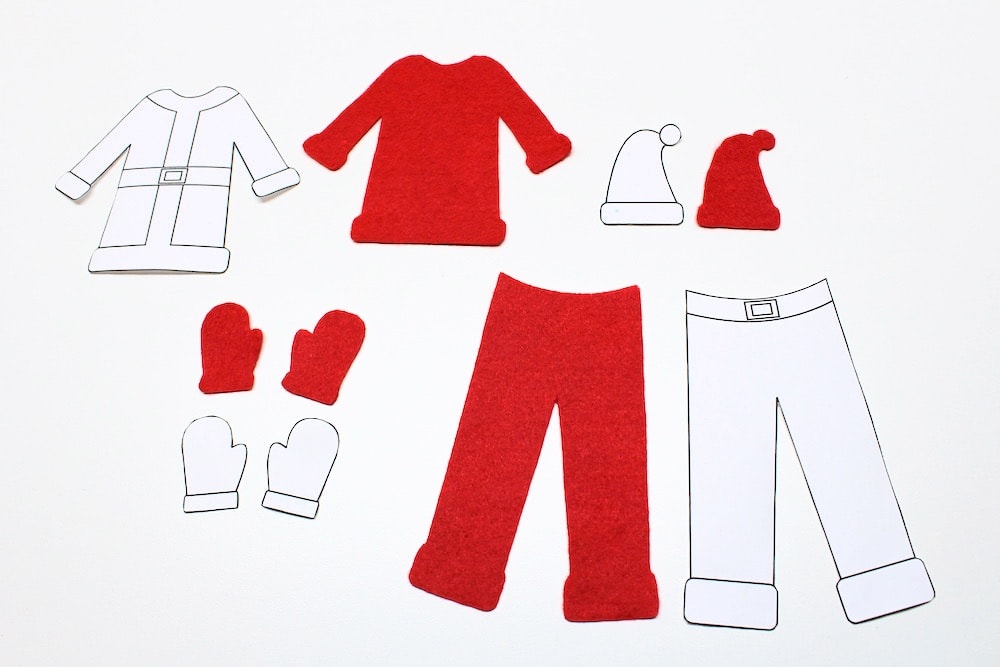
2. Cut Felt According to Template
Since I went into detail about how to do this above, I won’t do so again here. But you’re free to choose whichever method you like as they both work very well!
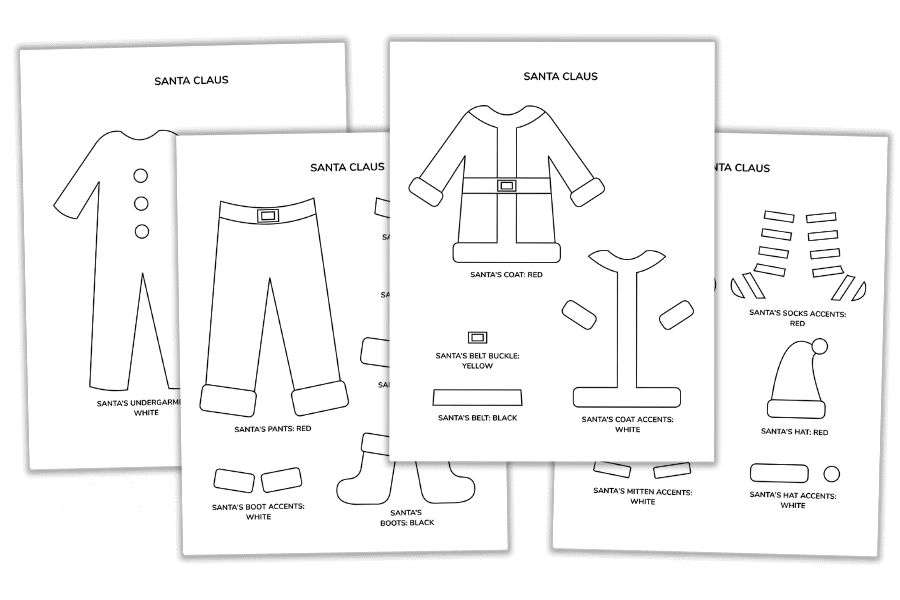
Use the shapes on the first page of the template to create the basic outline of the clothing. Cut around the entire shape—the details only there to guide you and to help you visualize the finished project!
I used red for every shape except the boots, for which I used black.
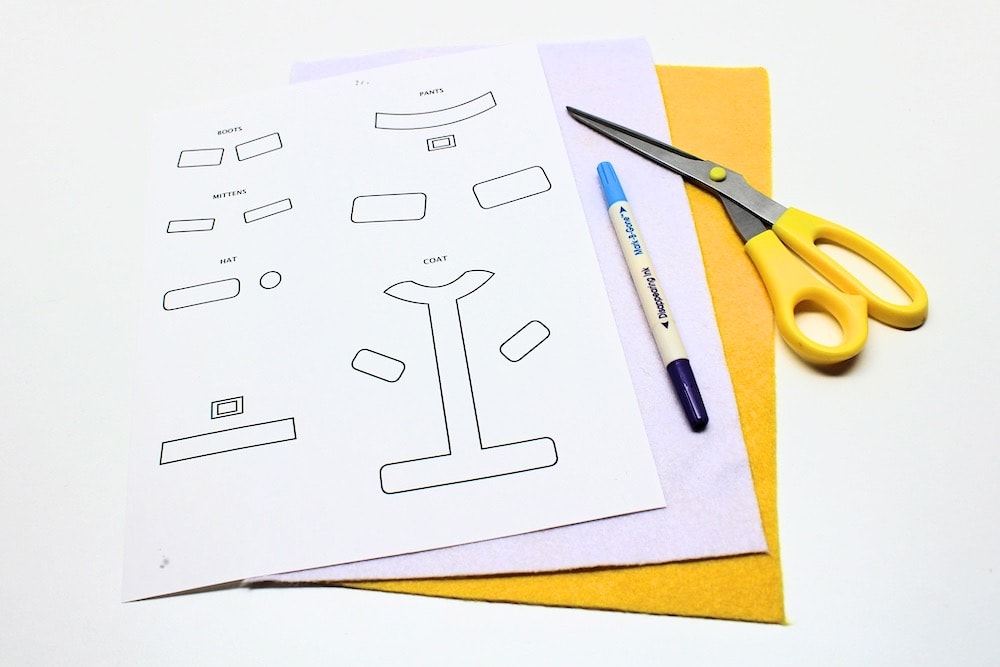
The second page of the template will be used to create all the details. To make things easier for you, I wrote a caption above each shape that indicates which item of clothing it belongs to.
I used white for every shape except the two belts (which are meant to be black) and the two belt buckles (which are meant to be yellow).
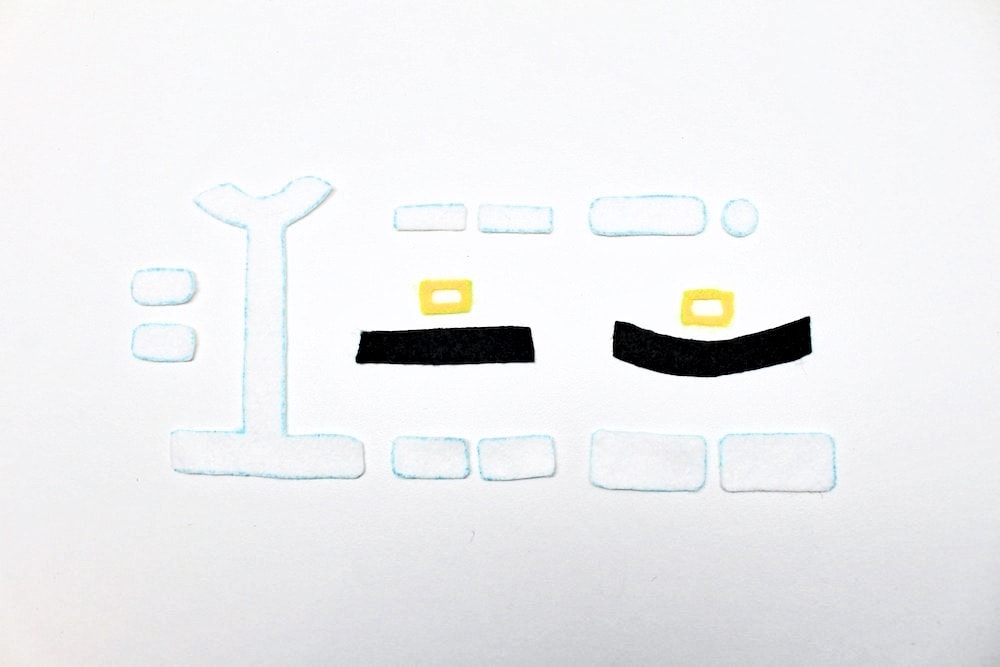
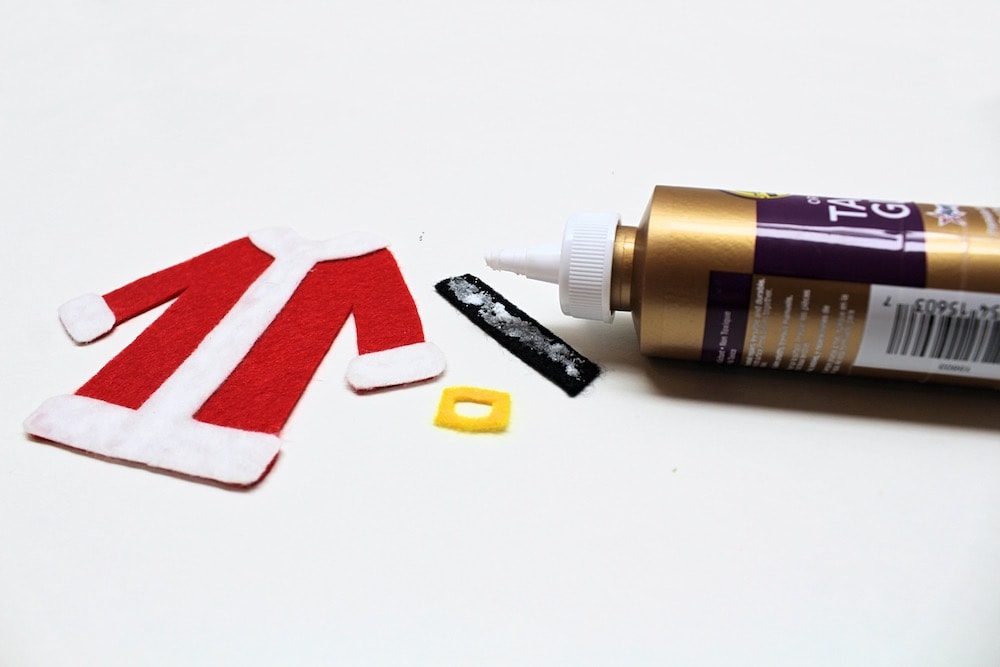
Tip: The belt buckle is a little tricky because of the rectangular hole in the middle. Don’t bother to try to cut the hole straight from the pattern—I used the template to cut the outer shape, then folded it in half to cut a rectangle out from its middle. It worked really well and was way simpler than trying to follow the template exactly!

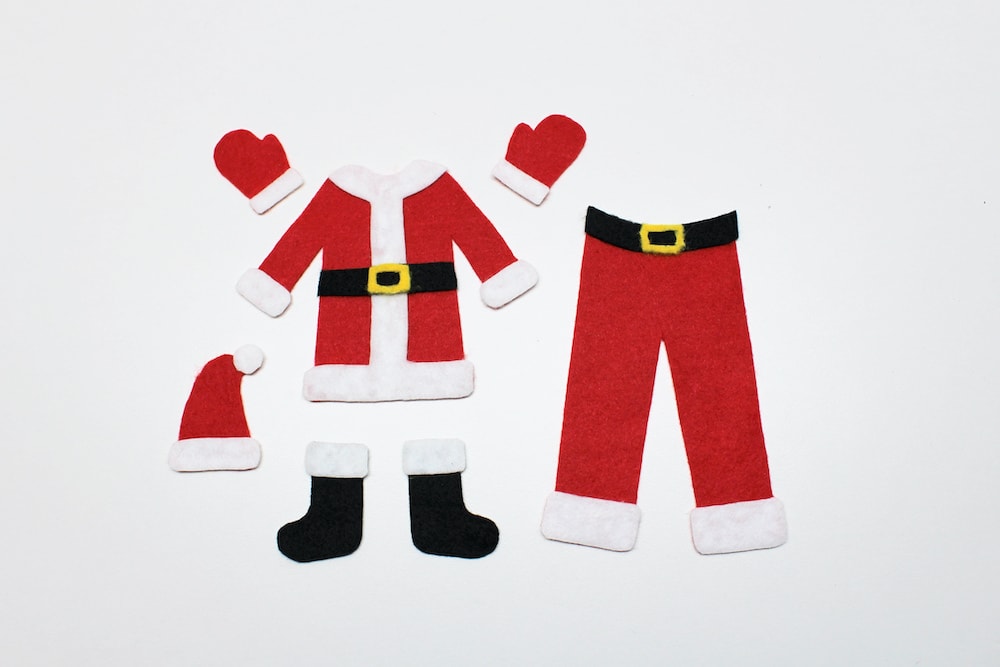
3. Assemble Clothing
Use tacky glue to assemble Santa’s clothing according to the details pictured on the first page of the template.
Here’s what it should look like when it’s finished:
Note: I didn’t do this, but if you want, you can even add some extra details like buttons using fabric markers!
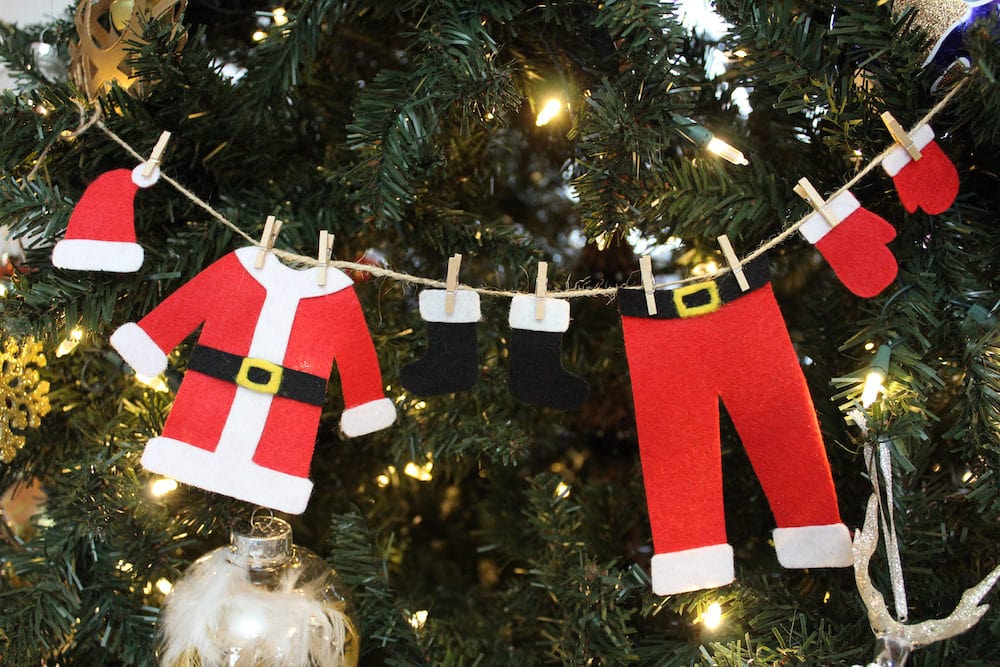
4. Attach Clothing to Clothesline
Use miniature clothespins to hang the clothing onto a piece of twine. You don’t need to glue them in place—simply place the twine in between the clothespins and clothing and clamp the clothespins down over both.

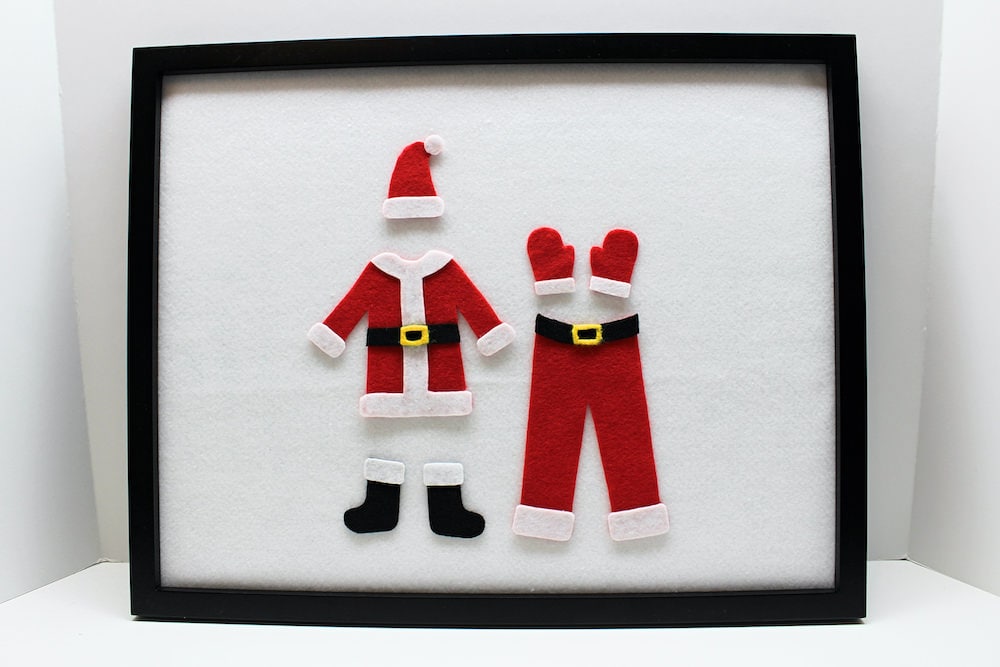
Doesn’t it look adorable? And since they’re not glued in place, you’ll be able to adjust the position of the clothing however you like… or even remove them from the clothesline temporarily to use them as a play set for your child’s Felt Board!
5. Hang Clothesline on Tree
We used our Santa’s clothesline as a garland for our tree, though of course you’re free to hang yours wherever you like. It would probably look really cute hanging over a mantle as well!
Since I cut my piece of twine long enough, I was able to simply wrap each end around one of the branches of our tree. This keeps it in place quite nicely while giving us the freedom to move it around as we see fit.
And that’s it! I’ll be completely honest—cutting all the small pieces of felt was a bit time-consuming. But I just love how it turned out and as far as I’m concerned, it was totally worth the effort!
Let me know how yours turns out by sounding off in the comments below!
Related Homemade Christmas Decorations
Looking for more DIY Christmas projects you can do at home? Check out these articles:
- Easy Feather Ornaments (2 Ways!)
- DIY Ribbed Glitter Ornaments
- Easy Alcohol Ink Ornaments
- Rustic Twine-Wrapped Ornaments
need to try this Santa suit
I hope you enjoy it!