Making your own DIY scratch art sheets at home couldn’t be easier—in fact, even preschoolers should be able to do most or all of this project themselves! And because homemade scratch art is way cheaper than the store-bought variety, you’ll never have to buy it again!
JUMP TO…
Does anyone else remember getting scratch art kits for their birthday when they were kids? I always loved them, but the store-bought kits never included enough sheets for my liking, so I was always disappointed by how quickly they ran out.
I wish I’d known then how easy it is to make them yourself!
You may think I’m exaggerating, but it really is extremely simple—so simple, in fact, that my four-year-old made her own right alongside me as I was taking pictures for this article!
So if your kids love scratch art, but you don’t love the cost of constantly buying new kits for them, why not show them how to make their own?

Get hundreds of pages of activities!
Get access to all our paid printables, as well as monthly activity planners, for just $5/month. (New printables added twice per month!)
Required Materials
Here’s what you’ll need to make your very own scratch art sheets at home:

- White cardstock (regular paper is too thin and won’t hold up as nicely)
- Oil pastels or wax crayons (see note below)
- Dish soap (I’ve linked to the one I used, but whatever brand you use to do your dishes should work just fine)
- Black acrylic paint
- Paintbrush or foam brush
- Small container (for mixing the paint)
Note: Crayons will work in a pinch, but I’d really recommend using oil pastels if you can get your hands on them. You’ll need to cover the entire sheet of cardstock in color, and this will be way easier if you use oil pastels because they spread a lot better. You can find them online quite easily.
How to Make DIY Scratch Art Paper (Step-by-Step)
1. Cut Cardstock (Optional)
You can skip this step if you like, but since you’ll need to color the entire sheet of cardstock, you may want to cut it down to size to make things easier. I was using Legal-sized cardstock, so I cut it in half and gave one of the halves to my four-year-old so she could make her own.
(I used my trusty paper trimmer to cut the cardstock down to size because I love how clean the cuts are! Of course, a ruler and scissors will work too.)
2. Color Cardstock
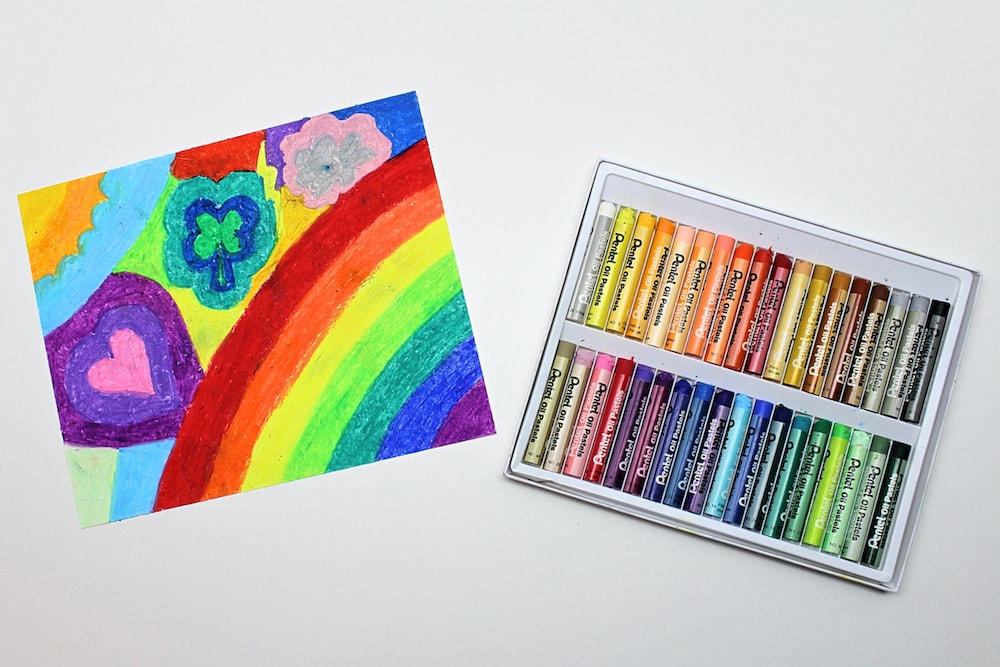
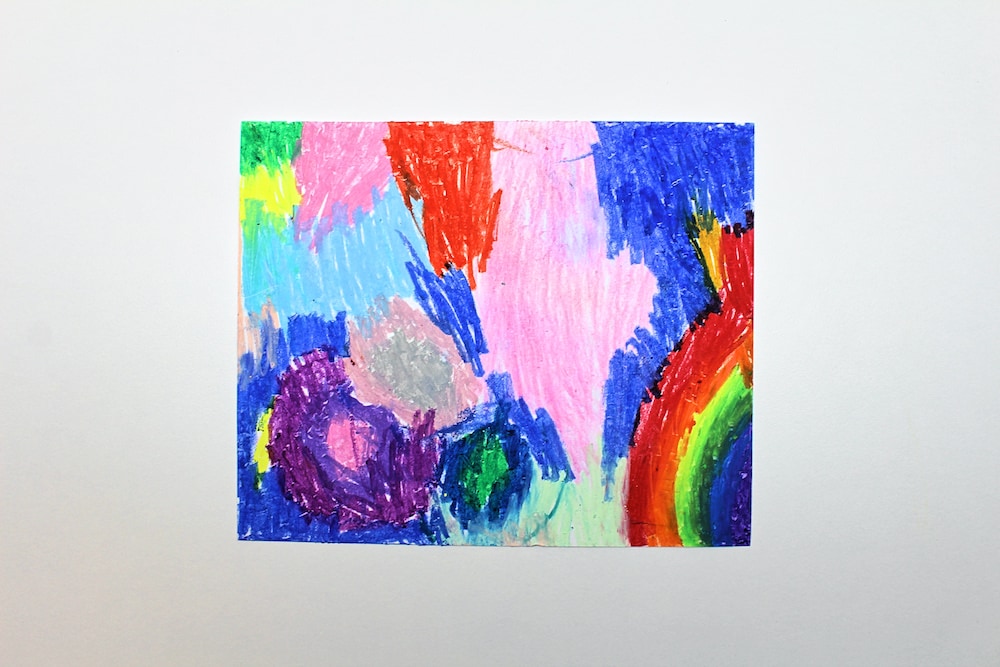
Next, you’ll want to cover the entire sheet of cardstock in color using oil pastels. (As mentioned above, you can also use wax crayons, but pastels are much smoother and will make this process a lot easier.)
You can draw whatever you like as long as the entire surface of the cardstock ends up covered in pastel. I drew a rainbow in the corner and went from there, but you can simply fill in your cardstock with shapes and stripes if you’re not feeling particularly inspired.
Children can easily do this step. In fact, my four-year-old was quite excited about this project and barely asked for my help! She was so proud of herself that she asked me to photograph hers as well:
Whatever you choose to draw, though, I’d encourage you to use a variety of different colors. This will yield much nicer results since the colors you use will shine through when you scratch off the black paint!
3. Paint Cardstock
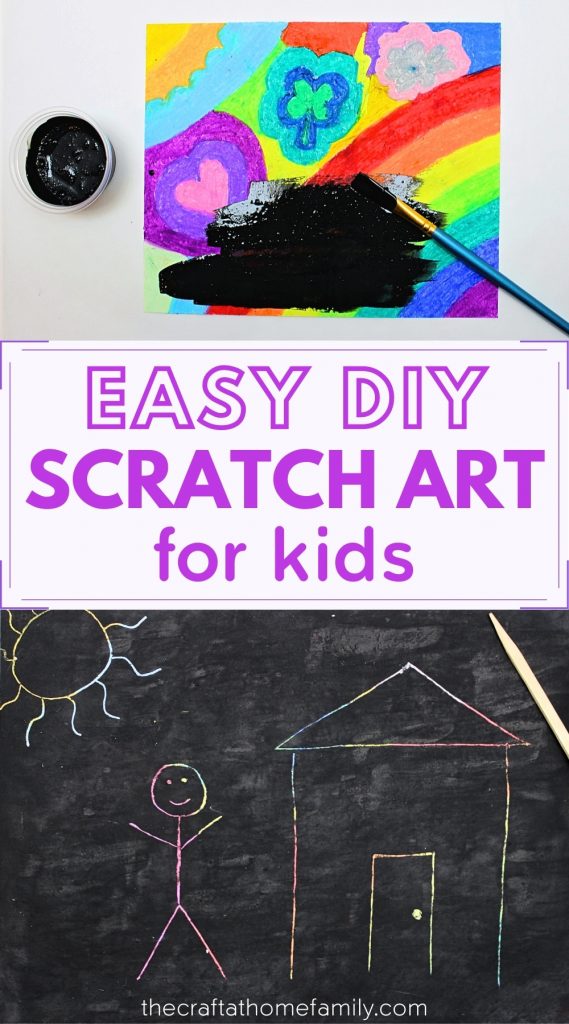
Once the entire sheet of cardstock has been covered in oil pastel, it’s time to paint over it! Mix equal parts dish soap and acrylic paint in a small container, then use the mixture to paint the entire sheet black.
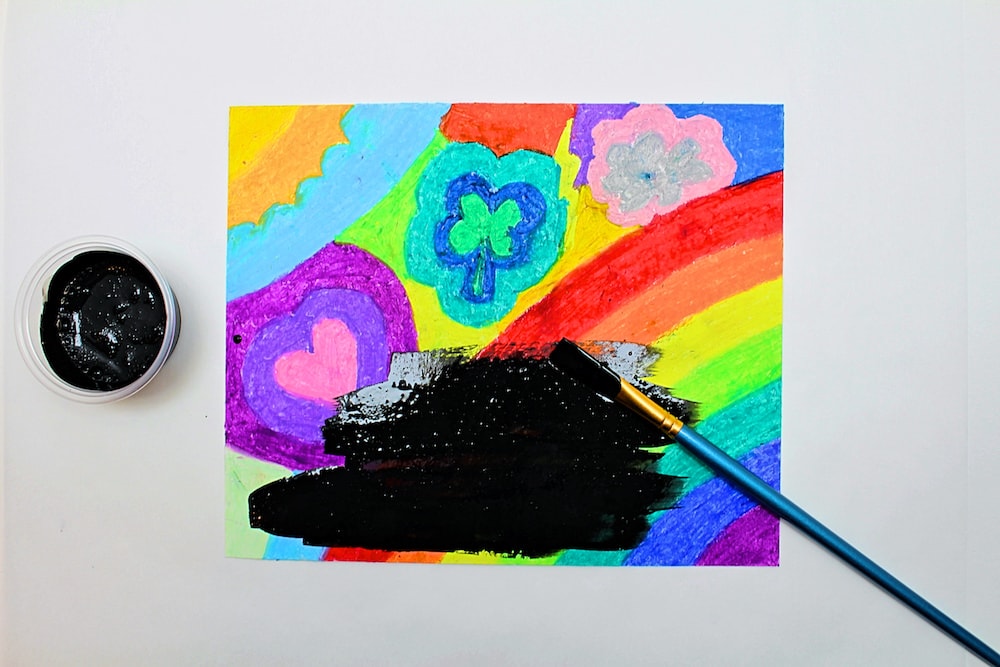
One layer of paint probably won’t provide sufficient coverage, so feel free to use several layers of paint like I did. Adding several layers won’t be an issue, and in fact, properly covering up the colors will lead to nicer results once you’re ready to scratch off the paint.
Once again, my four-year-old was thrilled to do this step on her own, so feel free to let your child do so as well! Our kids are still young, so I’m always happy when I can find a craft that they’re able to do entirely on their own.
Tip: I gave my four-year-old a sponge brush rather than a regular paintbrush and to make things easier for her.
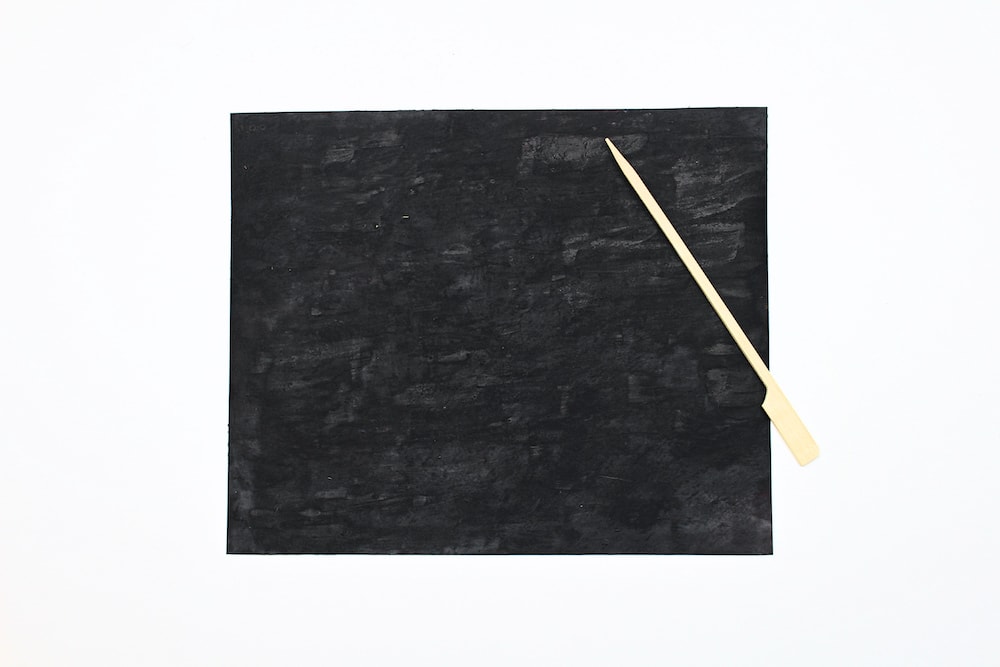
4. Let Dry
Let your scratch art sheet rest undisturbed until the paint is fully dry. Depending on how many layers of paint you used, this could take a few hours.
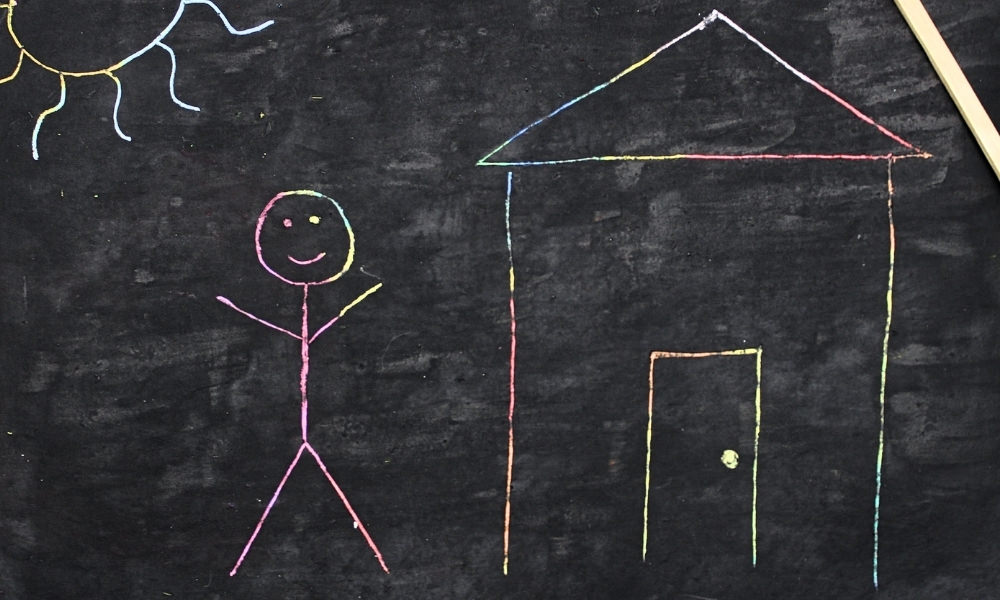
5. Create Scratch Art!
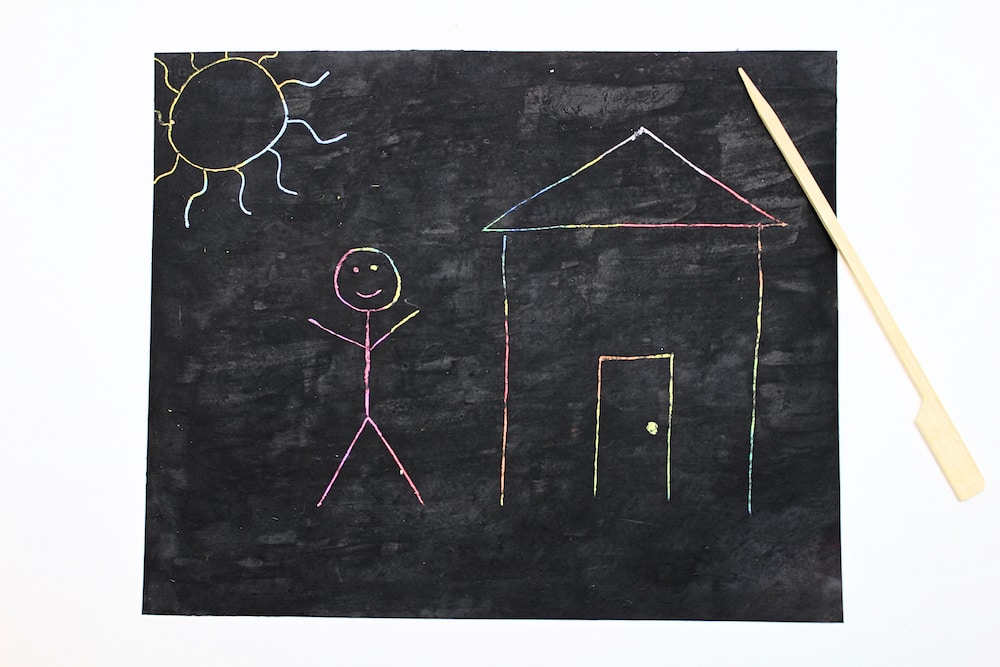
Once the paint has dried completely, you’re ready to create some homemade scratch art!
Use a toothpick or something similar to draw anything you like by scratching off the paint. We used small wooden skewers from the dollar store—I liked that they were easier to hold than toothpicks and had only one sharp tip rather than two.
And that’s it! So easy to make, and way cheaper than buying a pre-made kit at the store!
Plus, this project was a definite hit with my four-year-old, who asked to make it again less than 48 hours later. I hope your kids enjoy it just as much!
Related Scratch-Off Projects
Looking for more fun projects you can do using DIY scratch-offs? Check out these articles:
- Scratch-Off Ladybug Card (with Free Template!) — Perfect for Mother’s Day and other occasions!
- Scratch-Off Car Card (with Free Template!) — Perfect for Father’s Day or birthdays!
One time I and my brother made a space ship with paper,markers,crayons.
Fun!