
Have your old plastic baubles seen better days? Make them new again by transforming them into DIY twine-wrapped ornaments! These beautiful rustic ornaments would look gorgeous hanging on any Christmas tree—and all that’s required to make them is a few simple supplies and a little bit of your time!
JUMP TO…
Every December, I set some time aside to make some DIY Christmas ornaments with the kids. It’s something we love doing, and our tree has been looking more and more unique with every passing year!
Our goal is to eventually have a tree decorated with nothing but homemade ornaments. But we do still have a huge box of cheap plastic ornaments that we bought many years ago, and a lot of them are starting to look a little worse for wear.
If you also have old plastic ornaments that are starting to lose their lustre, this project is a great way to revive them! And all you really need to make it is Mod Podge and twine—though I do like to add a bit of glitter for extra sparkle!

Get hundreds of pages of activities!
Get access to all our paid printables, as well as monthly activity planners, for just $5/month. (New printables added twice per month!)
Required Materials
Here’s what you’ll need to turn your old plastic decorations into pretty rustic ornaments:

- Round plastic ornament (I think ours were from Walmart)
- Mod Podge
- Paintbrush
- Twine
- Scissors
- Fine copper glitter (optional)
- Copper paint (optional)
How to Turn Old Plastic Baubles into Rustic Twine-Wrapped Ornaments (Step-by-Step)
1. Remove Ornament Top
If possible, pull off the top of your ornament before you begin. This will make the finished product look cleaner and more polished.

2. Add Mod Podge
Use a paintbrush to spread Mod Podge around the top of your ornament.

3. Wrap Twine
Place some twine at the very top of your ornament, where you’ve spread the Mod Podge, and carefully start wrapping it around. You’ll need to hold the twine in place initially, but you should be able to stop pretty quickly as the Mod Podge and extra layers of twine begin to do it for you.

4. Repeat Previous Steps
Continue adding Mod Podge and wrapping twine until the ornament is completely covered. Be generous with the Mod Podge—you’ll need to add it both underneath the twine and on top of it in order to keep it in place.

As you get closer to the bottom of the ornament, it will probably become more difficult to wrap and the color of the ornament may begin to shine through in certain locations. Just take things slowly and readjust often, trying not to leave any large gaps.
5. Finish Wrapping
Once you get to the very bottom of the ornament, use scissors to cut the twine. Then, add a little more Mod Podge before twisting and pressing the twine into place.

6. Add Glitter (Optional)
You don’t have to do this, but I like to add a little bit of fine glitter to my twine ornaments to make them sparkle. For this kind of ornament, I tend to stick with brown or copper glitter because it goes perfectly with the color of the twine!
If you choose to add glitter, simply sprinkle it unevenly onto your ornament, adding Mod Podge if needed to help it stick. (You probably won’t need to add any as it shouldn’t be dry yet.)

7. Paint Top (Optional)
This step is also optional, but I like to paint the top part of the ornament using metallic paint in order to hide its original color. The color won’t show much once you place the top back on, so it’s really up to you to decide whether you want to bother with this.
I went with a coppery color that blended in nicely with the twine!

8. Place Top on Ornament
Carefully replace the top of your ornament and push it down into the Mod Podge-soaked twine to help it stay in place.

9. Let Dry
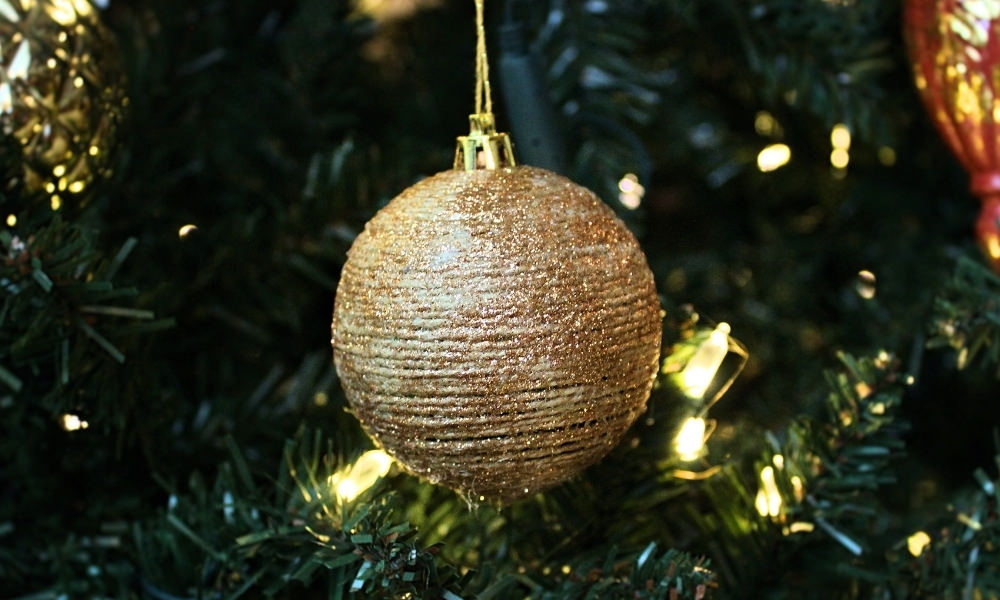
Let your ornament hang somewhere undisturbed in order to the allow the Mod Podge to dry completely. Once everything is dry, the ornament will be ready to hang on your Christmas tree!

Isn’t that so much prettier?! I’ll definitely be using this method to upgrade a lot of our old plastic ornaments!
Related Homemade Christmas Decorations
Looking for more fun ways to decorate your Christmas tree yourself? Check out these articles:
- DIY Ribbed Glitter Ornaments
- Easy Feather Ornaments (2 Ways!)
- DIY Santa’s Clothesline (with Free Printable!)
- Homemade Alcohol Ink Ornaments
Only your name will be made public. Please note that by submitting your comment, you are agreeing to the terms of our Privacy Policy.