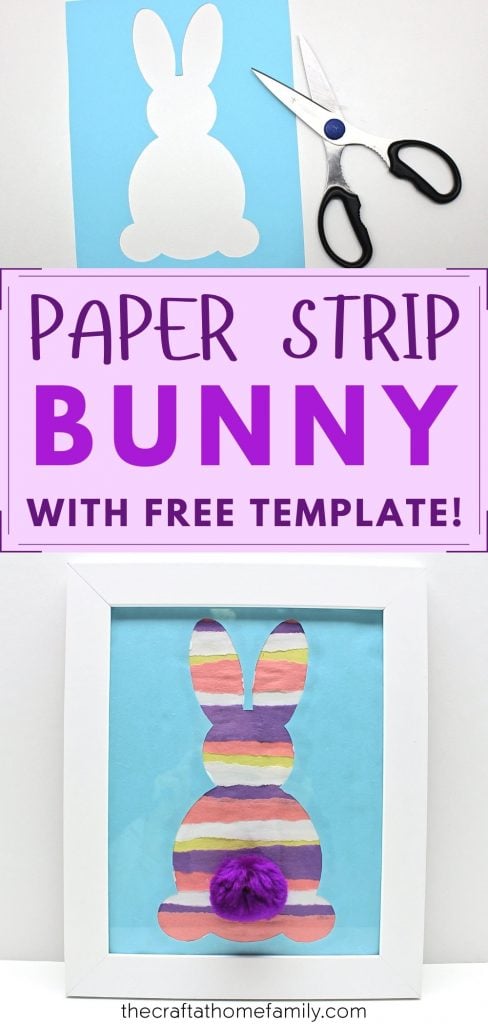
Turn strips of torn construction paper into fun Easter-themed artwork using our free Easter bunny template! This adorable bunny craft is so fun to make, and it’s simple enough for toddlers and preschoolers to help with!
JUMP TO…
If you’ve been following my blog for a while, you may have noticed that we’ve been doing a lot of torn paper strip artwork lately. That’s probably because we have four kids under five, so when we find something that they enjoy and can participate in… we tend to stick with it.
They loved the Torn Paper Strip Heart we made for Valentine’s Day and the Torn Paper Strip Clover we made for Saint Patrick’s Day. So now that Easter is right around the corner, it made sense for us to create some Easter-themed artwork as well!
We were originally going to make some torn paper strip Easter eggs—and you can too, if you replace the bunny outline with a large oval. But creating an Easter bunny allowed us to add some fun details like a fuzzy pom-pom tail, so we decided to go with that instead!
To make things easier, I even created an Easter bunny template that you can download and print at home. So request the template at the bottom of this article (you can use it for other crafts as well) and let’s get crafting!

Get hundreds of pages of activities!
Get access to all our paid printables, as well as monthly activity planners, for just $5/month. (New printables added twice per month!)
Required Materials
Here’s what you’ll need to make your very own paper strip Easter bunny at home:
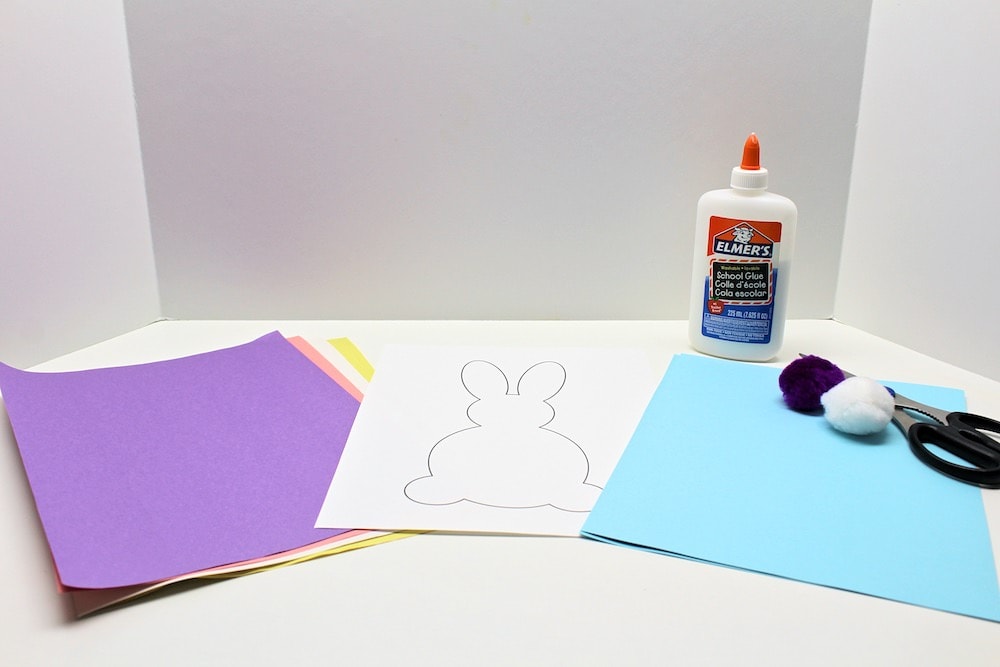
- My free Easter bunny template, which you can download using the form at the bottom of this article
- 2 sheets of pastel cardstock (we used blue, but purple would have been nice too!)
- Construction paper in Easter colors
- White school glue (in liquid or stick form)
- Pencil
- Scissors
- Frame (ours was from the dollar store)
- Large pom-pom (optional)
How to Make a Torn Paper Strip Easter Bunny (Step-by-Step)
1. Cut Cardstock (Optional)
Depending on the size of your frame, you may need to cut the cardstock down to size.
My dollar-store frame measured 8”x10”, which is a little smaller than Letter-sized cardstock, so I used scissors to cut off some of the cardstock. The cuts don’t need to be super clean since they’ll be hidden underneath the frame—just make sure to get the right fit!
2. Tear Construction Paper
Use your hands to tear up the construction paper. If you have a toddler, this is a great way to get them to participate while also channeling their destructive energies!

Tip: For whatever reason, the construction paper we used didn’t tear well at all when we tried to make horizontal tears—just vertical ones. If you’re having trouble tearing yours up, experiment with different angles to see what works!
3. Glue Construction Paper to Cardstock
This step is also perfect for toddlers and preschoolers (with adequate supervision)!
Simply use school glue to glue strips of construction paper onto one of your sheets of cardstock. Continue until it is mostly covered, alternating between the different colors of construction paper.

We decided to use Easter colors like pink, purple, yellow and white. Feel free to use whichever colors you like best!
4. Print & Cut Template
Download the template using the form at the bottom of this article and cut along the lines using scissors. Then, position it on top of your remaining sheet of cardstock and use a pencil to trace the design.
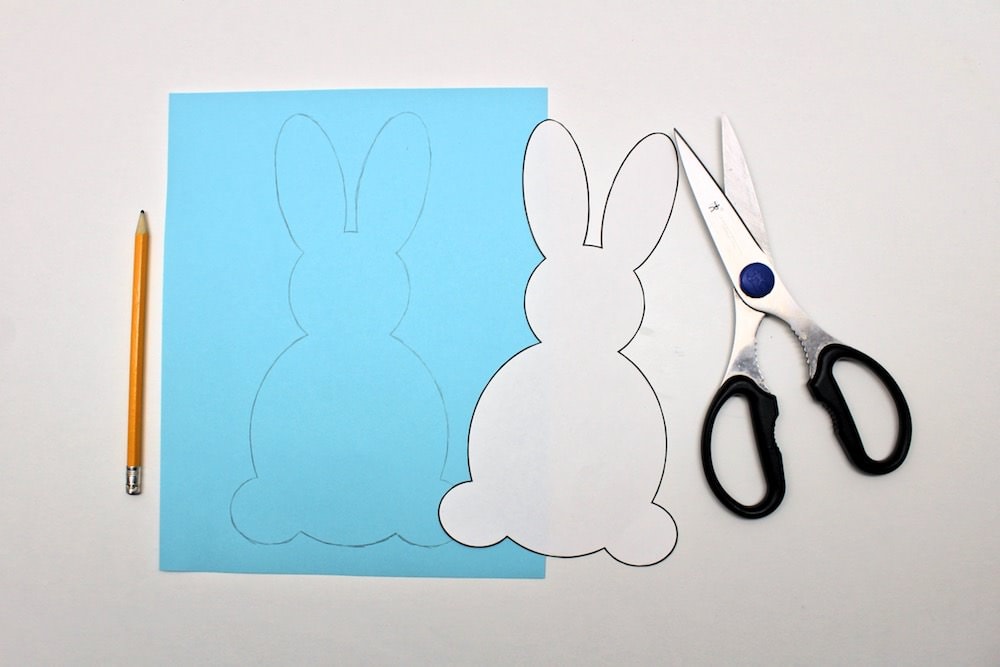
Finally, use the lines you traced to cut a bunny-shaped hole inside the sheet of cardstock!
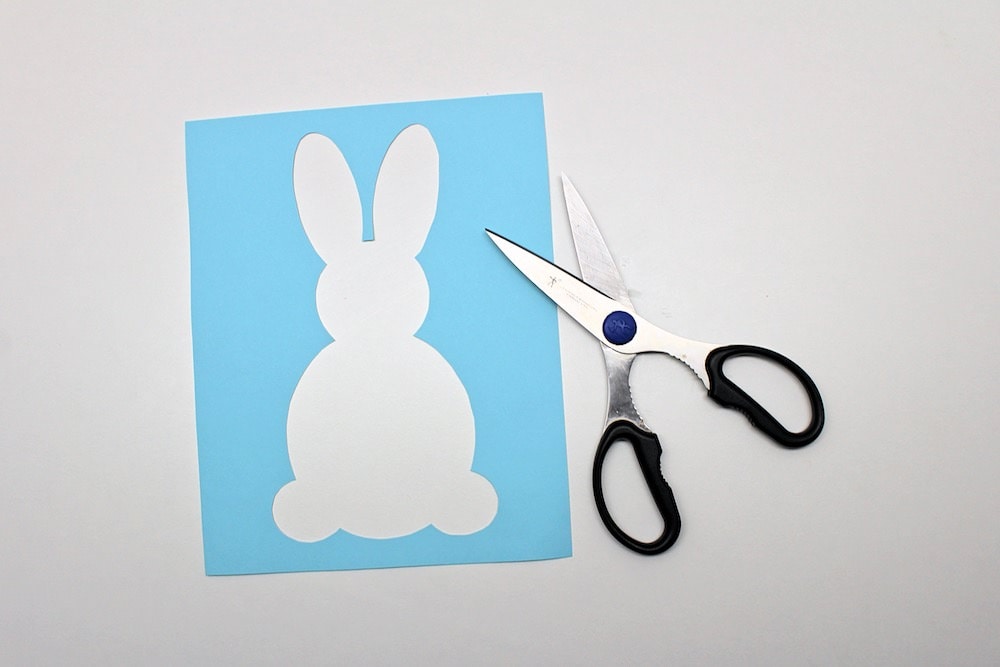
To do so, I simply poked a hole in the middle of it with scissors and used that as a starting point to cut out the bunny outline.
You may find it easier to remove one section at a time and if you do, that’s perfectly fine—you’ll only be needing the outline, so it doesn’t matter if the bunny itself gets cut into multiple pieces.
5. Glue Bunny Outline
Once you’re done cutting, discard the bunny and spread school glue around the outer edges of both the bunny shape and the cardstock itself. (Note: I used liquid glue, but a glue stick would work just as well and wouldn’t soak through as much.)
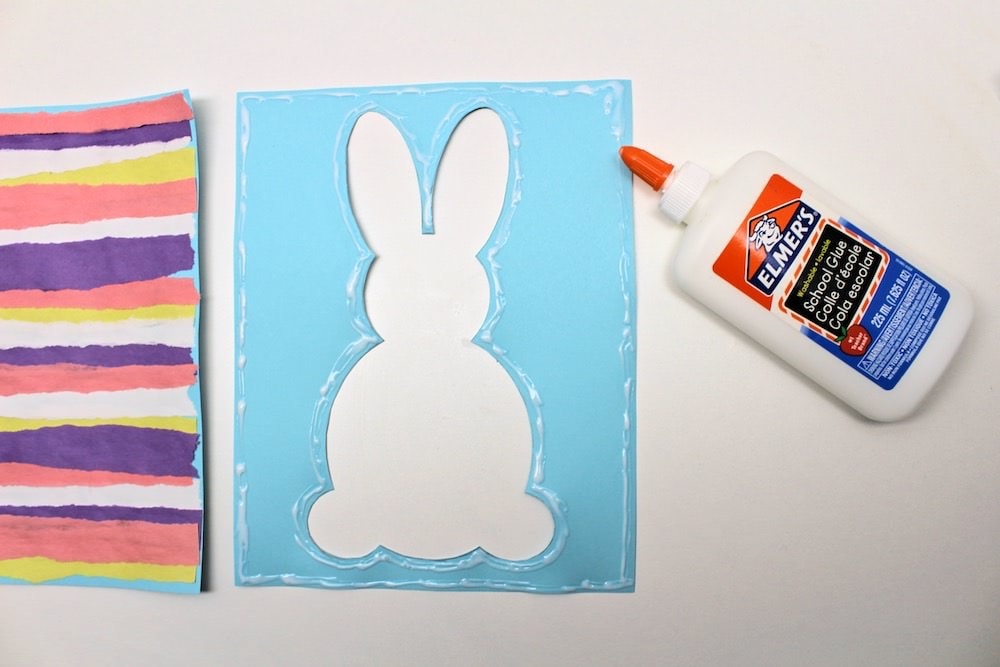
Then, place that sheet of cardstock on top of the other one and gently press down to help it stick. The torn construction paper strips should be visible inside the bunny-shaped hole.
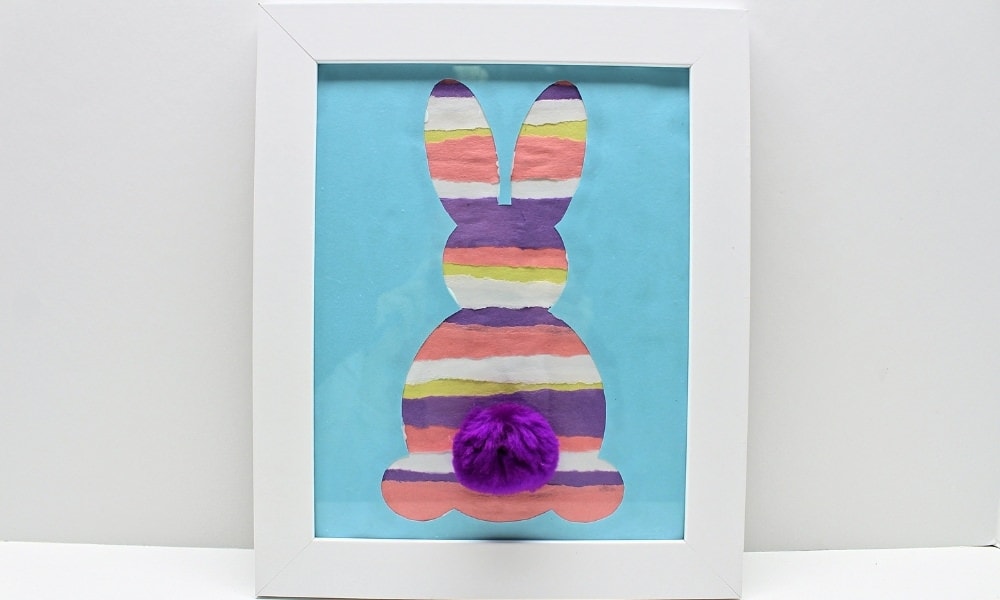
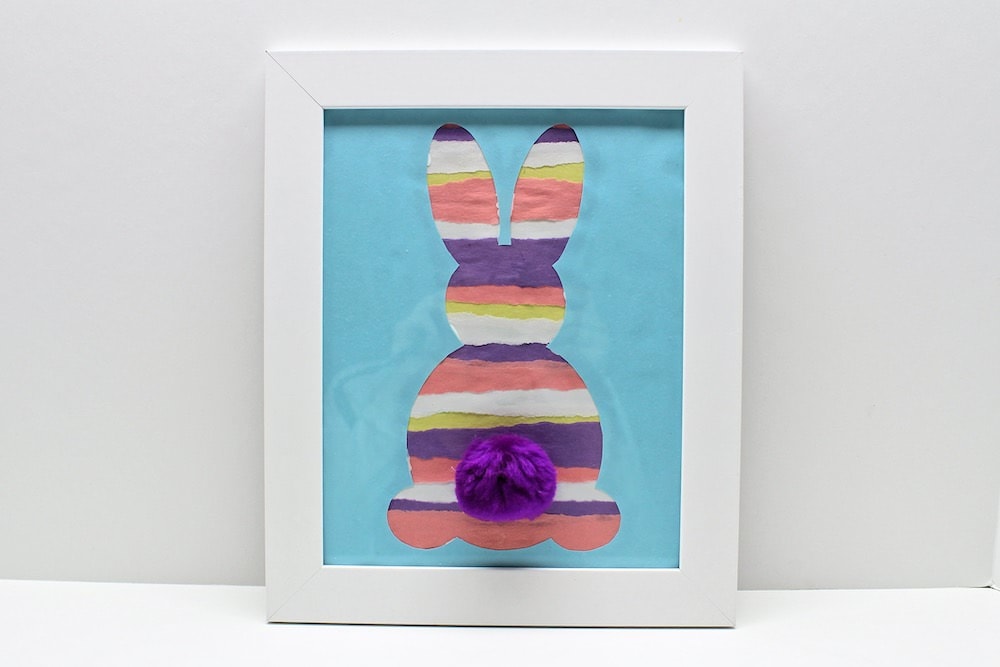
6. Frame Artwork
Give the glue a little time to dry, then place your artwork inside a frame to display it! (If needed, shave off a tiny bit of the cardstock with scissors to make it fit inside the frame.)
7. Add Pom-Pom Tail (Optional)
This last step is optional, but really cute and easy to do. Simply position a large pom-pom on top of the glass from your frame and use liquid school glue to glue it in place. The pom-pom will act as a puffy little tail for your Easter bunny!
You may prefer to skip this step if you’re planning on reusing the frame for other crafts. But even if that’s the case, you should be able peel off the glue pretty easily when the time comes—provided you used regular school glue and not something stronger.
And that’s it! We’ll definitely be thinking of more crafts to make using our Easter bunny template!
Related Easter Crafts
Looking for more fun Easter crafts to make with your kids? Check out these articles—all of which include a free Easter egg template for you to use!
- Cardboard Easter Egg Puzzles
- Easter Peeps Painting
- Easter Egg Symmetry Painting
- Cardstock Easter Eggs
- Glue and Chalk Pastel Easter Eggs
- Glittery Easter Eggs
- Raised Salt Watercolor Easter Eggs
Could I please have a bunny template? Thank you.
Lorraine Fenn
If you enter your email address in the form at the bottom of the article, it will be sent straight to your inbox!
Cute idea!
Thank you, so glad you enjoyed it!
Thanks for the template
You’re welcome, I’m so glad you found it useful!