Does your toddler constantly put everything in his or her mouth? Use one of these easy taste-safe mud recipes to set up a sensory bin filled with dinosaurs, farm animals or fake worms for them to play with. Each one of these edible mud recipes calls for just 2 to 3 ingredients and can be prepared in under 5 minutes—making them perfect for busy mornings or rainy days!
JUMP TO…
If you have a child at home who likes to put everything in their mouth, you know how tricky it can be to find sensory activities that are both fun and safe for them to play with.
Dried beans? Too hard. Magnetic chips? Too dangerous. Pom-poms? Choking hazard. Slime? Harmful if ingested.
Water is safe, but it can get a little repetitive over time. Thank goodness for all the taste-safe and edible sensory bin recipes that enable us to create some variety!
The Chia Seed Sensory Bin I made recently was a big hit, but you do have to let the chia seeds absorb the water. Since busy parents often don’t have the time to plan out all their activities in advance, having some recipes on hand that require no advance planning and very little prep work is a must.
And because our kids love this “Wash the Muddy Farm Animals” Sensory Bin so much, I started wondering what else we could do with fake mud.
As it turns out, not only are there lots of fun sensory things you can do with fake mud, but there are also lots of ways to make the mud itself. So if your baby or toddler loves playing with insects, dinosaurs and farm animals check out these easy DIY edible mud recipes that will allow you to make fake mud for sensory play in under 5 minutes!
(P.S. Are you looking for something a little less messy for an older child who no longer mouths everything? Check out this easy “clean” mud recipe for kids!)
Grab our 12 best sensory recipes!

By submitting your email address, you are agreeing to the terms of our Privacy Policy. You can unsubscribe at any time.
How to Make Taste-Safe Mud with Cake Mix
Required Ingredients
Here’s what you’ll need to make a batch of edible cake mix mud for your child:
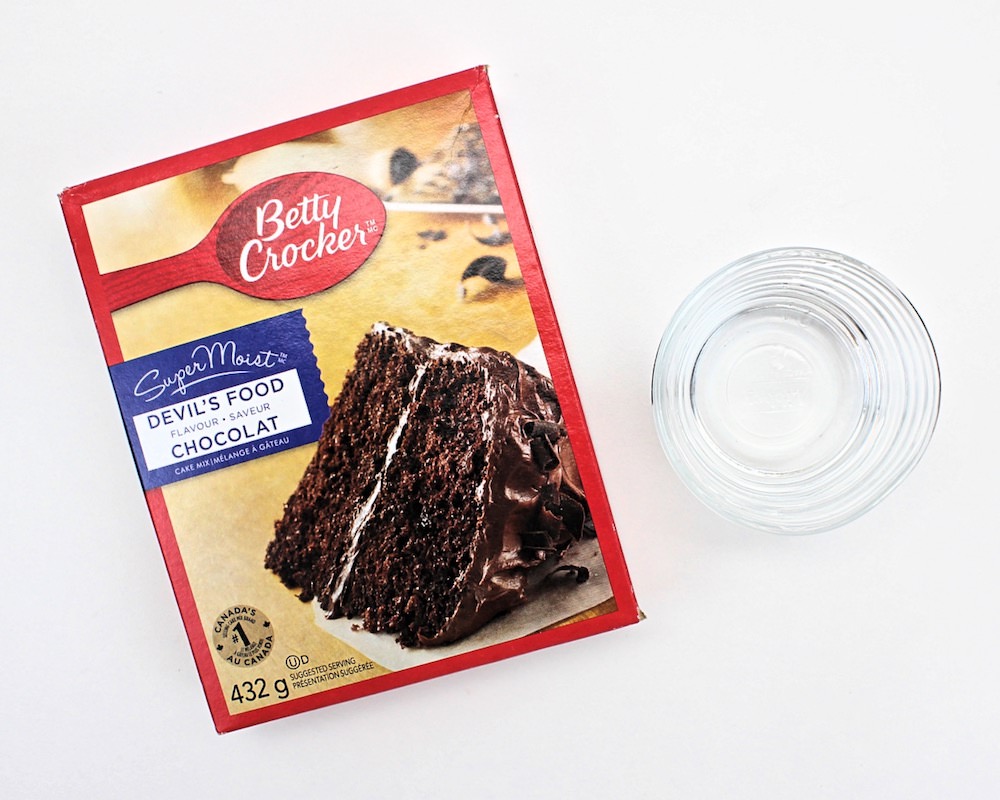
- Dry chocolate cake mix
- Water
Step-by-Step Instructions
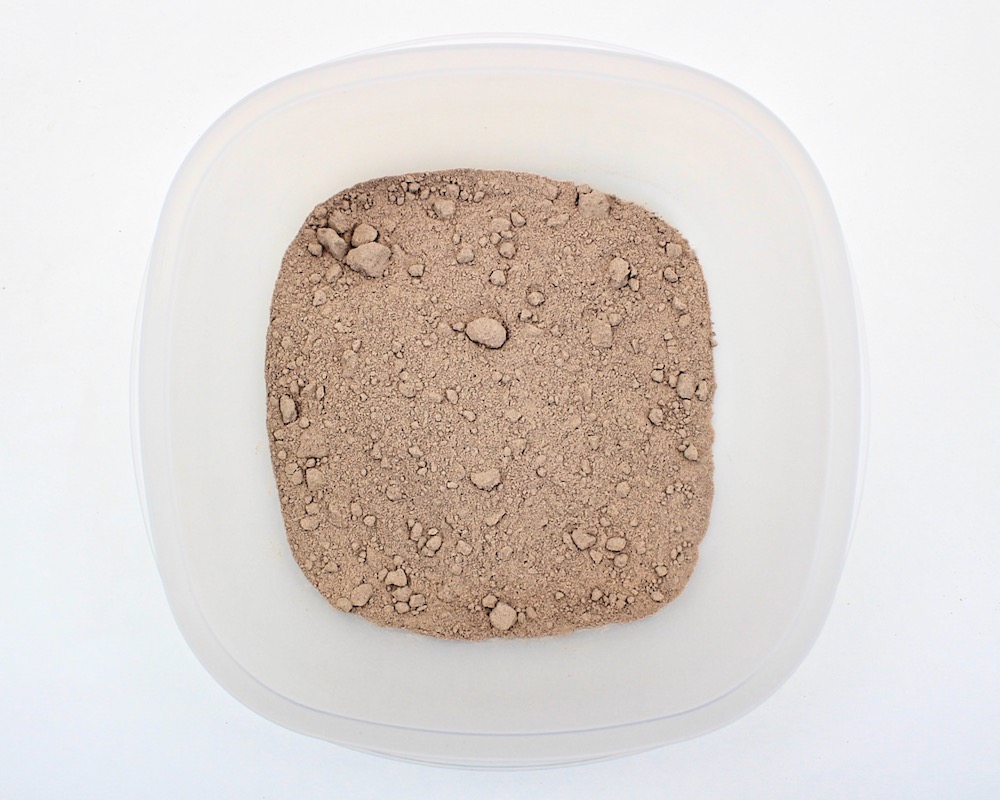
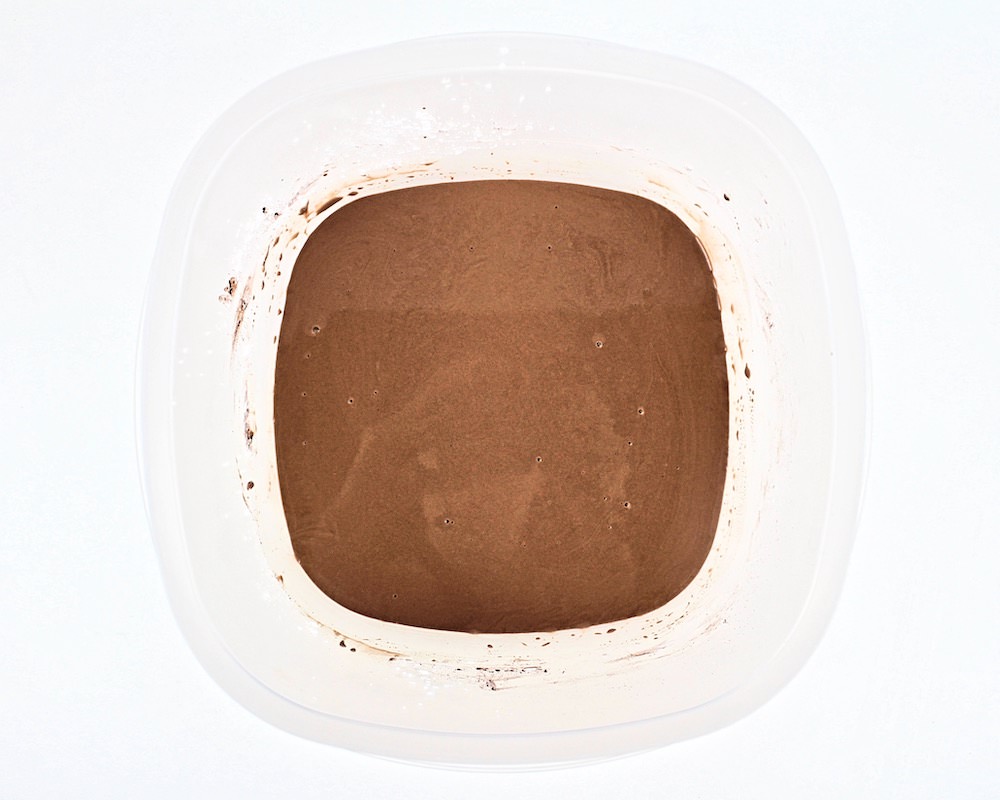
1. Pour Cake Mix into Bin
Start by pouring some dry chocolate cake mix into a container or bin. The amount you’ll need will depend on the size of the container you’re using and on what you’re planning on doing with the mud.
2. Add Water
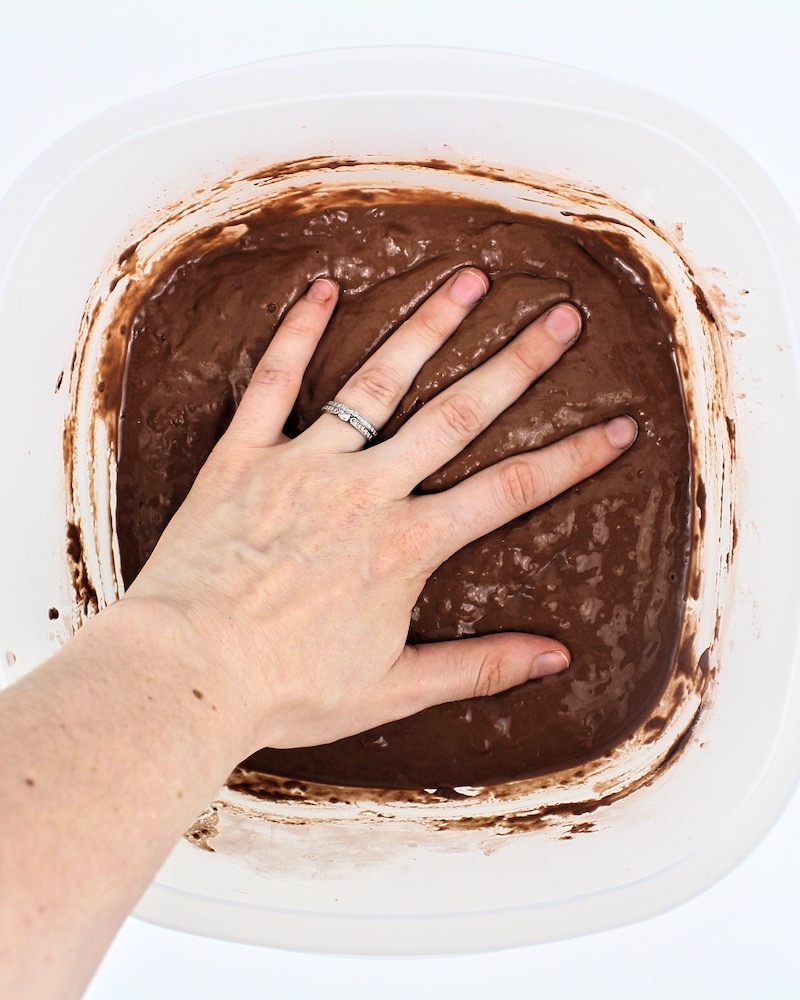
Add a bit of water and stir with a spoon until well combined.
The amount of water you’ll need depends entirely on your personal preference and on what you’re planning on doing with the mud. Adding less water will make the mud thicker (better for mud pies) while adding more water will make it thinner and more runny.
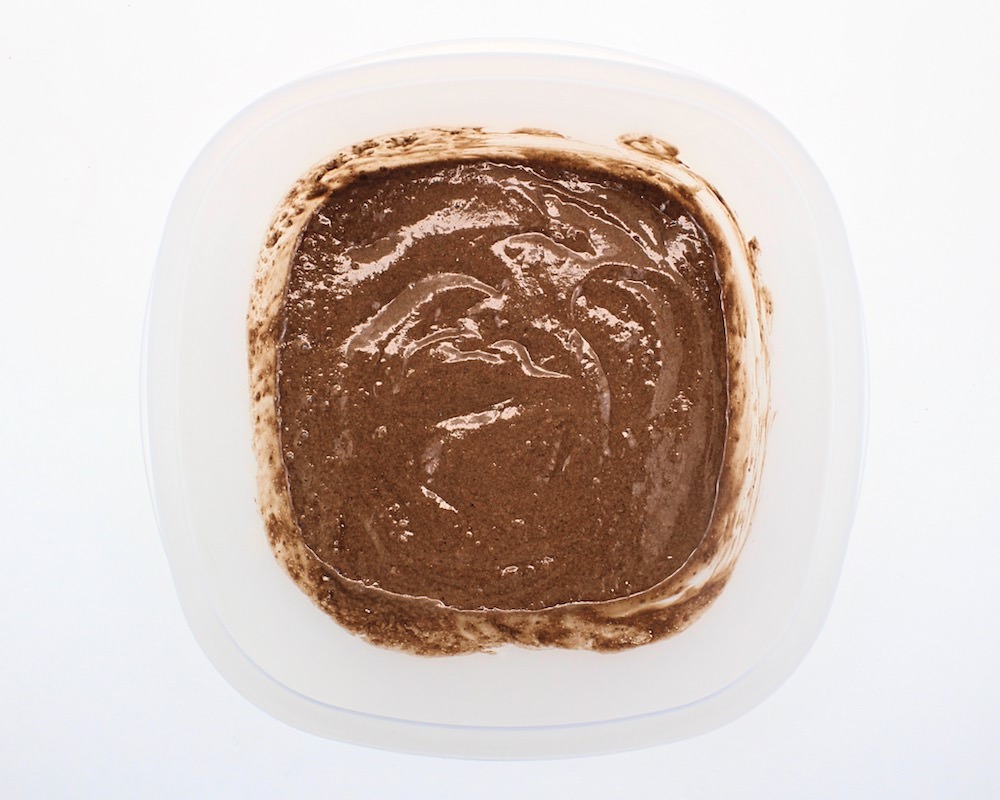
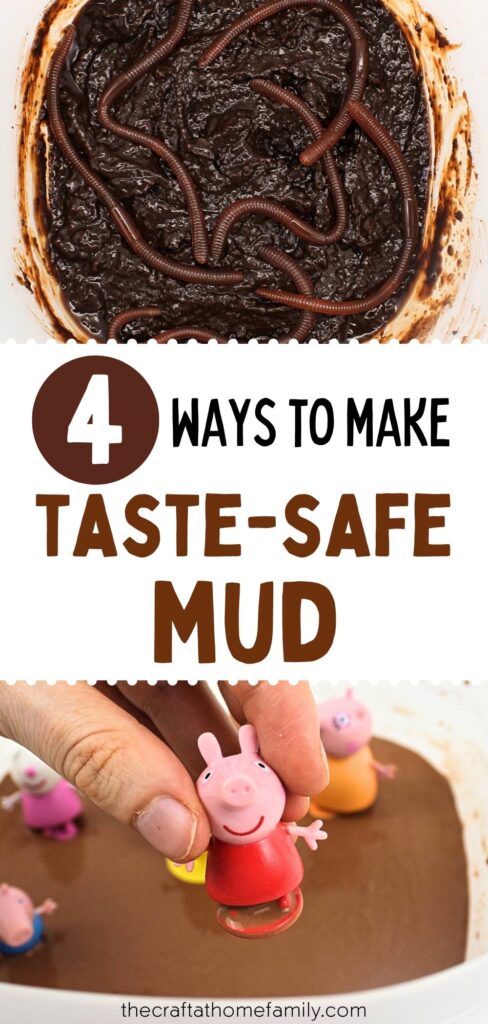
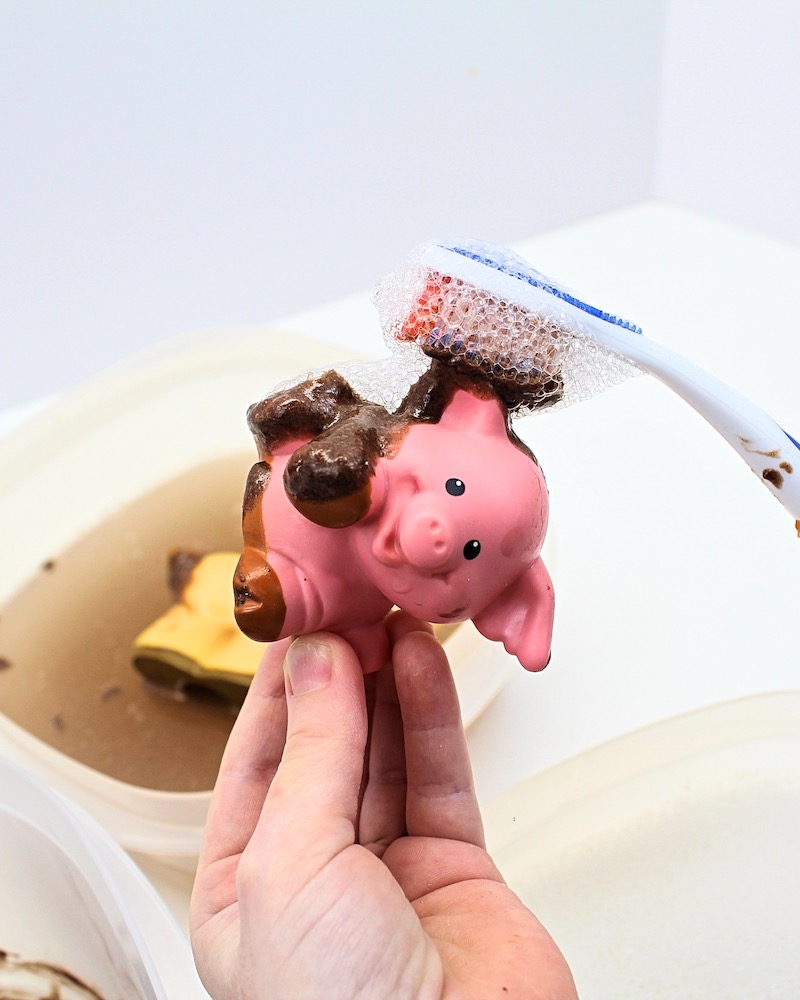
Once you’ve added enough water to achieve the perfect consistency, let your child play with their fake mud sensory bin! We like to add small plastic toys like dinosaurs, farm animals or pigs and wash them with toothbrushes and soapy water.
Pros & Cons of This Method
There are several ways to make taste-safe mud, but this is probably the easiest. It’s also my go-to edible mud recipe for when I prepare my kids’ all-time favorite activity.
I like using this method because it’s quick, it doesn’t require any measurements and it is cost-effective—cake mix can be bought at the dollar store, and one box should be enough for several sensory bins.
It also has a nice, thick texture that makes it good for sensory bins that involve washing the mud off toys using toothbrushes and soapy water.
That being said, one thing to keep in mind about this type of taste-safe mud is that if your child tries to eat it, it will taste like chocolate, which could encourage them to keep eating it.
So if this is an issue for you, you may want to try the flour and cocoa powder recipe I shared below. It has a similar texture, but none of the yummy chocolate flavor!
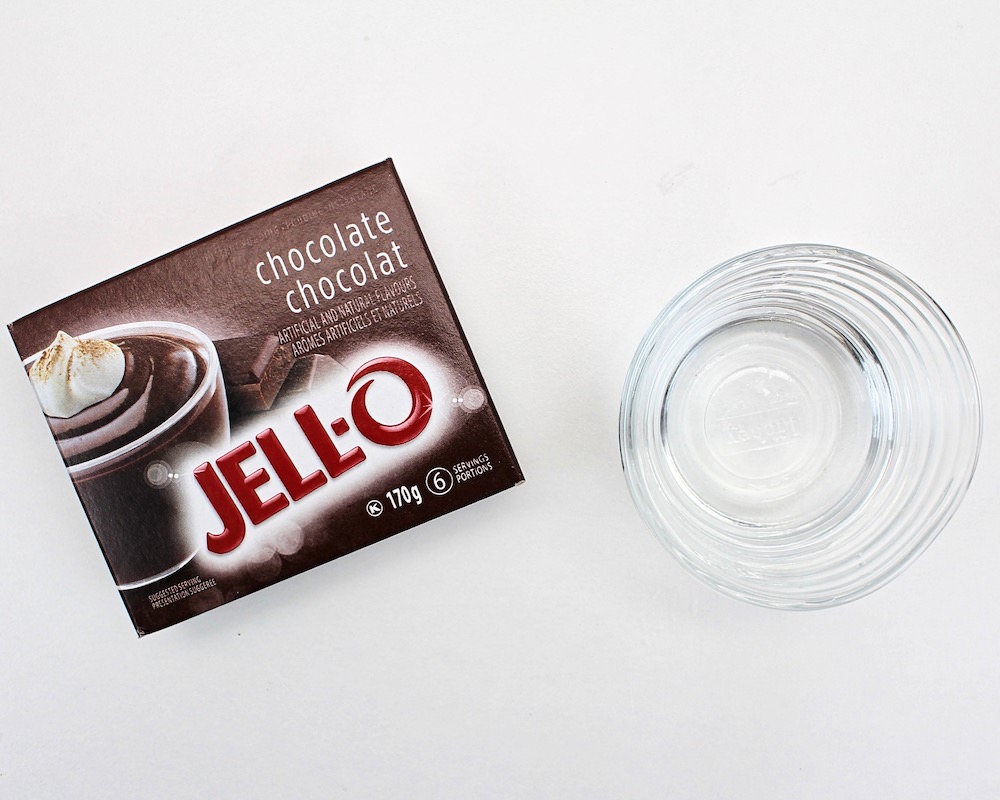
How to Make Taste-Safe Mud with Pudding
Required Ingredients
Here’s what you’ll need to make a batch of edible pudding mud for your child:
Note: If you’re really pressed for time, skip all the steps below and just scoop some ready-to-eat chocolate pudding into your sensory bin for an instant edible sensory activity!
Step-by-Step Instructions
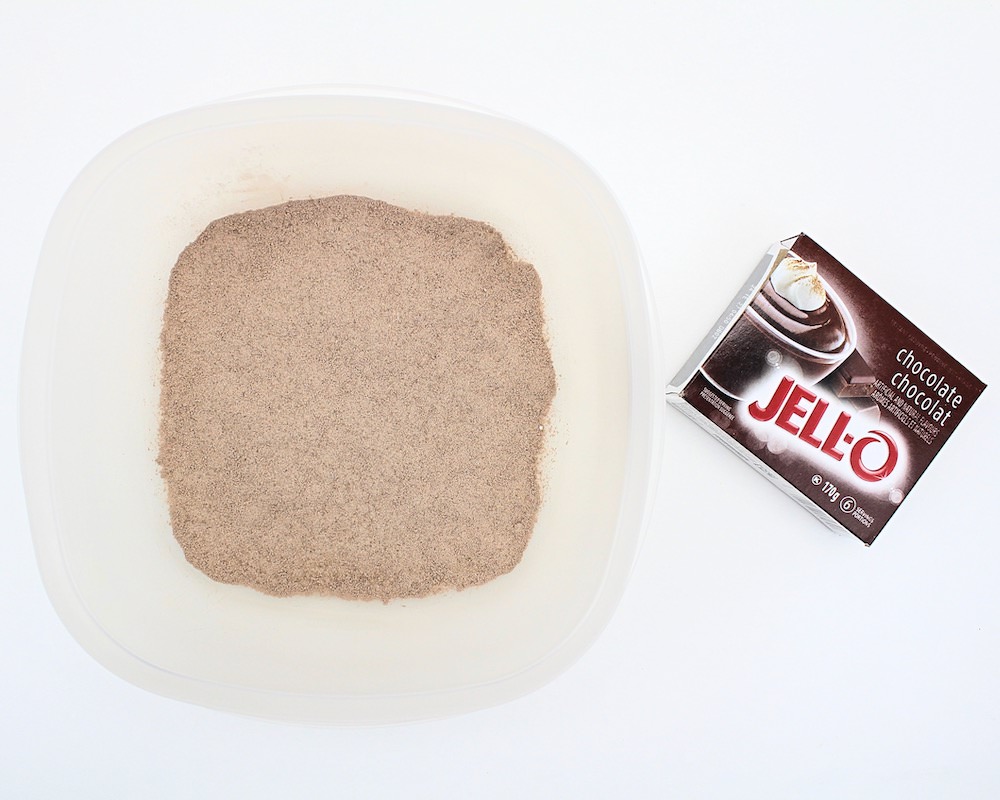
1. Pour Pudding Mix into Bin
Start by pouring some dry chocolate pudding mix into a container or bin. The amount you’ll need will depend on the size of the container you’re using and on what you’re planning on doing with the mud.
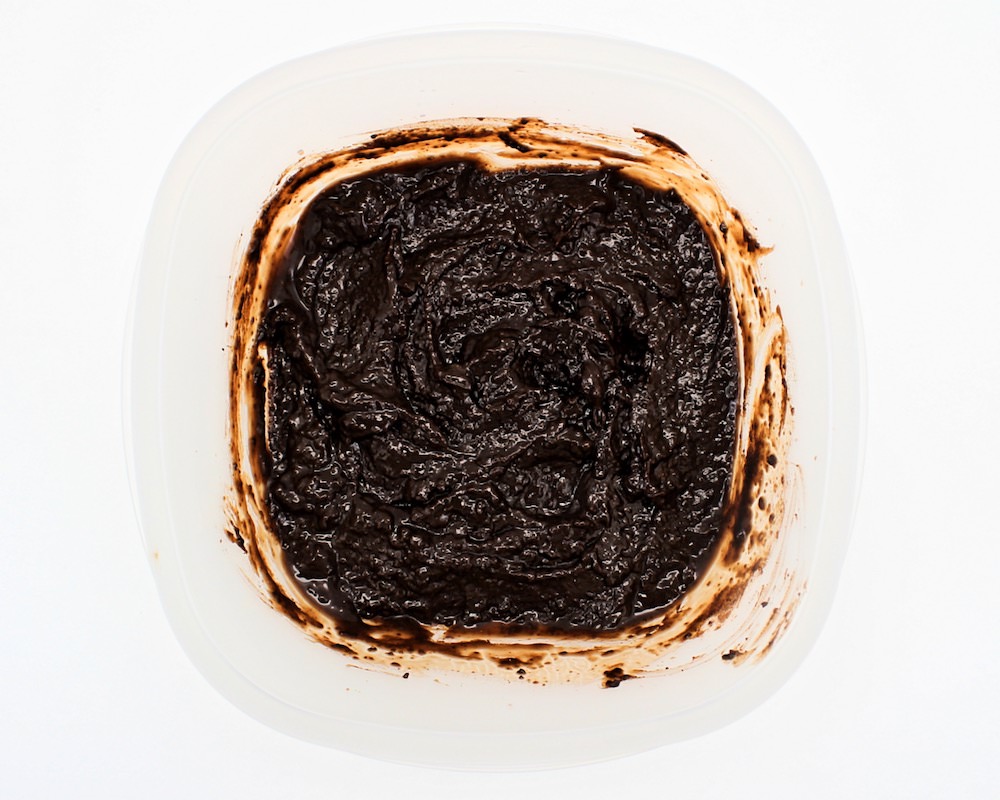
2. Add Water
Add a bit of water and stir with a spoon until well combined.
Once again, the amount of water you’ll need depends entirely on your personal preference and on what you’re planning on doing with the mud. That being said, I have found that pudding mix tends to require more water than cake mix does in order to develop a “muddy” consistency.
Once you’ve added enough water to achieve the perfect consistency, let your child play with the pretend mud.
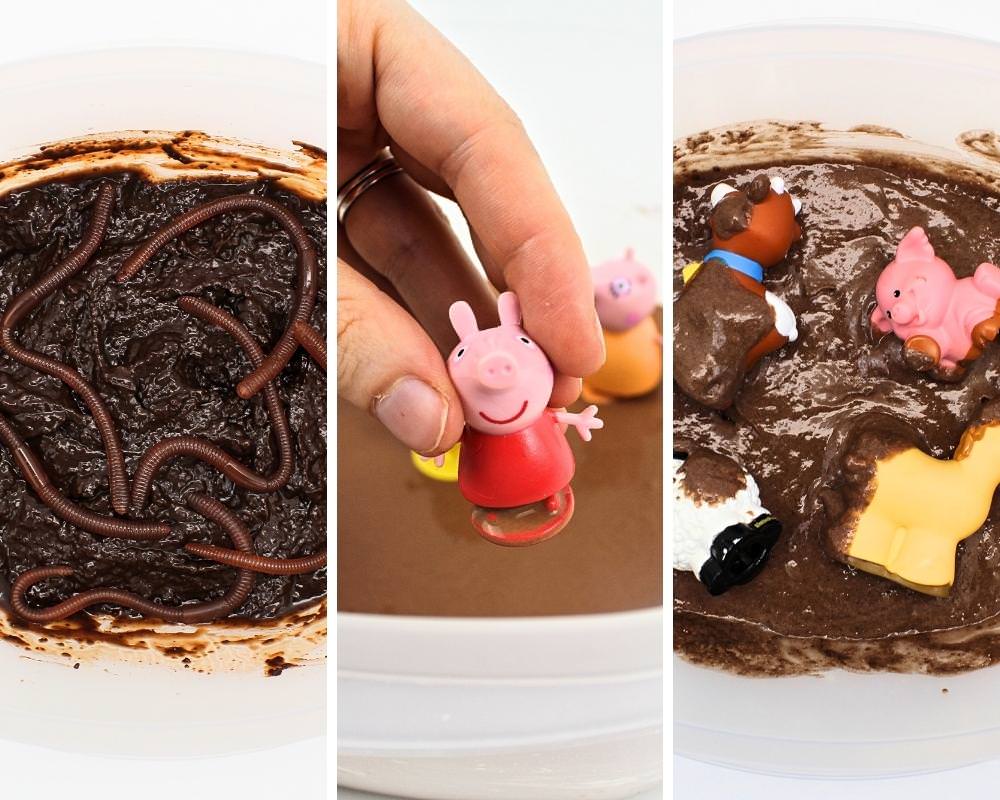
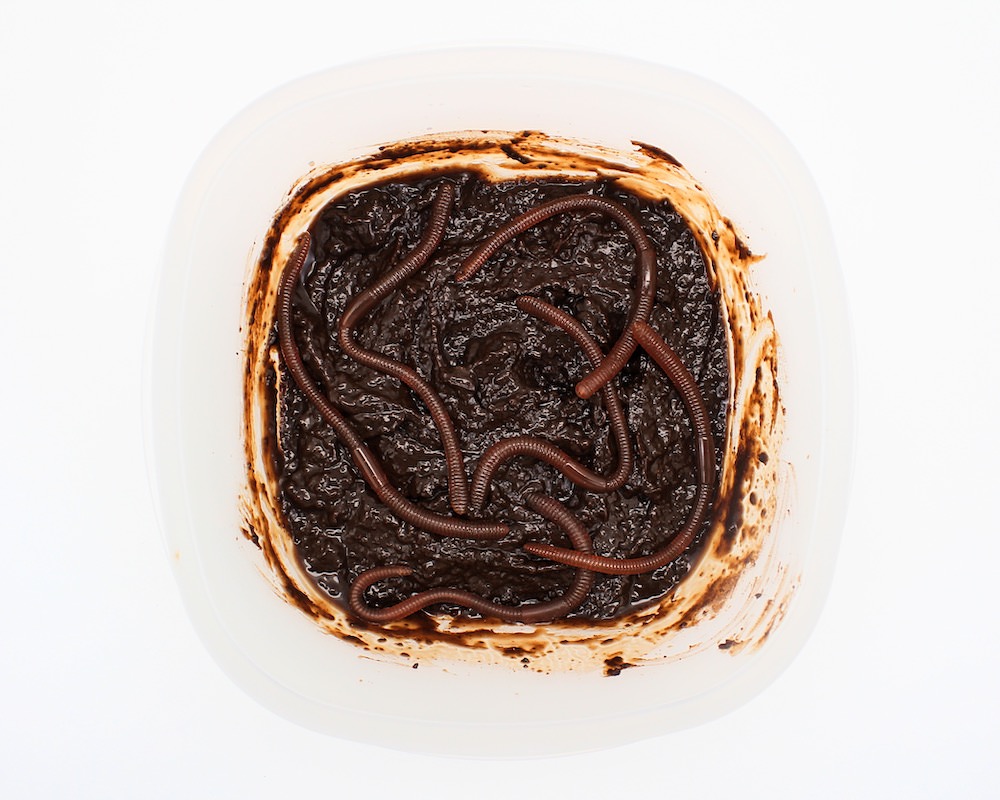
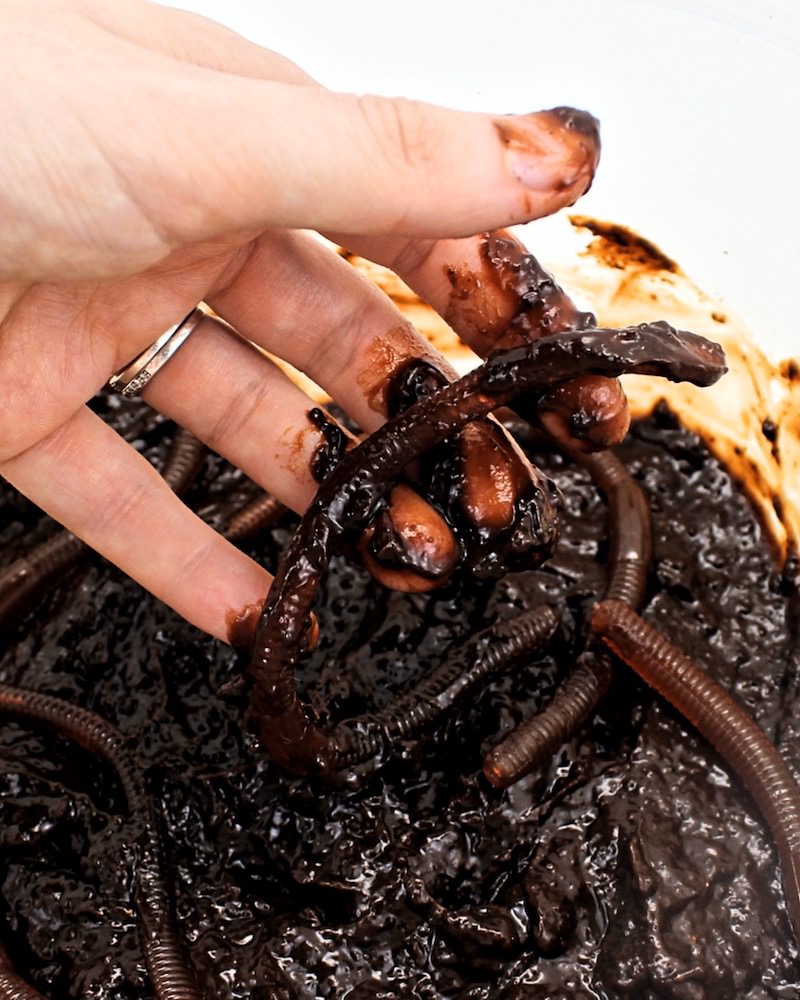
Pudding mud has a silkier, slightly more gelatinous texture than cake mix mud, so I decided to spice things up by adding some rubber worms. The kids had a blast with them!
Pros & Cons of This Method
Like the previous recipe, this taste-safe pudding mud is super simple to make and doesn’t require any measurements. And once again, you should be able to buy the supplies you need at the dollar store.
You probably won’t get quite as much mud from a box of pudding mix than you will from a box of cake mix, which is why I tend to favor the latter. That being said, the difference in cost shouldn’t be too significant.
Pudding mud feels silkier and looks darker in color than the other fake mud recipes shown in this article. This makes it particularly well suited for sensory bins that are supposed to mimic dirt—which is why I felt that fake worms would be the perfect addition to this activity!
Like the previous recipe, this DIY mud tastes like chocolate, which could encourage your child to keep eating it depending on their age and personality.
If that is an issue for you, stick with the two recipes below—both are taste-safe, but neither of them tastes good.
How to Make Taste-Safe Mud with Flour
Required Ingredients
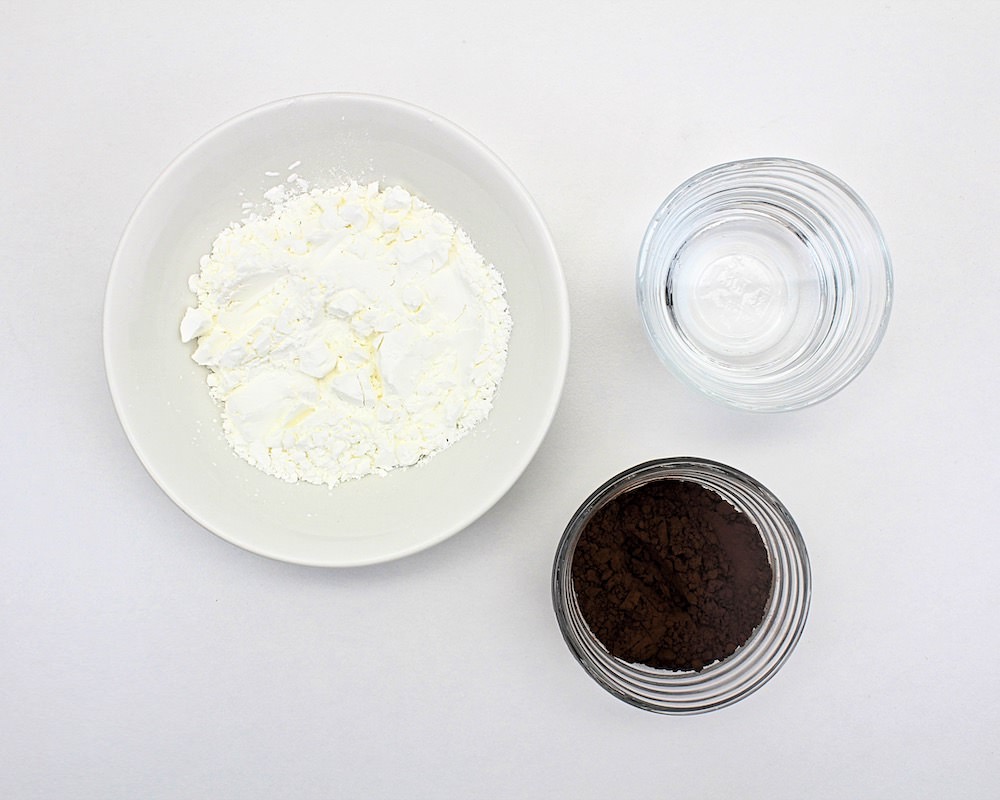
Here’s what you’ll need to make a batch of edible flour mud for your child:
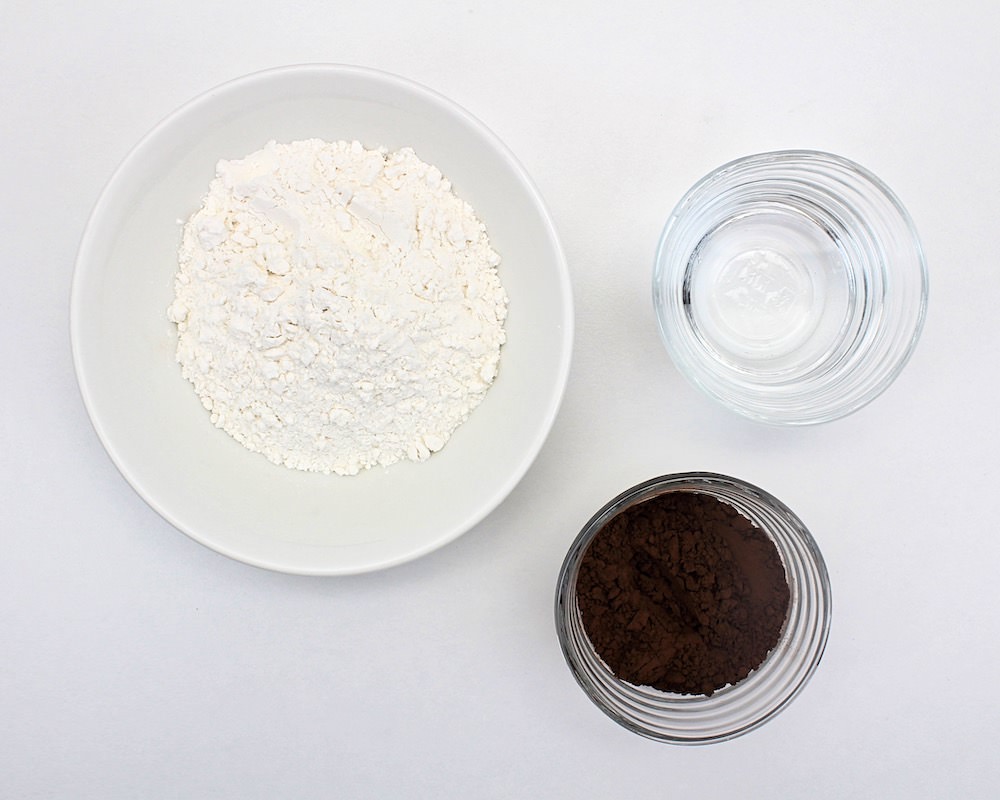
- All-purpose flour
- Cocoa powder
- Water
Step-by-Step Instructions
1. Bake Flour
Since this recipe is meant to be taste-safe, you’ll have to start by baking the flour to rid it of any harmful bacteria.
Raw flour can contain harmful bacteria like salmonella and E. coli that make it unsafe to eat, so if you’re making this mud for a young child who still puts things in their mouth, please make sure that you do NOT skip this step.
In order to heat treat the flour and make it safe for consumption, all you’ll need to do is spread it out on a baking sheet and bake it for 5 minutes at 350°F. Then, simply let it cool and it will be ready to use.
You can also treat the flour in the microwave by heating it up in 30 second intervals until it reaches a temperature of 165°F.
Note: If your child is old enough NOT to put the play mud in their mouth and you don’t need this recipe to be taste-safe, feel free to skip this step.
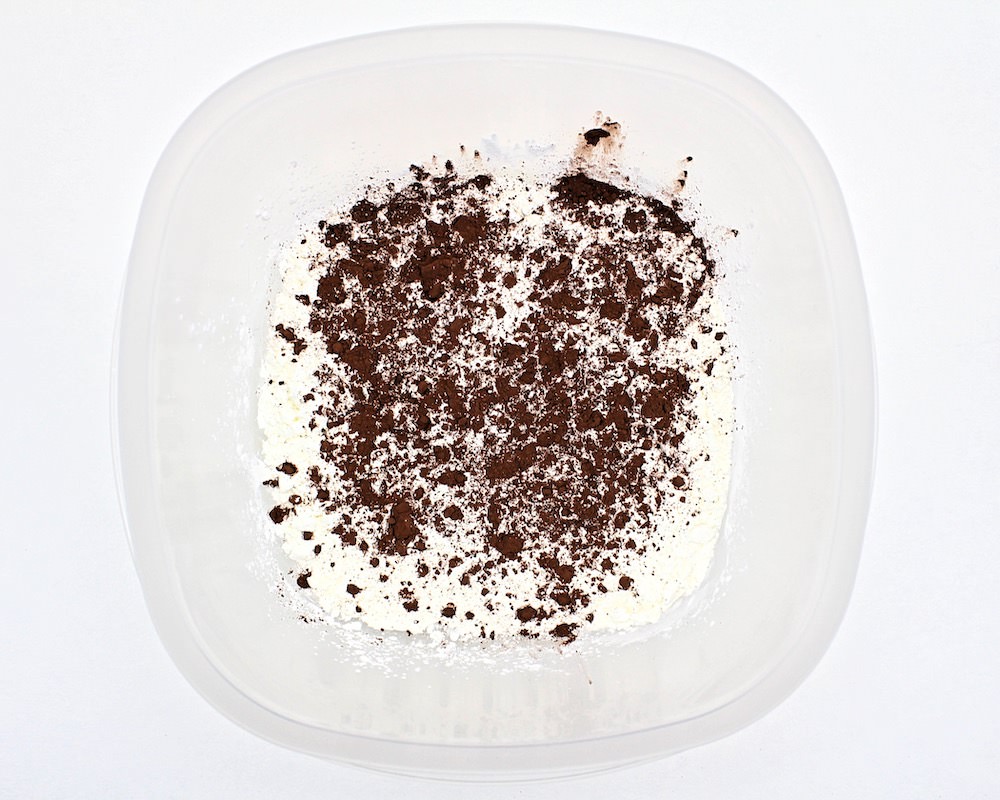
2. Put Flour and Cocoa Powder in Bin
Once your flour has cooled down, pour it into the container or bin your child will be using to play. Then, sprinkle some cocoa powder on top of it and mix with a spoon until combined.
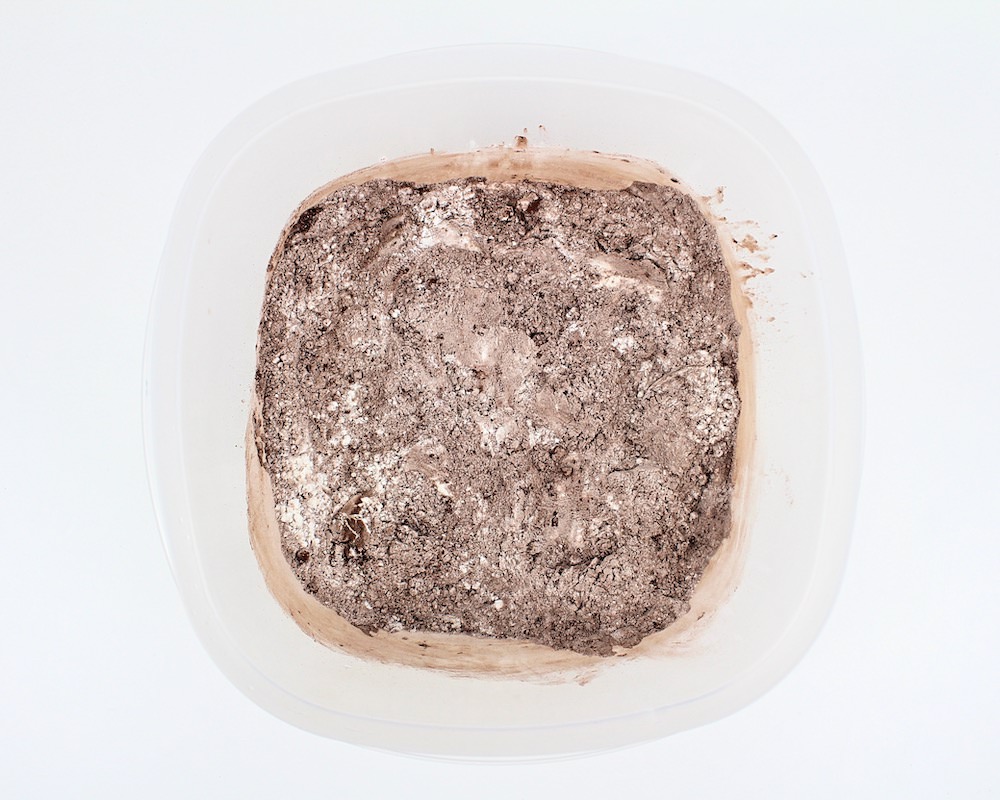
You won’t need to measure any of the ingredients exactly, but a good rule of thumb is to use about 1-2 tablespoons of cocoa powder per cup of flour.
That being said, it depends on your personal preference. The more cocoa powder you use, the darker the mud will be. I recommend starting with a little bit as you can always just add more if needed.
3. Add Water
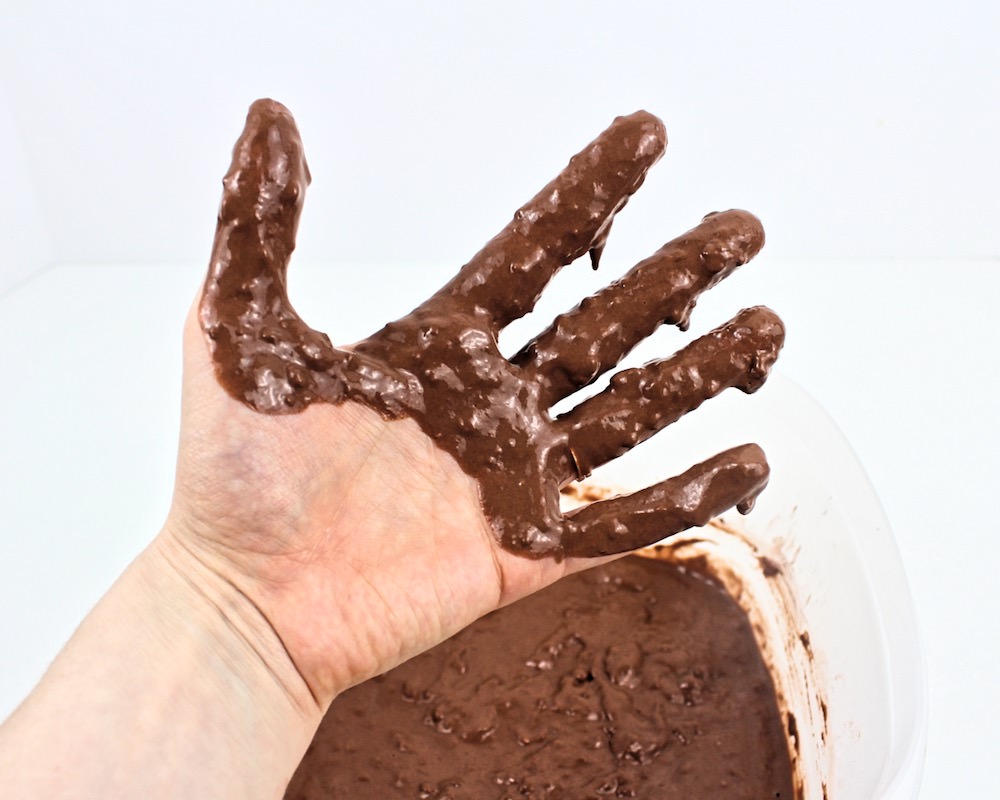
Add a bit of water and stir with a spoon until well combined. As always, the amount of water you’ll need depends entirely on your personal preference and on what you’re planning on doing with the mud.
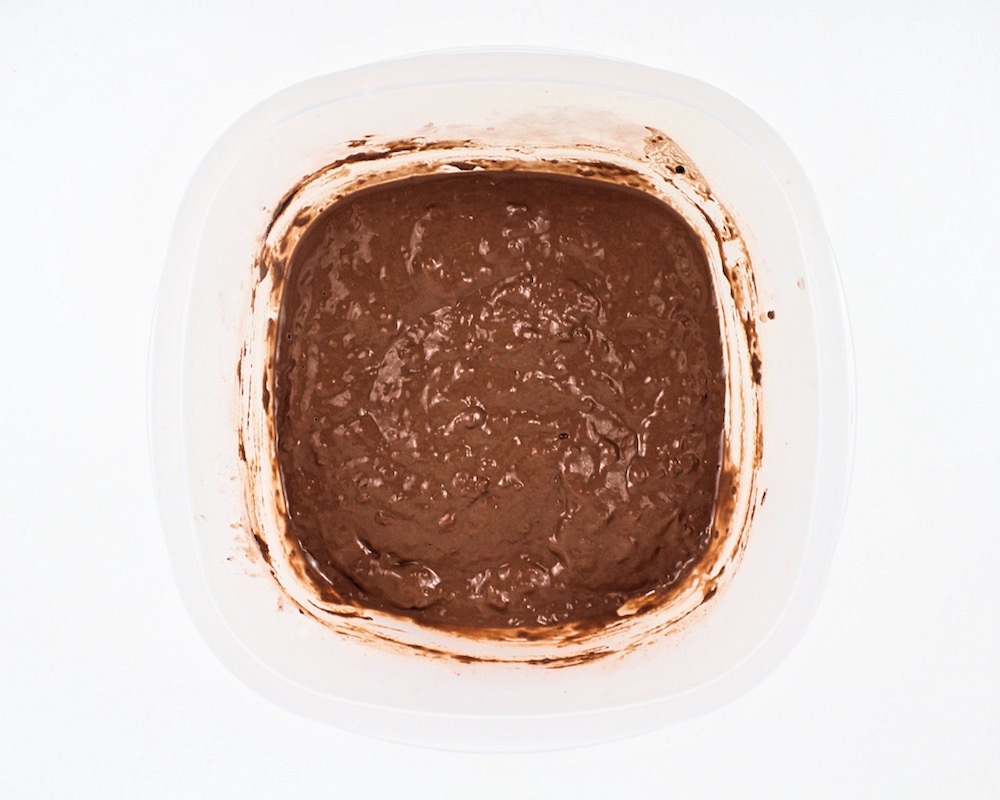
Once you’ve added enough water to achieve the perfect consistency, let your child play with their mud sensory bin!
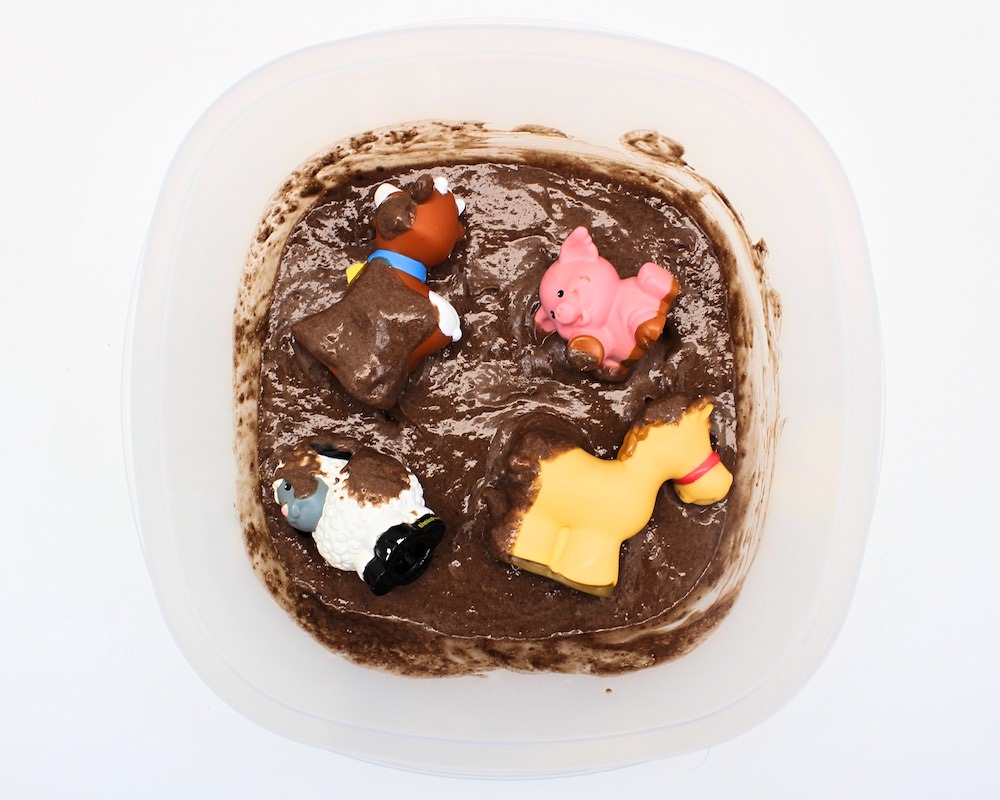
This type of edible mud has a consistency similar to the cake mix mud, so it’s great for toy washing bins—farm animal and dinosaur sensory bins are our favorites—and for toddler-safe mud pies (if you add less water).
Pros & Cons of This Method
This flour and cocoa powder mud feels similar to the cake mix mud—probably because they both contain some of the same ingredients.
But while the consistency of this homemade mud may be similar to that of previous recipes, the taste is not.
Since this recipe doesn’t contain any sort of sweetener, the mud ends up tasting like flour and cocoa powder, which isn’t very appetizing for kids. I consider that a good thing, since I don’t want my kids actively trying to snack on our sensory bin fillers.
This recipe does take a little longer to prepare though, since the flour has to be heat treated before it can be used.
But if you know you’ll be making this often (or if you have a penchant for raw cookie dough), you can always heat treat a whole bunch of flour at once and store it in a container in your pantry so that you always have some on hand when you need it.
Note: This recipe is probably the most cost-effective of the options provided in this article since flour is sold in large bags.
How to Make Taste-Safe Mud with Cornstarch (AKA Chocolate Oobleck)
Required Ingredients
Here’s what you’ll need to make a batch of edible cornstarch mud for your child:
- Cornstarch
- Cocoa powder
- Water
Step-by-Step Instructions
1. Put Cornstarch and Cocoa Powder in Bin
Start by pouring some cornstarch into a bin and sprinkling it with a bit of cocoa powder for added color.
Once again, precise measurements aren’t required, but you’ll probably need about 1-2 tablespoons of cocoa powder per cup of cornstarch. (You can always add more cocoa powder if the color isn’t dark enough.)
Stir the ingredients with a spoon before moving on to the next step.
2. Add Water
Add a bit of water and stir with a spoon until well combined.
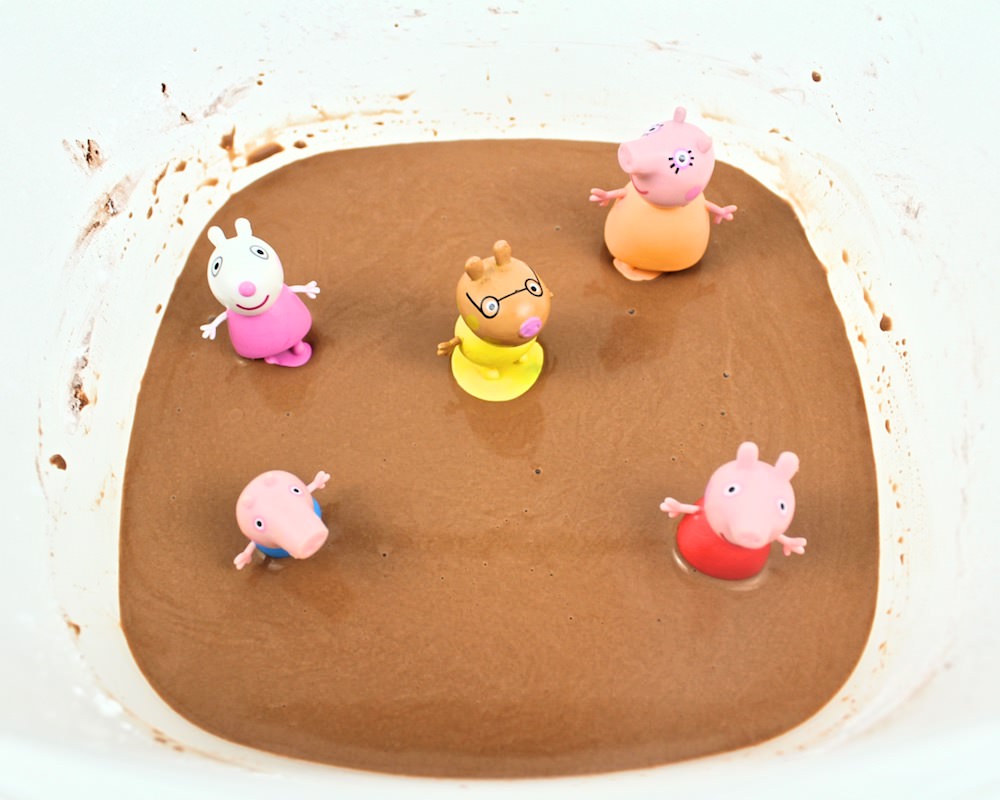
This DIY mud recipe has a consistency that is very different from the others, because it is essentially just chocolate-scented oobleck.
Oobleck is a non-Newtonian fluid that forms when you combine water and cornstarch. It behaves like a liquid in its resting state, but like a solid when pressure is applied to it.
In order to make oobleck, you’ll need about twice as much cornstarch as you will water. But since we’re making taste-safe mud rather than oobleck, feel free to add however much water you like in order to achieve the consistency that you like best.
Oobleck can be a bit hard to stir, so to make things easier, make sure you mix slowly and smoothly. If ever you feel a resistance from the cornstarch, simply decrease the pressure and mix more gently. Keep doing this until the water and cornstarch are well combined.
Once all the ingredients are combined and you’ve achieved the perfect consistency, let your child play with the edible sensory mud!
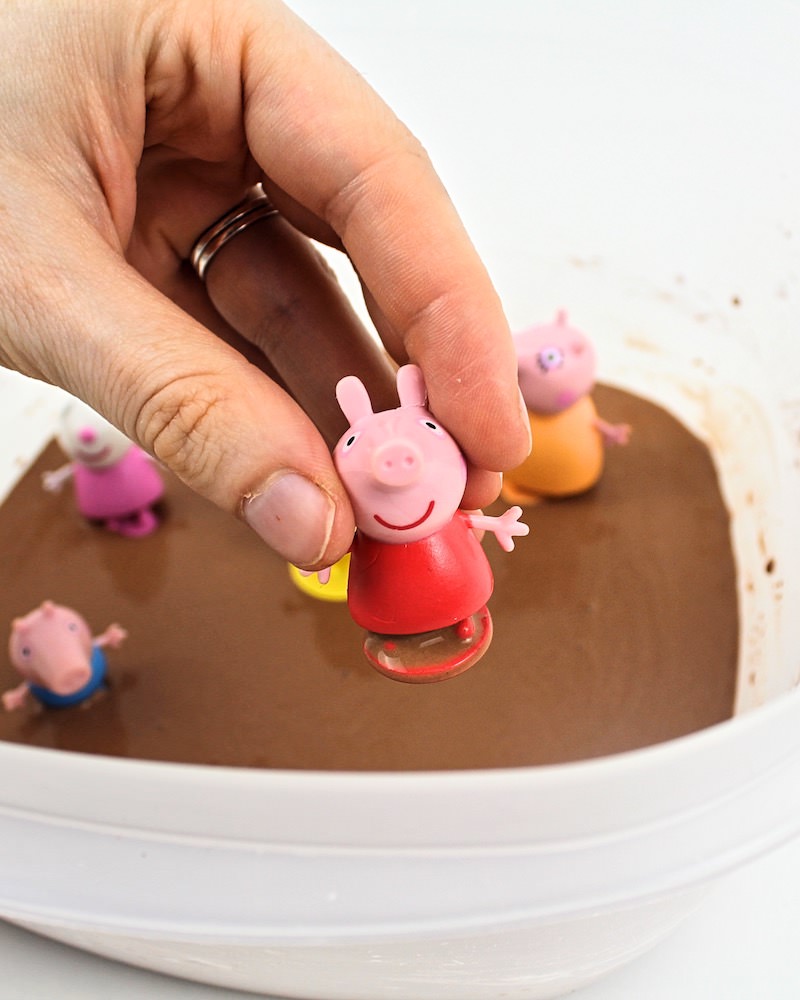
This recipe is great for messy sensory play since it has such a unique texture. We decided to break out our Peppa Pig toys because this fake mud recipe was the one that most resembled a muddy puddle!
Pros & Cons of This Method
Out of all the fake mud recipes I shared in this article, this one has the most unique texture. It feels solid when pressure is applied to it, but if you don’t apply any pressure, the toys will sink into it like it’s quicksand.
Since it glides right off the toys, this sort of fake mud isn’t great for toy washing sensory bins. But it is good for pretend play and small world sensory activities involving dinosaurs, animals or animals in mud.
Like the previous recipe, this edible mud doesn’t contain any sweeteners, so it doesn’t taste very good. This means that young kids won’t actively try to snack on it (which is always a plus in my book)!
Note: Do not pour this mud down the drain as it can clog your pipes. Instead, leave it out to dry overnight, then sweep up all the powder and dispose of it by throwing it in the trash or compost.
Related Taste-Safe Sensory Bins
Looking for more taste-safe activities to try with your toddler? Check out these articles:
- Taste-Safe Sensory Foam
- Chia Seed Sensory Play
- 2-Ingredient Fake Snow (That’s Actually Cold!)
- Edible Water Beads
- Taste-Safe Moon Sand
Join my mailing list using the form below to receive 12 of the most popular sensory recipes on my site in PDF format! You’ll be the first to know when I publish new recipes, and you’ll also gain receive to lots of free printable activities for your kids.
Grab our 12 best sensory recipes!
By submitting your email address, you are agreeing to the terms of our Privacy Policy. You can unsubscribe at any time.
Only your name will be made public. Please note that by submitting your comment, you are agreeing to the terms of our Privacy Policy.