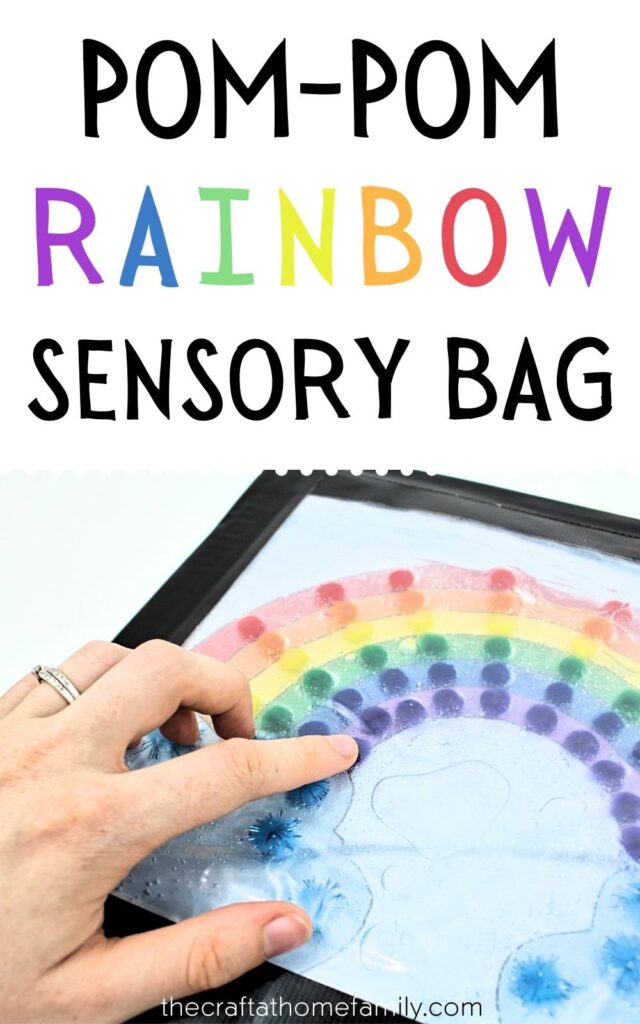
Tired of always doing the same old sensory activities? This pom-pom rainbow sensory bag is a great way to shake things up! Its texture is great for babies, but it also incorporates skills that make it engaging for toddlers and preschoolers. Plus, the included pattern makes it super simple to set up!
JUMP TO…
Have you ever tried making a sensory bag before? They are one of our favorite methods of sensory exploration, especially for younger kids.
Taste-safe sensory recipes are great, but some items are just too small for babies to explore, even if they are edible.
That’s where sensory bags come in. Since the items are sealed up in a bag, there is no risk of choking. That means you can let your little one explore as much as they like!
Sensory bags are SO versatile, and they vary in complexity from simply squirting paint into a bag to… well, this one.
But while this sensory bag may be more intricate than most, it is actually really simple to make—especially if you download the printable pattern I created!
I love this rainbow sensory bag because it calls on a variety of skills and is appropriate for a wide variety of ages:
- Babies will enjoy the cool texture of the hair gel and the color of the pom-poms, even if they aren’t capable of color sorting yet
- Toddlers can practice their color recognition skills by placing the pom-poms over the appropriate color, even if don’t place them exactly where they’re supposed to go
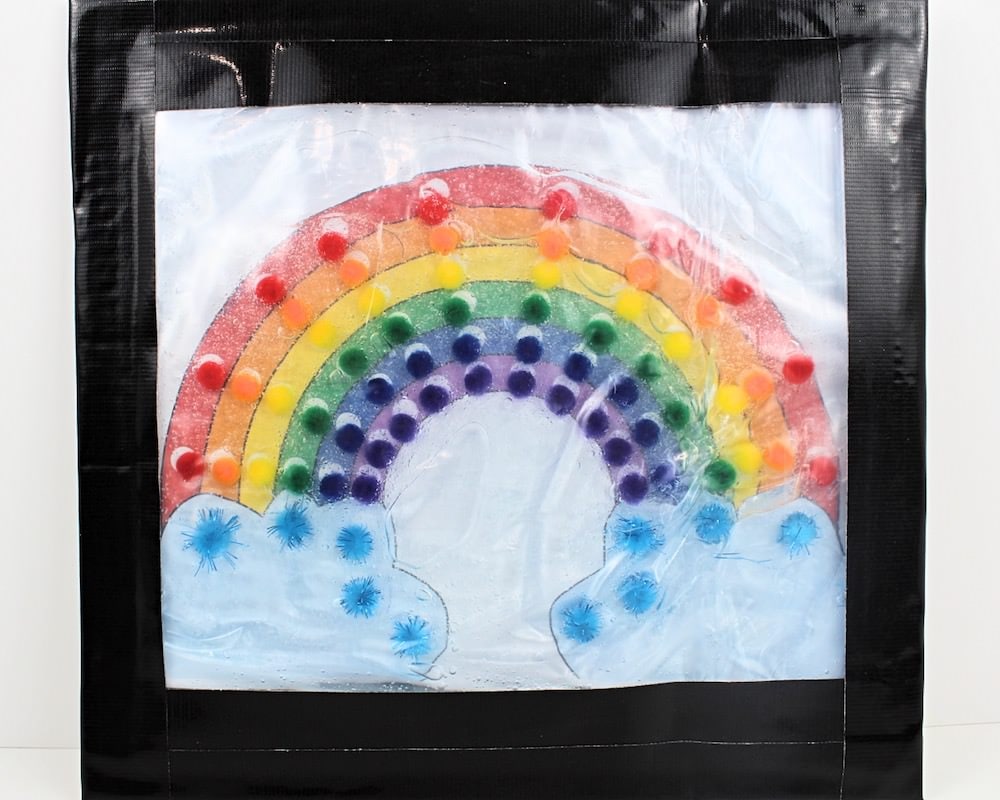
- Preschoolers can practice their counting and fine motor skills by filling each of the 70 white dots with an appropriately-colored pom-pom
To be totally honest, I think I enjoyed this one as much as the kids did. There was something really therapeutic about squishing every pom-pom into the correct location.
Plus, it was sort of fun having a sensory experience that also had a concrete objective. I’ll definitely have to do more projects like this one in the future!

Get hundreds of pages of activities!
Get access to all our paid printables, as well as monthly activity planners, for just $5/month. (New printables added twice per month!)
Required Materials
Here’s what you’ll need to make your very own pom-pom color sorting sensory bag at home:
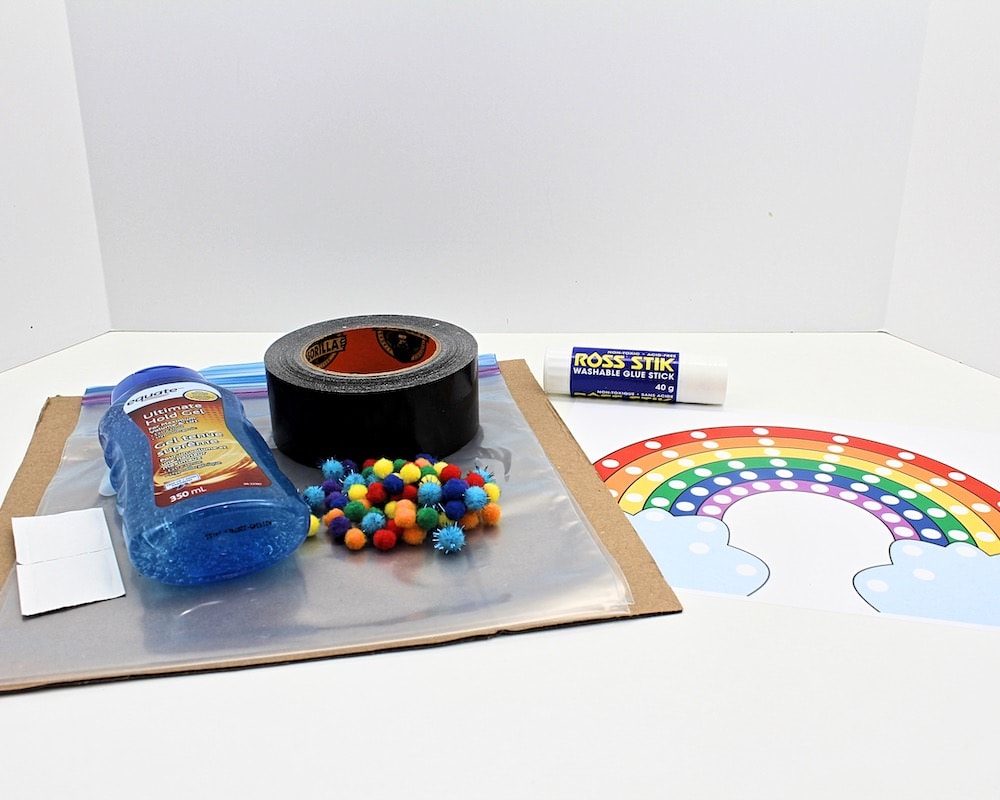
- My pom-pom rainbow printable, which you can download using the form below (there’s another form at the bottom of the article if you’d rather keep reading)
- Gallon-sized freezer bags
- Alcohol wipe (optional but recommended)
- Large cardboard box or panel
- Stick of glue
- Clear hair gel or sports gel
- 10 mini pom-poms in each of these 7 colors: light blue, purple, dark blue, green, yellow, orange and red
- Duct tape or Gorilla tape
Note: Make sure your pom-poms are the right size by arranging them all on the template before you start making this sensory bag. Ours measured about 10 mm / 0.4 in.
How to Make a Rainbow Pom-Pom Sensory Bag (Step-by-Step)
1. Remove Logo (Optional)
You don’t have to do this step, but it’s easy and will make your sensory bag look nicer, so I always do.
To remove the logo from the bag, all you need to do is rub it with an alcohol wipe and it should come right off. If ever you don’t have any alcohol wipes, you can use a tissue and a bit of rubbing alcohol, or even a couple drops of baby oil.
Note: We like to use two bags because it helps prevent leaks and makes the sensory bag more durable. If you want to do the same, don’t forget to remove the logo from both bags.
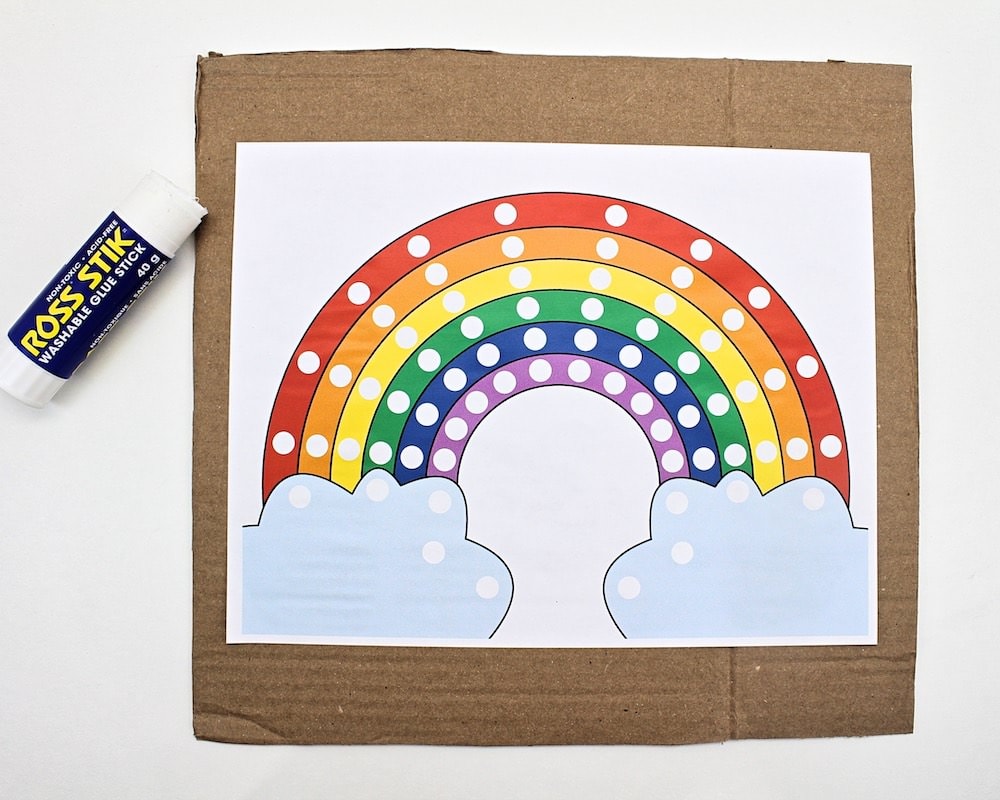
2. Print Template
Once you have received your free download, print the rainbow template on a sheet of US Letter sized paper (8.5 x 11 inches).
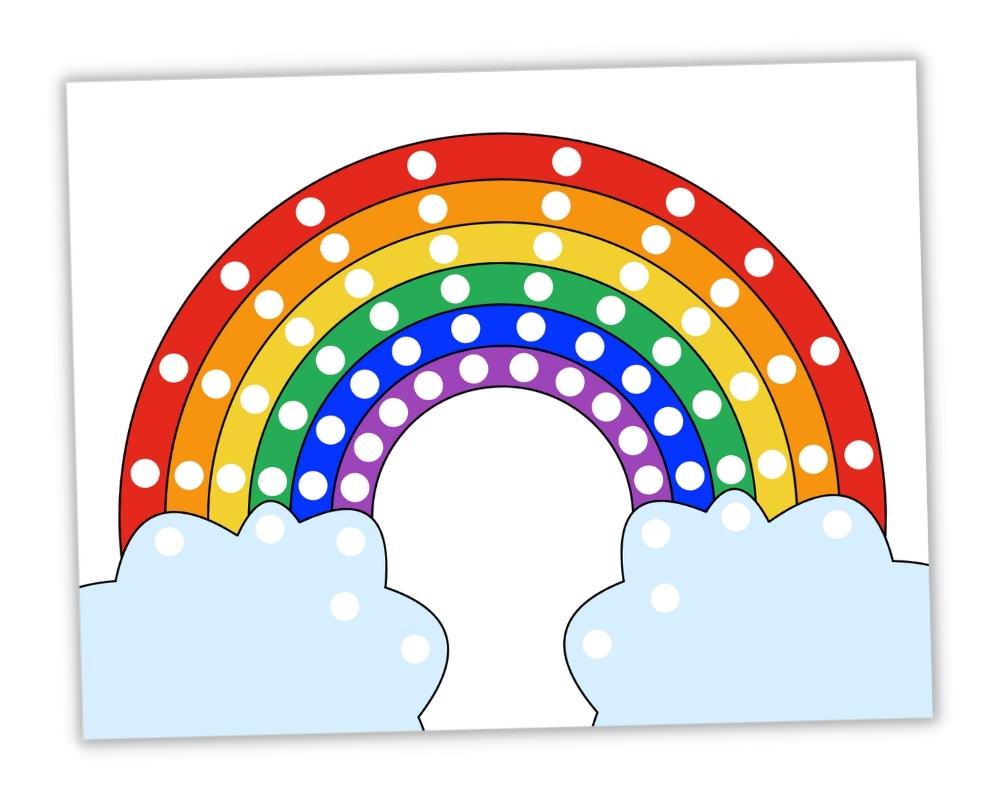
Note: Most home printers aren’t capable of printing right up to the edge of the paper, so some of the design will probably get cut off. That is totally fine.
3. Cut Cardboard
Grab some thick cardboard and use scissors to cut it into a rectangle that is slightly larger all around than the sheet of paper with the printed template. You’ll also want to make sure that it the same size or larger than the gallon-sized freezer bag you’ll be using to cover the template.
4. Glue Template
Use a stick of glue to glue the template onto the cardboard.
5. Add Hair or Sports Gel
If you’ve chosen to use two bags, place one bag inside the other. Then, pour some clear hair gel or sports gel into the inside bag. (Note: Make sure to pour the hair gel into the inside bag and NOT in between the two bags. I’ve done it accidentally and it is a pain to clean up.)
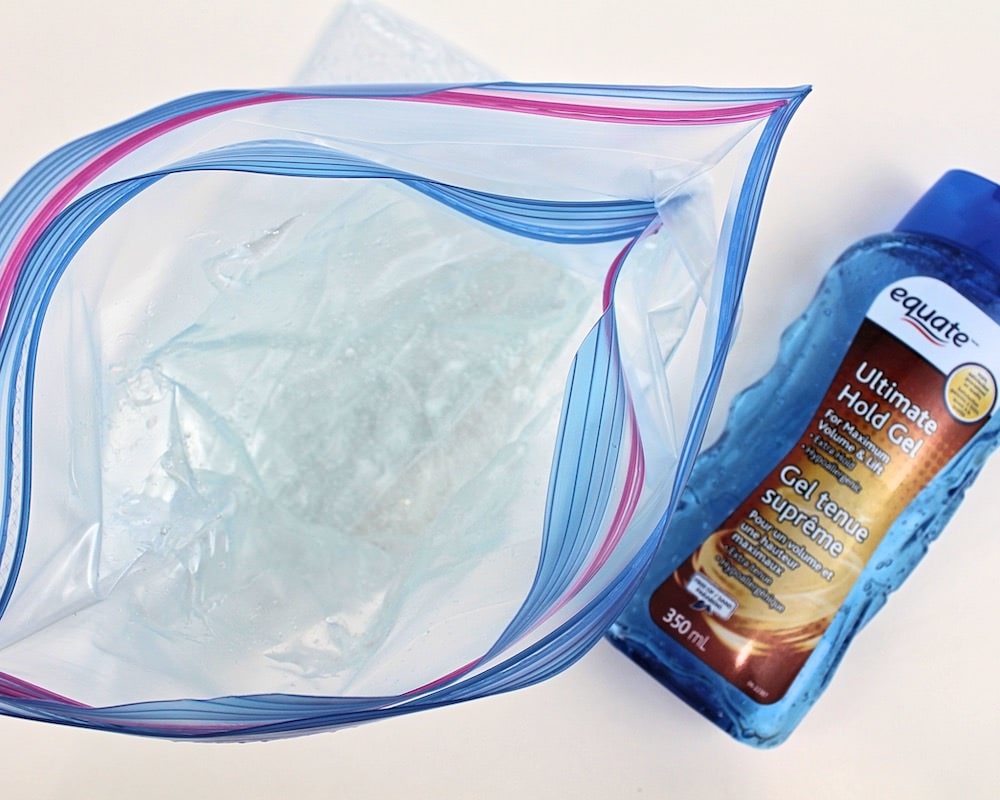
Note: We buy our hair gel from Walmart. Each bottle contains 350 ml, and we typically use up an entire bottle per sensory bag.
6. Add Pom-Poms
Pour all the mini pom-poms into the bag with the hair gel. You’ll need 10 mini pom-poms for each of the colors on the template: purple, dark blue, green, yellow, orange and red for the rainbow, and light blue for the clouds.
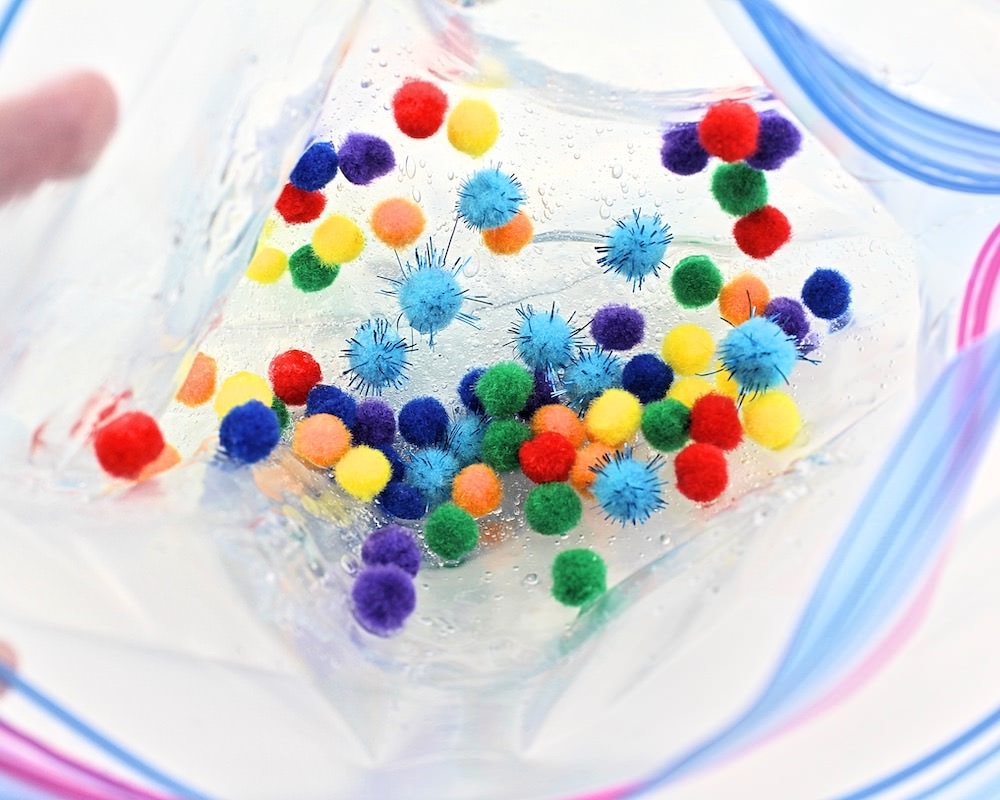
I used glitter pom-poms for the clouds because I couldn’t find light blue pom-poms in the same size as the others. I think it added a nice touch.
That being said, I wouldn’t recommend using glitter pom-poms for the other colors. Glitter pom-poms are not as sturdy as regular pom-poms, and the glitter tends to detach itself from the pom-poms and end up suspended in hair gel inside the sensory bag.
7. Seal Ziploc Bags
Seal up the bag with the hair gel, making sure to remove as much air as possible as you do so.
Then, if you’ve chosen to use two bags, use scissors to cut off the excess plastic above the zipper of the bag you just sealed. This will help it fit better inside the second bag.
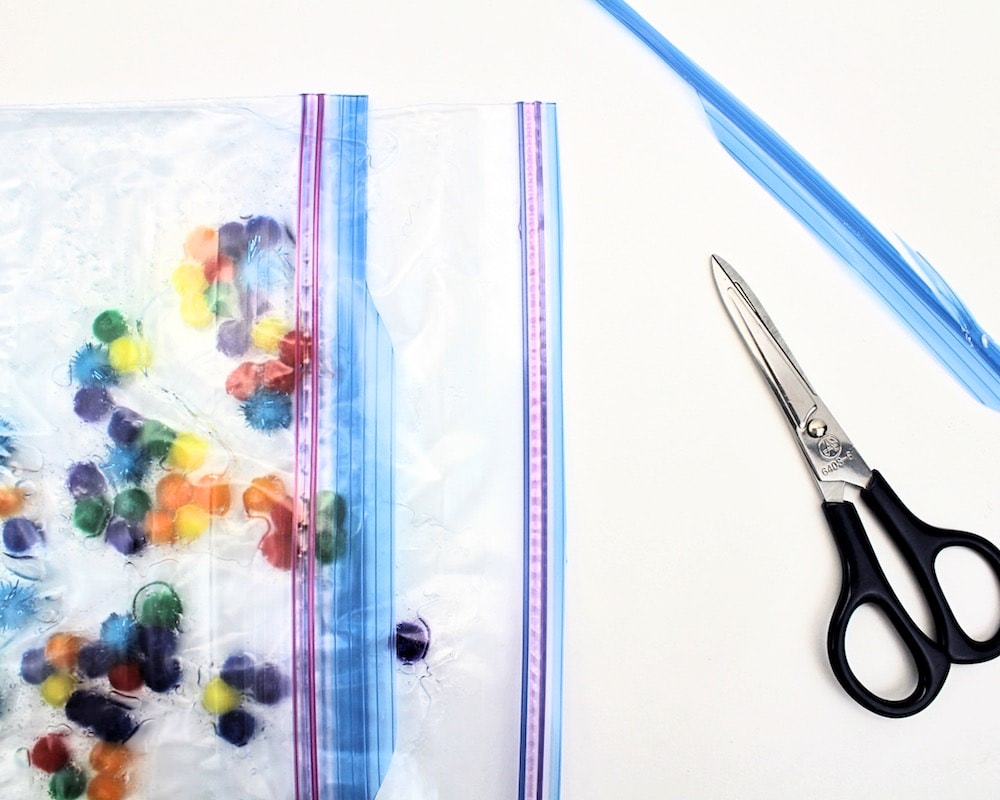
Once you have cut off the plastic, place the first bag inside the second and seal the second one up too.
Note: The bags are much harder to open once the plastic has been removed, so make sure you remove all the air BEFORE sealing them to avoid having to open them up again to get more air out.
8. Tape Bag to Cardboard
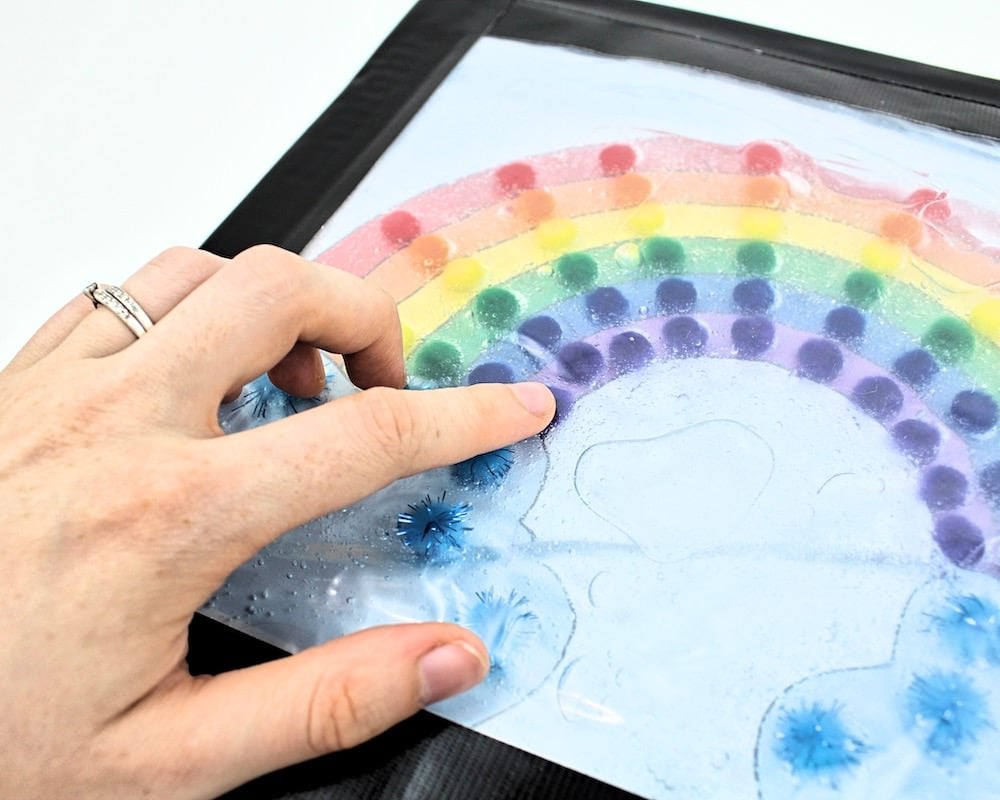
Place the pom-pom sensory bag on top of the cardboard and secure it in place using duct or Gorilla tape. You should be able to see the rainbow template through the clear bags and hair gel.
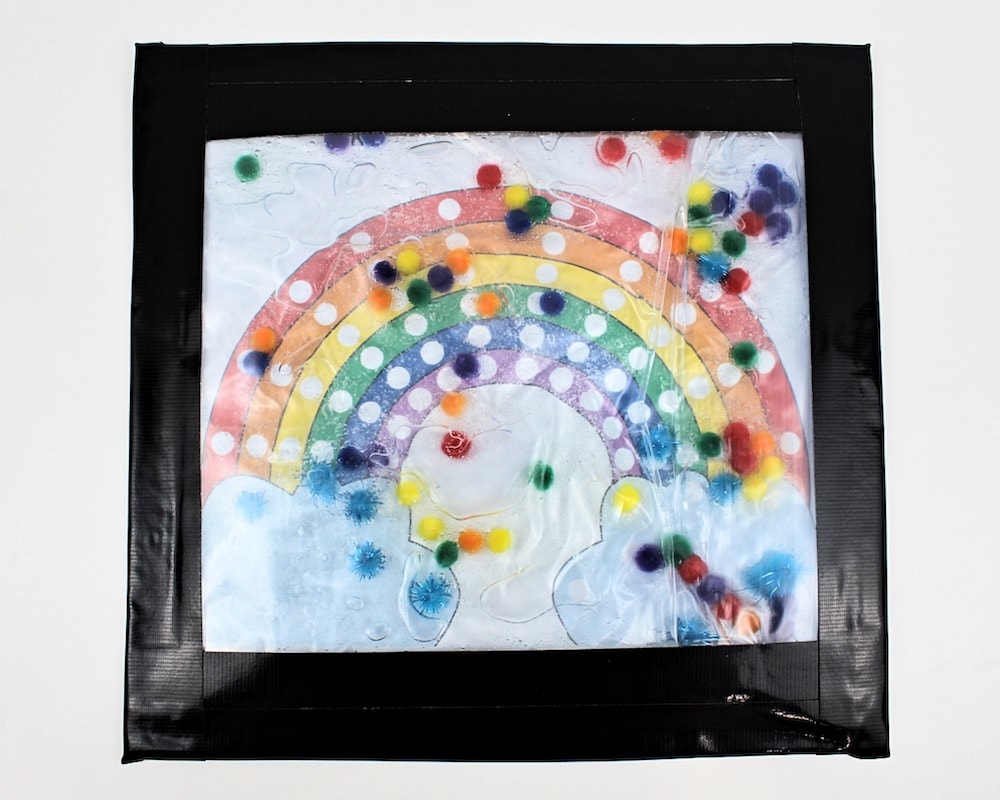
Once the bags have been secured to the cardboard, it’s time to play! Give the bag to your child and let them have fun sorting the pom-poms.
This bag is super squishy and satisfying to play with, so even babies will have fun with it. But if your kids happen to be a bit older, they can use this sensory bag to practice a variety of abilities, including counting, color recognition and fine motor skills. So cool!
Related Sensory Bag Ideas
Do you love DIY sensory bags as much as we do? Check out these articles:
- Surprise Water Bead Sensory Bag
- Glow-in-the-Dark Nighttime Sensory Bag
- Melted Snowman Sensory Bag
- Simple Shape Matching Sensory Bag
- Monster Googly Eye Sensory Bag
Only your name will be made public. Please note that by submitting your comment, you are agreeing to the terms of our Privacy Policy.