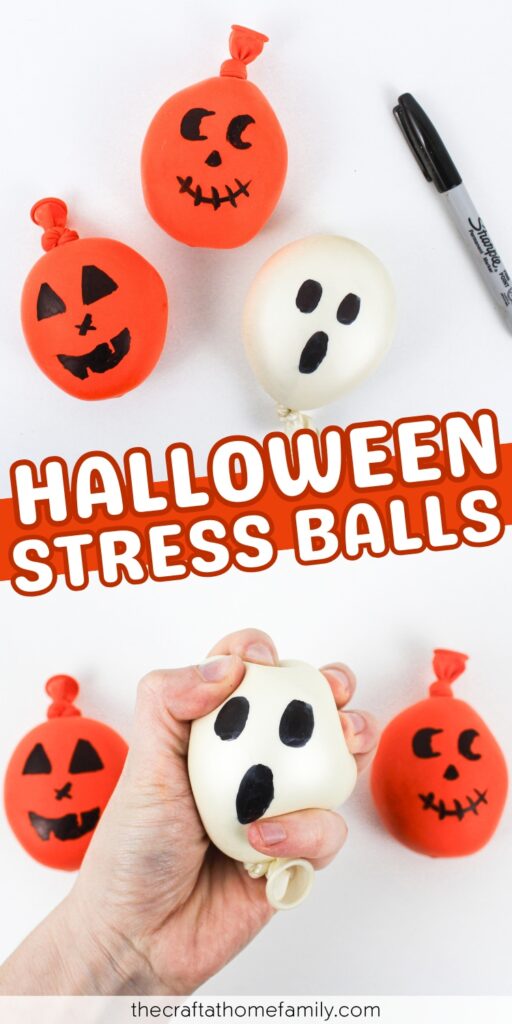
Looking for a fun last-minute Halloween craft to make with your kids? These easy Halloween stress balls are super cute, super simple to make, and have a squishy texture that kids will love!

JUMP TO…
These adorable Halloween squish balls are part craft, part sensory play, and lots of fun for kids to make and play with! They’re made from simple supplies that you probably already have at home, and they have a fun texture that is super satisfying to squish.
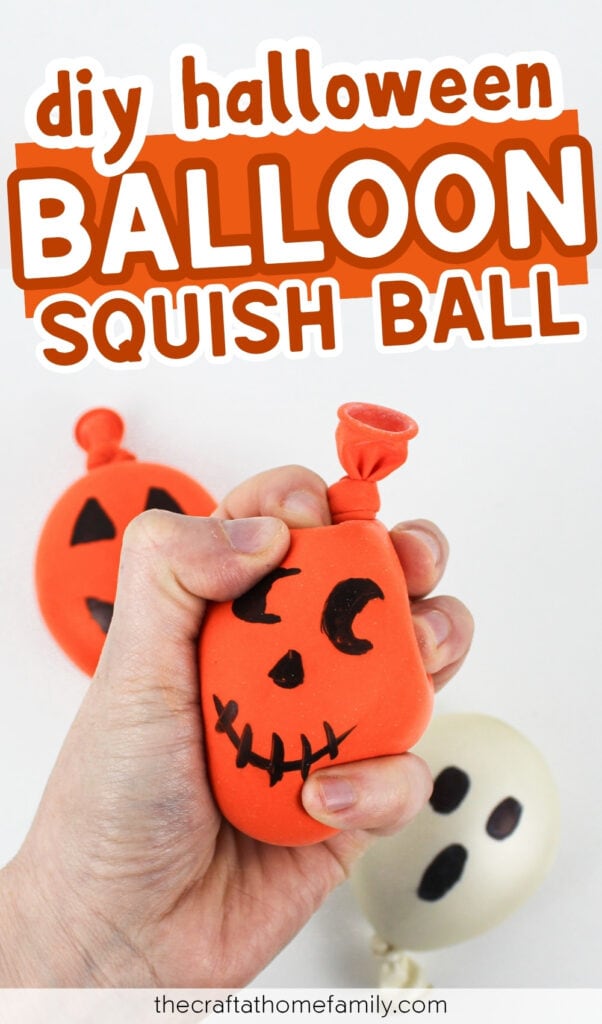
This spooky cute twist on DIY balloon stress balls would make a great last-minute craft idea for Halloween!
Why You’ll Love This Craft
- Simple supplies: You probably already have everything you need to make these cute DIY stress balls at home, and if you don’t, a quick trip to the dollar store should remedy the situation.
- Easy to make: This craft is low-prep, low-mess, and comes together in just a few simple steps.
- Fun texture: These stress balls are my kids’ newest obsession, and we all love how soft, squishy and moldable they feel.
- Sensory craft: This simple craft is twice the fun because it doubles as both a craft and a sensory play activity, which means the fun doesn’t end when you finish making the stress ball!
Looking for more Halloween-themed sensory crafts? Check out this Googly Eye Monster Sensory Bag or this Jack-o’-Lantern Sensory Bottle!
Grab our 12 best sensory recipes!

By submitting your email address, you are agreeing to the terms of our Privacy Policy. You can unsubscribe at any time.
Required Materials
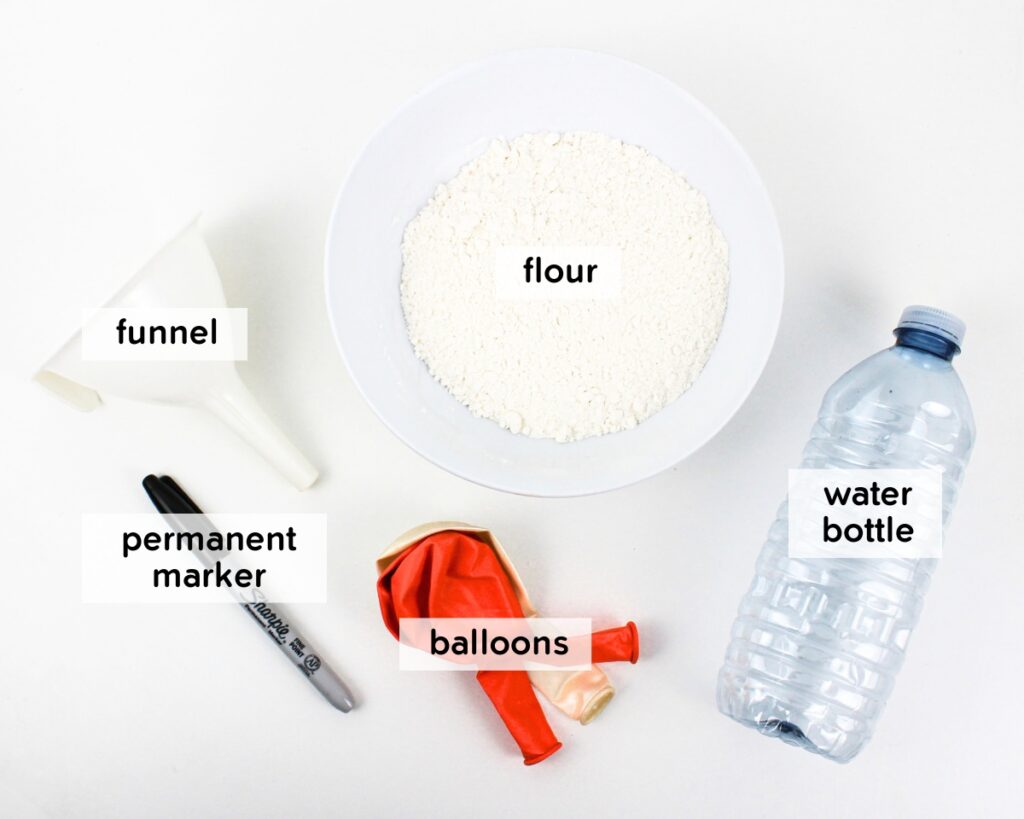
- Funnel: I used the largest of a set of 3 plastic funnels that we keep in the kitchen, which had a mouth of about 4.75 inches in diameter. I wouldn’t recommend using anything much smaller than that if you want the flour to easily go through it.
- Empty plastic bottle: This is the secret to getting more filler inside the balloons and giving your stress balls the best, most satisfying texture! I tried making these stress balls with just a funnel, and the results weren’t nearly as good. You’ll need a bottle with a narrow neck—I used an empty water bottle. Plastic is best because it is pliable, and you’ll be able to squeeze it to help the flour go out. (It’s also safer than glass for any young kids who may be helping you!)
- Flour: I used regular all-purpose flour because it was the most cost-effective option for filling the stress balls. Other filler options include cornstarch, baking soda, rice, play dough, oobleck, water beads (only in homes with no pets or young kids), moon sand and dried beans, each of which has a different texture. Feel free to play around with different filler options to see which one you like best! Just keep in mind that some of them won’t fit through the opening of the funnel, so you’ll need to use an alternate method to get them into the balloon.
- Balloons: You won’t need anything fancy—I bought 12-inch orange balloons at the dollar store, and off-white ones at Walmart. Rubber and latex are both fine. I don’t recommend using smaller balloons, as smaller stress balls are less satisfying to squish.
- Permanent marker: I used a black fine point permanent marker for this project. Chisel point would be fine too, but not ultra fine point, as that might cause the balloon to pop. To minimize smudging, make sure to use a permanent marker and not a regular washable marker. You can also experiment with using colors other than black if you wish!
The full supply list and instructions can be found in the how-to card.
Grab our 12 best sensory recipes!
By submitting your email address, you are agreeing to the terms of our Privacy Policy. You can unsubscribe at any time.
How to Make Halloween Stress Balls (Step-by-Step)
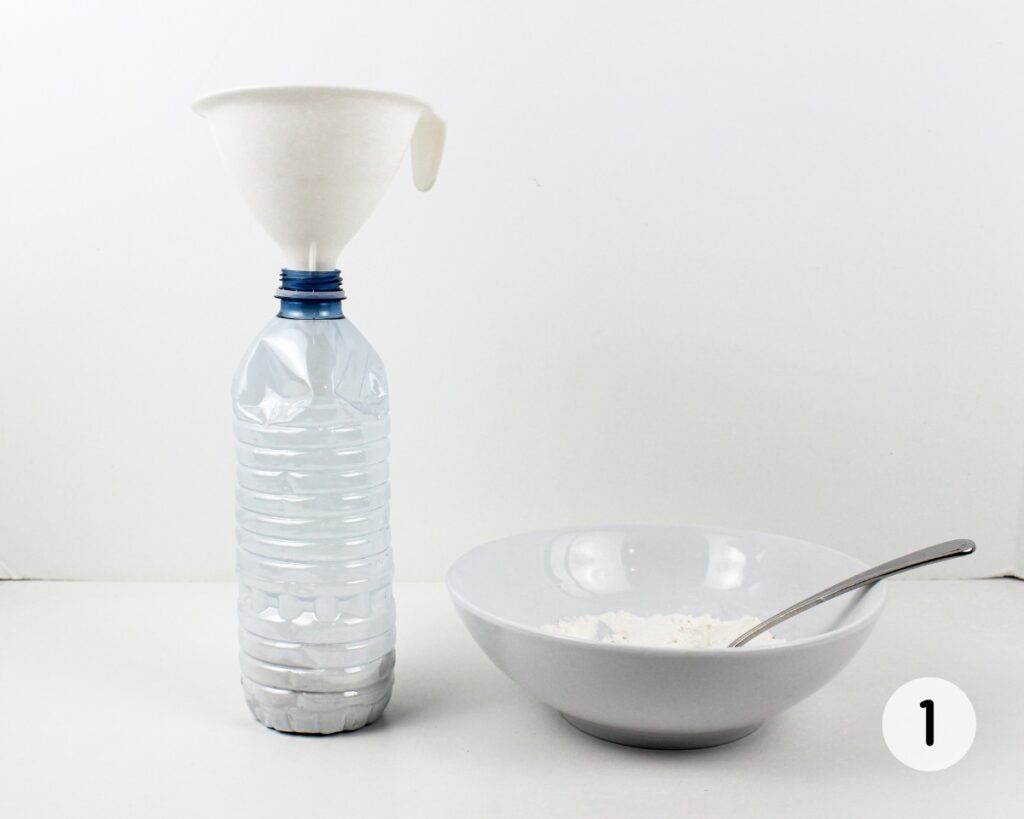
Step 1: Fill bottle with flour. Use a funnel to pour the flour (or another filler of your choice) into an empty plastic bottle, wiggling the funnel as needed or pushing the flour down with a pencil to help it go through.
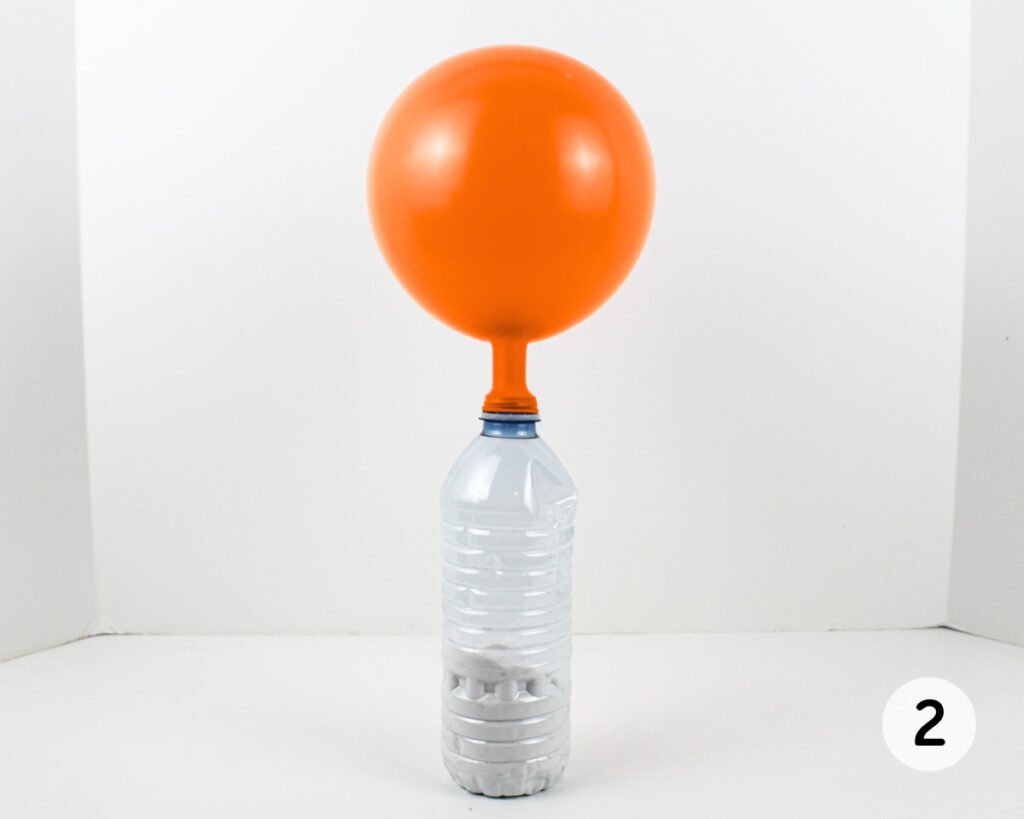
Step 2: Add balloon. Inflate and deflate a balloon 2 to 3 times to help stretch it and make it more pliable. Then, inflate it once more, keep it pinched shut with one hand to prevent the air from escaping, and use the other hand to pull the lip of the balloon over the neck of the plastic bottle.
Step 3: Fill balloon with flour. Flip the bottle upside down and allow the flour to fall from the bottle into the balloon, squeezing the bottle as needed to help it along. Continue until the bottle is empty and as much flour as possible has made its way into the balloon.
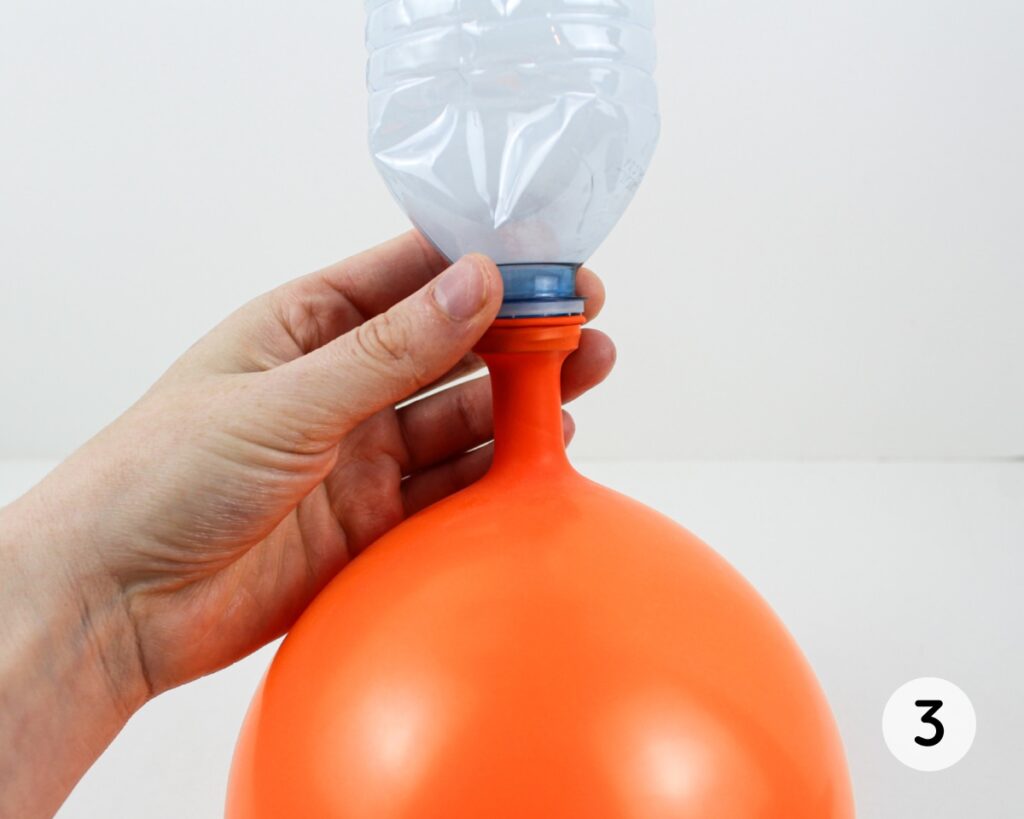
Step 4: Remove air from balloon. Pinching the neck of the balloon with your fingers to prevent the air from escaping, use the fingers of your other hand to carefully remove the balloon from the bottle. Then, using both hands to control the amount of air and flour that is able to escape, very slowly let the air out of the balloon until there is only flour remaining.
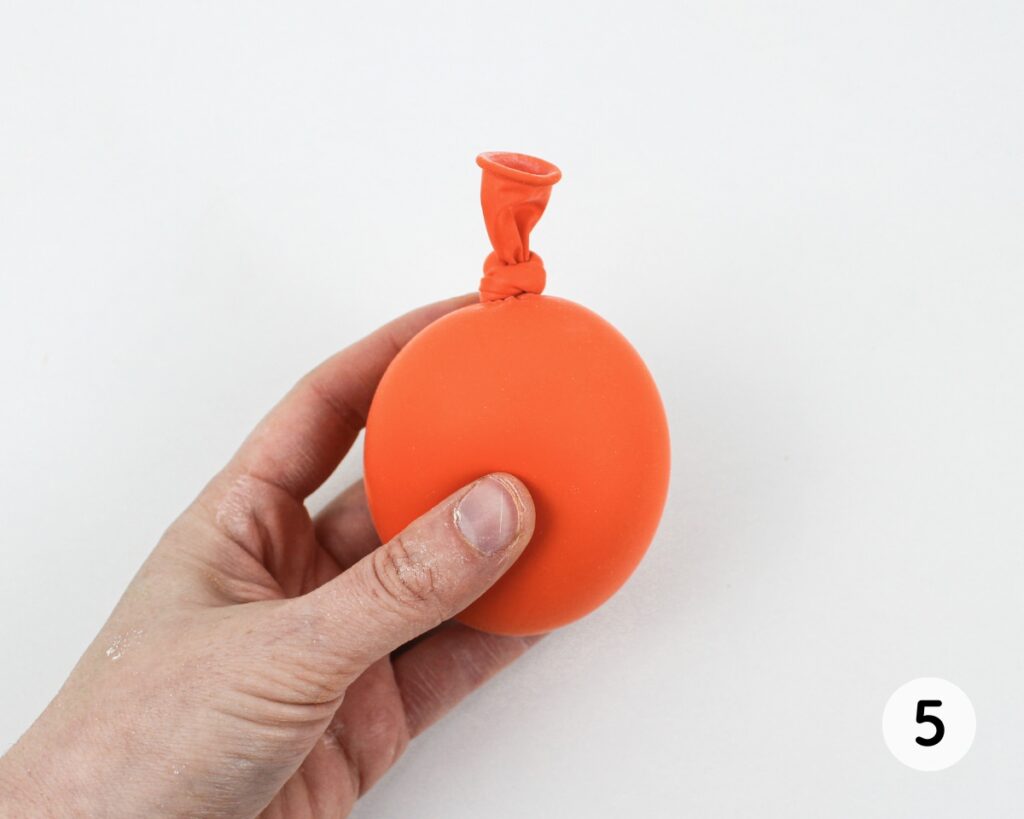
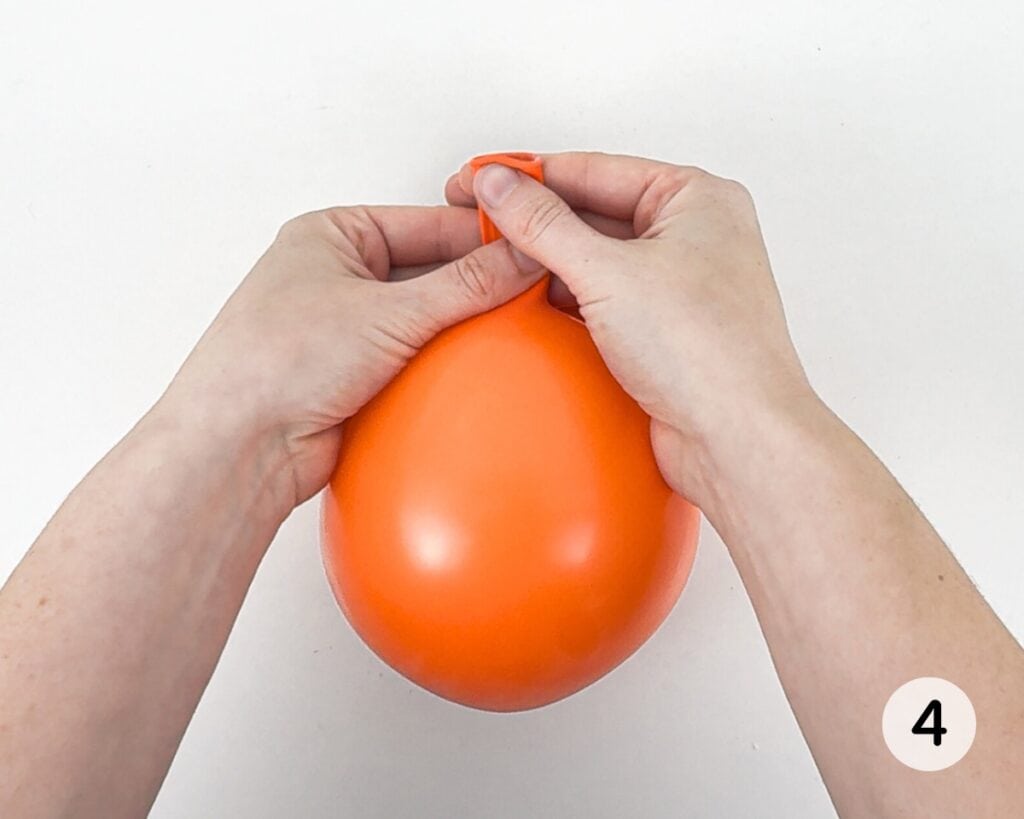
Step 5: Tie balloon. Once you have removed as much air as possible from the balloon, carefully tie it up by making a knot as close to the base of the balloon as possible, without letting in any extra air. If desired, you can use scissors to trim some of the excess balloon near the knot. You can also cut the neck off a second balloon and pull it over the filled balloon to cover the knot and help prevent leaks. (This will make the stress ball sturdier, but also less squishy.)
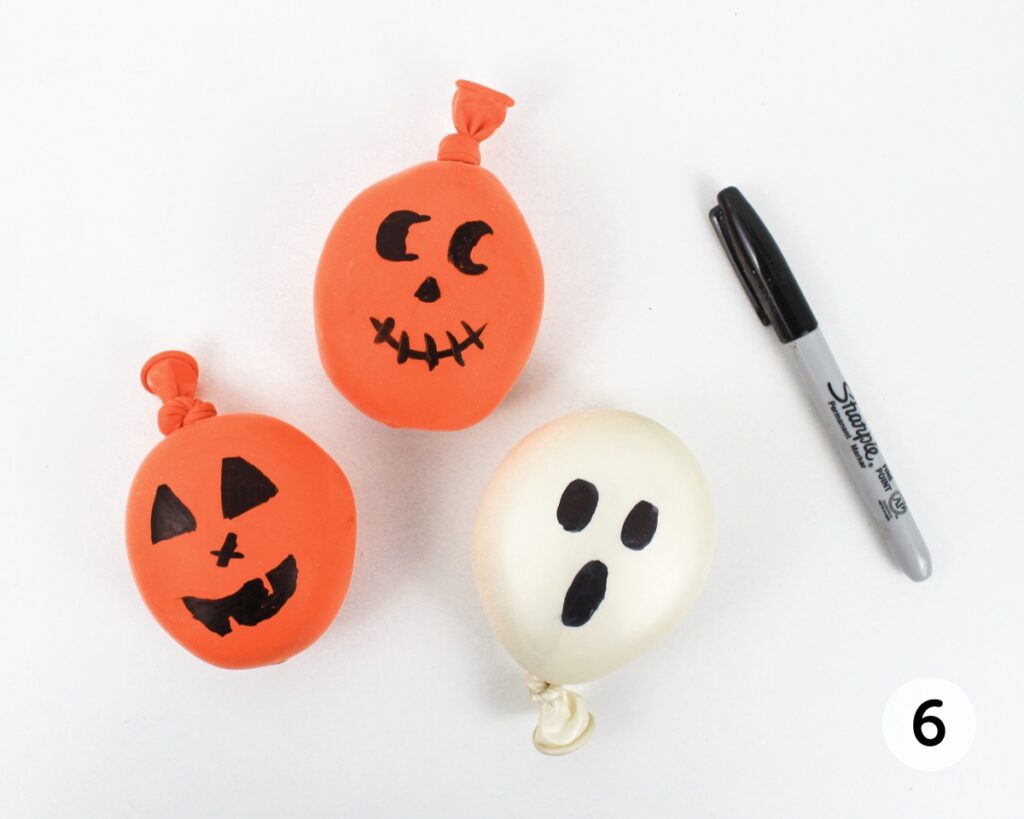
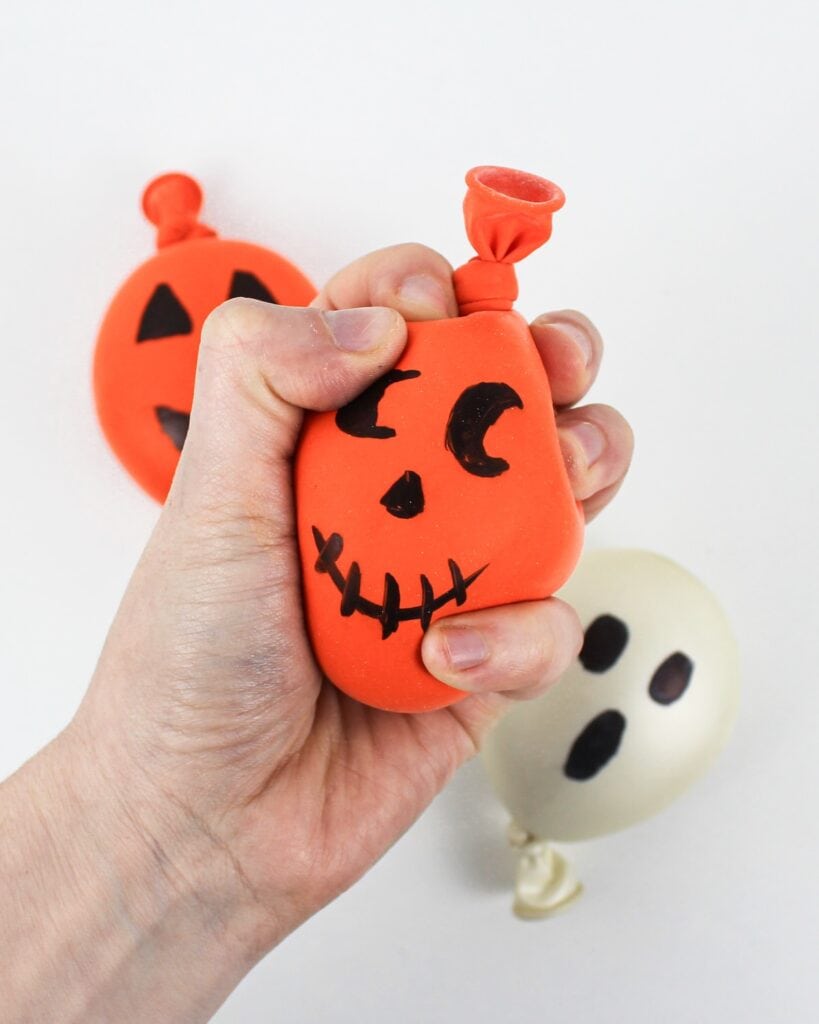
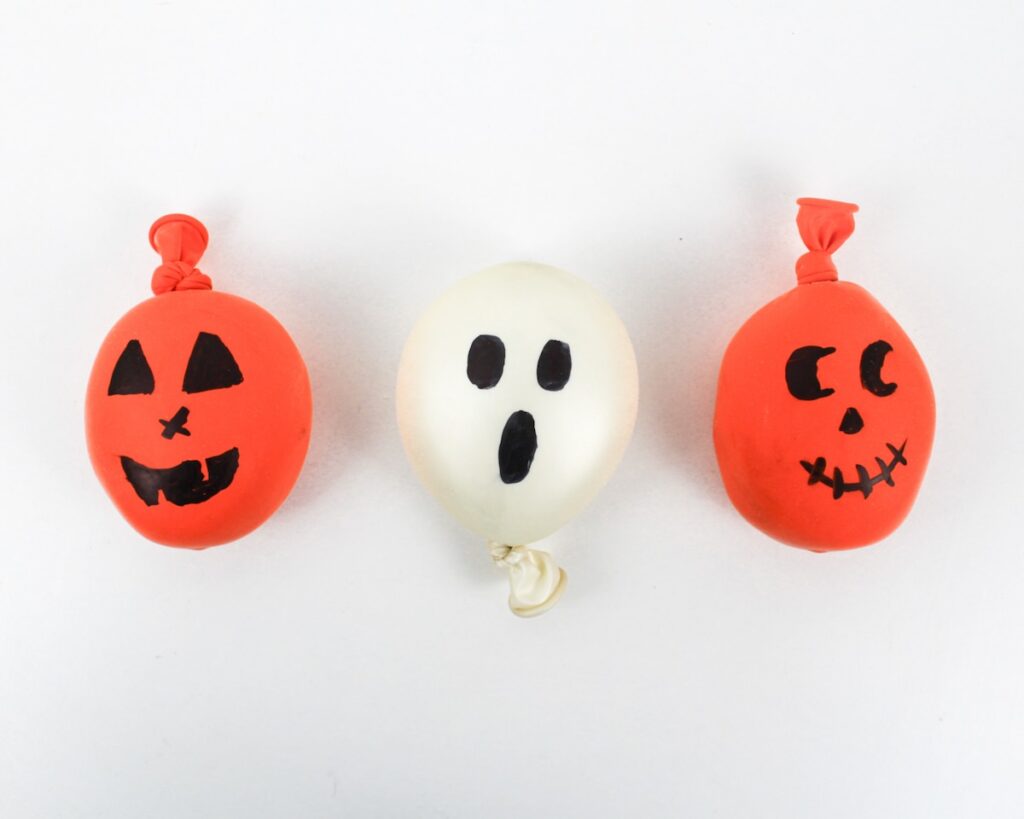
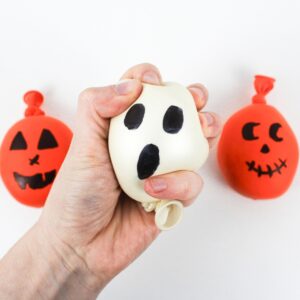
Step 6: Draw face on balloon. Use a permanent marker to give your stress ball a face. Orange balloons can be decorated to look like jack-o’-lanterns, while white balloons can be made to look like ghosts. You can also get creative and create your own unique designs, like eyeballs or monsters—particularly if you have other colors of permanent markers on hand. Regardless of which design you choose, you’ll need to allow the permanent marker ink to dry fully before you start using the stress ball.
These stress balls were a huge hit with my kids! They have been playing with them non-stop since I made them, and have even customized them by making them double-sided, and adding cat ears and other fun details using permanent markers.
Helpful Tips
- Don’t skip the bottle: You may be tempted to skip the plastic bottle and just funnel flour directly into the balloon, but I tested both methods, and the bottle method made it a lot easier to get more flour inside the balloon, which resulted in a better texture for the stress ball.
- Dry the inside of the bottle: To prevent the flour from sticking, make sure that the inside of the bottle is completely dry before you use it.
- Pinch the balloon shut: For best results, make sure to keep the neck of the balloon pressed shut when manipulating it. This will prevent air and flour from getting in or out unintentionally.
- Remove all the air: Make sure to remove as much air as possible from the balloon during step 4. For the best texture, only flour should remain inside the balloon, even if this means that a bit of flour comes out as you are letting the air out. (If ever you accidentally leave some air inside the balloon, you can either carefully untie it and try again, or wait a few days for the air to slowly slip out on its own.)
- Allow the ink to dry: If you don’t allow the permanent marker ink to dry before you use the stress ball, the designs will smudge very quickly once you start manipulating the stress ball. Feel free to wet the designs in order to erase and redraw them, but once you’re done, you’ll need to wait for the ink to dry before you start squeezing the stress ball.
- Retrace your designs: We found that even if we allowed the permanent marker ink to dry fully before we used the stress balls, the designs did eventually fade with use. If that happens, simply trace over them with a permanent marker again to make them look good as new!
Frequently Asked Questions
Have a question that wasn’t answered here? Let me know in the comments and I’ll be happy to help!
More Halloween Crafts for Kids


If you have tried these Halloween Stress Balls or any other project on my website, please let me know how it went in the comments below. I can’t wait to hear from you!
Halloween Stress Balls
Materials
- 1 funnel (medium or large)
- 1 empty plastic bottle
- ¾ cup all-purpose flour more if desired
- 1 12-inch rubber or latex balloon orange or white
- 1 black fine point permanent marker
Instructions
- Use a funnel to pour the flour (or another filler of your choice) into an empty plastic bottle, wiggling the funnel as needed or pushing the flour down with a pencil to help it go through.
- Inflate and deflate a balloon 2 to 3 times to help stretch it and make it more pliable. Then, inflate it once more, keep it pinched shut with one hand to prevent the air from escaping, and use the other hand to pull the lip of the balloon over the neck of the plastic bottle.
- Flip the bottle upside down and allow the flour to fall from the bottle into the balloon, squeezing the bottle as needed to help it along. Continue until the bottle is empty and as much flour as possible has made its way into the balloon.
- Pinching the neck of the balloon with your fingers to prevent the air from escaping, use the fingers of your other hand to carefully extricate the balloon from the bottle. Then, using both hands to control the amount of air and flour that is allowed to escape, very slowly let the air out of the balloon until there is only flour remaining.
- Once you have removed as much air as possible from the balloon, carefully tie it up by making a knot as close to the base of the balloon as possible, making sure not to let any extra air in. If desired, you can use scissors to trim some of the excess balloon near the knot, and stretch a second balloon (neck cut off) over the filled balloon to cover the knot and help prevent leaks.
- Use a permanent marker to give your stress ball a face. Orange balloons can be decorated to look like jack-o’-lanterns, while white balloons can be made to look like ghosts. (You can also come up with your own design using whatever colors you have at home!) Allow the permanent marker ink to dry fully before you start using the stress ball.
Video
Notes
-
- Don’t skip the bottle: Funnelling flour directly into the balloon is less effective, and will make it harder to add the full ¾ cup.
- Use a dry bottle: This will prevent flour from sticking to the inside.
- Pinch the balloon shut: Make sure you don’t let air or flour escape unintentionally from the balloon as you are making the stress ball.
- Remove all the air: For best results, only flour should remain inside the balloon when you tie it up.
- Allow the ink to dry: Allow the permanent marker ink to dry before you start playing with the stress ball. Designs that fade over time can be traced over again as needed.
Grab our 12 best sensory recipes!
By submitting your email address, you are agreeing to the terms of our Privacy Policy. You can unsubscribe at any time.
Only your name will be made public. Please note that by submitting your comment, you are agreeing to the terms of our Privacy Policy.