Not only is this fork painted Easter chick super simple to make, but your kids will love the process of painting with a fork. If you’ve been looking for an easy Easter craft that uses supplies you already have at home, you’ll definitely want to give this one a try!
JUMP TO…
Love making crafts with your kids? This simple Easter art project is perfect for both younger and older kids, and it involves a fun process art activity that your kids will love.
This easy craft would make a great last-minute project for Easter weekend, and you probably already have most of the required supplies at home.
Why You’ll Love This Craft
- Easy to make: This craft is perfect for kids of all ages, and even younger kids should be able to complete most of the steps without any help from an adult.
- Super cute: How adorable are those little feathers?! I loved how this project turned out, and so did my kids.
- Fun for kids: Painting with a fork instead of a paintbrush is super fun for children who like trying out different artistic techniques, and it’s a great way to switch things up if you’ve been doing a lot of painting at home!
Looking for more Easter crafts to make with your kids? Check out this Torn Paper Strip Easter Bunny, this Easter Peeps Painting Craft, or these Glue & Chalk Pastel Easter Eggs. Or, pick your favorite idea from this big list of Easter Crafts for Kids!

Get hundreds of pages of activities!
Get access to all our paid printables, as well as monthly activity planners, for just $5/month. (New printables added twice per month!)
Required Materials
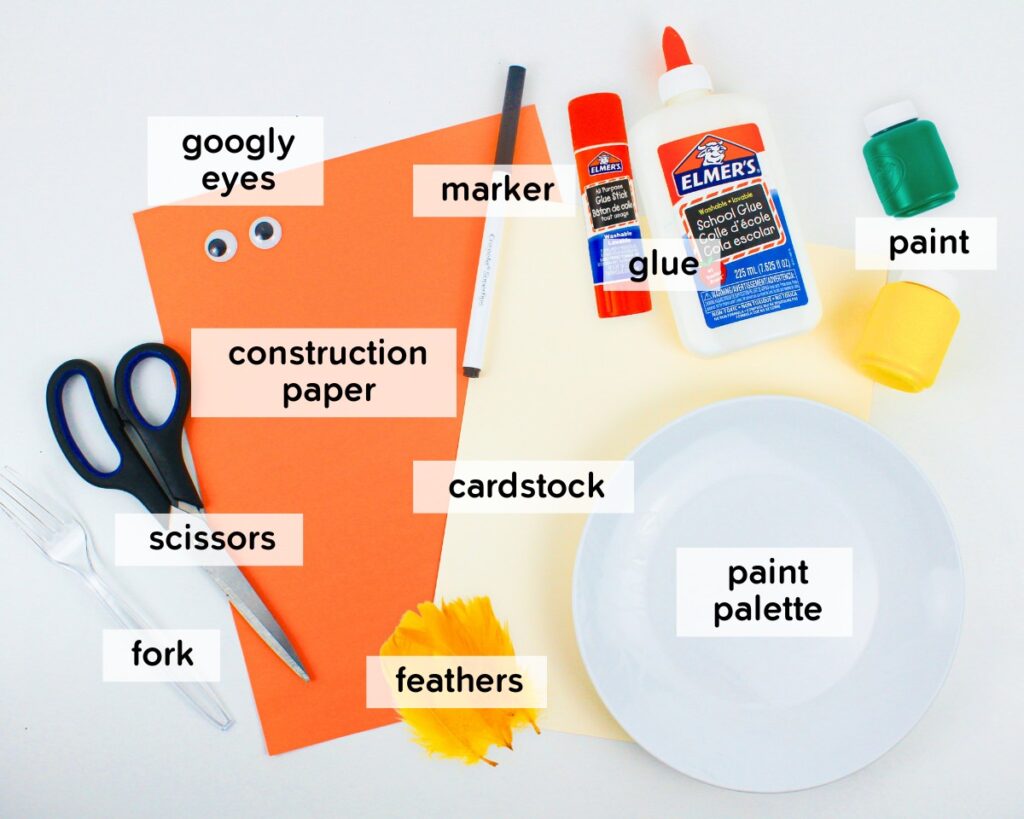
- Fork: I used a plastic fork, but metal could also work.
- Paint palette: You’ll need a paint palette with a flat surface large enough to accommodate the tines of a fork. If you don’t have a paint palette, you can also use a paper, plastic or ceramic plate. (I tend to use plastic or ceramic because they can be washed and reused.)
- Paint: Washable kids’ paint and acrylic paint are both fine. (I used washable paint.) You’ll need to use yellow for the chick’s body, and green for the grass.
- Cardstock: I used cream-colored cardstock, but any light color will do. You can even choose Eastery pastel shades like light purple or pink, though I wouldn’t recommend yellow since the chick’s body is also that color.
- Construction paper: You’ll need orange in order to create the chick’s beak. Orange cardstock can also work if it’s what you have at home.
- Scissors: Metal scissors are best, especially if you are planning on adding feathers. If you plan on skipping the feathers, plastic scissors can work.
- Googly eyes: They’ll need to be pretty big—mine were about 1.8 cm wide.
- Glue: I used both a glue stick and liquid school glue for this craft. If you’re skipping the feathers, liquid glue is all you’ll need.
- Marker: Any type of marker is fine. I used a black washable fine tip marker, but dark orange is also a good option.
- Feathers: This is optional, but a fun addition to the craft. I chose two medium-sized feathers in a shade of yellow that was slightly darker than the yellow paint I used for the chick’s body. You can use a lighter yellow if you want, but I liked the contrast between the two colors.
The full supply list and instructions can be found in the how-to card.
GRAB OUR FREE 30-PAGE ACTIVITY BUNDLE!
By submitting your email address, you are agreeing to the terms of our Privacy Policy. You can unsubscribe at any time.
How to Make a Fork Painted Chick (Step-by-Step)
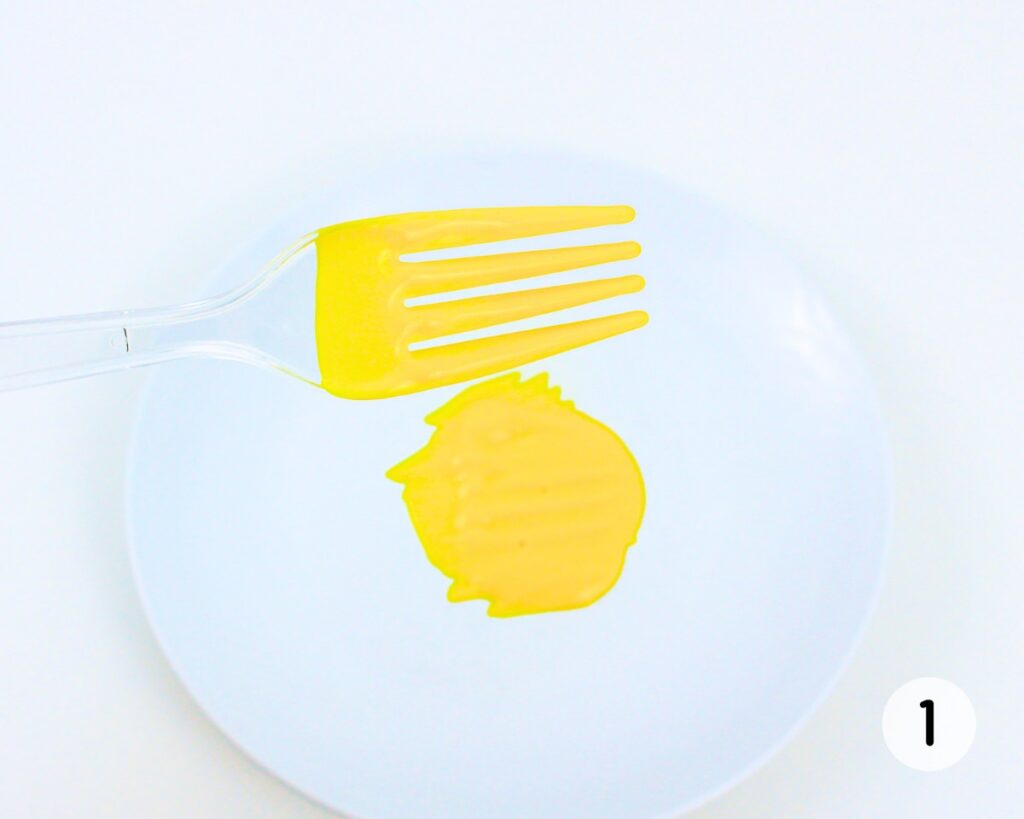
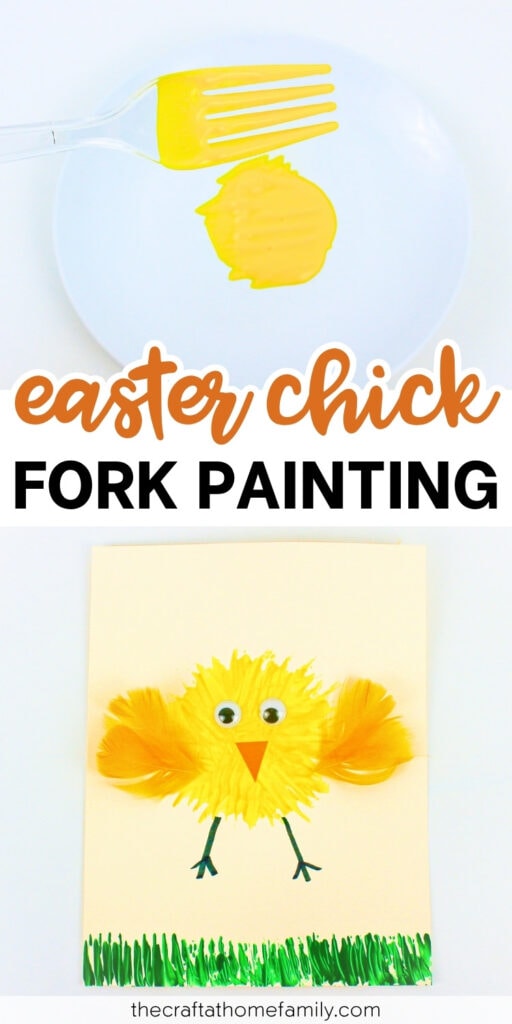
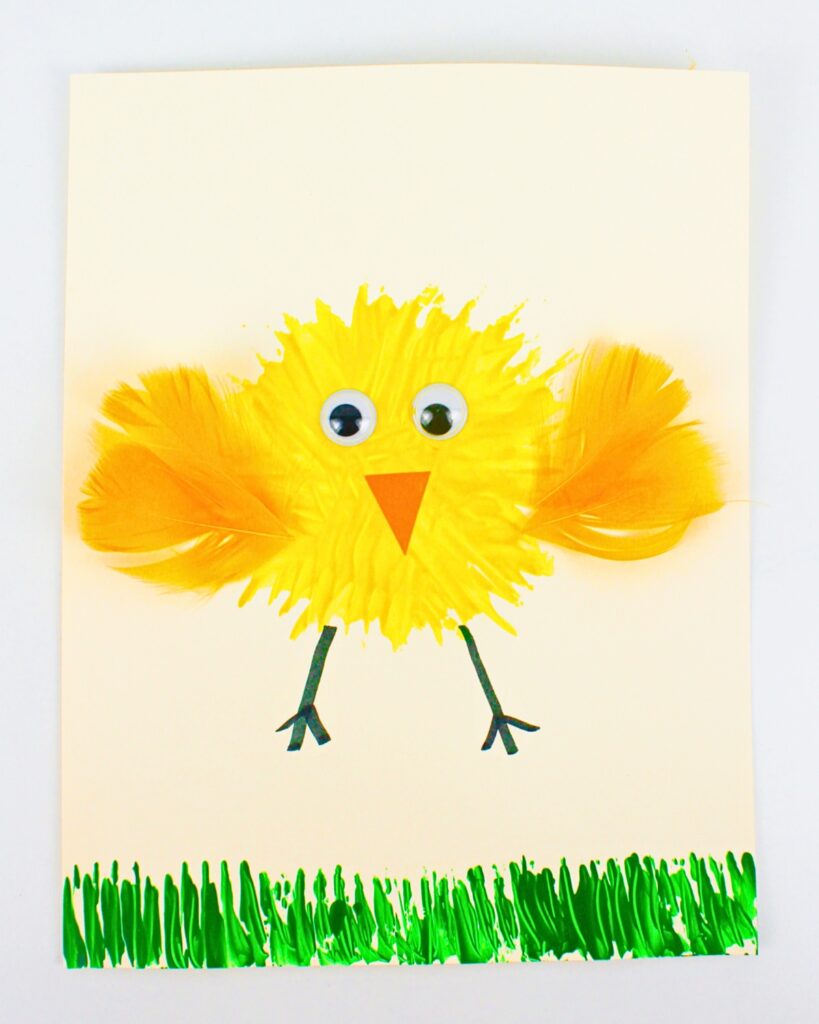
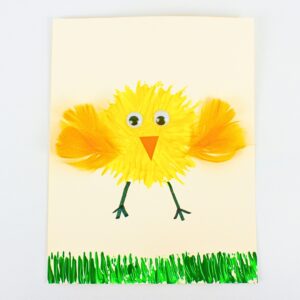
Step 1: Dip fork in paint. Pour some yellow paint onto a flat paint palette, then dip the back of the fork in paint to coat it.

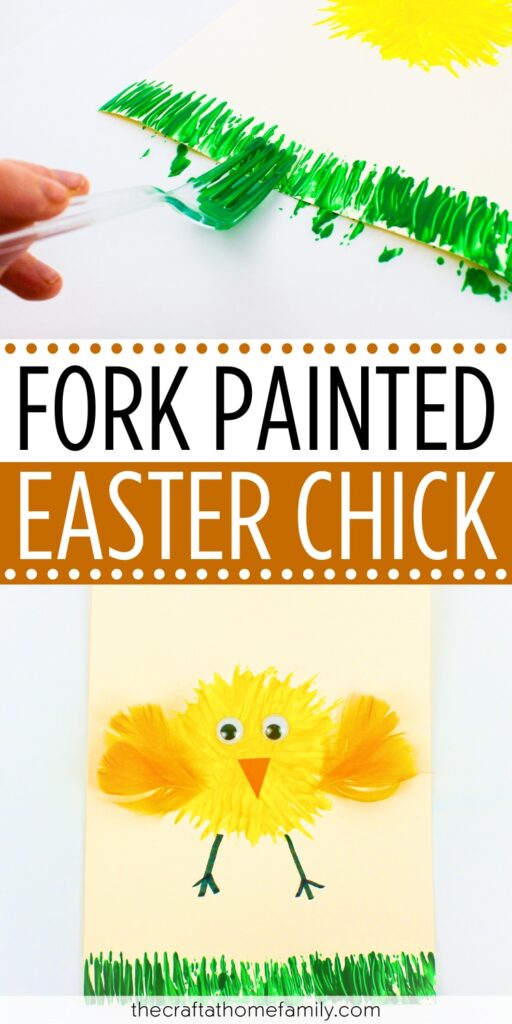
Step 2: Paint chick’s body. Press the paint-covered fork onto the middle of a sheet of cardstock, then gently glide it to create an imprint. Repeat as needed, dipping the fork in paint again as often as required and rotating it to create imprints that are positioned outward from the same center. Allow to dry fully.
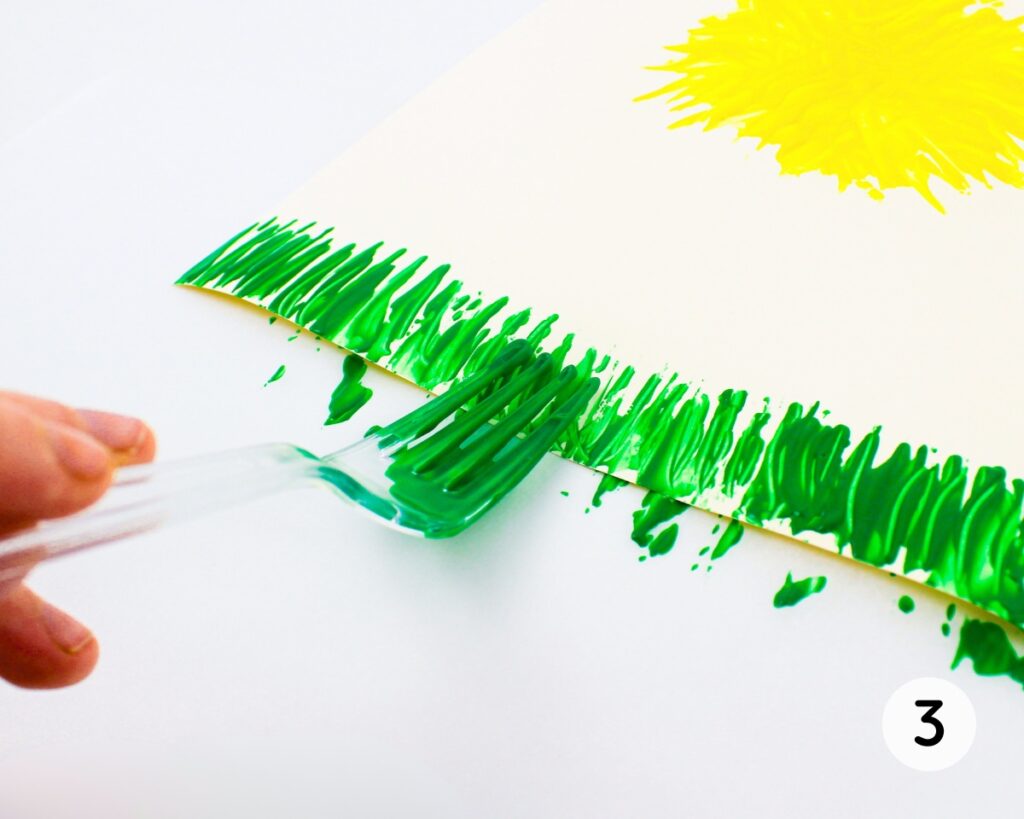
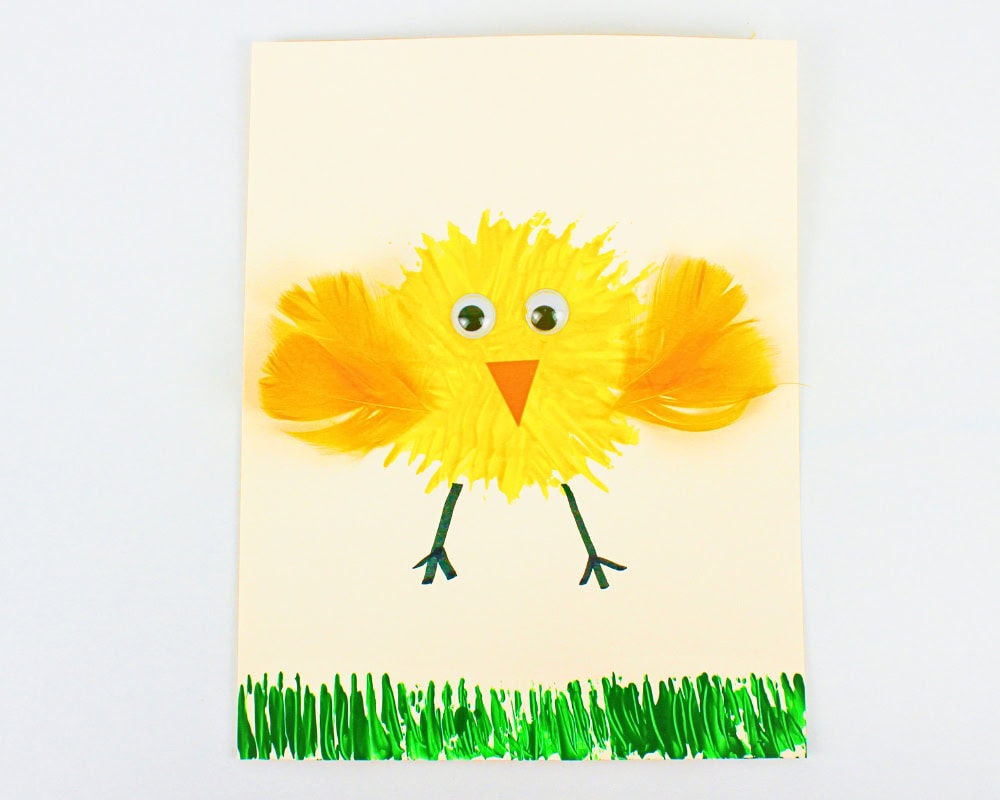
Step 3: Paint grass (optional). If desired, pour some green paint onto the paint palette, dip the fork in paint to coat the back, and use it to create blades of grass at the bottom of the sheet of cardstock. (This will cause some of the paint to spread onto your work surface, so I recommend placing parchment paper underneath to make the cleanup easier.) Allow to dry fully.
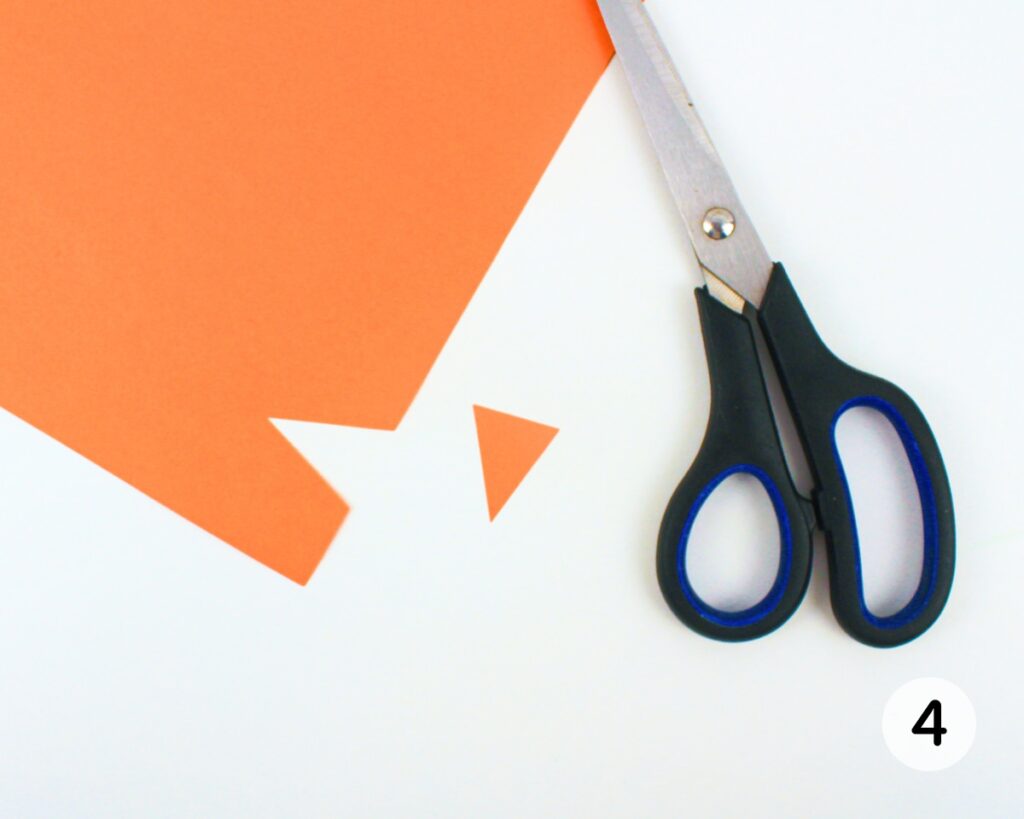
Step 4: Cut beak. Use scissors to cut a small orange triangle out of construction paper.
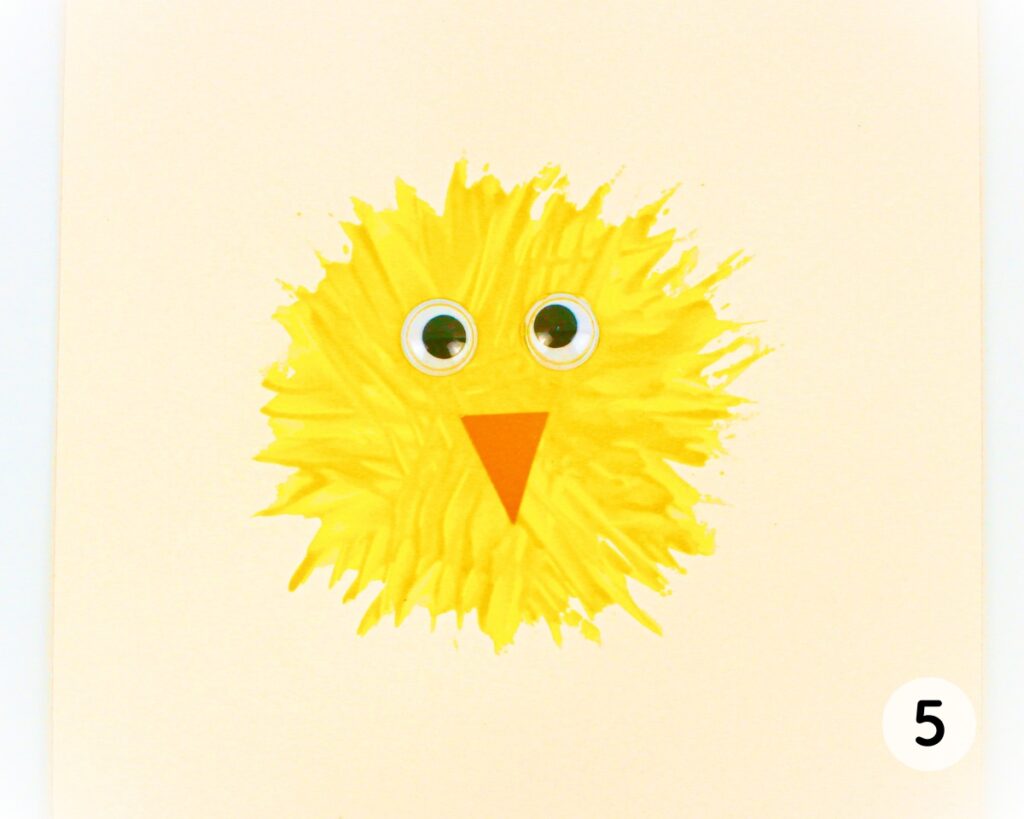
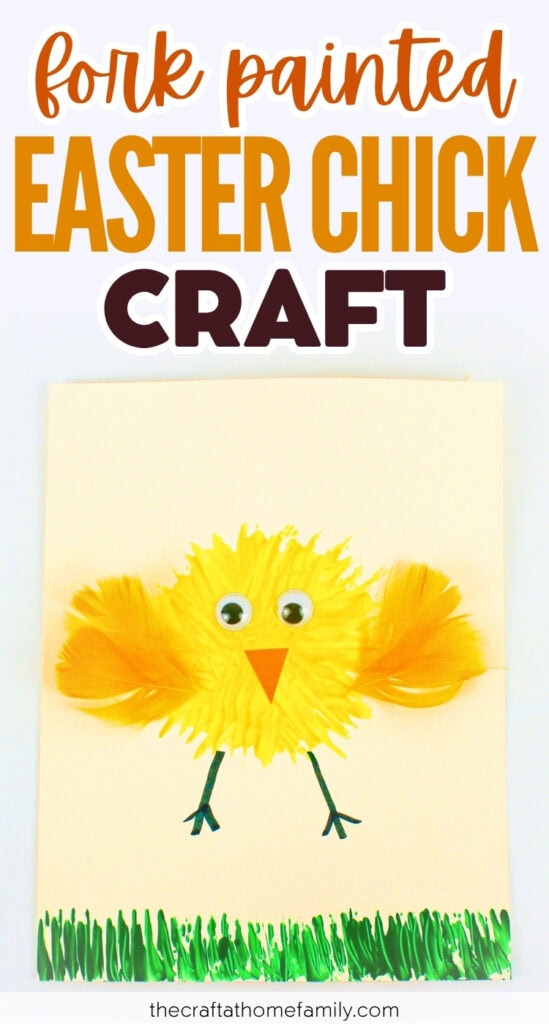
Step 5: Add eyes and beak. Once the paint has dried, glue two large googly eyes, along with the orange construction paper triangle, to the chick’s body.
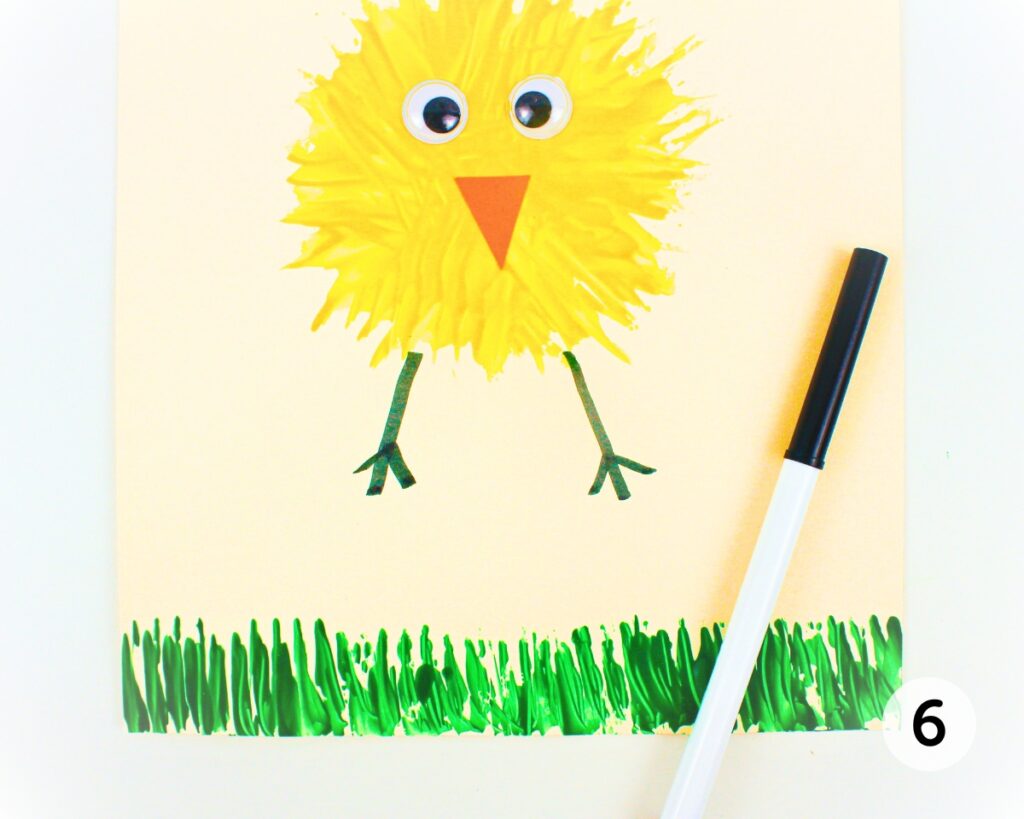
Step 6: Draw legs. Use a black or dark orange marker to give your chick two legs.
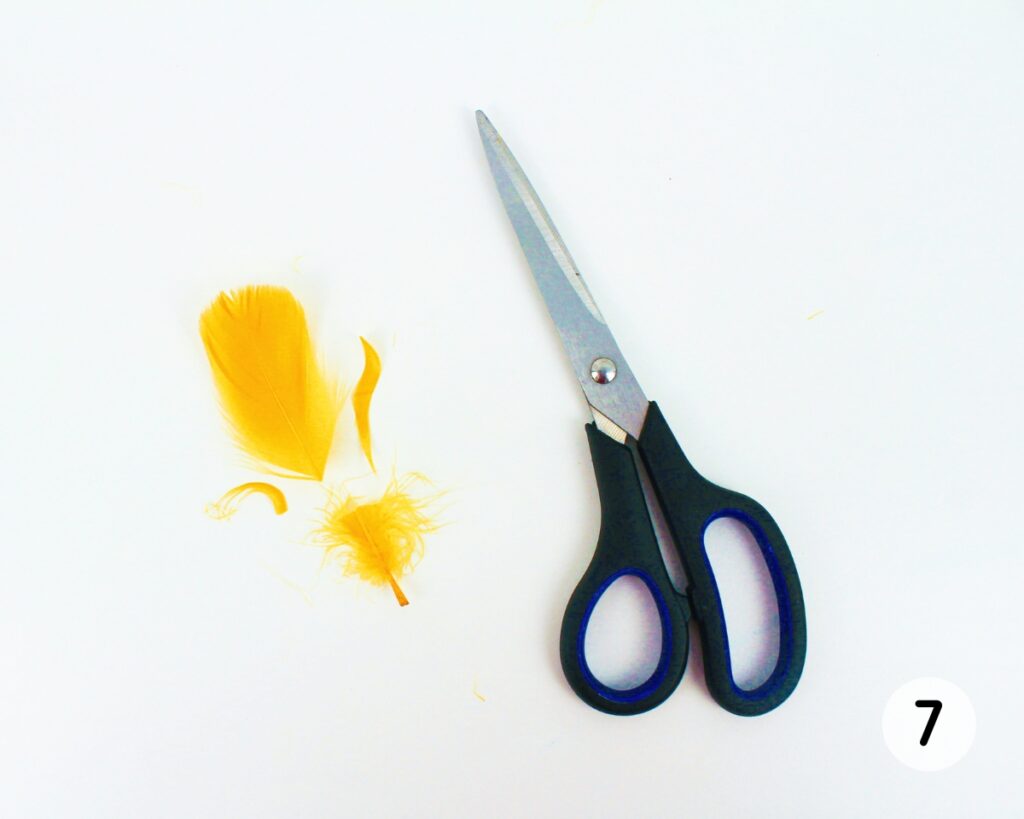
Step 7: Cut feathers (optional). If you wish to add feathers to the chick, use scissors to cut off the base of the feathers, and remove any loose strands by gently pulling them off with your fingers.
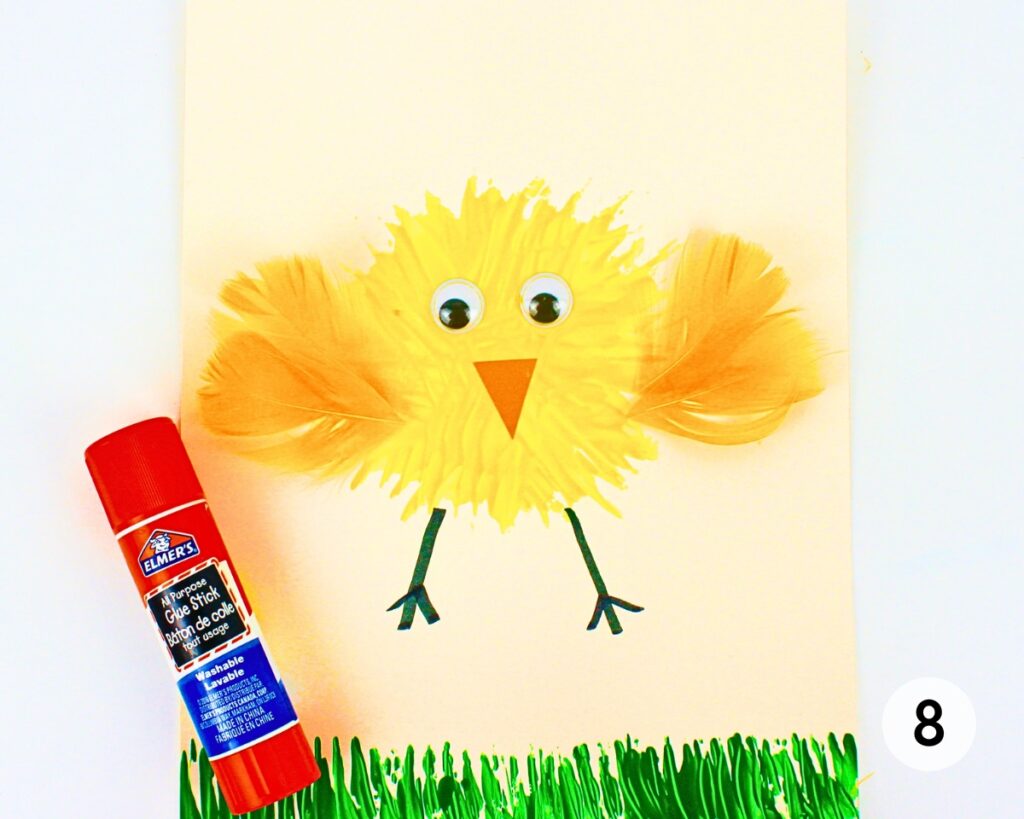
Step 8: Glue feathers to chick (optional). Use a glue stick to spread glue on either side of the chick’s body, and press the feathers onto it in order to secure them in place.
This was such a fun project to make, and it turned even cuter than I had imagined! I love that it only used supplies that we already had at home (though I recognize that we probably have more craft supplies than most).
Helpful Tips
- Protect your work surface: Some parts of this craft—particularly the grass—can get a bit messy. Place some parchment paper or newspaper underneath your artwork to avoid staining your work surface.
- Allow the paint to dry: For best results, make sure the paint is fully dry before you start adding googly eyes and feathers to the craft.
- Remove excess feather strands: After you cut off the bottom of the feathers, gently remove any excess feather strands that are no longer properly attached.
- Pick the right glue: I used two types of glue for this project—liquid glue for the eyes and beak that I placed on top of dried paint, and a glue stick to help the feathers quickly adhere to the cardstock.
More Easter Crafts for Kids


If you have tried this Fork Painted Easter Chick or any other project on my website, please let me know how it went in the comments below. I can’t wait to hear from you!
Fork Painted Easter Chick
Materials
- 1 fork (pastic or metal)
- 1 paint palette
- paint (yellow and green) washable or acrylic
- 1 sheet light-colored cardstock
- 1 sheet orange construction paper
- 1 pair sharp scissors
- 2 large googly eyes
- liquid school glue
- 1 marker (black or dark orange)
- glue stick optional
- 4 yellow feathers optional
Instructions
- Pour some yellow paint onto a flat paint palette, then dip the back of the fork in paint to coat it.
- Press the paint-covered fork onto the middle of a sheet of cardstock, then gently glide it to create an imprint. Repeat as needed, dipping the fork in paint again as often as required and rotating it to create imprints that are positioned outward from the same center. Allow the paint to dry fully.
- If desired, pour some green paint onto the paint palette, dip the fork in paint to coat the back, and use it to create blades of grass at the bottom of the sheet of cardstock. (We recommend placing parchment paper underneath to protect your work surface.) Allow the paint to dry fully.
- Use scissors to cut a small orange triangle out of construction paper. Then, making sure the paint has dried fully before proceeding, glue two large googly eyes, along with the orange construction paper triangle, to the chick’s body, and use a marker to give your chick two legs.
- If you wish to add feathers to the chick, use scissors to cut off the base of the feathers, remove any loose strands, then use a glue stick to glue them to either side of the chick's body.
Only your name will be made public. Please note that by submitting your comment, you are agreeing to the terms of our Privacy Policy.