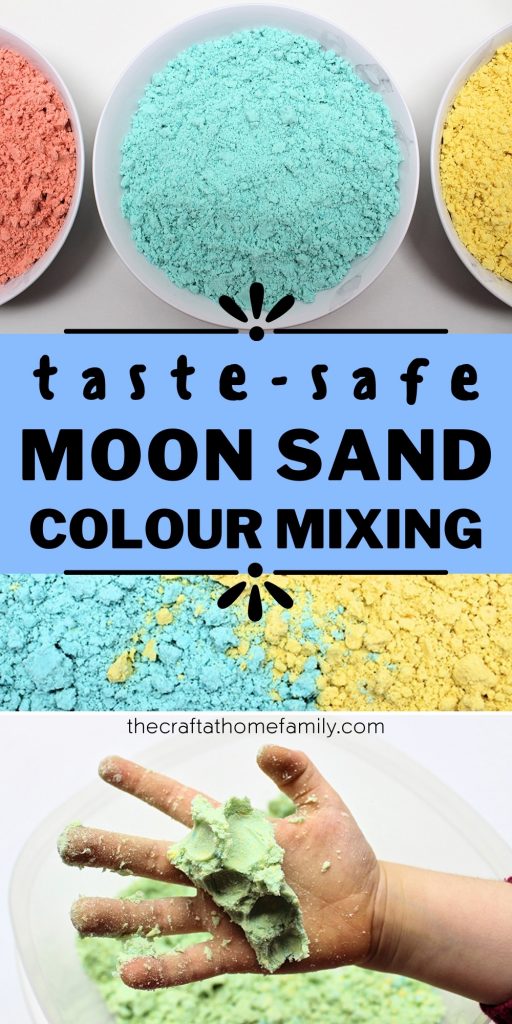
You only need three simple kitchen ingredients to create your very own taste-safe moon sand! Moon sand (or cloud dough) is soft and crumbly, but it also holds its shape when pressed. Kids will love combining it into new colors!
JUMP TO…
If you’ve never made moon sand (you may know it as “cloud dough”), you should definitely give it a try!
It’s a little messy, but it’s easy to make and has a really fun texture. Moon sand is soft and crumbly, but also moldable, and it holds its shape well when pressed together. Plus, you probably already have all the ingredients you need to make your own taste-safe version of it at home!
This activity combines the sensory experience of cloud dough with the fun of color mixing! My four-year-old is usually pretty good at posing for pictures, but in this particular case, she was having so much fun that she didn’t want to stay still long enough to let me photograph her.
Thankfully, I had to take two sets of pictures to test the difference between using vegetable oil and coconut oil, so she was a little more willing to pose the second time around!
(P.S. Looking for more taste-safe sensory activities for your child? Check out this list of 25 Taste-Safe Sensory Play Ideas for kids!)
Grab our 12 best sensory recipes!

By submitting your email address, you are agreeing to the terms of our Privacy Policy. You can unsubscribe at any time.
How to Make Basic Moon Sand
Moon sand (or cloud dough) typically requires only two ingredients: flour and oil. We decided to bake the flour and use cooking oil because our two-year-old likes to put everything in her mouth. But if you don’t need this recipe to be taste-safe, you can achieve the same results with baby oil.
If you’re looking to make basic cloud dough and don’t want to bother with colors, the recipe is super simple. All you need to do is combine flour and oil using an eight-to-one ratio (eight cups of flour for every cup of oil). Once they’re combined, it’s ready to play with!
Note: I recommend playing with your moon sand outside or at the very least, inside a container. It has a tendency to get pretty messy!
Required Ingredients
Here’s what you’ll need to make your own colored, taste-safe cloud dough at home:
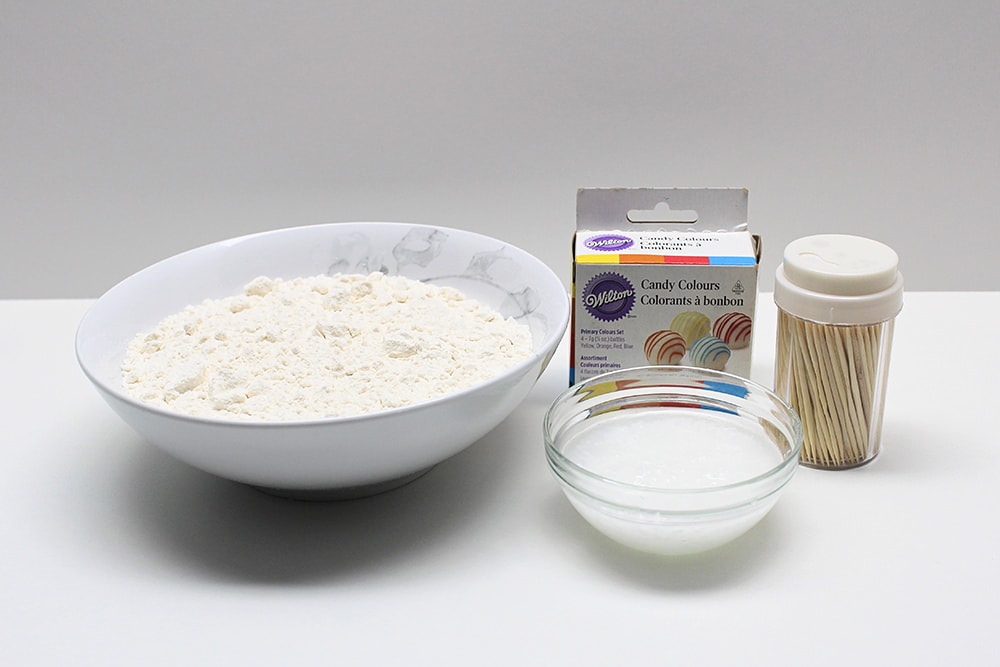
- All-purpose flour (baked on a cookie sheet for 5 minutes at 350°F)
- Cooking oil (we tried it with vegetable oil and coconut oil—I’ll discuss the difference between the two below)
- Oil-based candy coloring (or unsweetened Kool-Aid powder)
- Toothpicks (for stirring)
- Mixing bowls and spoons
Note: The cooking oil needs to have a liquid consistency. In Canada, coconut oil stays solid most of the year due to the ambient temperature, so I had to place it in the microwave for a few seconds to melt it. You may or may not have to do this depending on where you live.
Ingredient Notes
Because this recipe is meant to be taste-safe and raw flour isn’t safe to eat, you’ll need to bake the flour for a few minutes to kill any harmful bacteria. To do this, simply spread it evenly on a baking sheet and bake it for about 5 minutes at 350°F. (You can skip this step if you don’t need it to be taste-safe.)
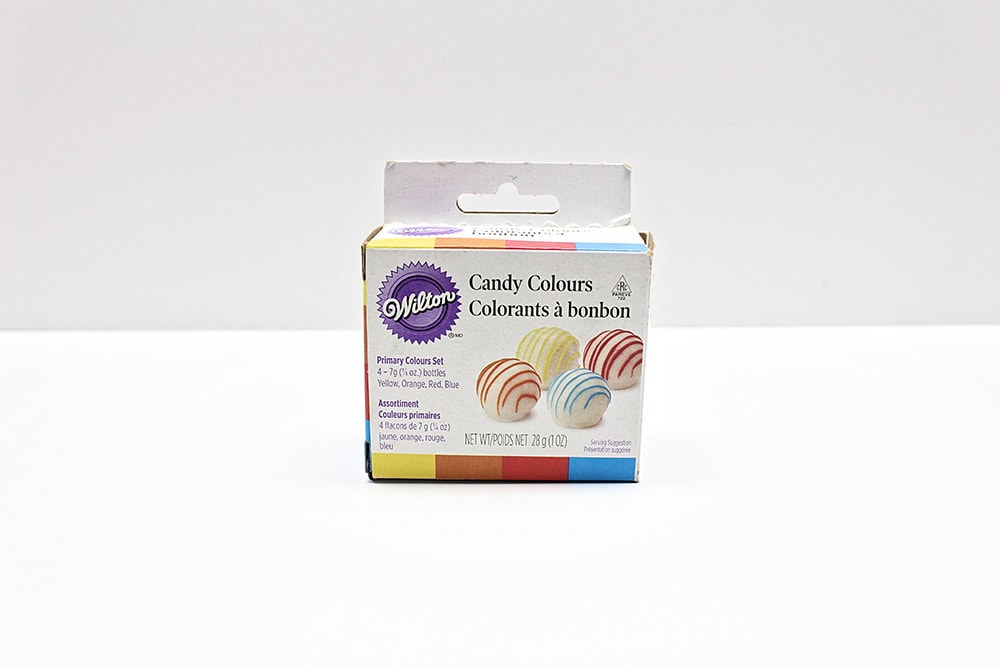
Also, cloud dough typically only required flour and oil, but since we wanted to mix colors, we had to add a third ingredient that you might not already have: candy coloring.

- WILTON-Madagascar Pure Vanilla Extract
- The finest quality for baking with a smooth rich taste
- Made in United States
- Create pretty pastel colors
- Concentrated oil-based colors blend easily with Candy Melts
You won’t be able to use regular food coloring because it is water-based and therefore won’t mix with oil. Candy coloring, on the other hand, is oil-based, so you’ll be able to stir it into the oil before pouring it into the flour.
Alternatively, you could color the cloud dough using powder paint (if you don’t need it to be taste-safe) or even unsweetened Kool-Aid powder!
How to Make Colorful & Taste-Safe Moon Sand (Step-by-Step)
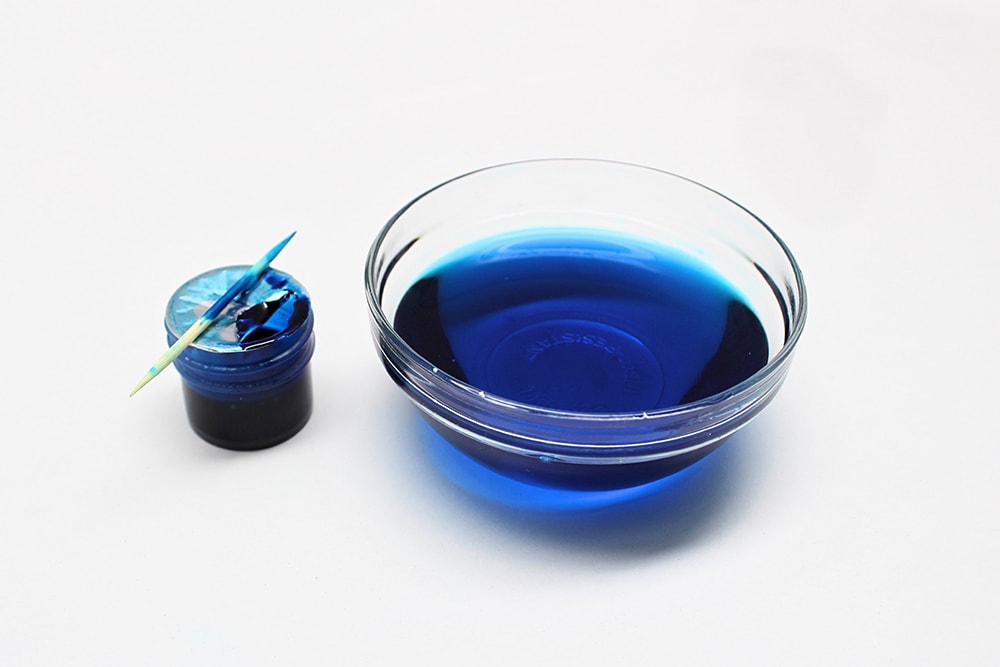
1. Add Candy Coloring to Oil
In order to make colorful moon sand, the first thing you’ll need to do is add the coloring.
Since candy coloring is oil-based, it needs to be mixed in with the oil. (If your coconut oil is solid, melt it in the microwave for a few seconds before doing this step.) I used a toothpick to add several globs of coloring to the oil and stirred until well combined.

You’ll want to keep adding candy coloring until the oil looks nice and saturated. Don’t be stingy with it or you’ll end up with very pale colors once the ingredients are combined—remember that the ratio of flour to oil is eight-to-one!
Note: If you’d rather use Kool-Aid powder, skip this step and stir it into the flour instead.
2. Mix Flour & Oil
Once you’re satisfied with the hue of the oil, pour it into a bowl of oven-baked flour and mix them together. We didn’t want to make a huge batch, so we used two cups of flour and ¼ cup of oil. You might have to break up a few clumps to combine them properly.

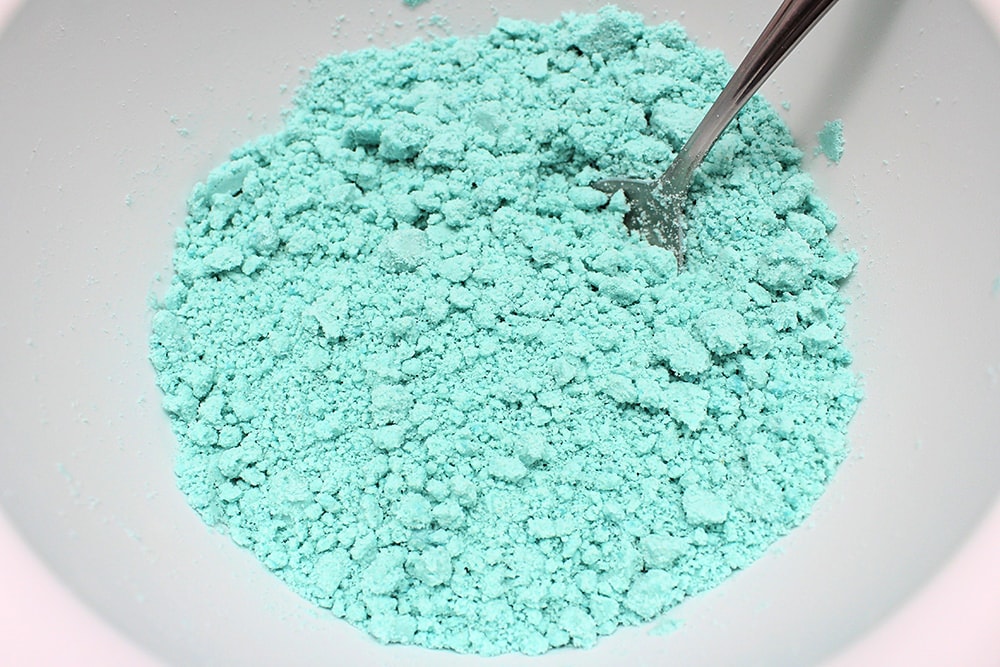
As you can see, the color looks much lighter once the oil has been mixed into the flour!
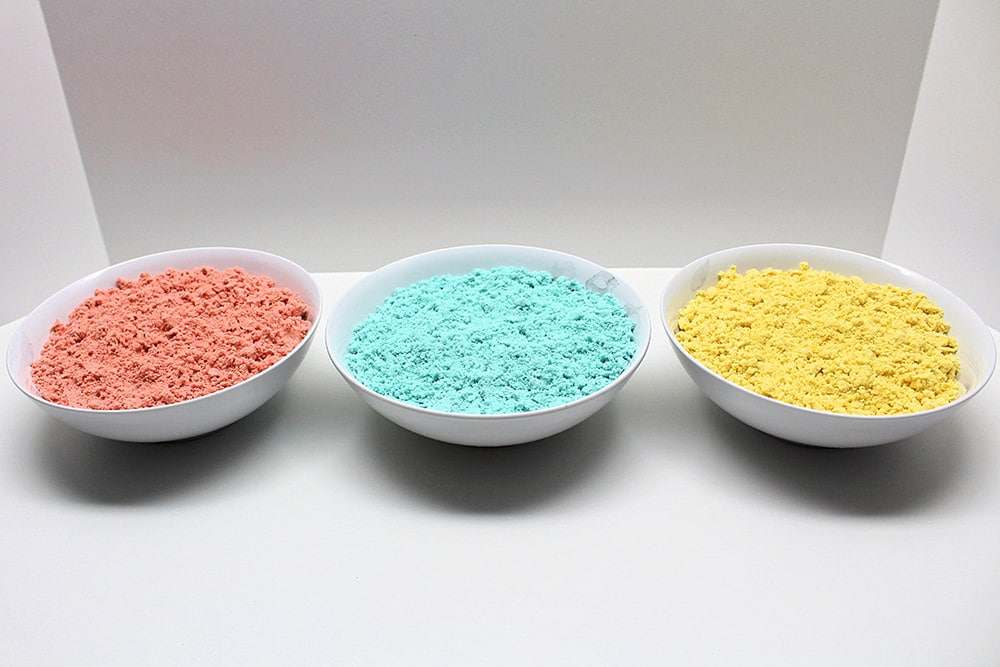
3. Repeat for Each Color
Since we wanted to mix the colors, we decided to make three batches—one for each primary color. If you’re doing the same, just repeat the previous steps until you have three bowls of colored cloud dough.
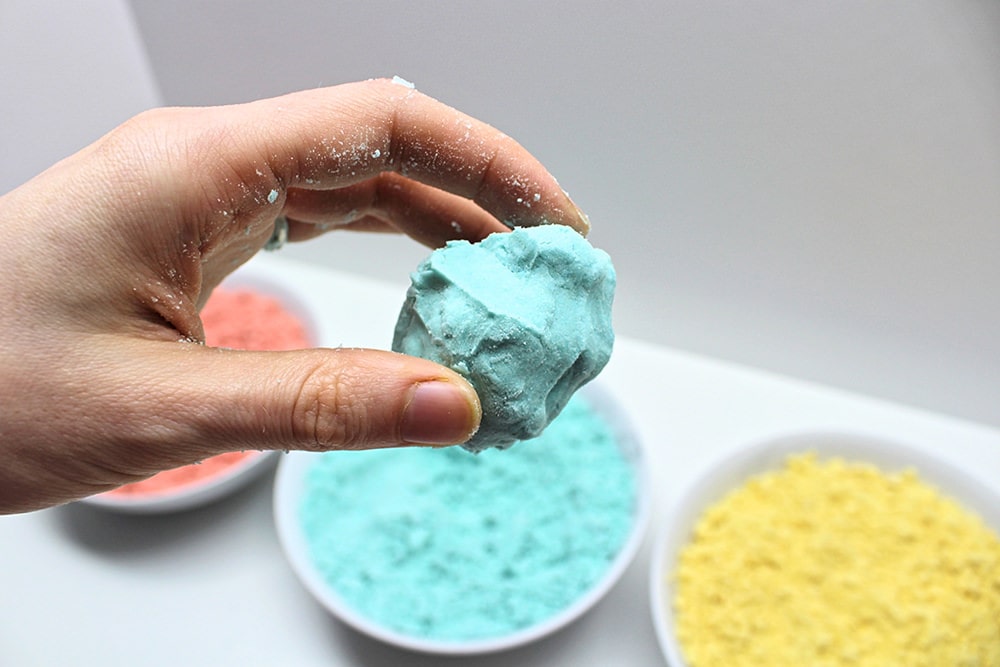
4. Play!
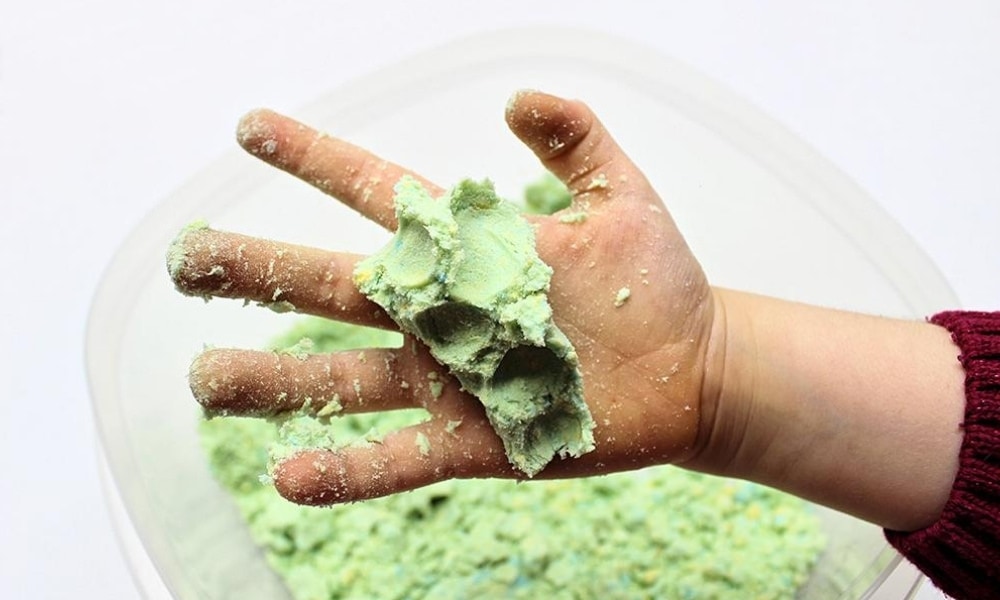
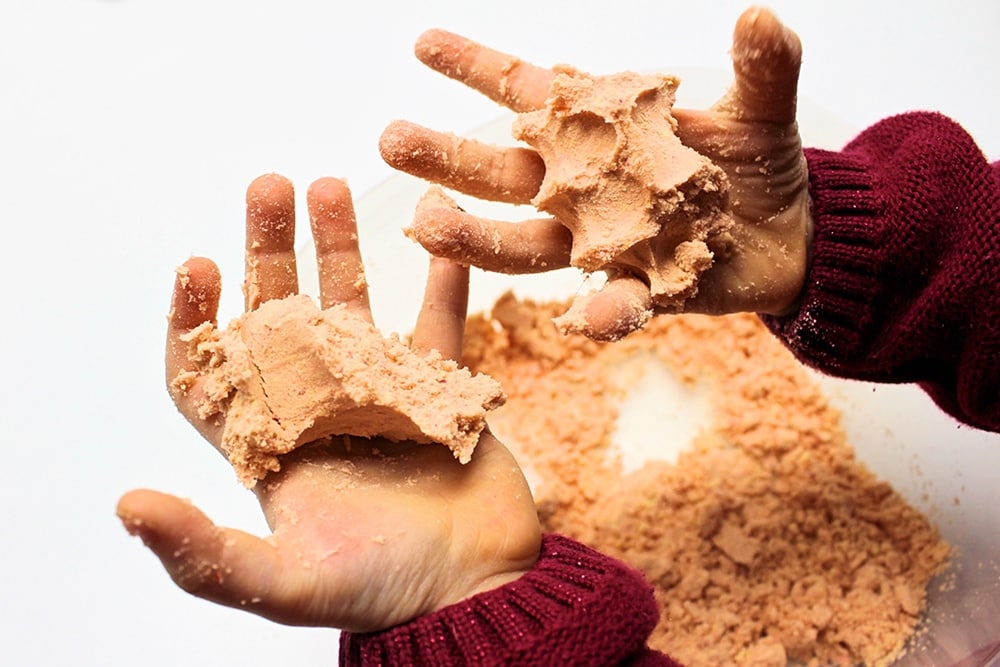
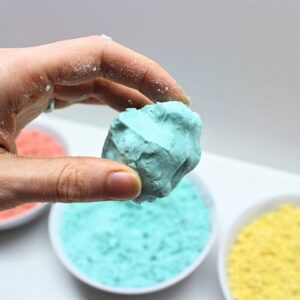
Once you have all the colors you need, your cloud dough is ready to play with! It’s very soft and powdery, but holds its shape well when pressed together.
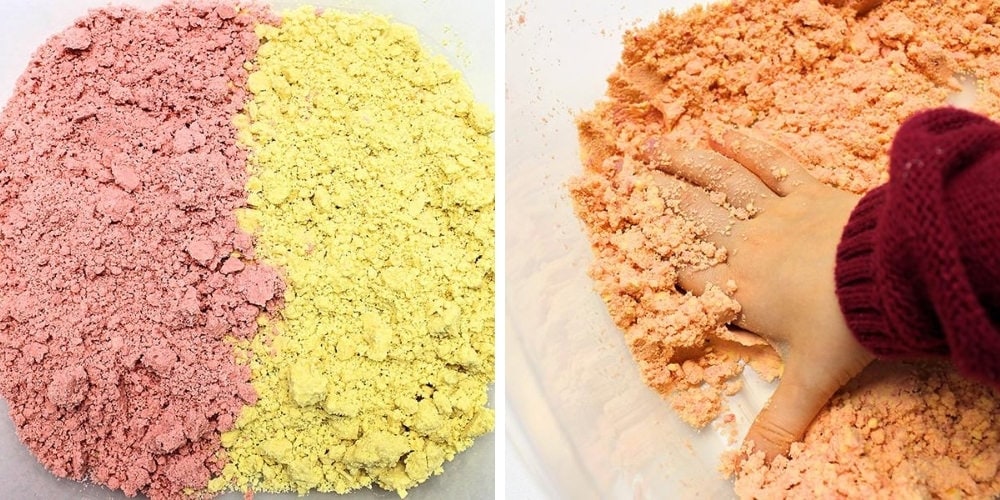
Since we decided to add a color-mixing component to this activity, we paired two primary colors together and started playing with the cloud dough to combine the two. My four-year-old loved seeing new colors appear!
We took two sets of pictures to test the difference between vegetable oil and coconut oil. The second time, she remembered mixing colors the first time and immediately started to stir the cloud dough around to reveal a new color.
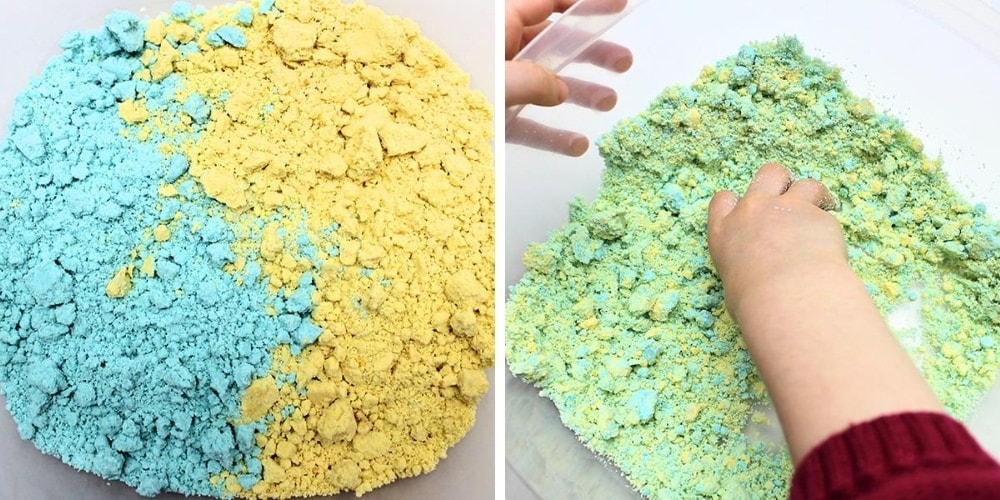

The color mixing worked really well when we tried to create orange and green!
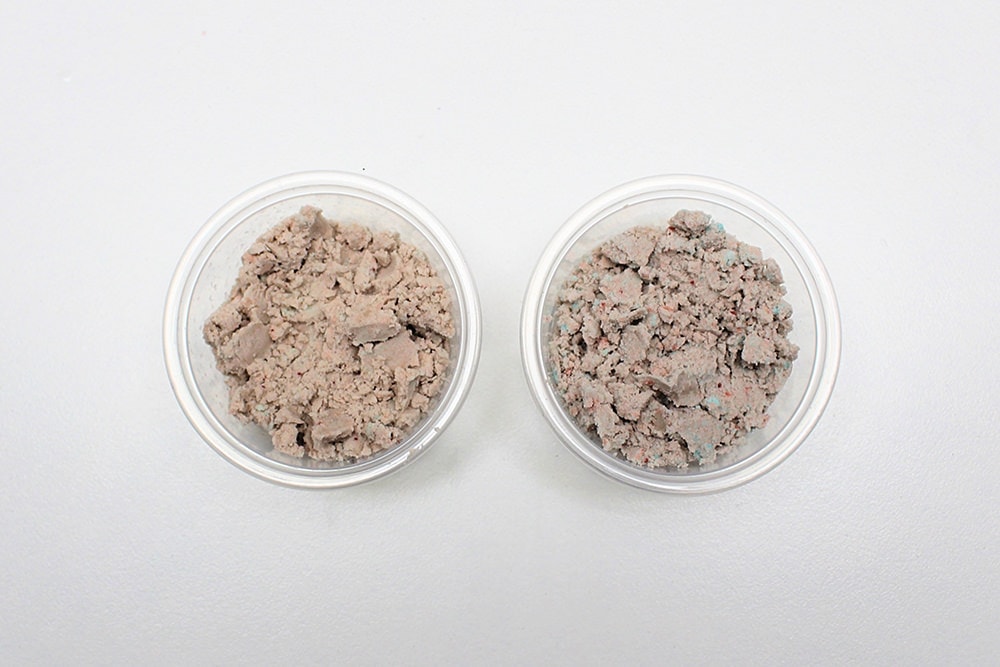
Unfortunately, when it came to purple, the results weren’t as nice.


The purple color is actually the reason we ended up taking two sets of pictures—I used vegetable oil the first time around and since vegetable oil is yellowish in color, I wanted to see if the experiment would work better using clear coconut oil.
Unfortunately, I wasn’t much more successful the second time around. I’m thinking the purple color didn’t work out because the colors weren’t vibrant enough, or because I couldn’t figure out the correct ratio of red and blue. If you manage to create a nice purple color, I’d love to hear what you did!
But even though the purple isn’t as nice as the green and orange, it’s still just as fun, and your kids will love seeing a new color appear when two others are combined! You could even try mixing colored moon sand with regular white moon sand to discuss why it lightens the color!
What Type of Oil Should You Use?
If you’re hesitating between vegetable oil and coconut oil, just use whichever you have on hand or prefer. Both are taste-safe, and the two batches I made to test the difference came out virtually identical.
Since vegetable oil has a yellow tinge, I thought the clear color of the coconut oil might make for a nicer purple color. But as you can see from the pictures below, it didn’t end up affecting it much. (Left is vegetable oil and right is coconut oil.)
It also didn’t have any effect on the texture. In fact, the only noticeable difference between the two batches was the smell, but that’s only because I used unrefined coconut oil—yours might not even have a smell if it’s refined or if you use a different brand than I did.
If cost is your main consideration, definitely go with vegetable oil. It tends to be way cheaper no matter where you buy it. You can even use baby oil, but if you do, keep in mind that this recipe will no longer be taste-safe!
Taste-Safe Moon Sand
Ingredients
- oil-based candy coloring as needed
- ¼ cup cooking oil (vegetable or coconut)
- 2 cups all-purpose flour
Instructions
- Place the flour on a baking sheet and bake it in the oven for 5 minutes at 350°F to kill any harmful bacteria. (You can skip this step if you don't need the moon sand to be taste-safe.)
- Use a toothpick to mix some candy coloring into the oil.
- Pour the oil into the flour and stir until well combined. Repeat for each color you want to make, then give the moon sand to your child and let them play!
Video
Notes
Related Sensory Activities
Looking for more fun sensory activities that you can do at home with your kids? Check out these articles:
- Chocolate Play Dough (Taste-Safe!)
- Stovetop Psyllium Husk Slime (Taste-Safe!)
- Stretchy Water Bead Slime
- Surprise Water Bead Sensory Bag
Join my mailing list using the form below to receive 12 of the most popular sensory recipes on my site in PDF format! You’ll be the first to know when I publish new recipes, and you’ll also gain access to my free printables library, which is filled with lots of printable activities for kids.
Grab our 12 best sensory recipes!
By submitting your email address, you are agreeing to the terms of our Privacy Policy. You can unsubscribe at any time.
Please describe the details in baking the flour to achieve taste saftiness.. Thank you
Hi Sherri! You’ll need to preheat your oven to 350°F, spread the flour evenly on a baking sheet and bake it for about 5 minutes. This should kill any harmful bacteria. Just make sure you keep a close eye on it so it doesn’t burn!
Do you think packets of Kool aid might be a good substitute to color it?
Yes, I believe powdered Kool-Aid could be a good substitute for candy colouring as long as it’s the unsweetened kind (to prevent the sugar from making things sticky). It would add a nice scent too! I would mix it in with the flour before adding the oil.
Purple is a hard color to get right. But I do remember seeing them add a little bit of yellow to the paint I was getting mixed at Home Depot, so maybe yellow helps?