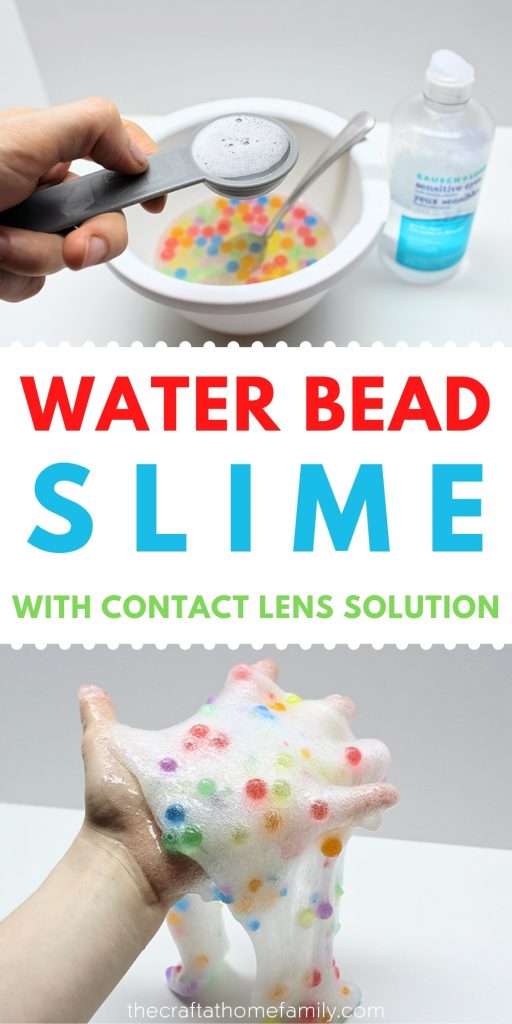
Not sure what to do with that big batch of water beads? Try putting them in slime! Hydrated water beads add an awesome textural element to this super fun, super stretchy slime recipe. And since it calls for contact lens solution rather than borax, it won’t be as harsh on your child’s skin!
JUMP TO…
A few months ago, I hydrated some water beads for my article on Surprise Water Bead Sensory Bags.
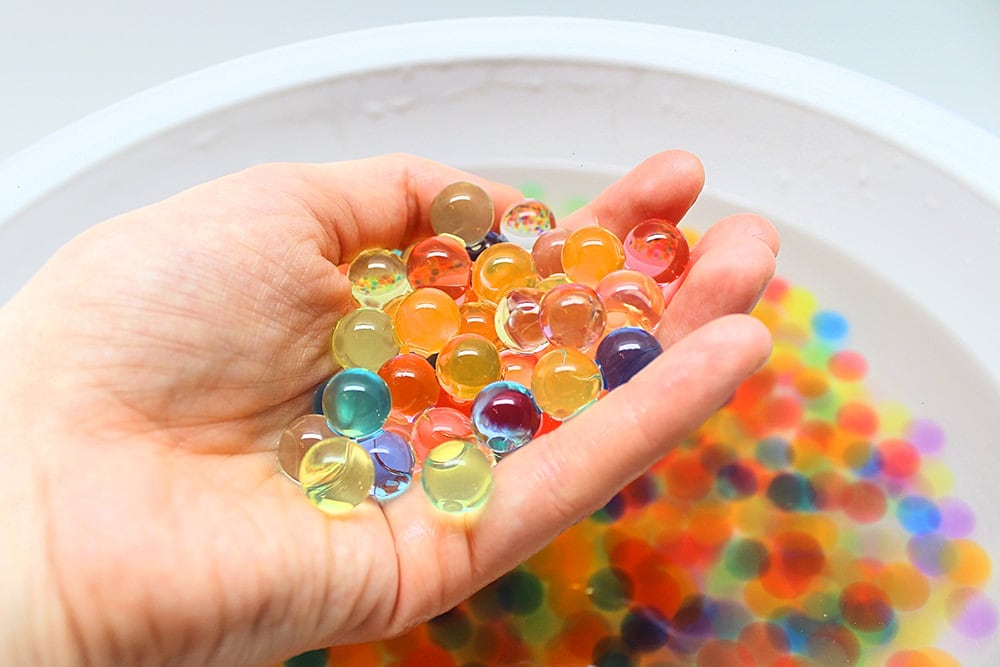
I only hydrated a small quantity, but if you’ve ever used water beads, you know how much bigger they get once they’ve absorbed water. One teaspoon of dried beads can turn into a huge bowl of hydrated ones!
Once they were hydrated, I placed the water beads in a gallon-sized freezer bag and my four-year-old has been playing with them ever since. Sometimes, I pour them into a large bowl and let her scoop them into various containers. Other times, we place them in sandwich bags and squeeze them until they burst as a way to channel destructive energies.
And since they have such a great texture, I thought that they would make a great addition to a batch of slime, which my daughter is a huge fan of!

Get hundreds of pages of activities!
Get access to all our paid printables, as well as monthly activity planners, for just $5/month. (New printables added twice per month!)
Using Contact Lens Solution as a Slime Activator
A lot of slime recipes call for ingredients like borax or Liquid Starch. But Liquid Starch isn’t sold in Canada, and really, I’m not a big fan of letting my kids play with slime that contains those ingredients anyway.
Thankfully, contact lens solution can be used an activator as well!
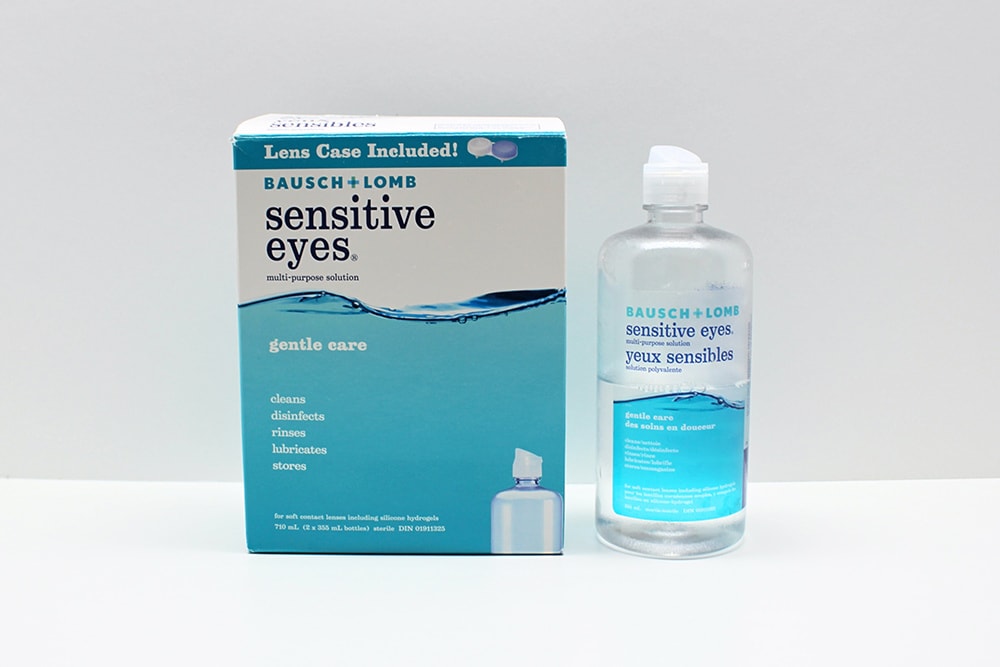
In order for the chemical reaction to occur, the contact lens solution you use must list “boric acid” and “sodium borate” in the ingredients. These ingredients are derivatives of borax, so this slime is not borax-free in the strictest sense, but I feel more comfortable letting my kids play with it because contact lens solution is not as harsh on the skin. It’s also easy to find in a lot of stores, which makes it a great alternative to other slime activators.
Just make sure you check the ingredients carefully before buying it or you might end up disappointed!
Also, keep in mind that if you child is young and likes to put everything in their mouth, this slime is probably not for you. In our house, the only child who is allowed to play with this type of slime is our four-year-old, and it typically only comes out when her younger siblings are napping.
Thankfully, there are other recipes you can use for younger children to include them in the fun. Our personal favorite is this recipe for Taste-Safe Stovetop Psyllium Husk Slime!
Required Ingredients
Here’s what you’ll need to make some super stretchy water bead slime for your kids:

- Clear glue (we buy ours by the gallon to make slime and sensory bottles, and usually go with the AmazonBasics brand because it’s so much cheaper than Elmer’s here in Canada!)
- Water
- Baking soda
- Water beads, hydrated according to packet instructions
- Contact lens solution
As stated above, the contact lens solution you use must list “boric acid” and “sodium borate” as ingredients in order for the chemical reaction to occur. We bought ours at Walmart and carefully compared ingredients and prices before choosing the brand pictured below:
Grab our 12 best sensory recipes!

By submitting your email address, you are agreeing to the terms of our Privacy Policy. You can unsubscribe at any time.
How to Make Super Stretchy Water Bead Slime (Step-by-Step)
1. Hydrate Water Beads
If you already have hydrated water beads leftover from another activity, you can absolutely use them to make this slime! If not, the first step is to hydrate them by leaving them in a large bowl of water for several hours.
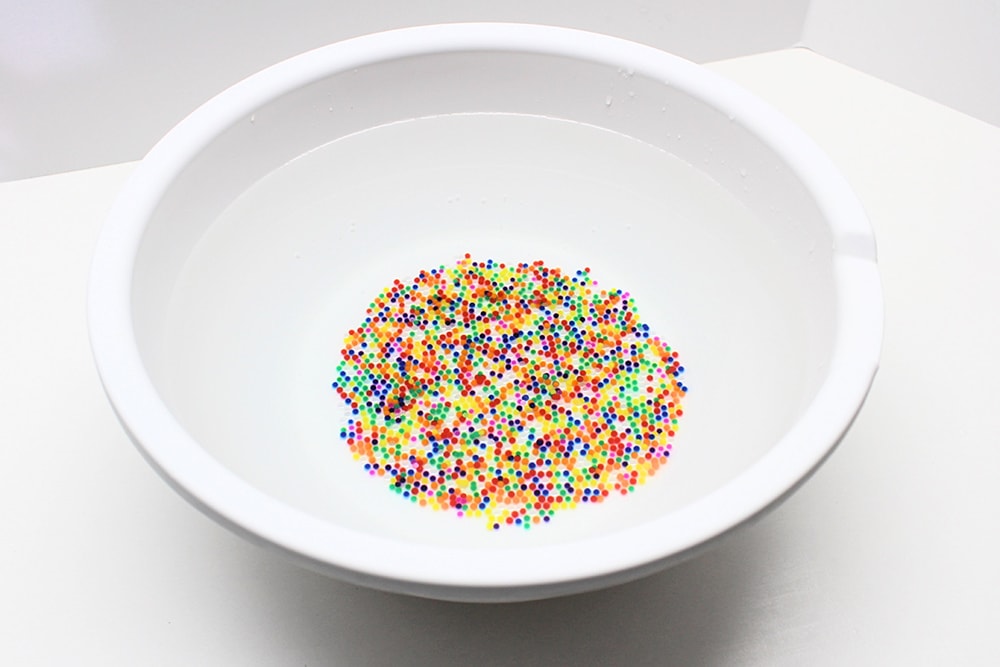
Make sure to use lots of water and only a small quantity of dried water beads—they are surprisingly absorbent and grow to many times their original size! The package I bought contains about 50,000 water beads and I’m pretty sure they would fill an entire bathtub if I hydrated them all at once. I usually only use about one teaspoon at a time.
2. Combine Water and Glue
Combine ½ cup of clear glue and ½ cup of water in a small bowl. The added water is what makes the slime so stretchy!

3. Add Baking Soda
Mix in ½ teaspoon of baking soda.
4. Add Water Beads
Add the hydrated water beads. You can use as few or as many as you like. If you’re not sure how many you want to use, just use fewer and reevaluate once the slime has formed. You’ll be able to add more even at that stage, so there’s really no messing up the quantities.
5. Add Contact Lens Solution
Once you’ve added the water beads, it’s time to add the slime activator! Start with 1 tablespoon of contact lens solution and stir until well combined.
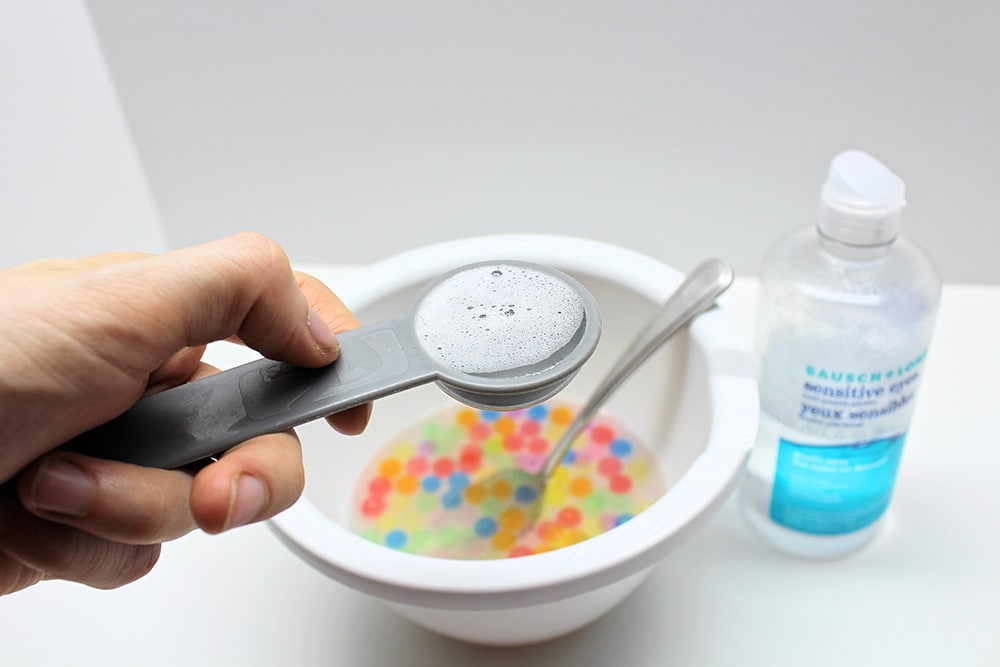
You might notice the mixture starting to solidify a little, but 1 tablespoon probably won’t be enough to fully activate your slime. You’ll probably end up needing somewhere between 1 tablespoon and 1 ½ tablespoons.
Once I’ve added the initial tablespoon, I usually add one small squirt at a time, mixing well between each addition. Don’t add too much at a time or your slime will become rubbery! (I’ll explain how you can fix this below, but you’re really better off adding the activator slowly to avoid the issue altogether.)
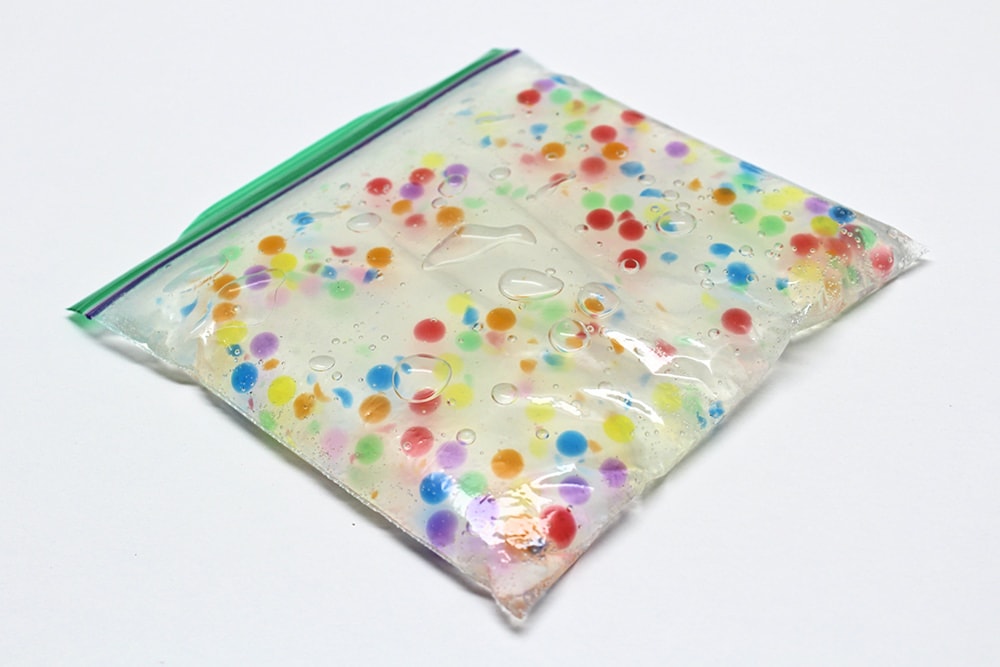
I usually stop adding contact lens solution when I see that the mixture is no longer as runny. Before the activator is added, it will behave like a liquid (which makes sense considering it’s basically just diluted glue). This is what you can expect to see before the mixture has been fully activated:
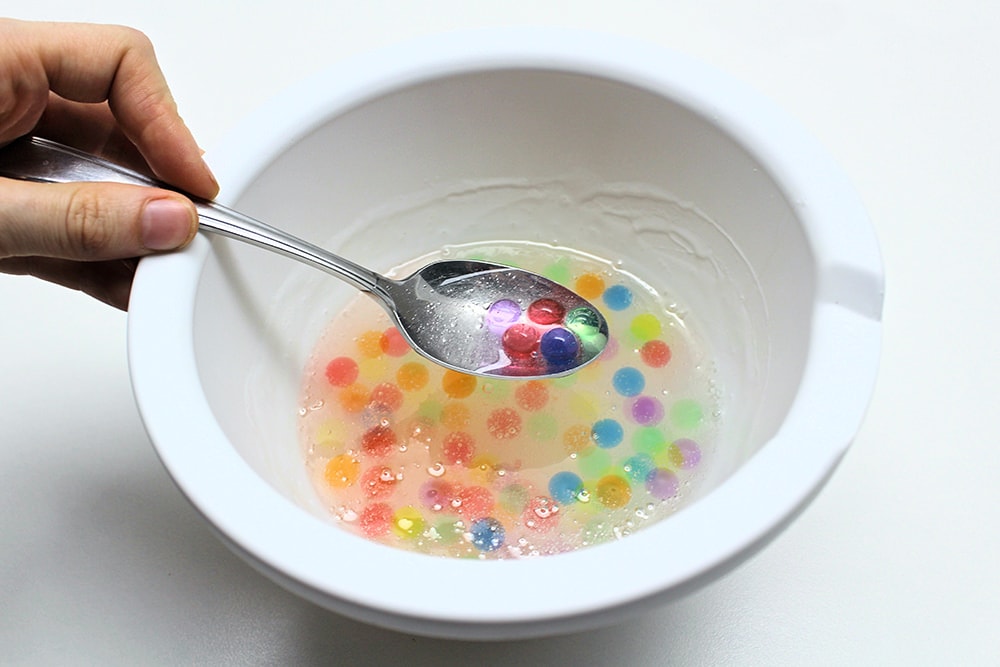
Once you’ve added enough activator, the slime should start to behave a little differently, and you should be able to peel some of the mixture off the side of the bowl using your spoon.
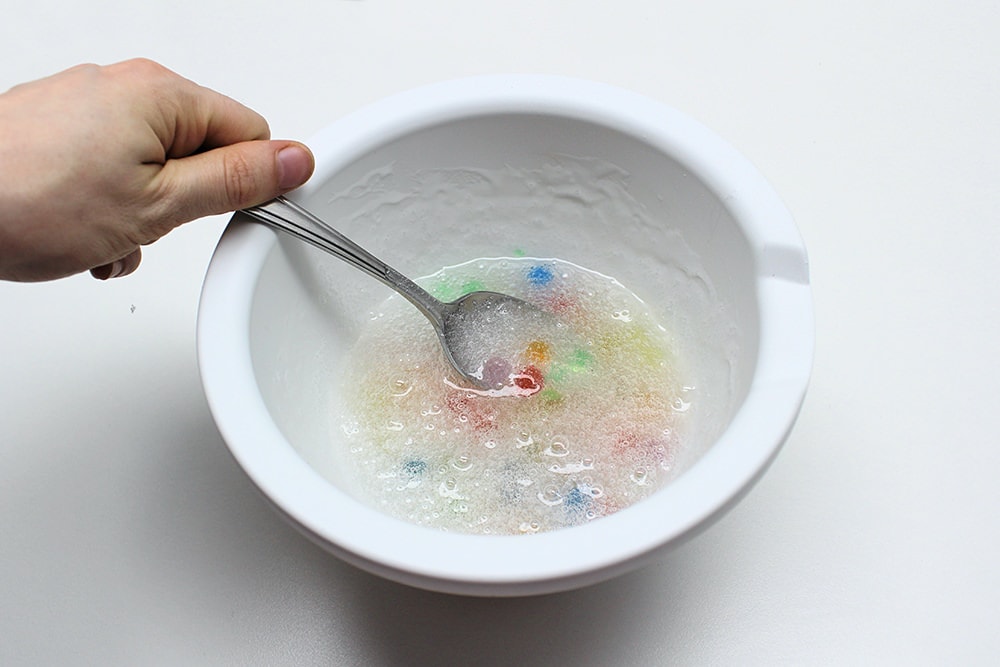
6. Knead Slime
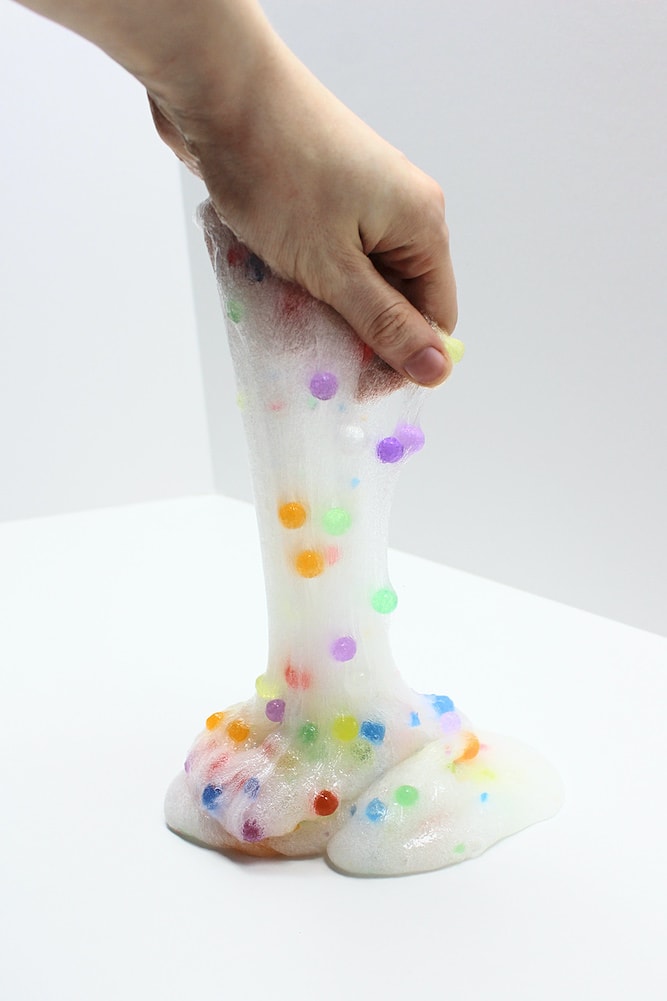
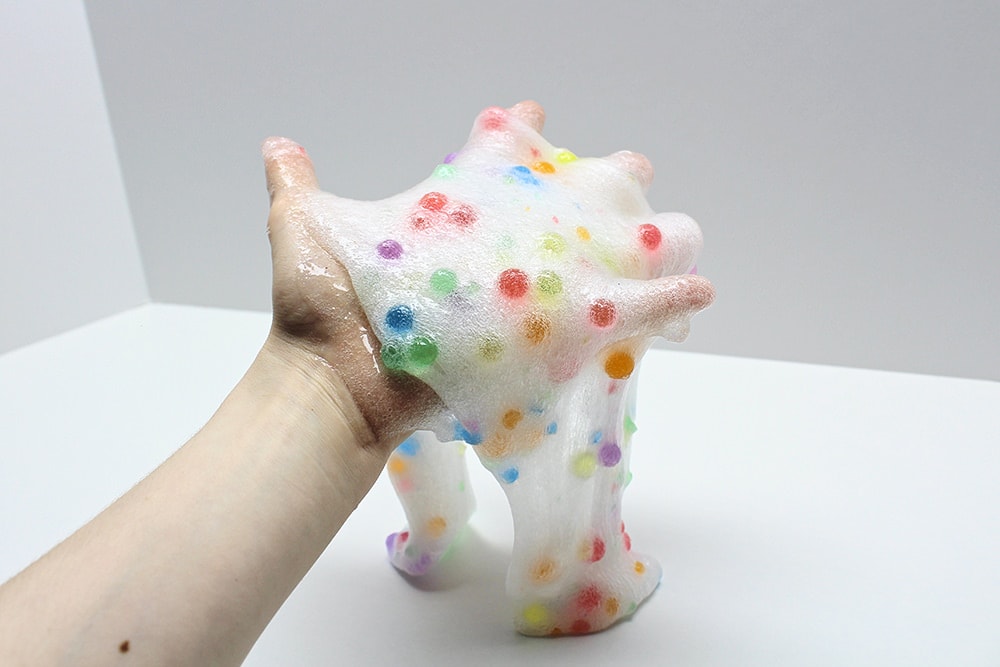
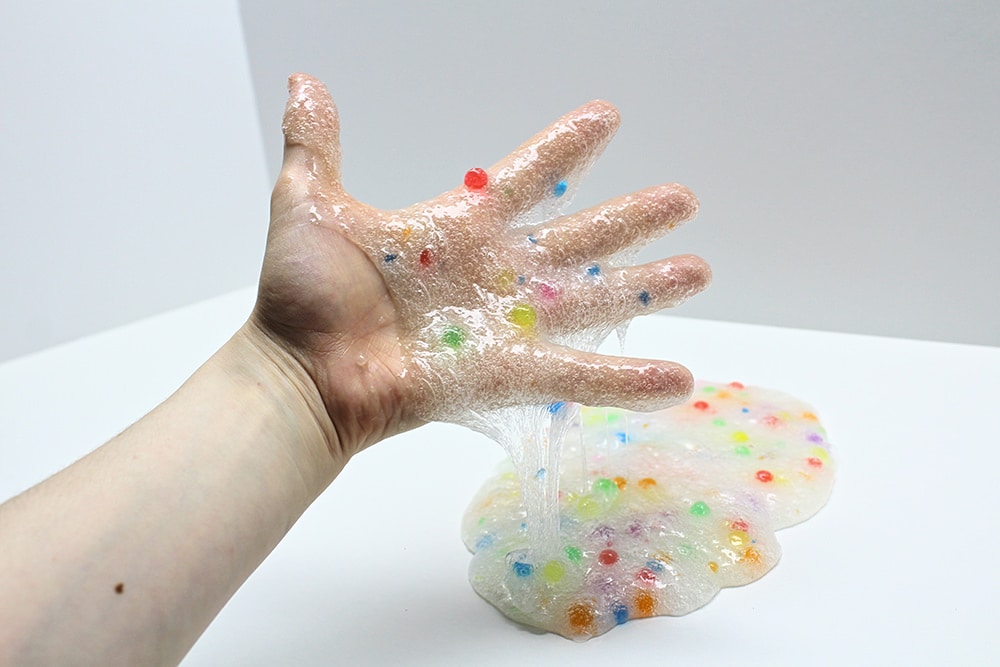
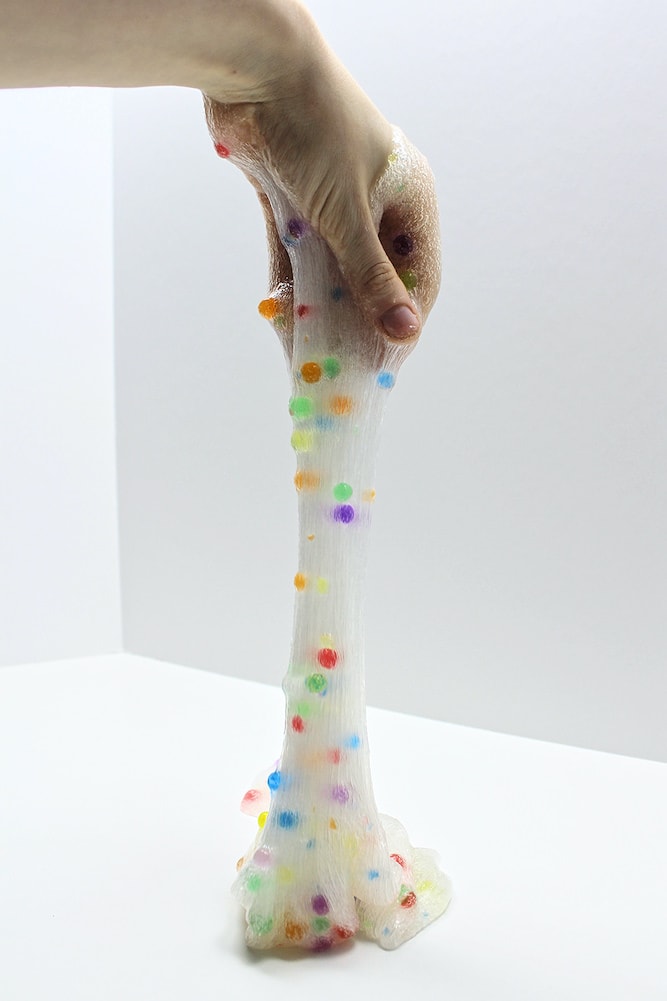
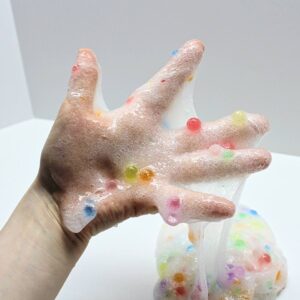
When that happens, it’s time to knead! It might be very sticky initially, but the more you knead the slime, the less sticky it should become. Don’t be surprised if it takes a lot of kneading! It’s perfectly normal, especially if you use less slime activator. I always try to use the smallest amount possible because it makes for super stretchy slime!
If ever your slime is simply too sticky to knead, you can add a little bit of extra contact lens solution to your hands to make things easier. Once the slime stops sticking to your hands, it’s ready to play with!
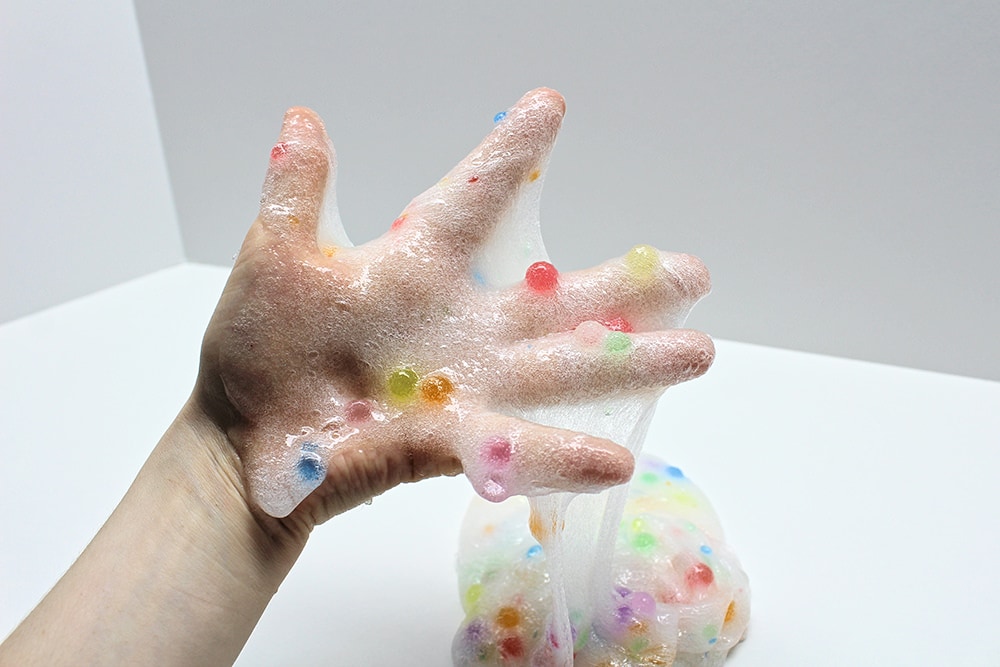
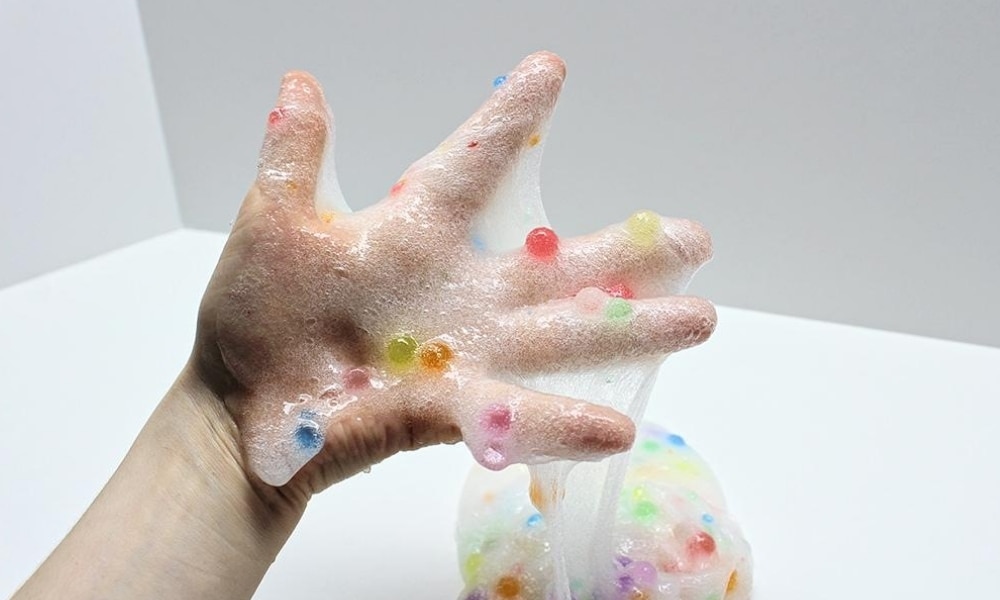
Because I used less activator, our water bead slime was extremely stretchy. In fact, it was stretching and oozing so fast that I was having a little bit of trouble photographing it!
Useful Tips
Removing Rings While Kneading
If you like to wear rings, I highly recommend removing them before kneading the slime. It starts out very sticky and is sure to end up in any crevices it can find, which will keep it in constant contact with your skin even once you’re done touching it.
I forgot to take my wedding ring off a few times while making slime with my four-year-old, and some of it ended up getting stuck underneath the ring and leaving a rash on my finger. I wasn’t sure what was causing the irritation until I soaked the ring in isopropyl alcohol to remove all the residue. I’m just glad I used contact lens solution and not something harsher like borax!
Fixing Over-Activated Slime
If ever you use too much contact lens solution and end up with rubbery slime that doesn’t stretch well after it’s been kneaded, don’t worry—it can still be salvaged. Just place it back in the bowl and add a little bit of warm water, then work the water into the slime with your hands until it becomes stretchy again, adding more water as needed.
Preventing Messes
I recommend playing with this slime inside a container or bin, because the water beads do have a tendency to pop out. This is not an issue if you’re expecting it, but water beads are extremely bouncy and will end up everywhere if you’re not prepared, so it’s best to keep them contained!
Adding More Water Beads
If the water beads do pop out, you can just fold some slime over them and they’ll pop right back in. You can also do this to add more water beads if you didn’t add enough to begin with!
Removing the Air Bubbles
You’ve probably noticed from the pictures that our slime was full of little air bubbles.
Slime made with clear glue always looks like that when it’s first made, but if you let it rest in a sandwich or freezer bag overnight, the bubbles disappear and the slime becomes transparent. (We always store our slime in sandwich or freezer bags anyway because it keeps longer that way.)
Here’s what happened to ours when we let it rest overnight:
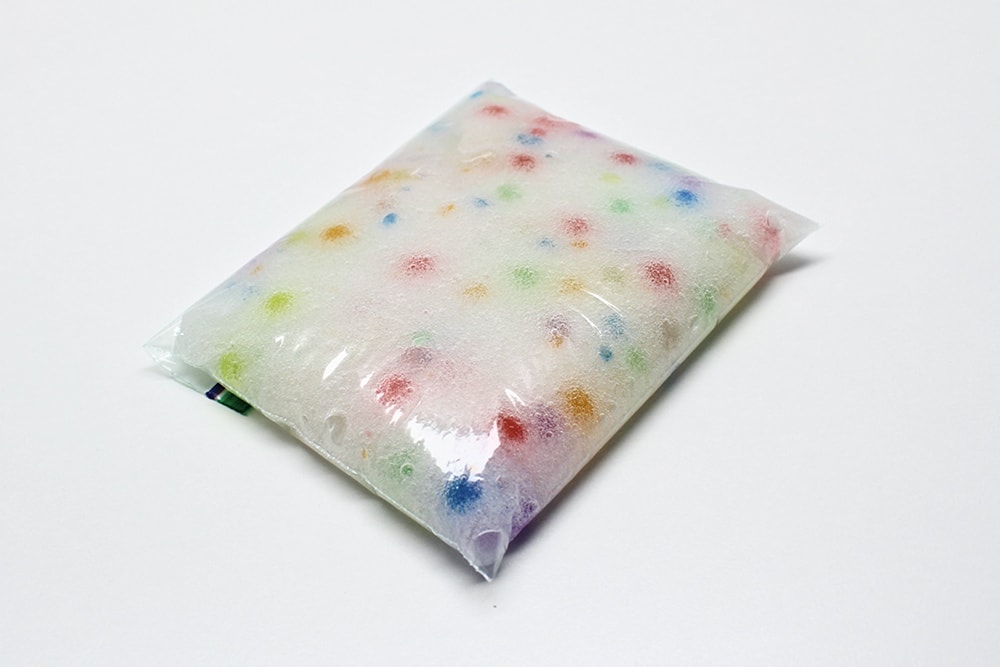
I thought it looked so cool once it went completely clear, though the bubbles came back pretty quickly once we started playing with it again!
I did notice that for whatever reason, the water beads shrunk a little overnight. I’m not sure if this would happen with all water beads, or if it’s just due to the particular brand I used, but it wasn’t really an issue. They still had a great texture and I actually liked them a little smaller because it meant there was a higher chance of squeezing several of them at once while playing with the slime!
I’ll admit that I didn’t really understand the slime craze before I started making my own. But now that I have, I totally get it! It has such an addictive texture and I’m constantly finding myself taking it out to play with it even when the kids aren’t around. This one is probably my favorite, followed by fluffy slime made with shaving cream!
Water Bead Slime
Ingredients
- ½ cup clear glue
- ½ cup water
- ½ tsp baking soda
- 1 ½ tbsp contact lens solution
- water beads as needed
Instructions
- Hydrate water beads according to package instructions.
- Combine the glue and water in a small bowl.
- Stir in baking soda.
- Add as many hydrated water beads as you like.
- Add 1 tablespoon of contact lens solution and stir with a spoon. Slowly add the rest of the contact lens solution, mixing well and making sure to stop before the slime gets too rubbery.
- Remove the slime from the bowl and knead it with your hands. It will start out sticky, but the more you knead it, the less sticky it will feel. Once the slime no longer feels sticky, it's time to play!
Notes
Related Slime Articles
Do you love homemade slime as much as we do? Check out these easy recipes that are perfect for younger kids:
Join my mailing list using the form below to receive 12 of the most popular sensory recipes on my site in PDF format! You’ll be the first to know when I publish new recipes, and you’ll also gain receive to lots of free printable activities for your kids.
Grab our 12 best sensory recipes!
By submitting your email address, you are agreeing to the terms of our Privacy Policy. You can unsubscribe at any time.
My kids love slime and I’m always on the lookout for new ways to make it for the variable textures. Can’t wait to try this!