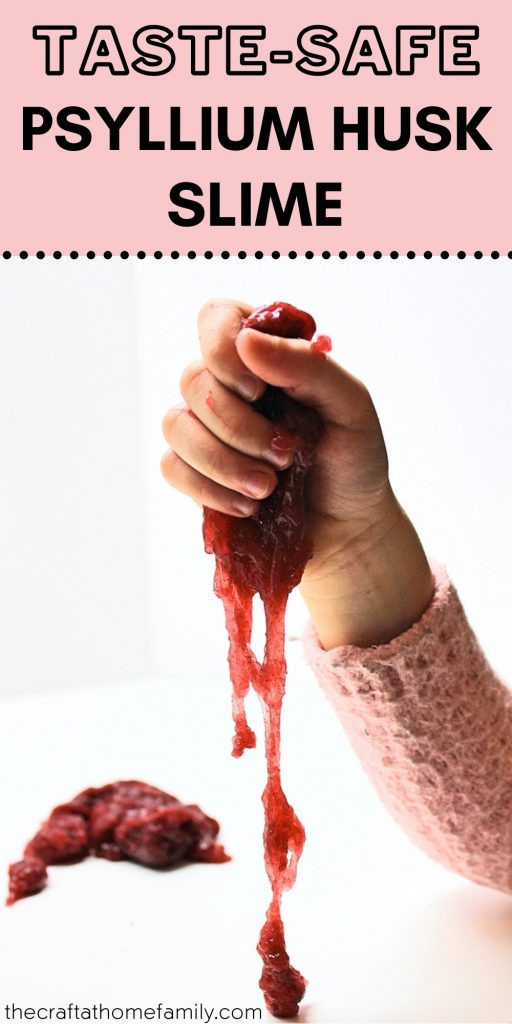
Do you have young kids who like to put everything in their mouths? Let them join in on the fun with this simple, cost-effective recipe for psyllium husk slime! This slime is taste-safe, so it’s perfect for toddlers. And if you don’t happen to have psyllium husk powder on hand, you can even replace it with Metamucil!
JUMP TO…
If, like us, you have a child who loves to put everything in their mouth, you understand what a struggle it can be.
You can’t take your eyes off them for a minute. Everything has to be edible, taste-safe or non-toxic; plants have to be hung from the ceiling; and if a guest leaves a glass of wine on the dinner table as they step into the other room, you can’t relax until you’ve placed it out of reach.
Our preschooler never did this, but our toddler has seemingly taken it upon herself to do it enough for the two of them, so it’s something we always have to take into consideration whenever we plan activities for them.
Since our preschooler no longer naps, we do have some time during the day where we can do “big kid” activities that her siblings can’t participate in. We use that time to read books, do quiet learning activities and make crafts that I wouldn’t trust her sister with. This is the only time we ever take out the “big kid” slime we make using contact lens solution.
But we do like to make a taste-safe version that our toddler can play with! It is water-based, calls for just one other ingredient (two if you choose to add food coloring) and the ironic part is that this slime is just about the only thing our toddler hasn’t tried to put in her mouth!

Get hundreds of pages of activities!
Get access to all our paid printables, as well as monthly activity planners, for just $5/month. (New printables added twice per month!)
About this Slime
This taste-safe slime is made from psyllium husk powder, which is the main ingredient in Metamucil. Some tutorials actually call for Metamucil, but I’d rather use regular psyllium husk powder for several reasons.
For one thing, it costs less. Also, I prefer to keep our taste-safe experiments unflavored so that our toddler doesn’t start actively trying to eat slime/paint/play dough, etc. She already eats plenty of non-edible things that don’t taste good, so she really doesn’t need any extra encouragement in that department.
Lastly, my kids are very strong-willed and apparently the slime is just not as fun to play with if they don’t get to choose its color!
Most tutorials will show you how to make psyllium husk slime using a microwave, but I prefer to cook mine on the stovetop and that is what I will be describing in this post.
Note: While this slime is taste-safe and won’t harm your children if they put it in their mouths, I wouldn’t recommend encouraging them to eat large quantities of it. If you’re looking for slime that is not only taste-safe, but also edible, I’ve seen fantastic recipes on other blogs that fit the bill perfectly!
Grab our 12 best sensory recipes!

By submitting your email address, you are agreeing to the terms of our Privacy Policy. You can unsubscribe at any time.
Required Ingredients
Here’s what you’ll need to make a batch of taste-safe psyllium husk slime:
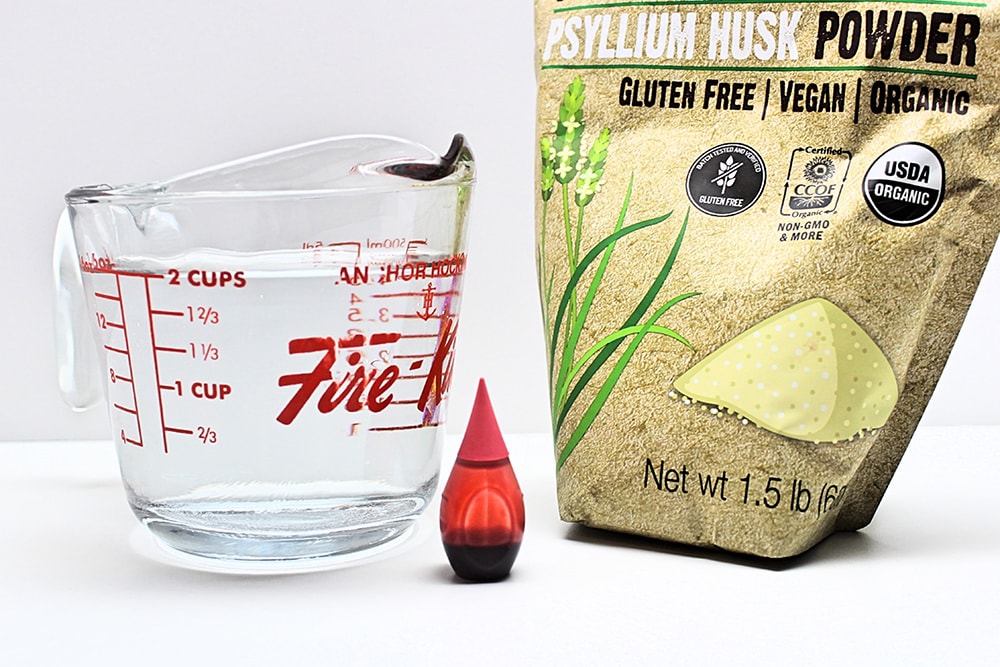
- Psyllium husk powder
- Water
- Food coloring
- Small saucepan
- Mixing spoon (I like to use silicone spoons to make the clean-up easier and prevent staining)
How Much Psyllium Husk Powder Will I Need?
You won’t need much psyllium husk powder to make this slime. I typically only use about 1 teaspoon per cup of water, so at this rate, the bag I bought off Amazon will probably last me for the next decade.
I’ve tried making this slime using different quantities of psyllium husk powder, but I find that if you use too much, it gets very rubbery and isn’t as much fun to play with. One teaspoon per cup of water gives it the perfect consistency. That means that this slime recipe is not only taste-safe, but also cost-effective!
If you’re not intending on making this recipe very often, or if you just want to try it out before committing to buying a large amount of psyllium husk powder, I’ve seen it at our local Bulk Barn. Buying it there would allow to choose as much or as little as you want.
How to Make Psyllium Husk Slime Using Your Stove (Step-by-Step Instructions)
1. Combine Psyllium Husk Powder & Water
The first step is to place your water in a saucepan (I usually use 2 or 3 cups so there is enough to play with) and mix in the psyllium husk powder using a spoon. You might have to break up a few clumps.
Make sure that your water is cold and that you don’t turn on the element before adding the psyllium husk powder. If your water is even the slightest bit hot, the powder will gel as soon as it touches it and you won’t be able to mix it in. I did this once and had to throw the whole thing out and start over.

2. Add Food Coloring (Optional)
Once you’ve mixed in the psyllium husk powder, add the food coloring (if you so choose) and then turn on the element on medium heat.
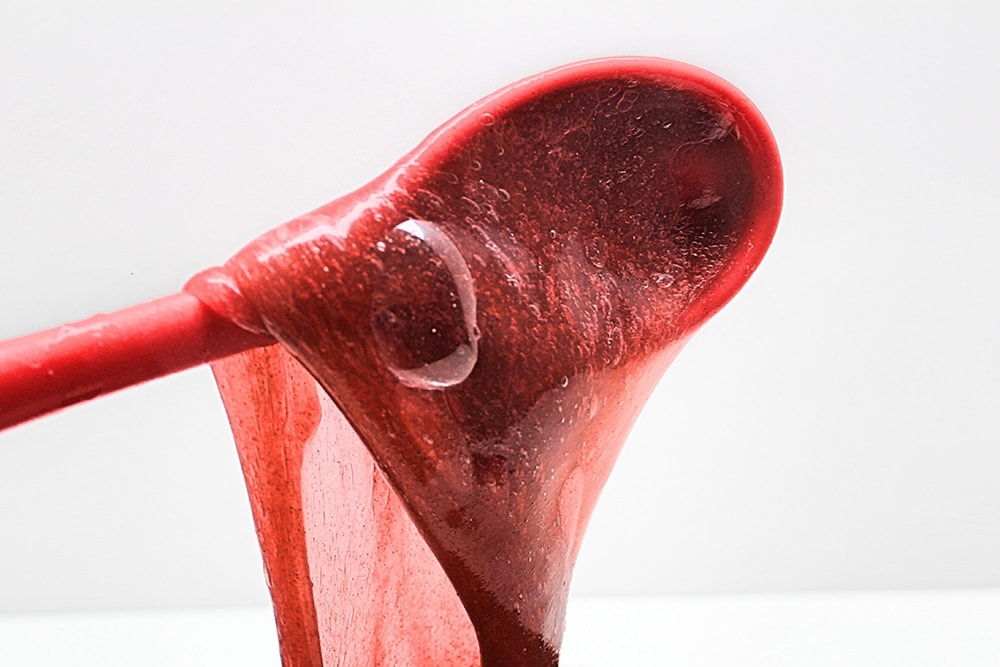
I wouldn’t suggest adding the food coloring any later than this, as it will be harder to mix in once the mixture gels. You don’t need to add much; we were actually trying to make the slime pink, but we used a few too many drops and ended up making it red instead!
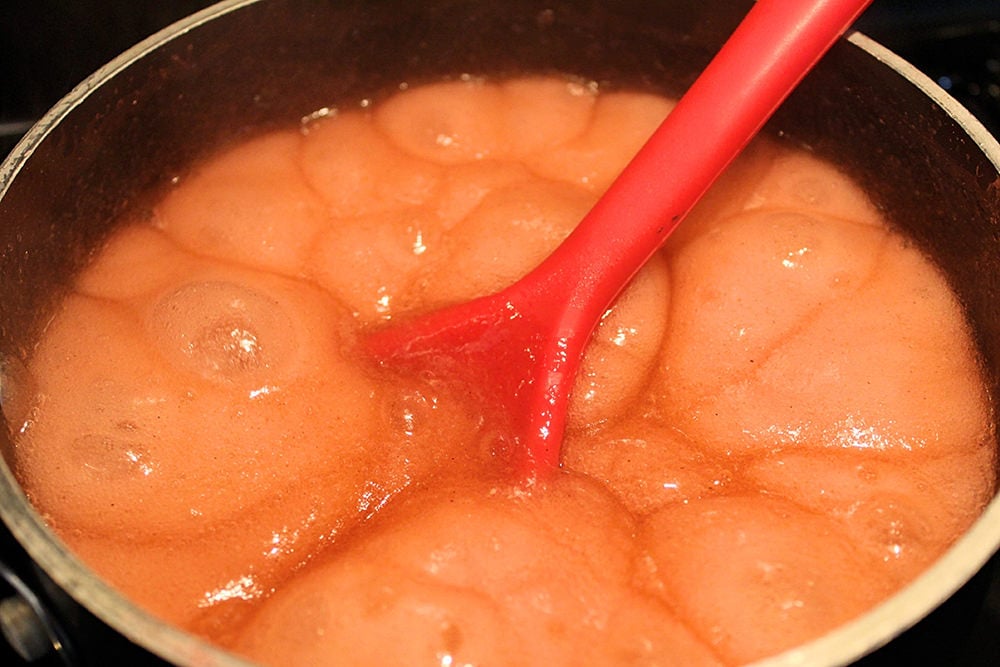
3. Bring to a Boil
Heat the mixture, stirring constantly, until it starts to boil.
4. Let Cool & Repeat
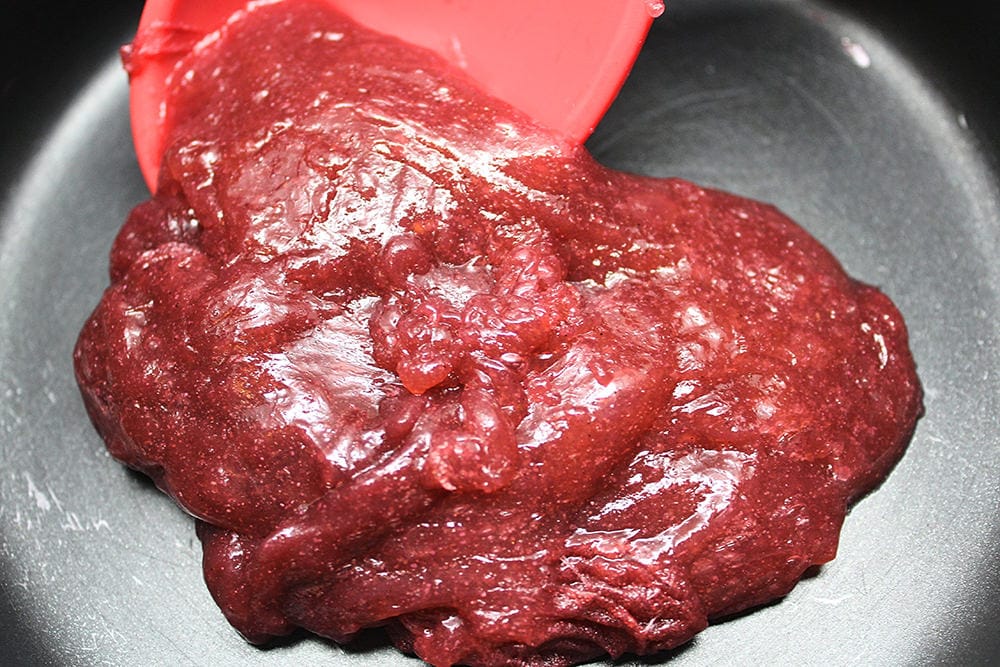
Let the mixture cook until it looks like it’s about to boil over, then immediately take it off the element. Let it cool for about 30 seconds to a minute, stirring occasionally, before putting it back on. Repeat this process several times.
This is the stage where the magic happens; the mixture starts out very soupy, but it will thicken each time you let it cool. This stage is also the reason I prefer to cook it on the stovetop—I find it harder to monitor when it’s behind a glass door and don’t want it to boil over inside the microwave!
You’ll have to do this about 5 or 6 times before the slime reaches the right consistency.
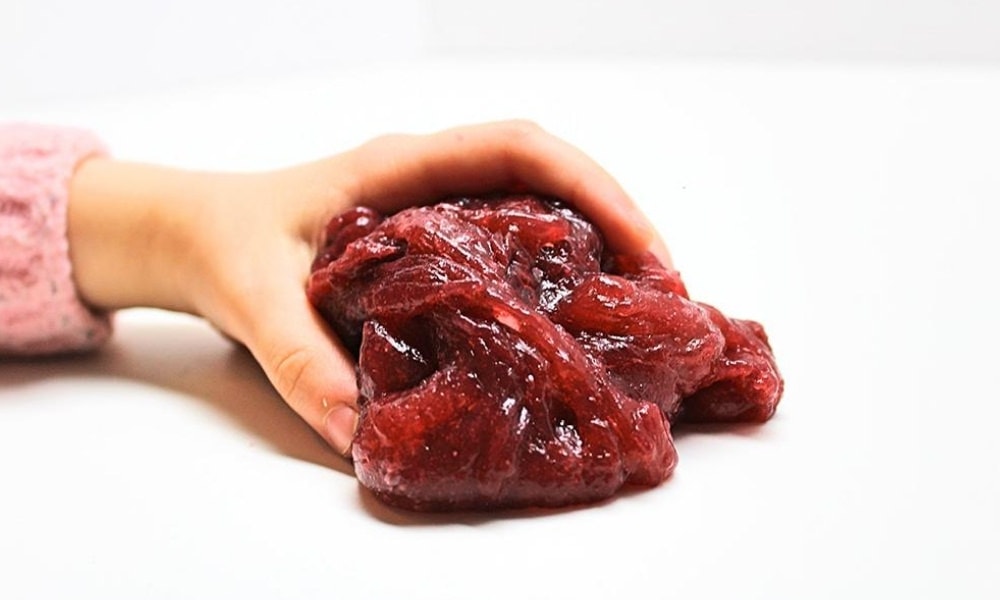
You’ll know it’s ready when it stops sticking to the surface of the pan. Once it does, don’t put it back on the element or it will start to get rubbery. If the slime starts to leave a fine film at the bottom of the saucepan, you’ve probably overcooked it. It’s really not as fun to play with when it loses its stretchiness.
5. Let Cool Completely
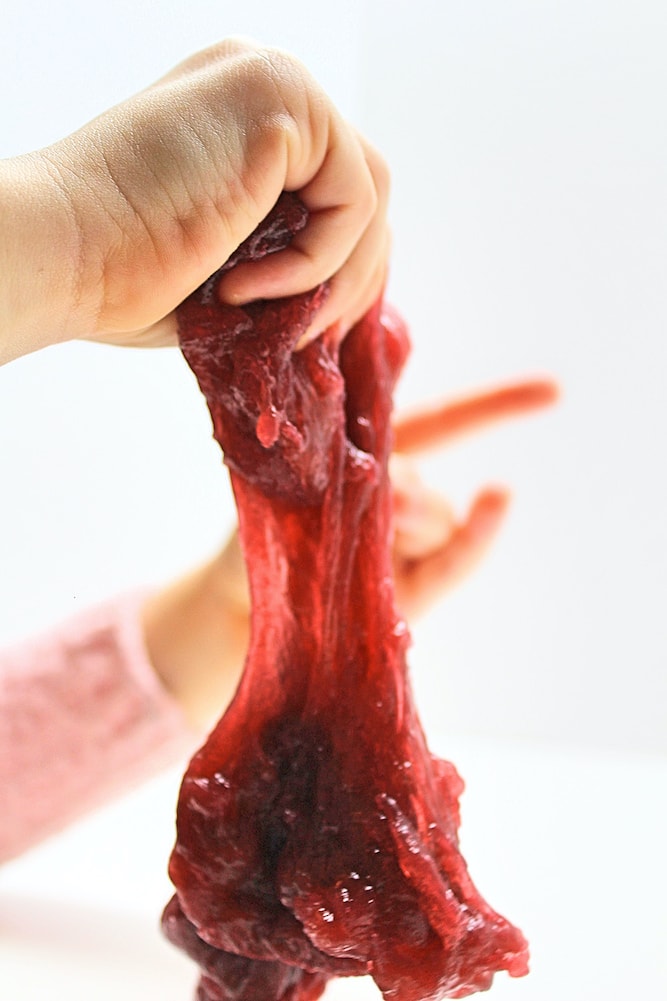
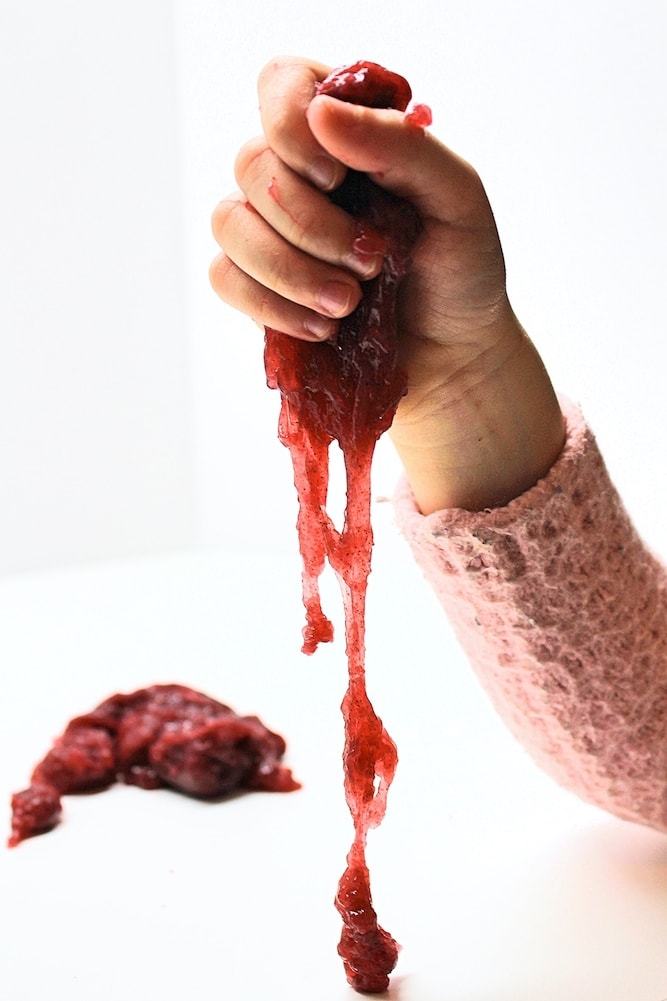
Once the slime has reached the right consistency, all you have to do is let it cool before your kids can play with it!
What are your favorite recipes for taste-safe slime? I’d love to hear about them in the comment section!

Taste-Safe Psyllium Husk Slime (Metamucil Slime)
Ingredients
- 2 tsp psyllium husk powder
- 2 cups water
- food coloring
Instructions
- Place the water in a saucepan (do NOT turn on the element) and stir in the psyllium husk powder with a spoon.
- Add a few drops of food coloring.
- Turn on the element on medium heat. Heat the mixture, stirring constantly, until it starts to boil.
- Let the mixture cook until it looks like it’s about to boil over, then immediately take it off the element. Let it cool for about 30 seconds to a minute, stirring occasionally, before putting it back on. Repeat this process 5-6 times, until the slime stops sticking to the surface of the pan.
- Set the slime aside to cool. When it's done cooling, you can give it to your child to play with!
Related Toddler Activities
Looking for more taste-safe activities to do with your little ones? Check out these articles:
- Chocolate Play Dough (Taste-Safe!)
- Glowing Oil & Water Mixing Experiment (Taste-Safe!)
- Moon Sand Color Mixing (Taste-Safe!)
Or, if your toddler likes to destroy things, try channeling their destructive energies with these easy activities:
Join my mailing list using the form below to receive 12 of the most popular sensory recipes on my site in PDF format! You’ll be the first to know when I publish new recipes, and you’ll also gain receive to lots of free printable activities for your kids.
Grab our 12 best sensory recipes!
By submitting your email address, you are agreeing to the terms of our Privacy Policy. You can unsubscribe at any time.
Only your name will be made public. Please note that by submitting your comment, you are agreeing to the terms of our Privacy Policy.