
Want to experiment with new slime textures? This easy DIY butter slime recipe is both non-sticky and super stretchy. Use Model Magic clay to create this unique slime that is unlike any other recipe you’ve tried before!

JUMP TO…
Do your kids love slime? Ours definitely do… and honestly, so do I.
One of the things my kids and I love to do is experiment with different slime textures. There are so many cool possibilities!
We’ve made Floam Bead Slime before and loved its one-of-a-kind crunchy texture. And butter slime is similarly unique, as it contains air dry clay and is a lot less jiggly than other types of slime.
So if you’re looking for a new type of slime to make with your kids, make sure you save this easy recipe for homemade butter slime!

Create your summer survival plan!
Join our live on May 16, 2026 to learn a simple system for spending less time planning activities and more time enjoying the summer.
What Is Butter Slime?
Butter slime is a type of slime that contains air dry clay—usually Model Magic. Because it is made with clay, it is less sticky than other types of slime.
Some butter slime recipes call for shaving cream, but this one is made with Model Magic and lotion. This will yield a super stretchy clay slime that doesn’t lose its volume after a few days like shaving cream slime inevitably does.
I have found that adding both air dry clay and lotion produces the best butter slime.
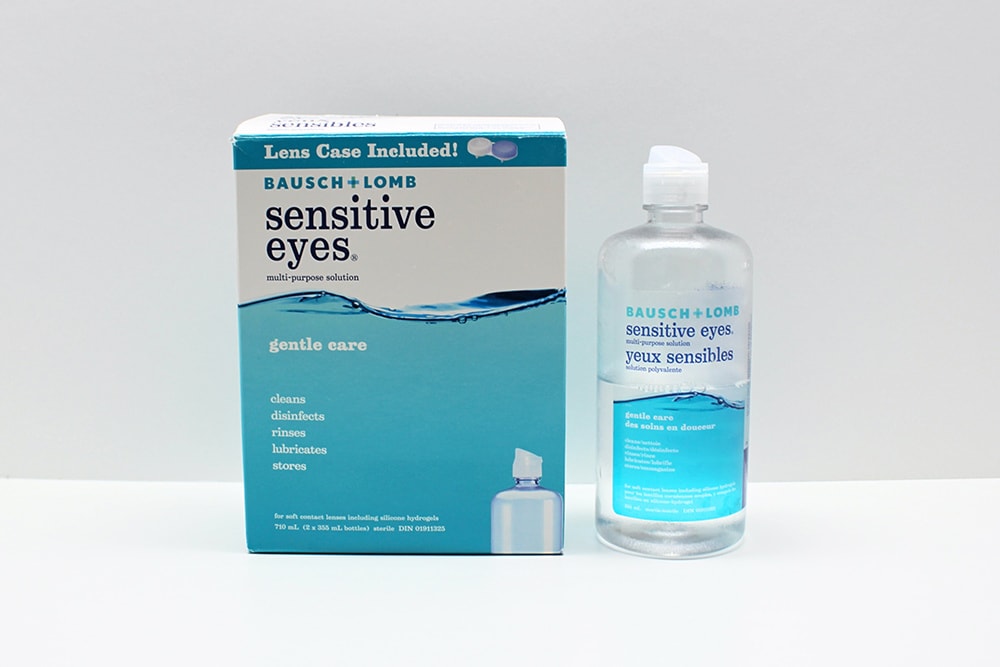
I also prefer to use contact lens solution as an activator instead of borax. While contact lens solution slime is not technically borax-free since it contains a form of borax called boric acid, it is softer on sensitive skin and easier to find.
Required Ingredients
Here’s what you’ll need in order to make butter slime at home:

- ¾ cup white glue (we’ve had success with both Elmer’s and Amazon Basics—consider buying it in bulk if you’re planning on making a lot of slime)
- 2 tbsp water
- ½ tsp baking soda
- 2 tbsp baby lotion
- 4 oz Model Magic clay in the color of your choice (you can also use an equivalent amount of another brand of air dry clay, but Model Magic is the best clay for this type of slime, and each bag contains the exact amount you’ll need for this recipe)
- 1 – 1 ½ tbsp contact lens solution
Note: The contact lens solution you use must list “boric acid” and “sodium borate” as ingredients in order for the chemical reaction to occur. We bought ours at Walmart and carefully compared ingredients and prices before choosing the brand pictured below.
Grab our 12 best sensory recipes!

By submitting your email address, you are agreeing to the terms of our Privacy Policy. You can unsubscribe at any time.
How to Make Butter Slime with Clay (Step-by-Step)
1. Combine Water & Glue
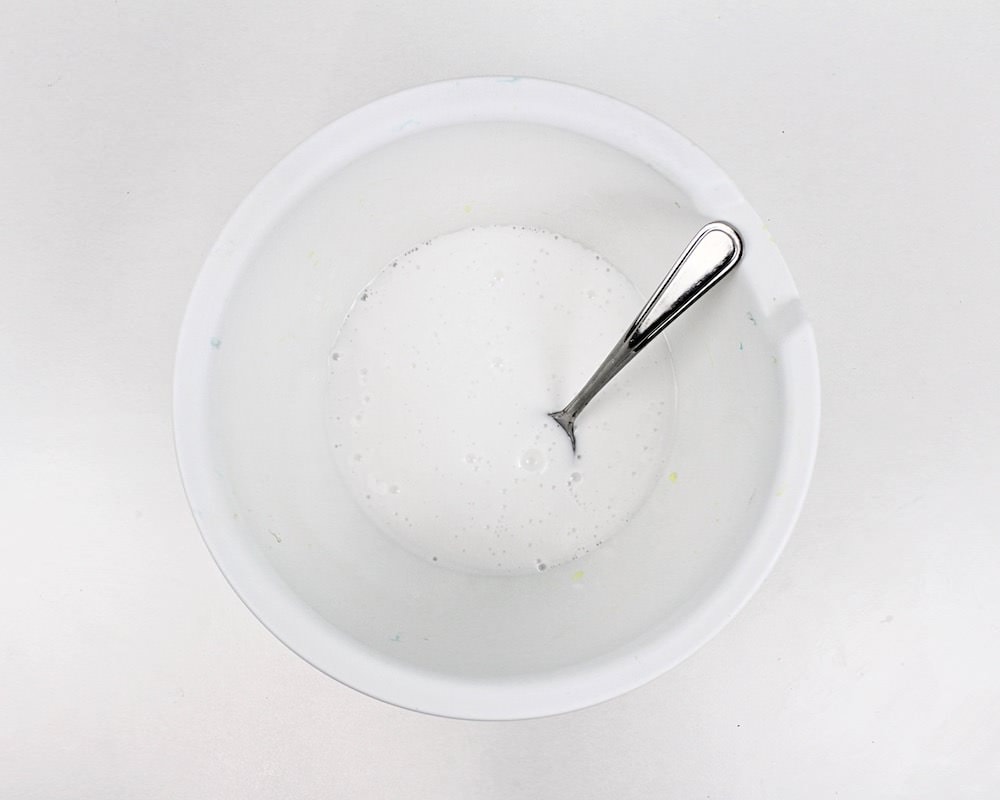
In order to make super soft Model Magic slime, start by pouring ¾ cup of white school glue and 2 tbsp of water into a bowl, and stirring until combined.
2. Add Baking Soda
Mix in ½ teaspoon of baking soda.
3. Add Baby Lotion
Add 2 tbsp of baby lotion and stir until combined. Adding lotion to your homemade butter slime will make it softer and stretchier.

I have found that the best lotion for slime is Johnson’s CottonTouch Newborn Face & Body Lotion, which I get at our local Walmart (but which you can order on Amazon if that’s more convenient for you).
This is the same lotion I use to make this super soft 2-Ingredient Cloud Dough, which is always hit with my kids.
4. Add Contact Lens Solution
It’s time to add the slime activator! Start with 1 tablespoon of contact lens solution and stir until well combined.
You may notice the mixture starting to solidify a little, but 1 tablespoon likely won’t be enough to fully activate your slime. You’ll probably end up needing somewhere between 1 tablespoon and 1 ½ tablespoons.
As you stir the mixture with a spoon, it should start to solidify a little, but a single tablespoon may not be enough to fully activate your slime. (You’ll probably end up needing somewhere between 1 tablespoon and 1 ½ tablespoons.)
Once I’ve added the initial tablespoon, I usually add one small squirt at a time, mixing well between each addition.
You can stop adding contact lens solution when the mixture starts sticking to the sides of the bowl, and can be peeled off using a spoon.
5. Add Clay & Knead Slime
Break off a piece of Model Magic clay and start kneading it into the activated slime. As the slime is incorporated into the slime, slowly add more pieces of clay and continue kneading until the entire package has been incorporated.
Note: If you like to wear rings, please remove them before kneading the slime. I once kept my wedding ring on while kneading slime, and it ended up getting into some of the crevices of the ring and causing a rash on my finger due to prolonged exposure.

This part can get pretty messy, so be prepared for that, and know that it is totally normal for your hands to get completely covered in sticky clay and glue.

But as long as you keep kneading, your slime will eventually stop being sticky and start being stretchy. Don’t be surprised if it takes a lot of kneading!
If ever, after kneading the slime for a while, you find that it is simply too sticky, you can always add a little bit of extra contact lens solution to your hands to make things easier.
But don’t be too quick to do that, as you don’t want to over-activate your slime and make it too stiff!
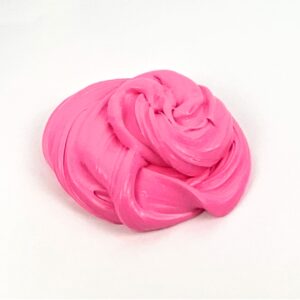
Once all of the air dry clay has been fully incorporated and the slime is no longer sticky, it’s ready to play with! Butter slime is one of our favorites—unlike most types of slime, it’s not very “jiggly” and it sort of feels like really stretchy play dough.

It also tends to make less of a mess than regular slime because the modeling clay makes it less sticky.

How to Store Homemade Butter Slime
Like all types of slime, butter slime can get a little stiff if it is exposed to air for too long. And because it contains air dry clay, it will eventually dry out and get hard if you leave it out.
To make it last, we like to store ours in a sealed Ziploc bag with the air removed whenever our kids aren’t playing with it. It usually keeps for several weeks when stored this way, as long as it is not exposed to air for extended periods of time.

Butter Slime
Ingredients
- ¾ cup white school glue
- 2 tbsp water
- ½ tsp baking soda
- 2 tbsp baby lotion
- 4 oz Model Magic clay
- 1 – 1 ½ tbsp contact lens solution
Instructions
- Combine the glue and water in a small bowl.
- Stir in baking soda.
- Add baby lotion and stir it in with a spoon.
- Add 1 tablespoon of contact lens solution and stir with a spoon. If the mixture is still very runny, slowly add a bit more contact lens solution, mixing well and stopping as soon as the mixture can be peeled off the sides of the bowl.
- Break off a piece of Model Magic and knead it into the glue mixture. Slowly add the remainder of the clay, kneading it all in with your hands. It will start out very sticky, but the more you knead it, the less sticky it will feel.
- Once the slime is no longer sticky and you are satisfied with the texture, the slime is ready for your child to play with!
Video
Notes
Related Slime Recipes
Looking for more fun slime recipes to make for your kids? Check out these articles:
- Crunchy Foam Bead Slime
- Heat-Sensitive Color-Changing Slime
- Easy Aquarium Rock Slime
- Homemade Gold Glitter Slime
Join my mailing list using the form below to receive 12 of the most popular sensory recipes on my site in PDF format! You’ll be the first to know when I publish new recipes, and you’ll also gain receive to lots of free printable activities for your kids.
Grab our 12 best sensory recipes!
By submitting your email address, you are agreeing to the terms of our Privacy Policy. You can unsubscribe at any time.
Only your name will be made public. Please note that by submitting your comment, you are agreeing to the terms of our Privacy Policy.