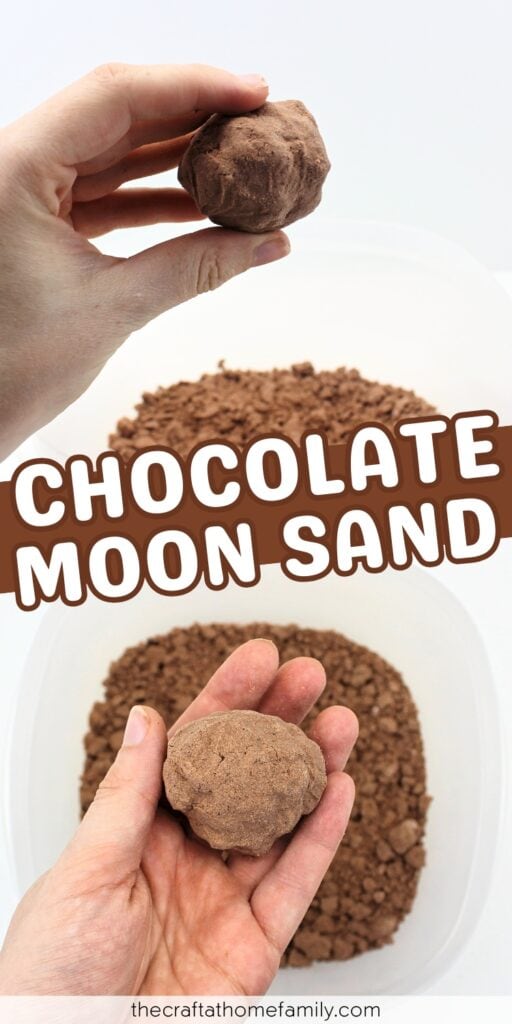
If your child enjoys playing with moon sand, they’ll love this fun twist on the classic! This chocolate moon sand is super simple to make, taste-safe and only requires a few common pantry ingredients that you probably already have at home.

JUMP TO…
Moon sand is one of our go-to sensory recipes for when we’re short on time or on supplies. It has a fun texture that is soft yet moldable, and we always have all the ingredients to make it in our pantry.
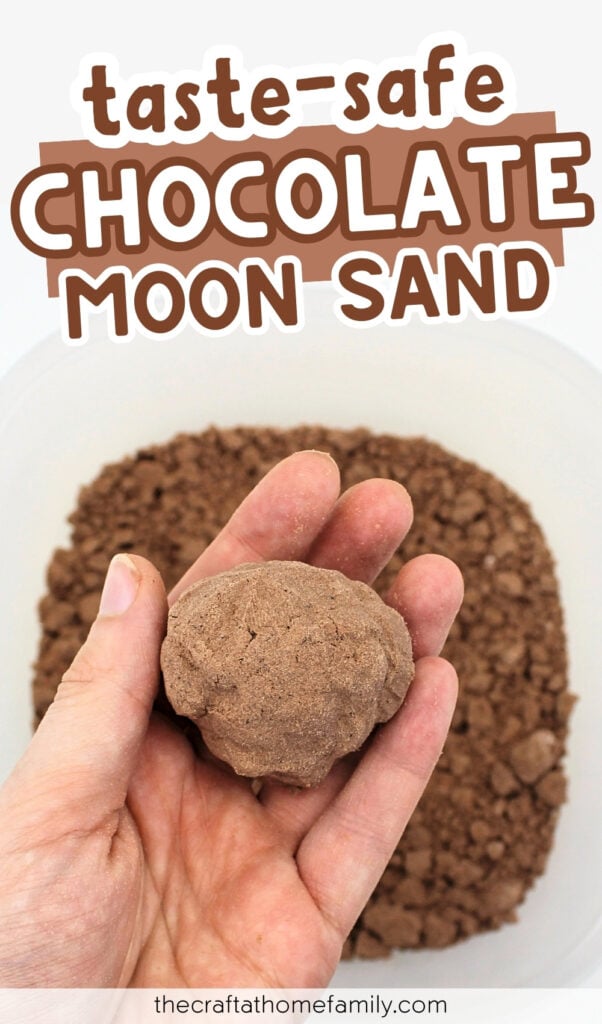
This chocolate-scented sensory bin filler is perfect for Valentine’s Day, but you can make it at any time of year. I love that this activity is taste-safe, but not tasty, which means that while it’s safe for little ones, they shouldn’t actively want to eat it!
Why You’ll Love This Recipe
- Easy to make: Making moon sand at home couldn’t be simpler! It only requires a few simple steps, and your child should be able to help you with every part of the process.
- Simple ingredients: You probably have all the ingredients you’ll need to make this in your pantry.
- Taste-safe: If you have a young child at home who still tries to put everything in their mouth, simply follow the instructions I provided below in order to make this recipe taste-safe.
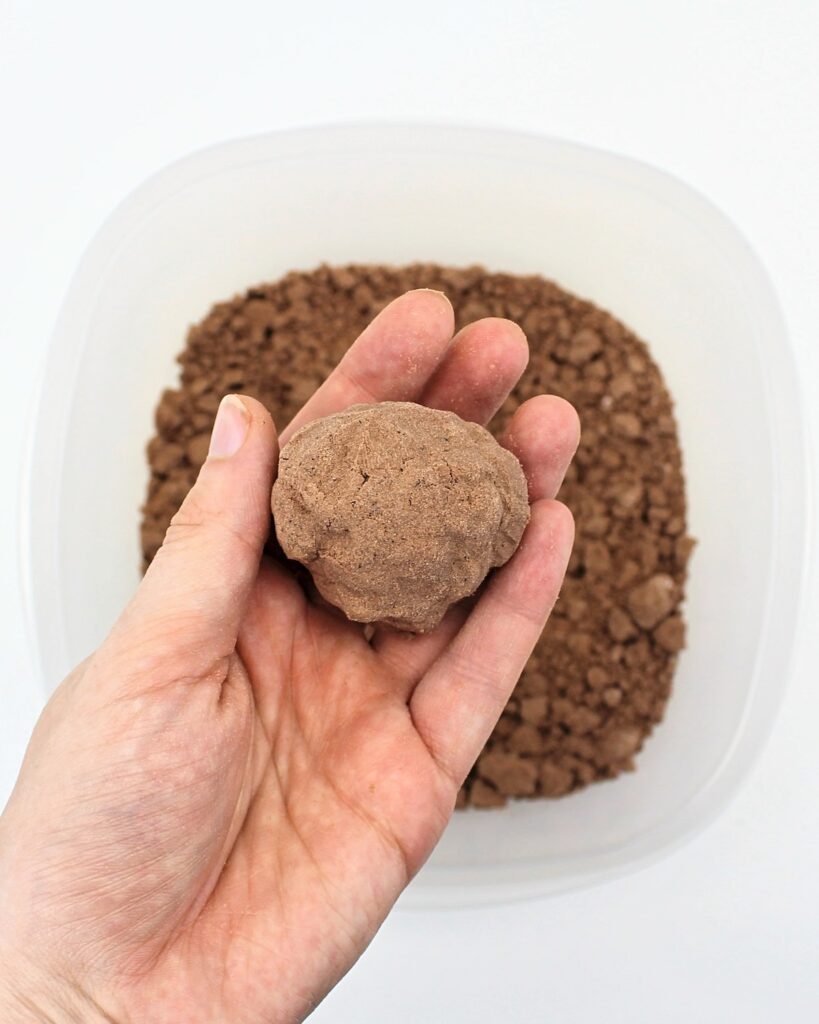
- Fun for kids: Moon sand has a unique texture that is soft and crumbly, but also moldable. It even holds its shape when pressed into a ball! As far as this chocolate-scented variant is concerned, the cocoa powder adds a fun new sensory component.
Looking for more chocolate-scented sensory play ideas? Check out this Chocolate Play Dough, these Taste-Safe Mud Recipes or this Edible Chocolate Frosting Play Dough!
Grab our 12 best sensory recipes!

By submitting your email address, you are agreeing to the terms of our Privacy Policy. You can unsubscribe at any time.
Required Ingredients
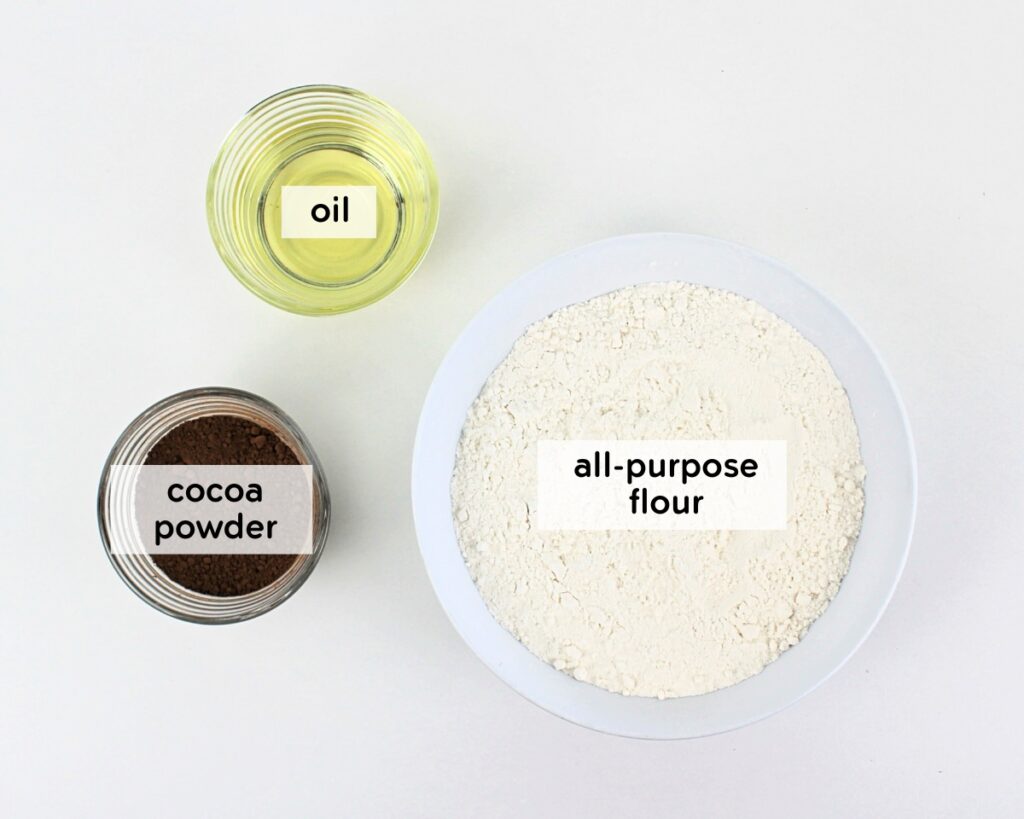
- Flour: You’ll need regular all-purpose flour for this recipe. If you need the moon sand to be taste-safe, you’ll need to buy heat-treated flour or heat treat the flour yourself first (instructions below), as raw flour isn’t safe to eat. If your kids are older and you’re not concerned that they’ll try to eat it, you can use flour straight out of the bag.
- Cocoa powder: Any type of cocoa powder you have at home will do.
- Oil: I generally use vegetable oil because it’s cheaper, but any type of cooking oil—or even mineral oil—will do. Make sure the oil you use is food grade if you need this activity to be taste-safe, and if you are using coconut oil that has solidified, return it to its liquid state first by melting it in the microwave. Because this moon sand is meant to smell like chocolate, I recommend sticking with oil that has a neutral scent to avoid overpowering the smell of the cocoa powder.
The full ingredient list, quantities and instructions can be found in the recipe card.
How to Heat Treat Flour
If you have a young child at home and you need this recipe to be taste-safe, you’ll need to buy heat treated flour or heat treat the flour yourself before using it. Raw flour that hasn’t been heat treated can contain harmful bacteria like salmonella and E. coli, which makes it unsafe to eat.
To heat treat flour, preheat your oven to 350˚F, spread the flour on a baking sheet and bake it for 5 minutes. You can also heat it in the microwave on high for 1 minute and use an instant read thermometer to check that its temperature has reached 165°F.
You’ll likely need to sift the flour or break up any clumps before using it.
(Note: If you find that you often have a need for taste-safe flour, try heat treating and sifting it ahead of time, in large batches, and taking it out as needed.)
Grab our 12 best sensory recipes!
By submitting your email address, you are agreeing to the terms of our Privacy Policy. You can unsubscribe at any time.
How to Make Chocolate Moon Sand (Step-by-Step)
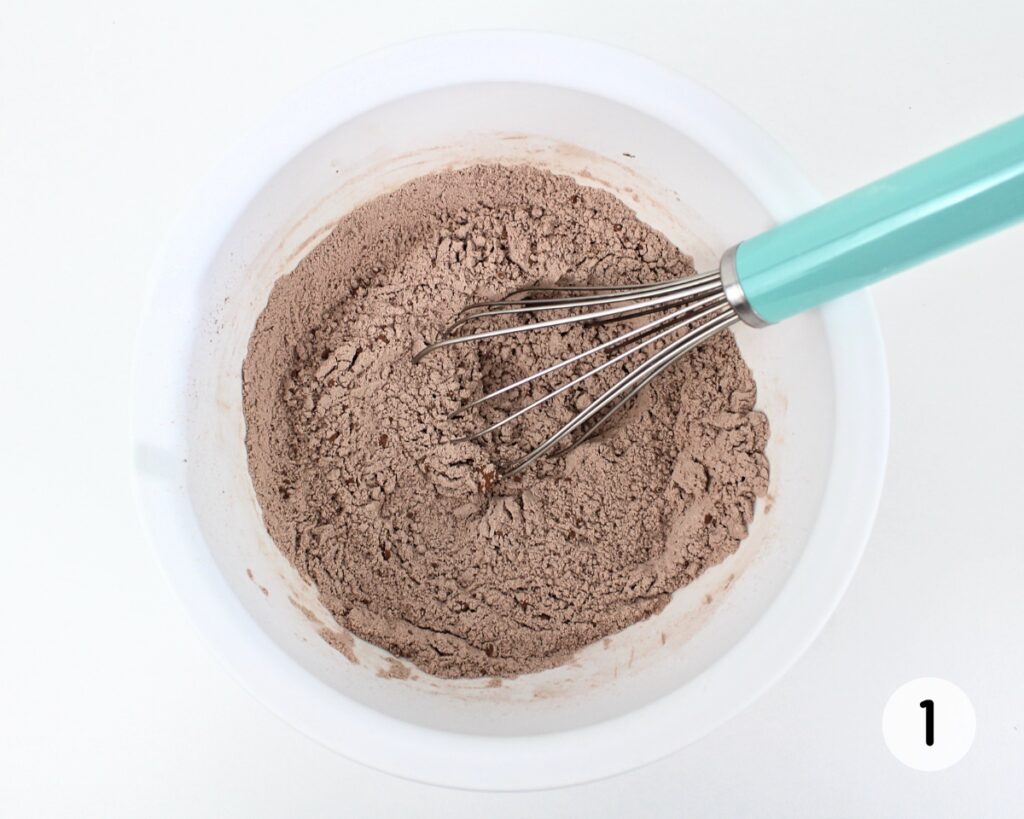
Step 1: Combine dry ingredients. Pour the cocoa powder and flour into a medium mixing bowl and combine them with a whisk or spoon.
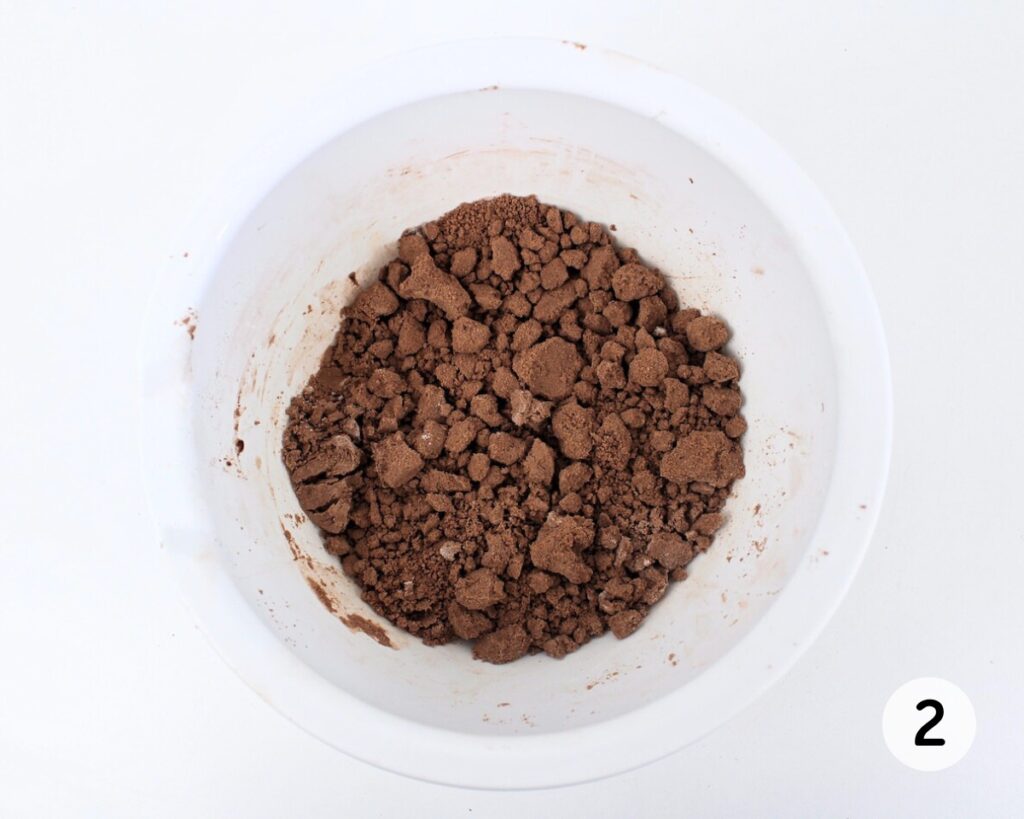
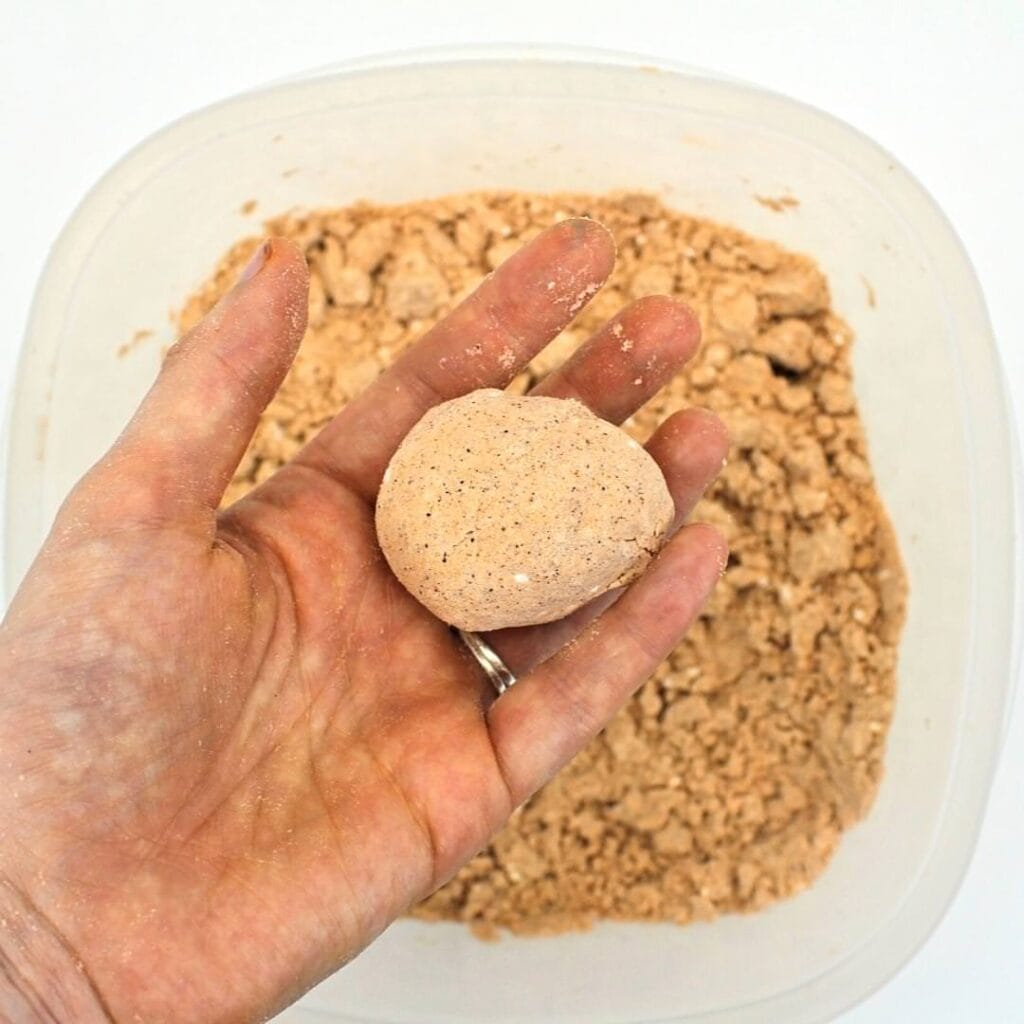
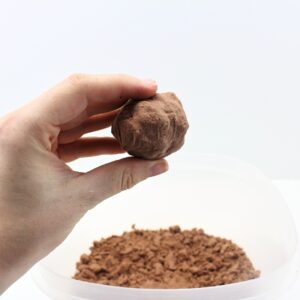
Step 2: Add oil. Pour the oil into the dry ingredients and stir it in with a spoon. Once you’ve gotten as far as you can with the spoon, finish mixing with your hands, kneading until the ingredients have been fully combined and have turned into a smooth, powdery mixture that holds its shape when pressed into a ball.
This recipe has all the fun of moon sand with a chocolate-scented twist! My kids really enjoyed pressing it into balls and using sand toys to mold it into shapes.
Helpful Tips
- Mix with your hands: Stirring with a spoon is rarely enough to make moon sand fully come together—expect to finish off the mixture with your hands in order to fully combine the ingredients.
- Choose your batch size: I used 1 ¾ cups of flour, ¼ cup of cocoa powder and ¼ cup of oil, but you can make smaller or larger batches as long as you stick with the same 7:1:1 ratio (seven cups of flour and one cup of cocoa powder for every cup of oil).
Looking for more fun ways to make play sand for your kids? Check out this Taste-Safe Kinetic Sand, this Edible Cheerio Sand or this Edible Rainbow Sand!
Storage Instructions
Once your child is done playing, you can store leftover moon sand by placing it in an airtight container or zip-top bag and keeping it at room temperature for up to 4 weeks. (It may even last longer provided it is kept clean and dry.)
Always make sure that your child has clean hands when playing, and avoid getting the moon sand humid or wet. If it starts to look dirty, develops an off smell or shows any signs of spoilage, discard it immediately and make a fresh batch for your child to play with.
How to Limit the Mess
- Keep it contained: Moon sand can get a bit messy due to its powdery texture—I recommend keeping it inside a bin during play to prevent it from getting everywhere.
- Cover your surface: Try placing a plastic tablecloth, or even some parchment paper, underneath your sensory bin to make it easier to clean up any sand that falls out of the bin.
- Take it outside: If the weather is sufficiently warm and not too windy, try taking your bin outdoors to play. The moon sand will simply decompose in nature.
- Use a pool or bathtub: Can’t take it outside? Instead of placing the sensory bin on a table, try doing this activity in a bathtub or in a pop-up kiddy pool on the floor. (This is a good tip for other messy activities, too!)
Frequently Asked Questions
Have a question that wasn’t answered here? Let me know in the comments and I’ll be happy to help!
More Moon Sand Recipes for Kids

If you have tried this Chocolate Moon Sand or any other project on my website, please let me know how it went in the comments below. I can’t wait to hear from you!
Chocolate Moon Sand
Materials
- 1 ¾ cups all-purpose flour
- ¼ cup cocoa powder
- ¼ cup mild-scented cooking oil (e.g. vegetable, canola or refined coconut oil)
Instructions
- To make your moon sand taste-safe, spread the flour on a baking sheet and bake it in the oven at 350°F for 5 minutes to kill any harmful bacteria. (Alternatively, buy heat treated flour at the store, or simply skip this step if you don't need the moon sand to be taste-safe.)
- Pour the cocoa powder and flour into a medium mixing bowl and stir them together using a whisk or spoon.
- Pour the oil into the dry ingredients and stir it in with a spoon. Once you’ve gotten as far as you can with the spoon, keep kneading the ingredients with your hands until they have been fully combined and have turned into a smooth, powdery sand that holds its shape when pressed into a ball.
Video
Notes
- Mix with your hands: After stirring with a spoon, use your hands to fully combine the ingredients and help the moon sand come together.
- Follow a 7:1:1 ratio: Make smaller or larger batches by sticking to a 7:1:1 ratio of flour to cocoa powder to oil.
Grab our 12 best sensory recipes!
By submitting your email address, you are agreeing to the terms of our Privacy Policy. You can unsubscribe at any time.
Only your name will be made public. Please note that by submitting your comment, you are agreeing to the terms of our Privacy Policy.