Looking to decorate your house (or classroom) for Halloween? These spooky Halloween paper chains are so cute, and they’re also easy enough for kids to make. Download and print our free template to start making your own DIY Halloween decorations in minutes!

JUMP TO…
Are your kids excited to decorate the house for Halloween?
October offers SO many decorating possibilities, and lots of them are kid- and budget-friendly… like these 3D paper chains made from regular old construction paper!
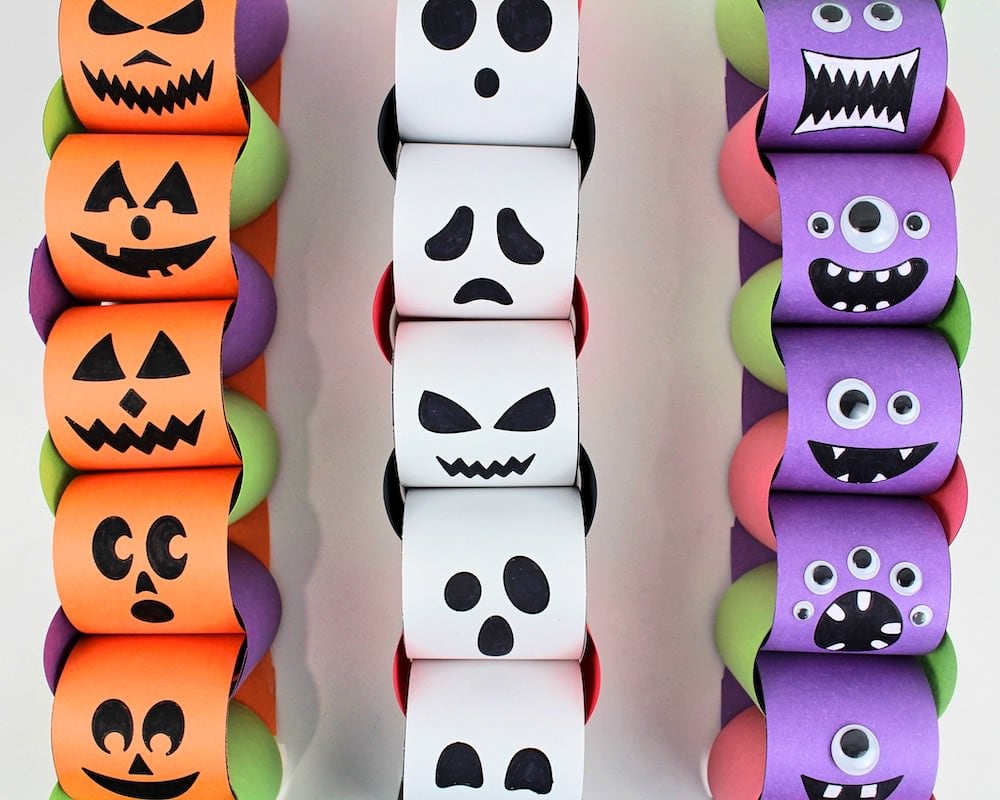
This spooky Halloween craft comes in multiple variations (pumpkin, ghost and monster), and all of them are both fun and easy to make with kids.
Plus, since most of the craft involves coloring and taping things together, only minimal adult supervision is required! Preschoolers should be able to do this Halloween activity quite easily on their own.
If that sounds like your type of project, all you need to do is grab the printable template to start sprucing up your Halloween decor!
GRAB OUR FREE 30-PAGE ACTIVITY BUNDLE!
By submitting your email address, you are agreeing to the terms of our Privacy Policy. You can unsubscribe at any time.
Required Materials
Here’s what you’ll need to create your very own Halloween-themed paper chains at home:
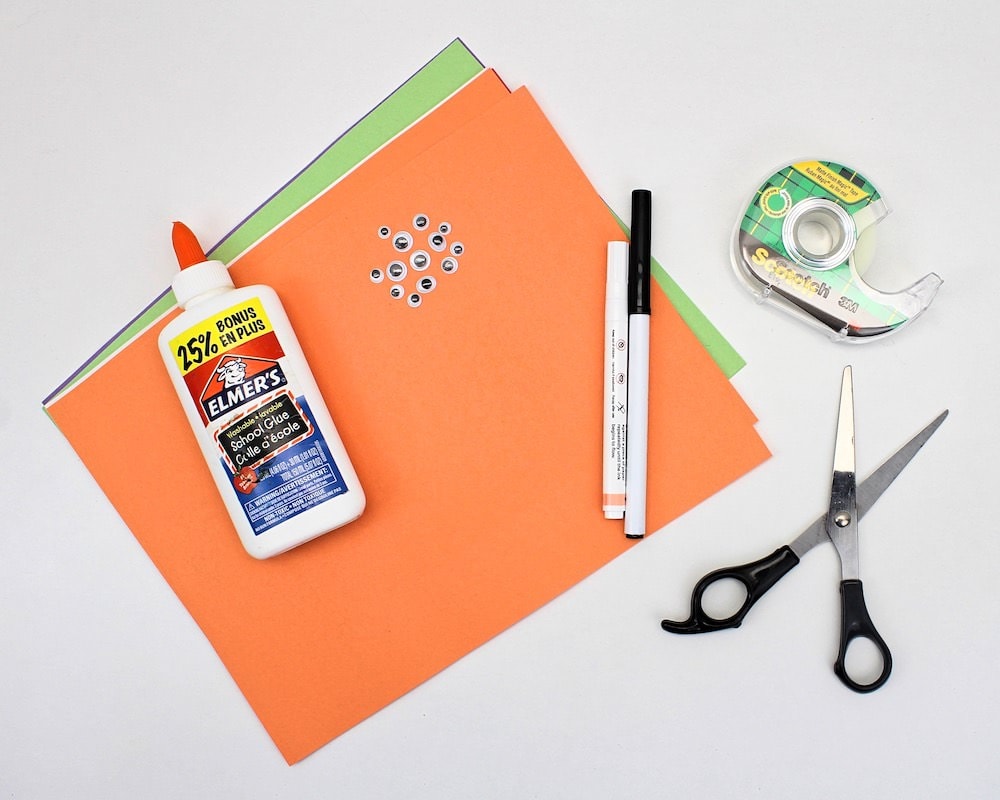
- Construction paper (we used orange, green and purple for the paper jack-o’-lantern chain; white, red and black for the paper ghost chain; and purple, pink and green for the paper monster chain)
- My free Halloween paper chain template, which you can download using the form below (there’s another form at the bottom of the article if you’d rather keep reading)
- Black marker, pencil or crayon
- White acrylic paint pen (or regular white paint and fine paintbrush)
- Googly eyes in various sizes
- Liquid school glue
- Scissors
- Adhesive tape
How to Make Halloween Paper Chains (Step-by-Step)
1. Print Template
Once you have requested and downloaded the template, the first step is to print it on US Letter sized paper (8.5 x 11 inches).
You can use any sort of colored paper, but if you use construction paper like we did, you’ll probably have to cut the paper down to size: construction paper tends to be a bit larger than 8.5 x 11 inches.
I used a paper trimmer to cut it to the right format because I love how quick and easy it is, and how clean the cuts are. But if ever you don’t have a paper trimmer at home, scissors will do just fine!
Note: If you do use a paper trimmer instead of regular scissors, make sure not to let your kids anywhere near it while you’re using it, and store it out of reach when not in use. The blade is really sharp and dangerous for children.
The template includes 4 pages:
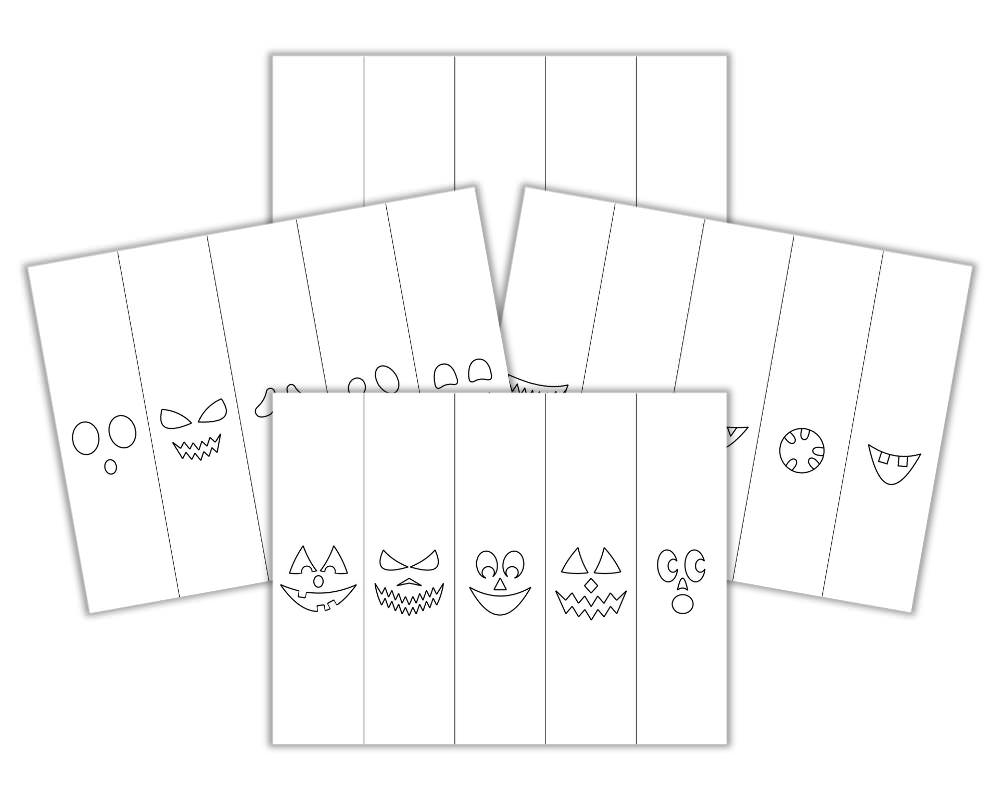
- Jack-o’-lantern faces (page 1)
- Ghost faces (page 2)
- Monster mouths (page 3)
- Blank (page 4)
Depending on how long you wish your chains to be, you may need to print out the template several times. Below are the colors and quantities you’ll need to make a short chain (5 faces) of each type.
Pumpkin paper chain:
- Template page 1 (jack-o’-lantern faces) printed on orange paper
- Template page 4 (blank) printed on purple paper—only half will be used
- Template page 4 (blank) printed on green paper—only half will be used
Ghost paper chain:
- Template page 2 (ghost faces) printed on white paper
- Template page 4 (blank) printed on black paper—only half will be used
- Template page 4 (blank) printed on red paper—only half will be used
Monster paper chain:
- Template page 3 (monster mouths) printed on purple paper
- Template page 4 (blank) printed on green paper—only half will be used
- Template page 4 (blank) printed on pink paper—only half will be used
This means that should you decide to make one short chain of each type, you will need these sheets of paper: 1 orange (jack-o’-lantern template), 1 green (blank template), 1 ½ purple (monster template and blank template), 1 white (ghost template), ½ red (blank template), ½ black (blank template) and ½ pink (blank template).
If you want to make a really long paper chain, simply multiply the quantities accordingly and follow the same instructions to create more chain-links.
Note: Since most printers are only capable of printing full pages, you’ll have to print the entire page even if I indicated that you’ll only need half. But if ever you decide to multiply the quantities, make sure you use the half-page measurement in your calculations or you’ll end up with way more than you need!
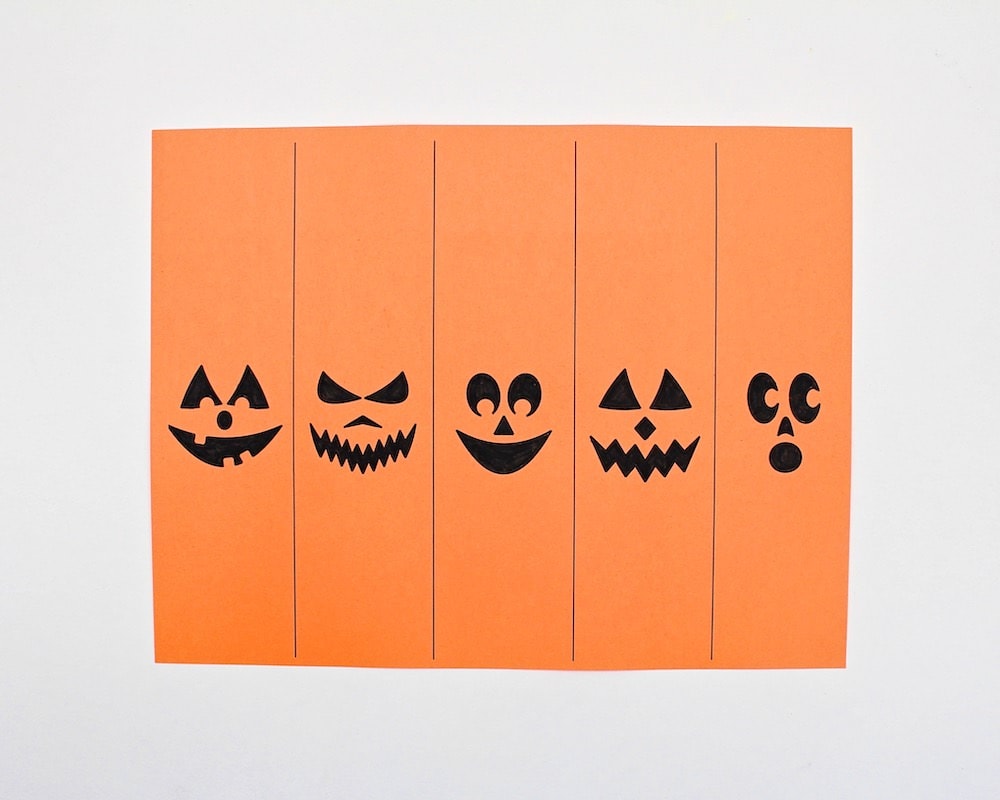
2. Decorate Template
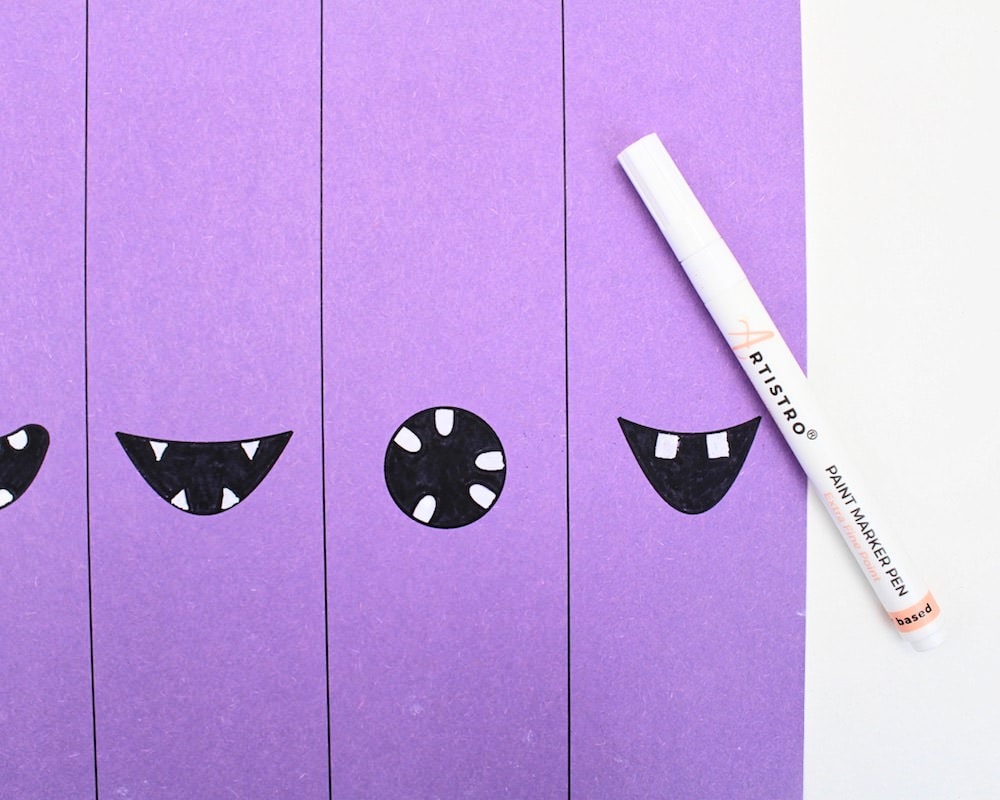
Grab a black marker (or pencil / crayon) and use it to color in the eyes and mouths of the printed template.
The jack-o’-lanterns and ghosts are pretty straightforward to complete since all you’ll need to do is fill in the shapes with black.
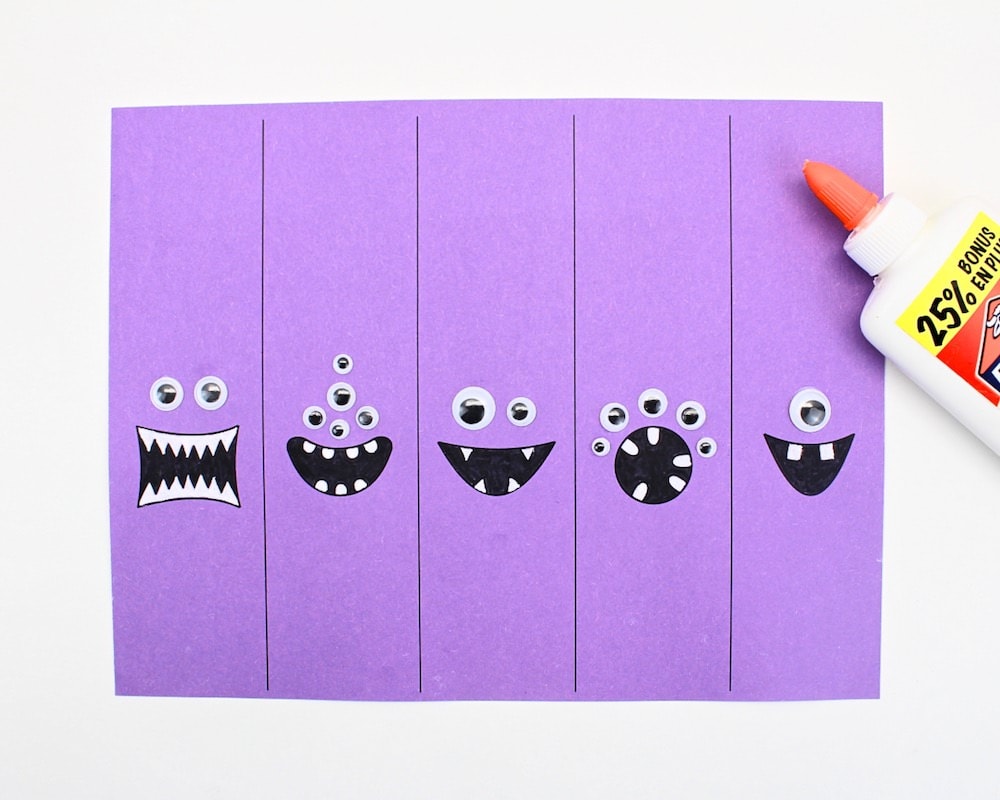
As for the monster template, it will require a few additional steps.
The first additional step is to color in the teeth.
I used a white acrylic paint pen to paint them in because it seemed like the simplest option. But if ever you don’t have any, you can always paint in the teeth with regular white paint and a paintbrush, or even cut small pieces of white paper and glue them on top.
You’ll also need to add some googly eyes using liquid glue.
Feel free to get creative with this and add one, two or multiple eyes to each monster. They don’t even need to all be the same size! Just make sure they’re not so big that they will peel off once the paper has been rolled into a chain-link. (Mine were sort of borderline.)
3. Cut Template
When you are done decorating the templates and the glue from the googly eyes has finished drying, use some scissors to cut along the lines on the printable template.
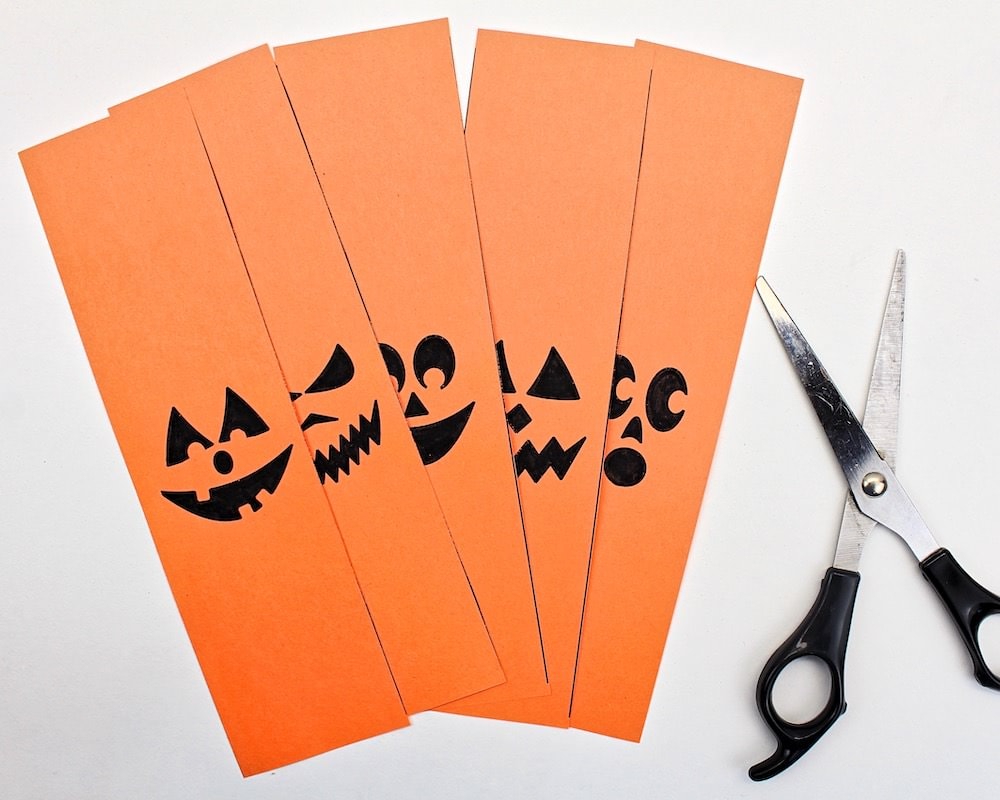
This should be easy enough for preschool kids to do since they’ll only need to cut straight lines—no complicated shapes! The lines probably won’t be perfect, but they’ll still be able to complete the craft, and they’ll be really proud of their work!
4. Assemble Paper Chain
After cutting along the lines, you will end up with lots of strips of colored paper. Each of the strips of paper will become a chain-link.
To assemble the chain, roll up a strip of paper so that the facial features are facing outward, then, use a piece of adhesive tape to hold it in place.
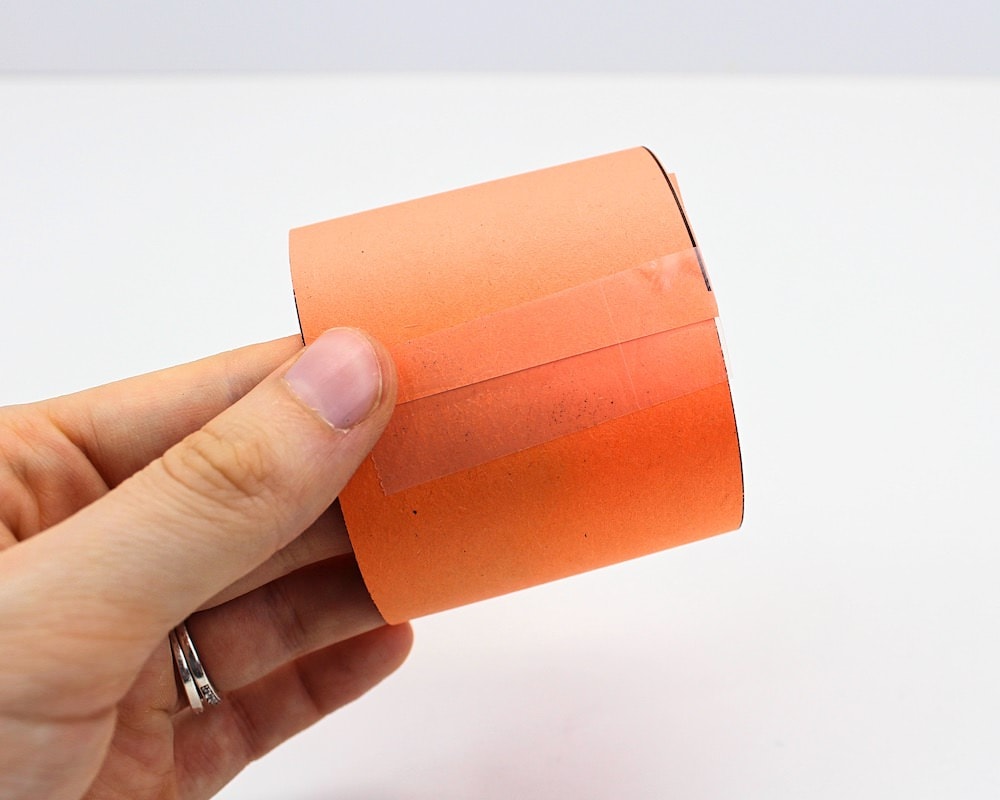
Make sure that the ends of the paper strip don’t overlap too much or the next chain-link won’t fit through it and you’ll have trouble attaching them.
Once your first chain-link has been secured with adhesive tape, grab a second strip of paper, gently insert it into the existing chain-link and repeat the process of closing it up with adhesive tape.
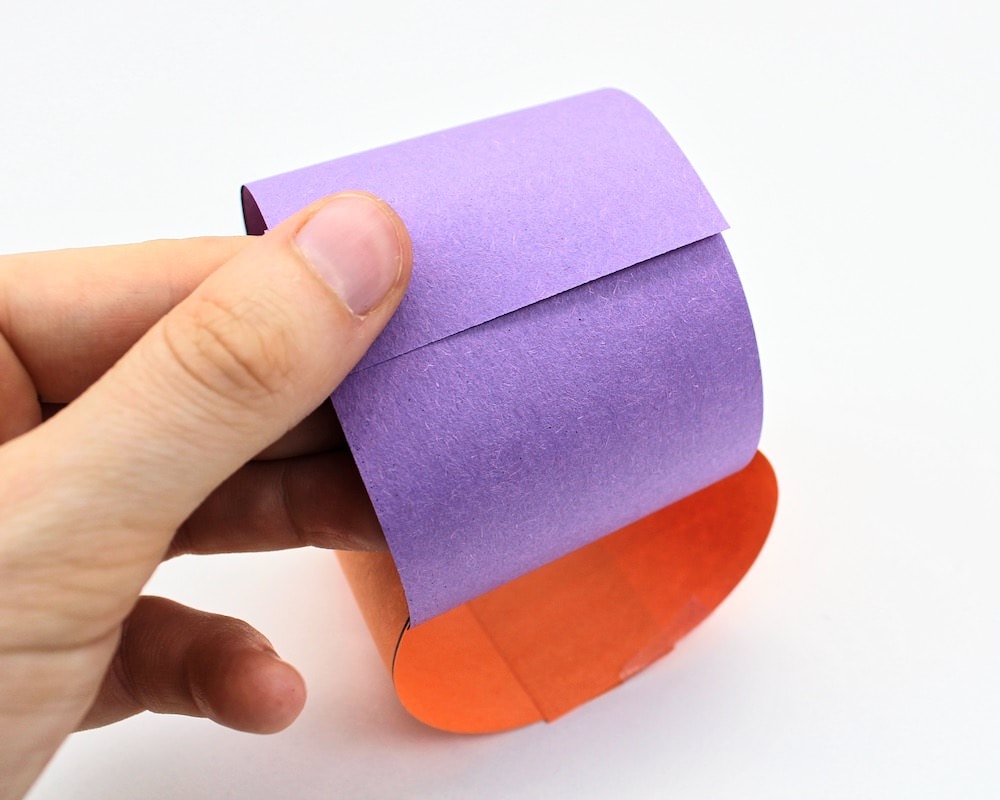
Continue doing this until all the paper strips have been linked together.
I like to rotate the colors that I use in between faces: purple and green in between the jack-o’-lanterns, black and red in between the ghosts, and green and pink in between the monsters.
This adds a nice touch, but it’s not mandatory and the craft will still look nice if you don’t choose to do it. You can even choose a single color—for instance, black—and use that color for all of the paper chain designs.
When the paper chains have been fully assembled, you’re done! Aren’t they adorable?
This easy paper chain craft would make look great hanging on your wall as a DIY Halloween decoration. You can also use it as a DIY Halloween countdown chain and cut off one chain link per day until October 31st!
And if you’re looking to decorate your classroom but you aren’t sure where to start, this craft would make a great school project for Halloween since your students should be able to complete it without much help.
Related Halloween Crafts
Looking for more spooky crafts to make this October? Check out these articles:
- Halloween Sponge Painting (with Free Template!)
- Easy Blow Painted Ghosts
- 7 Cutest Halloween Lollipop Crafts for Kids
- Free Build a Monster Printable
- DIY Glow-in-the-Dark Halloween Window Clings
- Paper Plate Spider Craft for Kids
- Sparkly Spiderweb Window Clings
How do I get the link for the paper chain?
There is a form at the bottom of the article that says “GET YOUR FREE HALLOWEEN PAPER CHAIN TEMPLATE”, and if you enter your email address in the form, the template will be sent to your inbox! 🙂