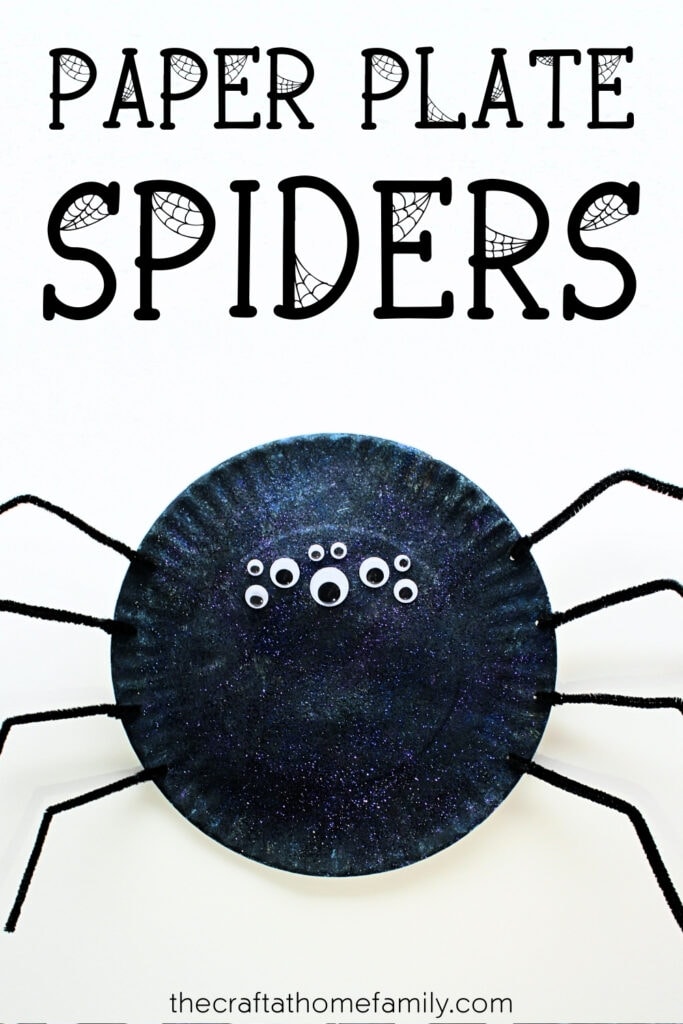
Looking for a fun craft to celebrate Halloween with your kids? Turn a paper plate into a spooky spider in just a few simple steps. This simple craft is perfect for both toddlers and school-aged kids, and can even be used as a DIY Halloween decoration for your home!
This post may contain affiliate links, which means I may receive a commission, at no extra cost to you, if you make a purchase through a link. As an Amazon Associate, I earn from qualifying purchases. Please see my full disclosure for further information.
JUMP TO…
Can you believe it’s already the time of year to carve pumpkins and decorate your home for Halloween?
I’m sure we weren’t the only ones, but things were a little weird for us last October. Our province was on lockdown, so rather than take the kids trick-or-treating, we stayed home and organized an indoor candy hunt instead.
With a little luck, this year will be a bit more normal. We would love to finally be able to enjoy all the Halloween traditions that the kids have been looking forward to!
So in order to get into the season’s spirit, the kids and I have been spending extra time making spooky Halloween-themed crafts and decorations. We even went to Michael’s to pick out a small plastic pumpkin to decorate together—though of course, we also bought a real pumpkin that we’ll be carving and turning into pumpkin pie.
But crafts don’t always need to be complicated, especially when you’re crafting with four children under the age of six. So when I suggested that we take out some paper plates and turn them into pumpkins and spiders, they were thrilled!
Required Materials
Here’s what you’ll need to make this cute DIY spider craft for Halloween:
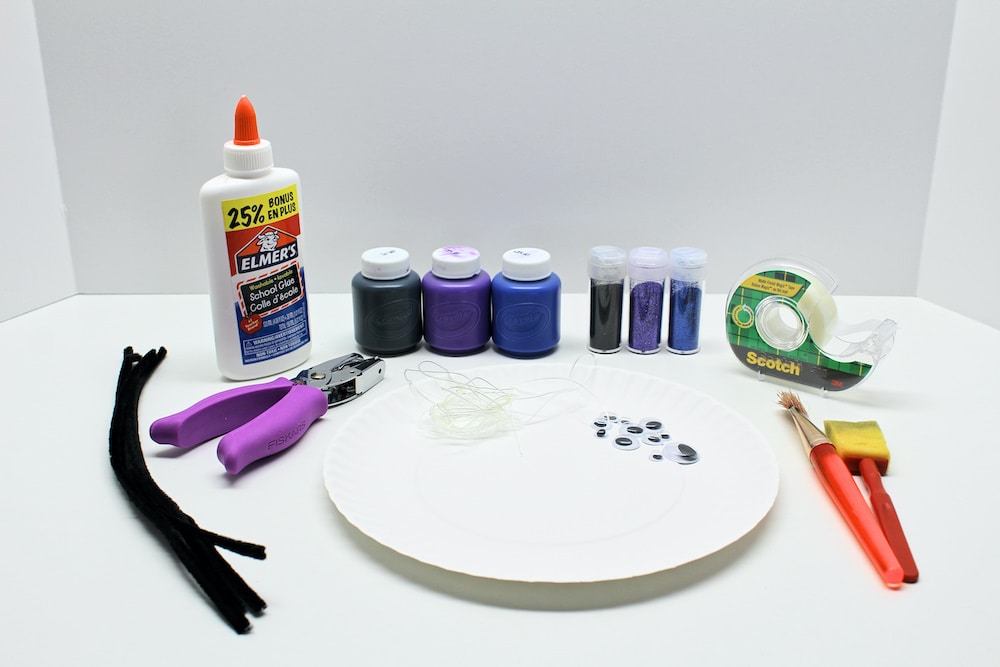
- Paper plate
- Large paintbrush or foam brush
- Paint palette or ceramic plate
- Washable kids’ paint in black, blue and purple (blue and purple are optional)
- Fine glitter in black, blue and purple (optional)
- Liquid school glue
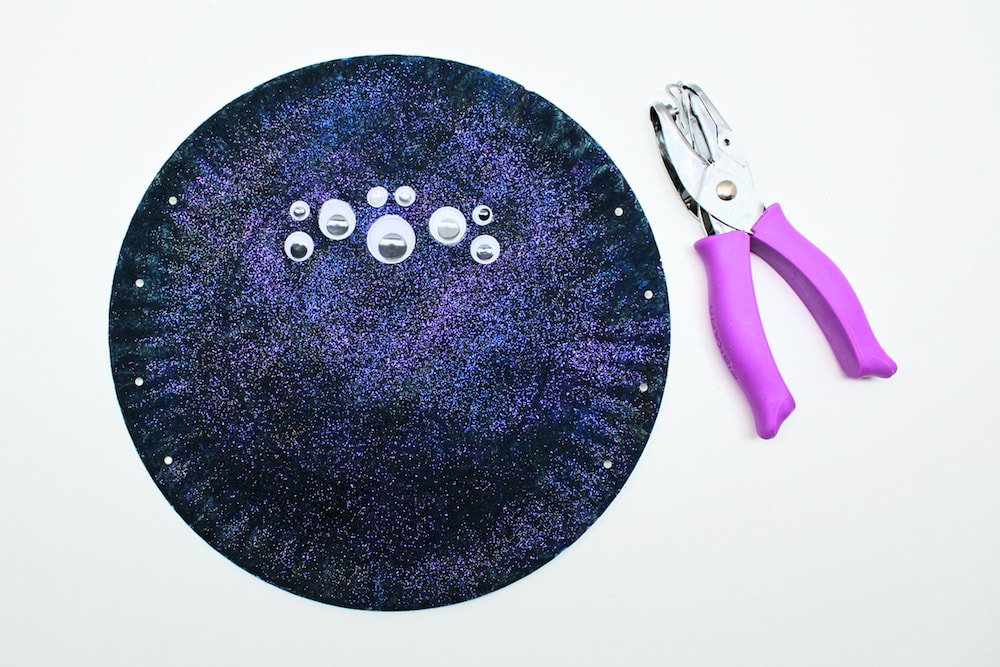
- Googly eyes
- Hole punch (I prefer to use an 1/8-inch hole punch for this project, but you can use a regular ¼-inch hole punch if that’s what you have at home)
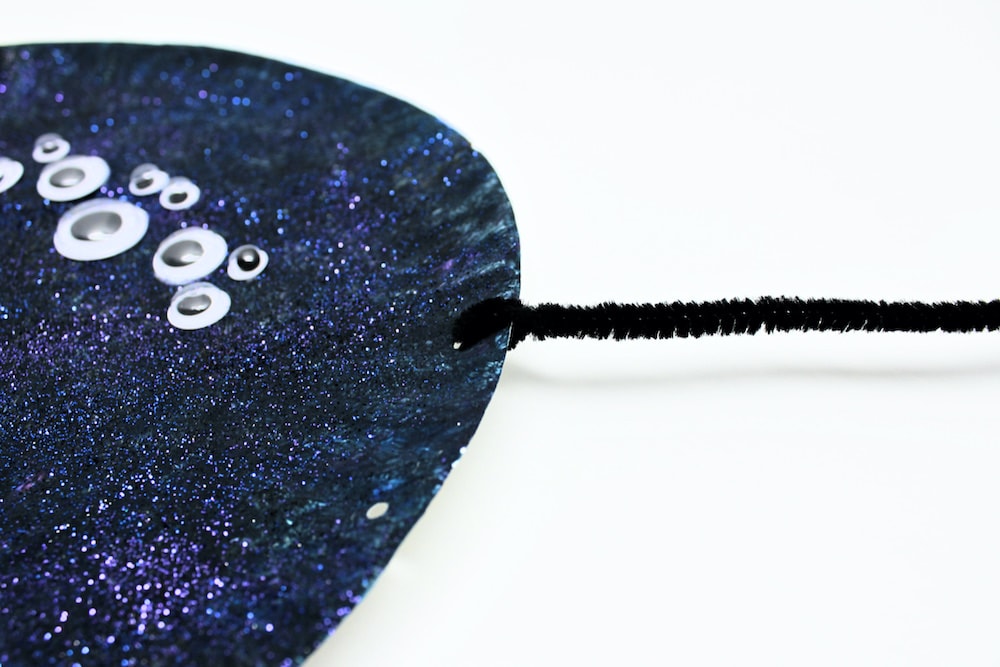
- 4 black pipe cleaners
- White or translucent thread
- Adhesive tape
Note: If you choose to use blue and purple paint and glitter, make sure to use the darkest shades you can find.
How to Make a Paper Plate Spider (Step-by-Step)
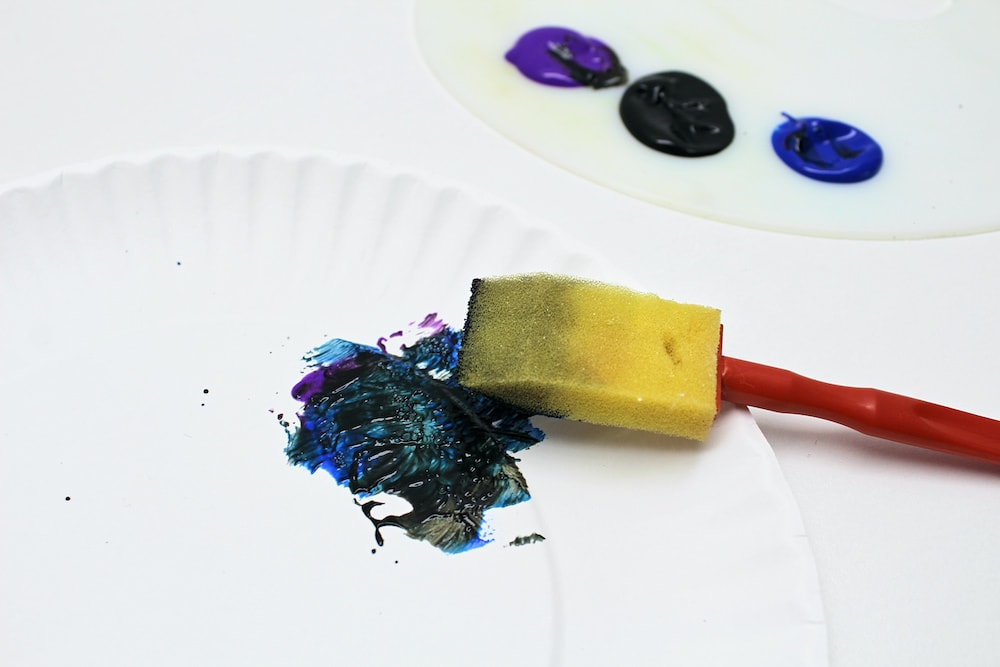
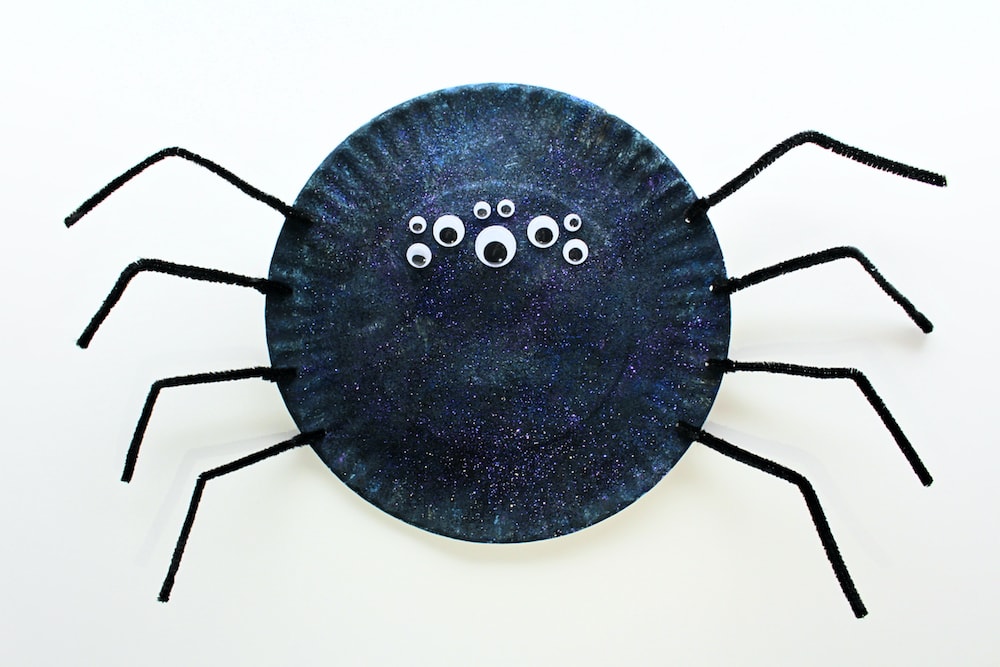
1. Paint Paper Plate
Start by pouring some black, blue and purple paint onto a paint palette or ceramic plate. Dip your paintbrush or foam brush into it, and use the paint to cover the entire surface of the paper plate.
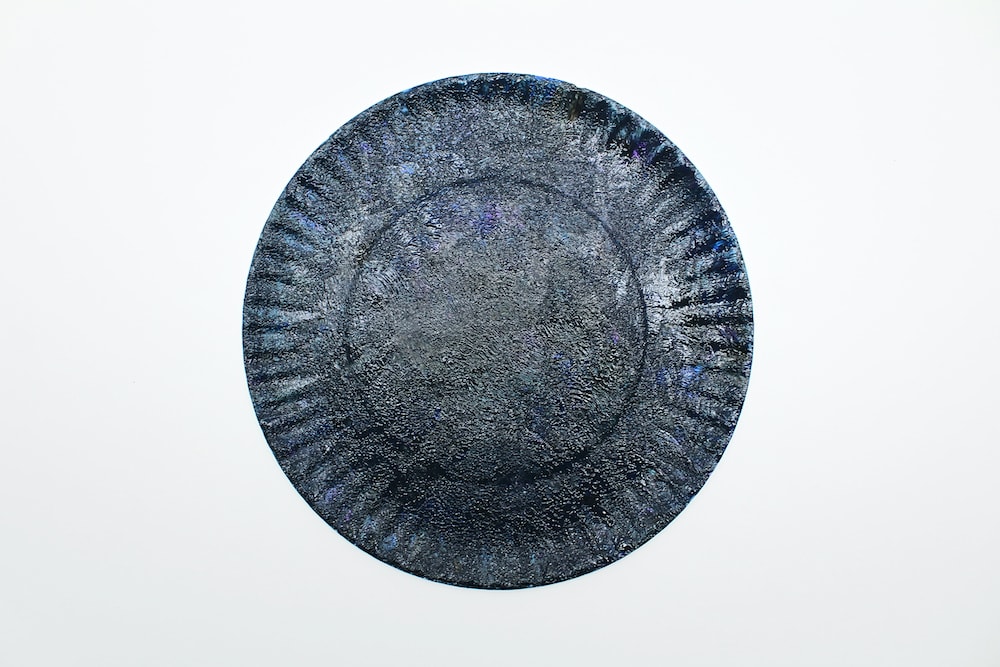
I like to add blue and purple paint to give the colour a bit more depth, but you can also choose to use nothing but black if you don’t want to complicate the project.
Since black should be the main colour of the spider’s body, I poured the black paint in between the two other colours so I could mix them more easily.
2. Add Glitter (Optional)
While the paint is still wet, sprinkle some black, blue and purple glitter onto the paper plate. This will give the spider an added sheen, but feel free to skip this step if you’re not a fan of glitter.
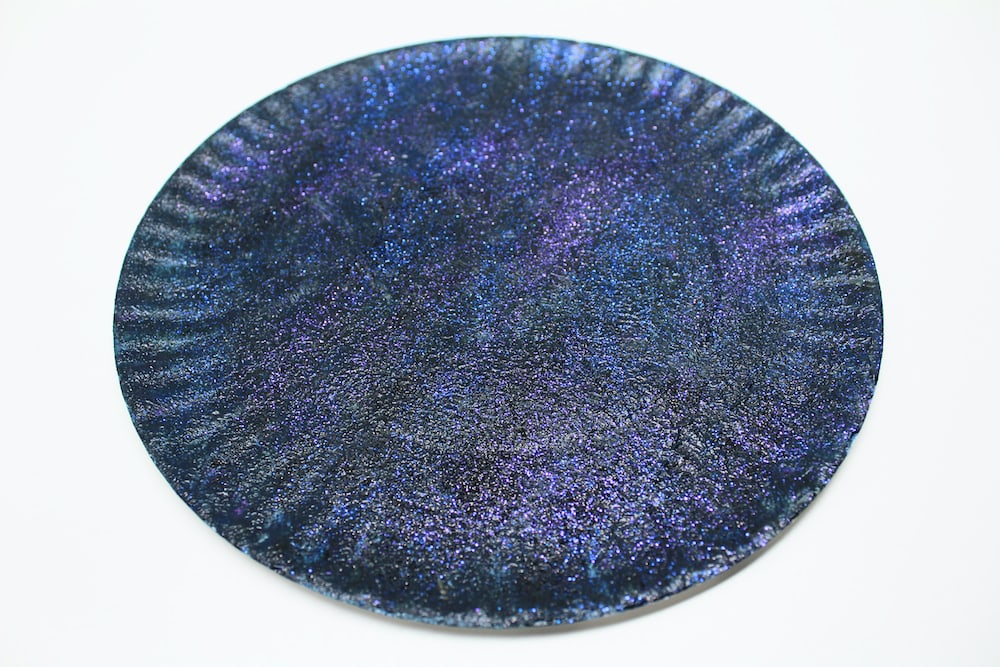
3. Let Dry
Let the paint dry completely before moving on to the next step.
4. Add Eyes
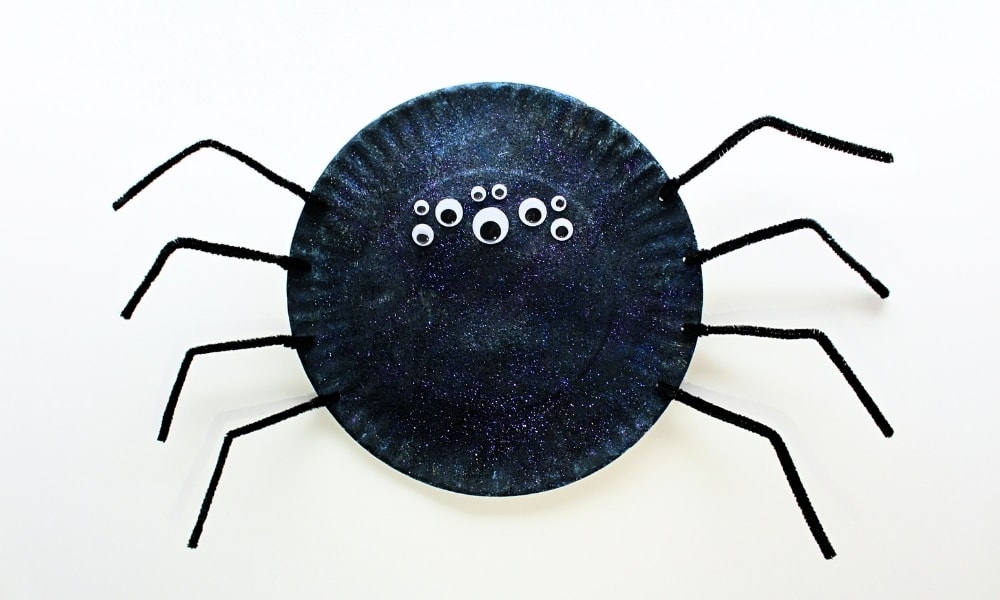
Once the paint is dry, glue some googly eyes onto the paper plate. We chose to use several different sizes because we liked the way it looked.
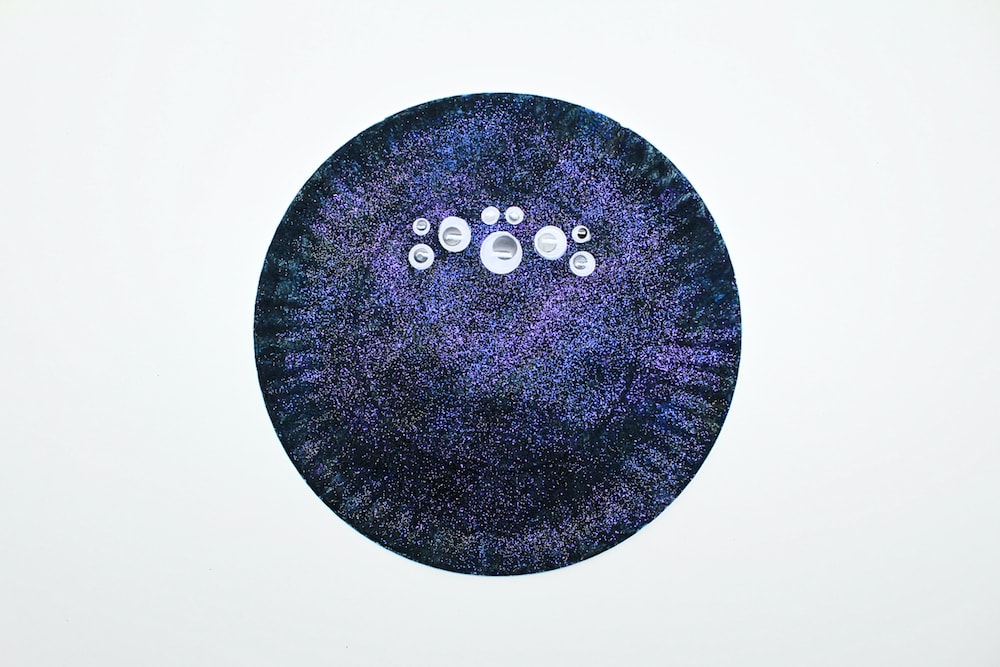
You can also use this as opportunity to practice symmetry.
The first time I made this craft with my kids (my eldest were two and three years old at the time), I let them place the googly eyes wherever they liked and then mirrored the placement of the eyes so that both sides would look even… though of course, you’re under no obligation to make the eyes symmetrical at all!
5. Create Holes
Use the hole punch to make eight holes—four on each side—on the edge of the spider’s body. If possible, try to place the holes symmetrically.
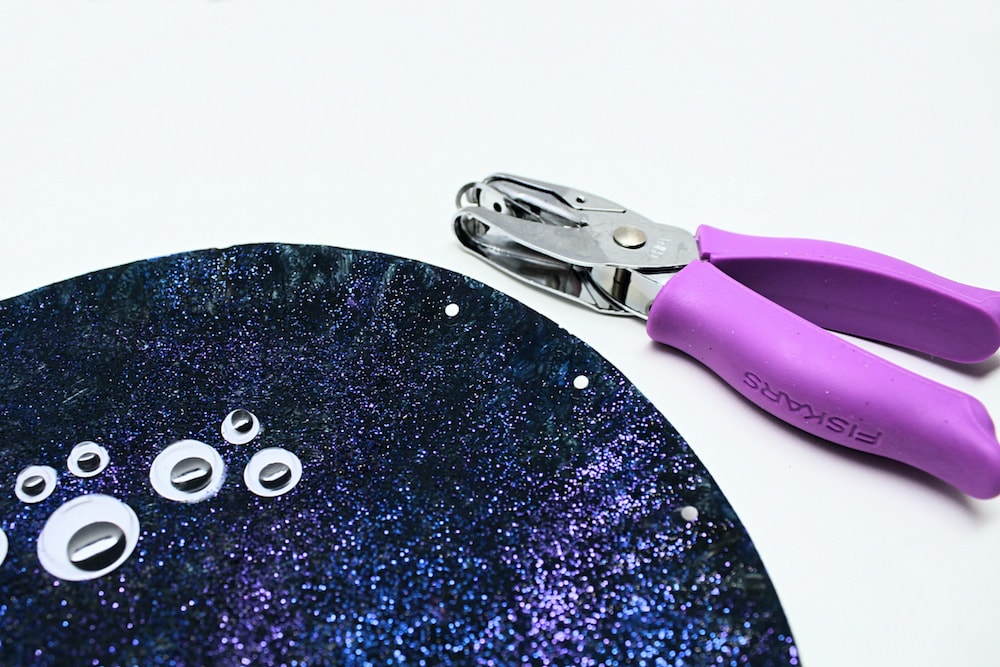
I used an ⅛-inch hole punch because the smaller holes helped keep the spider’s legs in place—the bigger the holes, the more likely it is that the legs will simply dangle downward instead of staying up. But if all you have is a regular ¼-inch hole punch, you can always use that for this project.
6. Cut Pipe Cleaners
Cut four pipe cleaners in half, keeping the lengths as even as possible. The pipe cleaners will become the spider’s eight legs.

7. Insert Pipe Cleaners into Holes
Insert a pipe cleaner half into each of the holes, twisting it into place to prevent it from falling out.
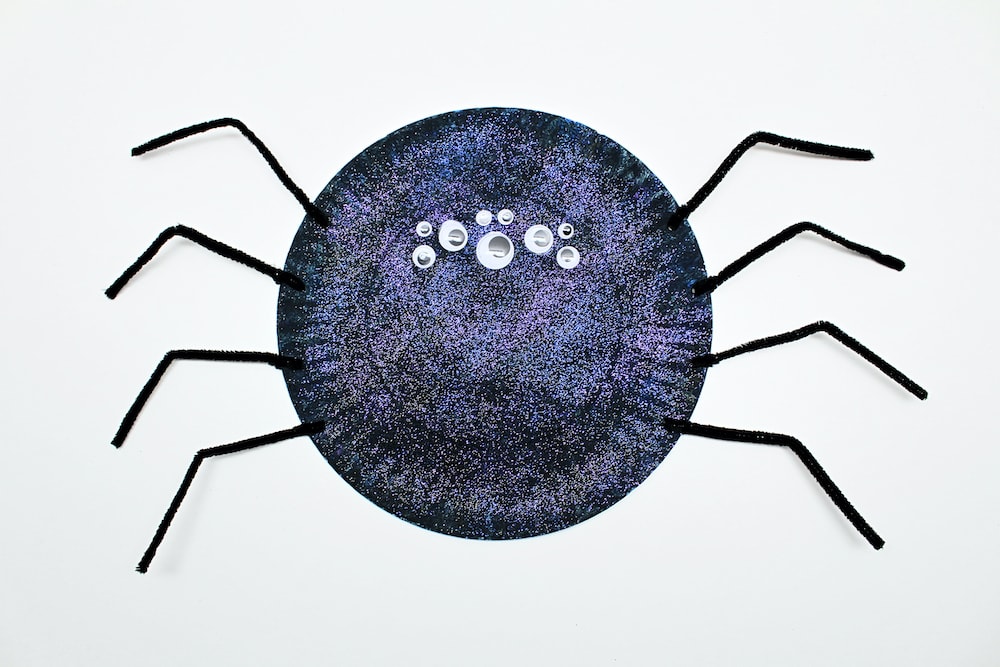
8. Bend Pipe Cleaners
When you’re secured all eight pipe cleaner halves, bend each one in half to make it look like a leg.
9. Add String
Use adhesive tape to attach a piece of white or translucent string to the back of the spider.
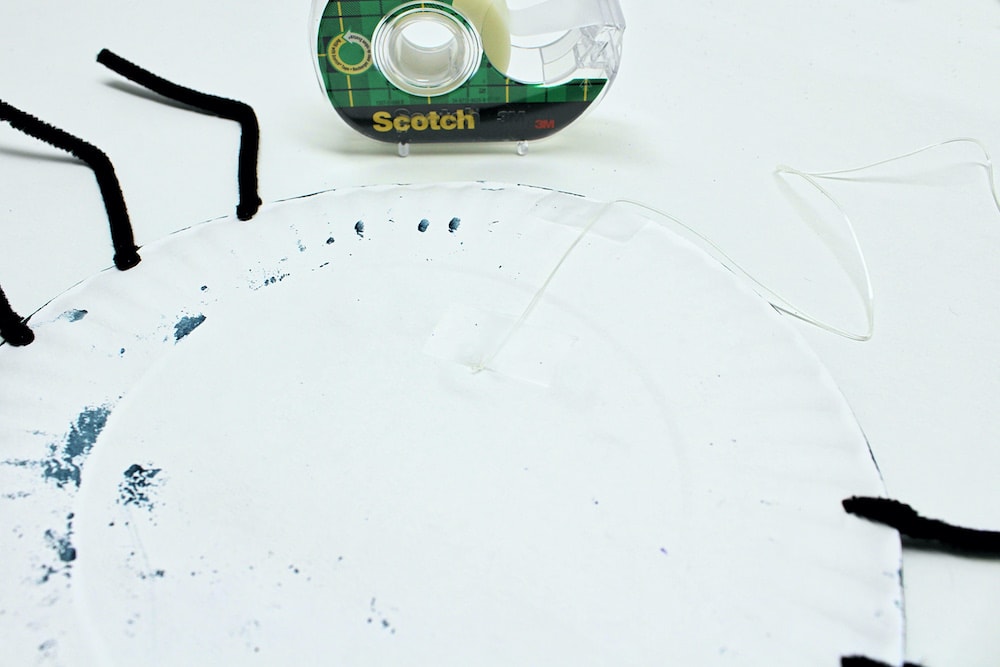
Then, hang it wherever you like to display your finished craft! We hung ours from the door of our craft cupboard, but you can also place them in front of your windows to use them as DIY Halloween decorations.
And if you’re looking for something else to do after you’re done with this craft, this cool floating spider experiment would fit perfectly!
Related Halloween Crafts
Looking for more fun crafts to do for Halloween? Check out these articles:
- Sparkly Spiderweb Window Clings (with Free Template!)
- Edible Mazipan Spiders
- Free Printable Pumpkin Carving Template
You can also sign up for my newsletter to receive fun craft and activity ideas right in your inbox! Subscribers gain access to my free printables library as well as to fun bonuses that will never be available on my site.
Only your name will be made public. Please note that by submitting your comment, you are agreeing to the terms of our Privacy Policy.