Looking to decorate your house with spooky homemade Halloween decorations? These glittery spiderwebs are super simple to make, and you probably already have all the materials you need at home! The tutorial even comes with a free spiderweb printable that you can use for any number of Halloween crafts!
JUMP TO…
We love to decorate our windows with DIY window clings related to the current season!
Last winter, we made pretty Color-Changing Snowflakes and Sparkly Snowflakes to sprinkle around the house for added holiday cheer. And this year, when autumn leaves started changing colors and falling to the ground, we celebrated by making cool Color-Changing Fall Leaves.
So now that Halloween is almost here, it’s only natural that we’ve decided to swap our fall leaves for glittery spiderwebs!
These spiderwebs are super easy to make, and they require very few materials. In fact, if you like to do crafts at home, you probably already have everything you need to make them.
So read on to see just how easy this project is, and don’t forget to request your free spiderweb printable using the form at the bottom of this page! (And if you’re looking for more spider-themed fun, check out this Glue & Chalk Pastel Spiderweb or this neat Floating Spider Experiment.)

Get hundreds of pages of activities!
Get access to all our paid printables, as well as monthly activity planners, for just $5/month. (New printables added twice per month!)
Required Materials
Here’s what you’ll need to make your very own sparkling spiderweb window clings at home:
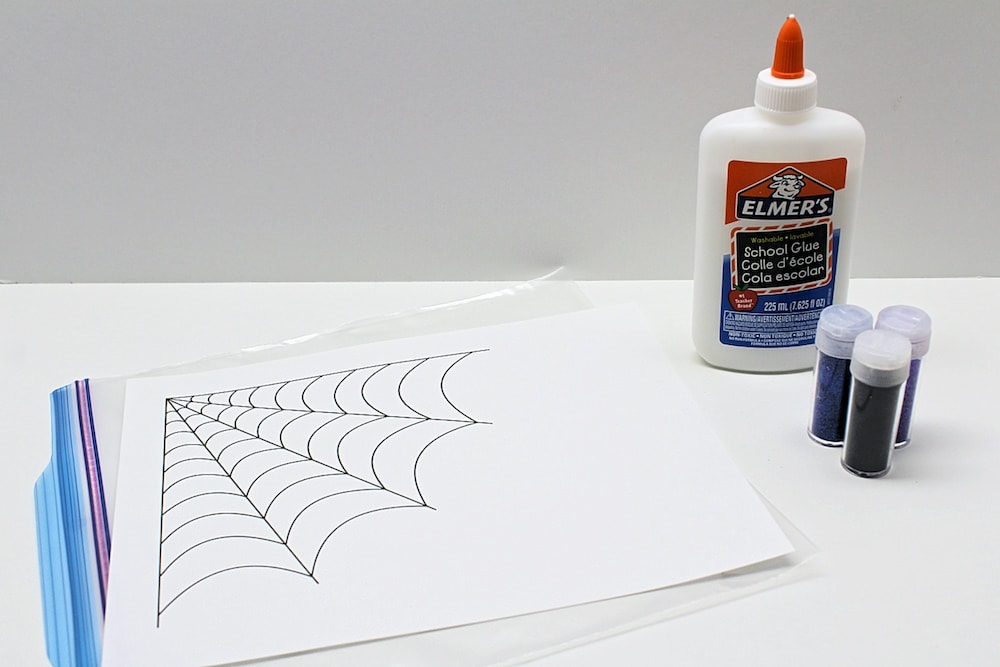
- My free spiderweb printable (which you can download using the form at the bottom of this article) or any other spiderweb design of your choosing
- Bottle of white school glue with precision tip
- Gallon-sized freezer bag (we buy ours at Costco when they go on sale)
- Fine glitter in black, dark blue and dark purple (or any other color you prefer)
Note: Some window clings are made using dimensional fabric paint, but I really don’t recommend it for this project. Window clings made using fabric paint tend to be very floppy and sticky, so they can make designs with fine lines quite difficult to handle.
How to Make Sparkly Spiderweb Window Clings (Step-by-Step)
1. Print Template
Start by printing my free spiderweb template (or any other spiderweb template of your choosing) on a sheet of Letter-sized paper.
Note: I recommend avoiding designs that have too many lines close together since the glue has a tendency to pool and most intricacies will likely be lost. My printable includes several spiderweb designs that you can use for any craft you like, but for this particular project, I recommend using the ones with the most white space.
2. Place Template in Bag
Next, place your printed spiderweb design inside the freezer bag. The printable file I created works great with Letter-sized paper (8.5” x 11”), which also happens to fit perfectly inside gallon-sized freezer bags!
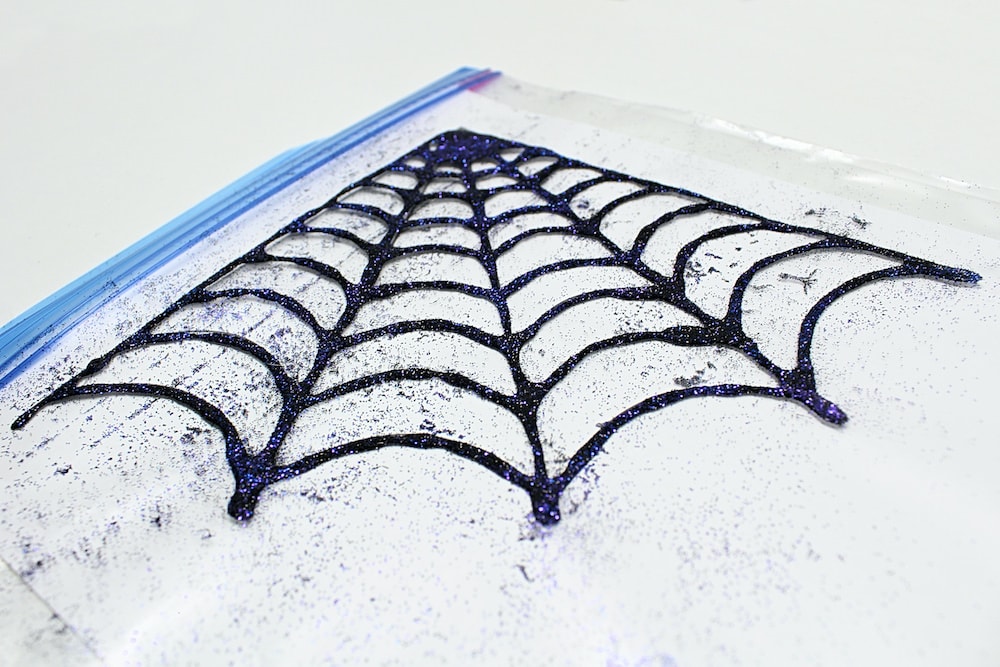
3. Trace Spiderweb
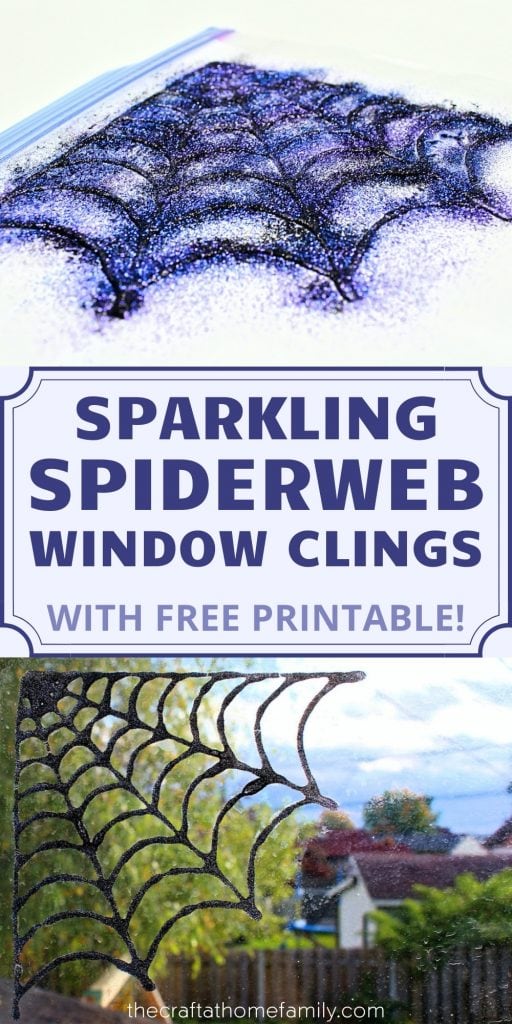
Once the template is inside the bag, use the glue to carefully trace over every line of the spiderweb. Be sure to trace nice thick lines—glue has a tendency to pool, so if you don’t use enough, the thinnest lines could break apart as the glue pools on both ends.

Because the glue tends to pool, it’s also possible that some of the more intricate patterns in the corner of the spiderweb may merge together. If they do, no need to worry as it’s perfectly normal and it happened to ours as well!
4. Add Glitter
While the glue is still wet, sprinkle on fine glitter until the design is completely covered. I used mostly black glitter, but finished it off with some dark blue and dark purple.
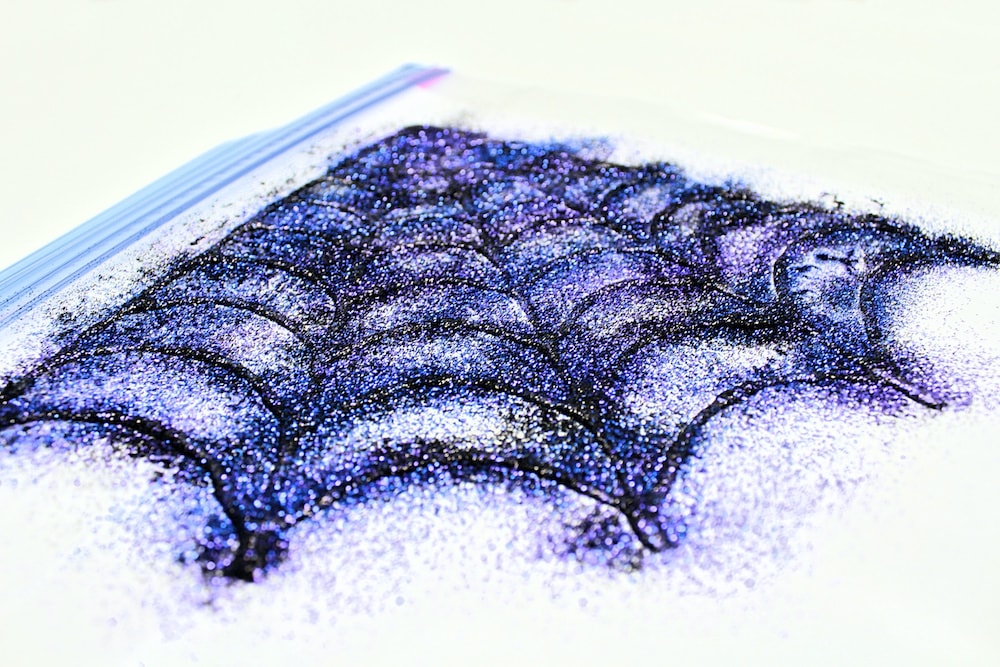
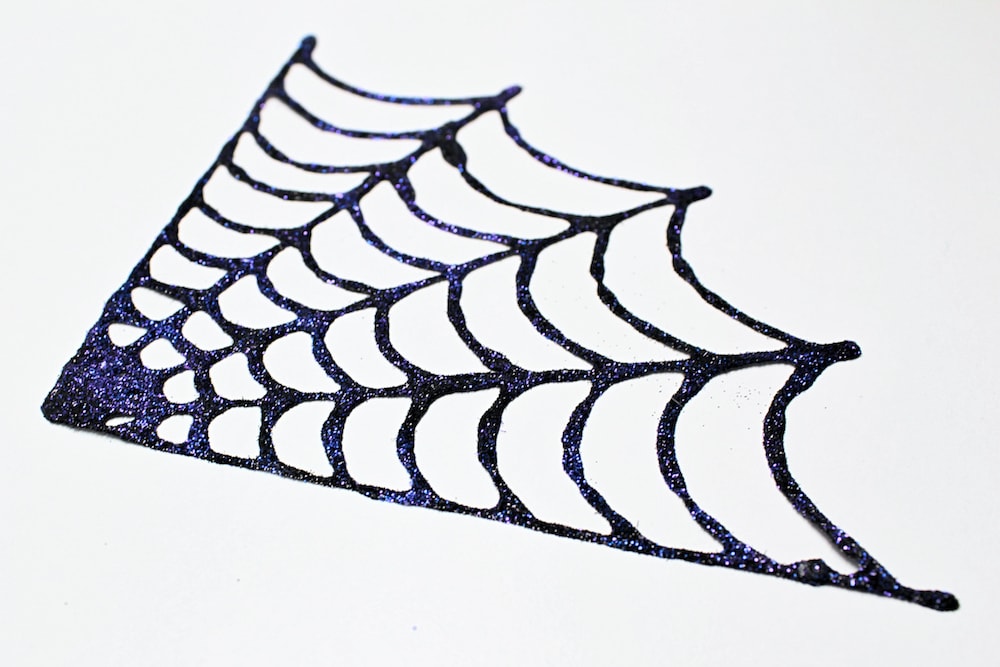
Once the glue is fully covered, feel free to very gently shake off some of the glitter to make sure that none of your lines have broken apart. If you see that they have, add a little more glue to fill in the gaps and cover that in glitter as well.
5. Let Dry
Let your spiderweb sit undisturbed for at least 12 hours. You’ll want the glue to be completely dry when you peel off the design.
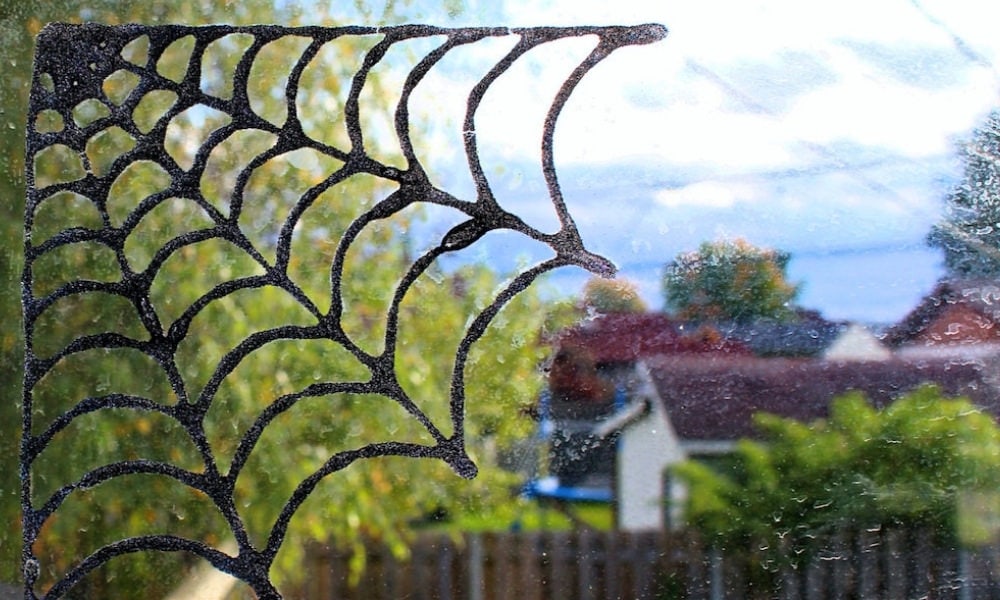
6. Peel Off
Once the glue has fully dried, gently peel off the spiderweb. I found it easier to start with the corner, since that was the thickest part of the spiderweb and the easiest to handle without breaking anything.
7. Place on Window
Once you’ve peeled it off the bag, your spiderweb is ready to be placed on your window!
Unlike dimensional fabric paint, it won’t stick on its own, so you’ll need to help it a little bit by adding water. I generally dampen the window first using a wet cloth or paper towel before gently pressing the window cling onto it.
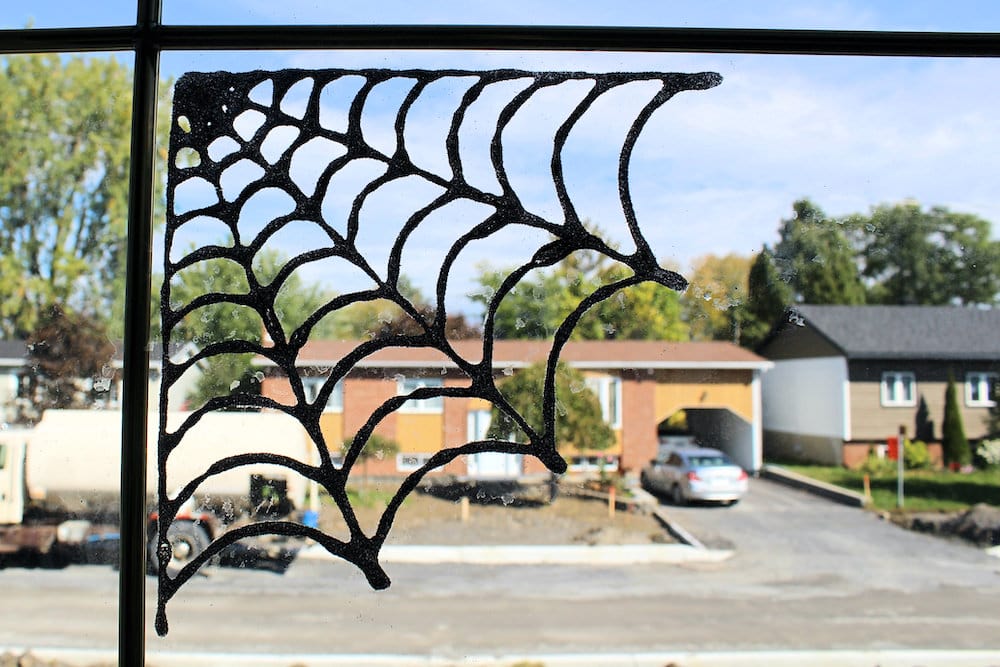
And there you have it—a cute DIY Halloween decoration that’s super simple to make! What are your favorite homemade Halloween decorations?
Related Halloween Projects
Looking for more fun crafts and activities to do at home this Halloween? Check out these articles:
And if you’re having trouble coming up with ideas or want to save time, you may also want to check out our Free October Activity Planner for Toddlers & Preschoolers!
Thanks