
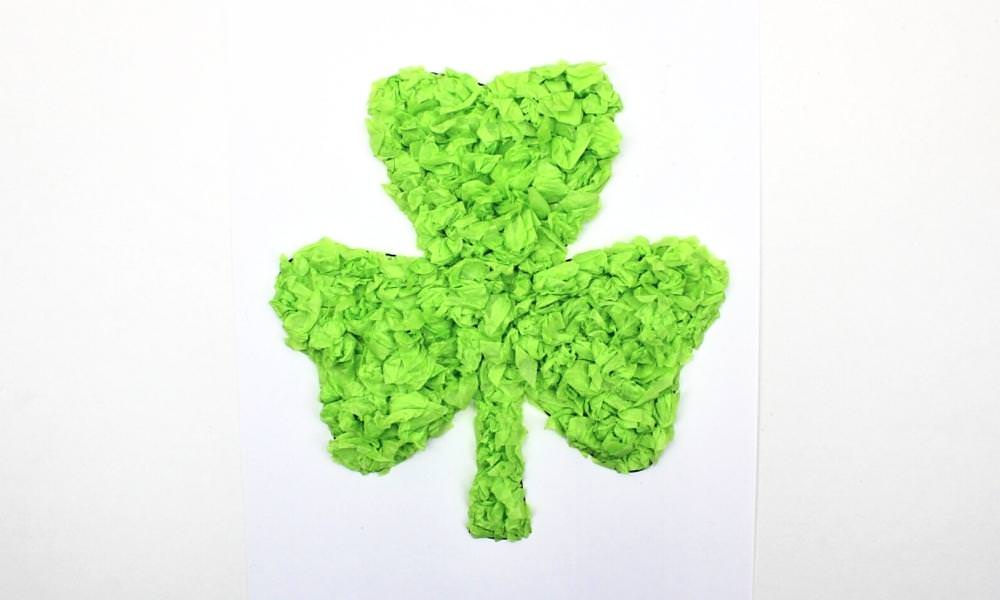
Need an easy project for Saint Patrick’s Day? This crumpled tissue paper shamrock craft is simple enough for toddlers to make, and it only requires a few simple supplies. Download our free shamrock template and start crafting with your kids!
JUMP TO…
I have a tendency to overcomplicated things.
And unfortunately, while some crafts that require many steps are totally worth it and come together beautifully in the end, making those crafts with four young kids can be time-consuming and stressful.
Sometimes the simplest crafts really are the best crafts—which is why I’ve been looking for quick shamrock and rainbow projects that I can throw together to keep the little ones occupied for Saint Patrick’s Day.
And because they’ve had so much fun doing crumpled tissue paper art in the past, I thought, Why not make shamrocks out of tissue paper as well?
So if you’re also busy and looking for something easy to do with your kids, download our free shamrock template and give this craft a try!

Get hundreds of pages of activities!
Get access to all our paid printables, as well as monthly activity planners, for just $5/month. (New printables added twice per month!)
Required Materials
Here’s what you’ll need to make this easy tissue paper shamrock craft at home:
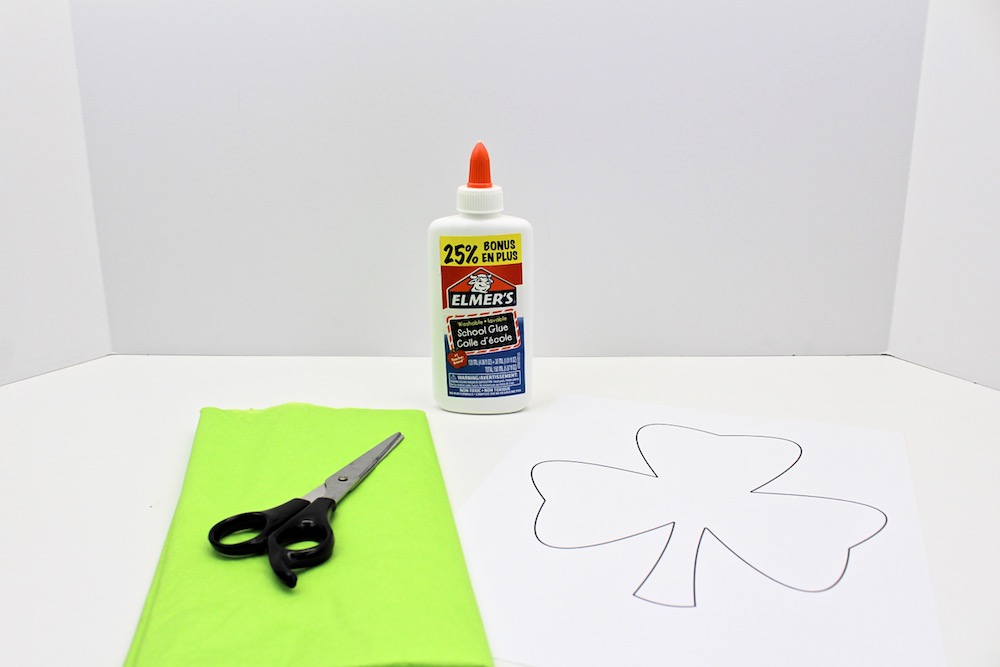
- My free shamrock and four-leaf clover template, which you can download using the form below (there’s another form at the bottom of the article if you’d rather keep reading)
- White cardstock
- Green tissue paper (also called crepe paper)
- Scissors
- Liquid school glue
How to Make a Crumpled Tissue Paper Shamrock (Step-by-Step)
1. Print Template
Start by downloading my free template and printing it on a sheet of Letter-sized cardstock.
The template includes both shamrocks and four-leaf clovers, and each of them come in multiple different sizes. I decided to use the largest shamrock template, but feel free to choose something different if you prefer.
I used white cardstock for the background, but you’re welcome to choose any color you like if you think it would look better. You can even switch things up and choose a different color of tissue paper if you like!
2. Cut Tissue Paper
Next, use scissors to cut the tissue paper into medium-sized squares.

Ours measured about 2” x 2”, but there’s no need to be exact with it. And there’s definitely no need worry if the squares don’t look perfect since you’re going to be crumpling them up anyway!
Tip: Place several sheets of tissue paper on top of each other and cut them simultaneously to speed up the process.
3. Crumple Tissue Paper
Once you’re done cutting the tissue paper into squares, start crumpling them up! No need to do anything fancy with them—we simply crumpled each one up into a little ball using our hands.
This is a great job to give to younger kids who want to participate, and a great way to keep them busy for a while!
4. Glue Tissue Paper
Once you’re done crumpling up the squares of tissue paper, it’s time to glue them onto the sheet of cardstock.
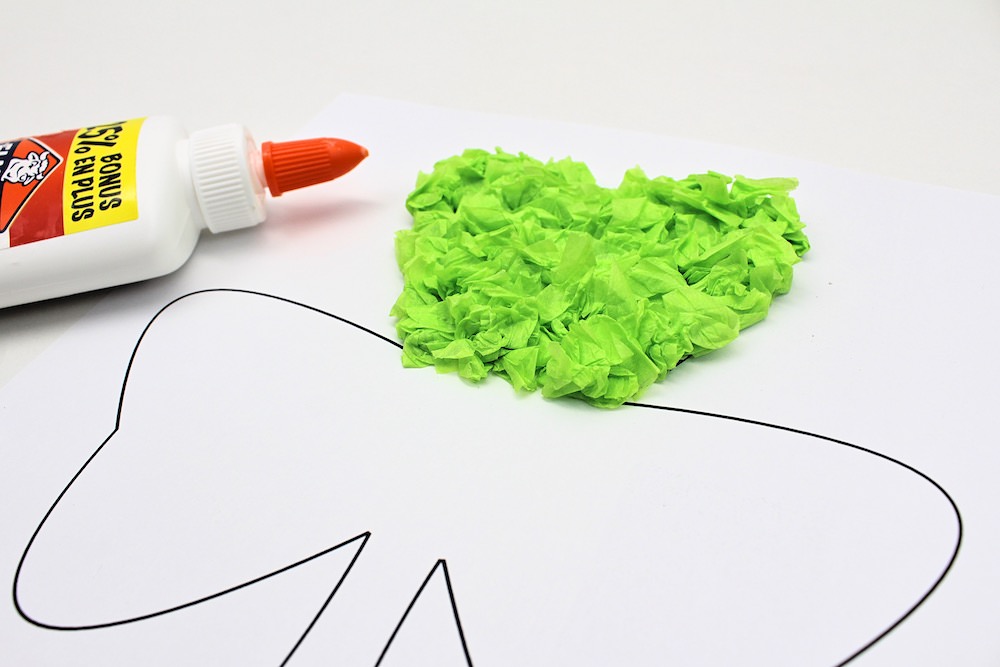
When making crumpled tissue paper art, I like to proceed by section and start with the edges before filling in the middle. I find that this makes it easier to stick to the shape from the template.
If this is your first time making crumpled tissue paper art, I recommend starting with one individual drop of glue per ball of tissue paper. Then, once you get the hang of it, feel free to draw lines that are enough to glue several balls of tissue paper onto the template!
Note: If you have younger kids who can’t squeeze glue out of the bottle, feel free to pour some into a small container for them. They can then dip the balls of tissue paper into the glue or use a paintbrush to apply it to the cardstock.
5. Let Dry
Once the shape on the printed template is completely covered, simply let the glue dry and your shamrock will be ready to display!
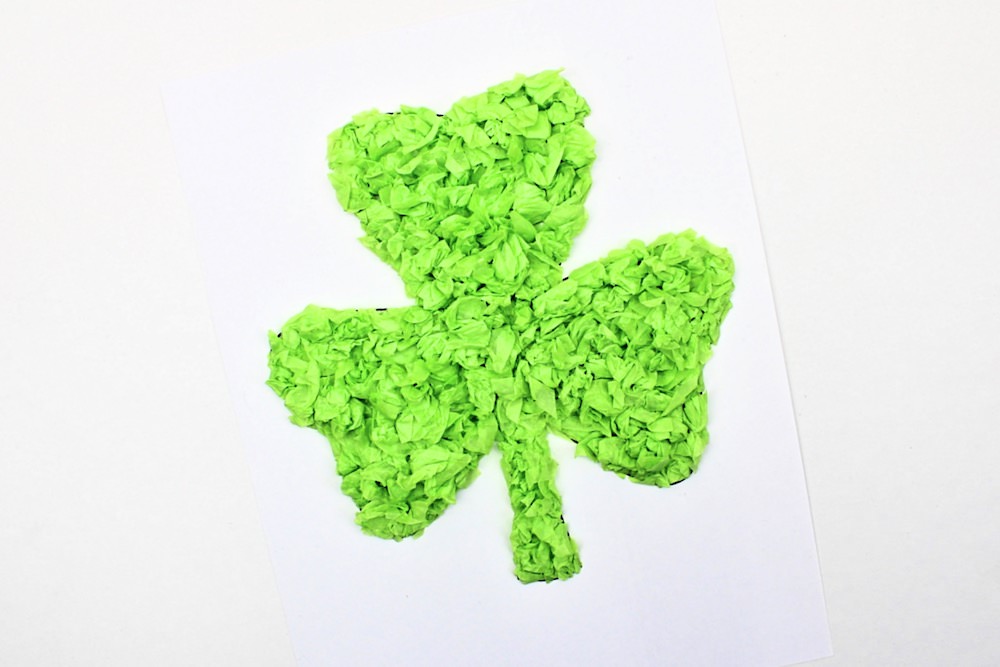
I love crumpled tissue paper art because it has a three-dimensional look and it can easily be adapted to pretty much every holiday. Plus, it’s so simple to make that even younger kids can participate.
Related Clover-Themed Crafts
Looking for more crafts to make for St Patrick’s Day? Check out these articles:
Only your name will be made public. Please note that by submitting your comment, you are agreeing to the terms of our Privacy Policy.