Looking for a fun back-to-school craft? This easy back-to-school chalk art is super simple to make, and it comes with a free set of templates that you can use for all your back-to-school projects!

This post may contain affiliate links, which means I may receive a commission, at no extra cost to you, if you make a purchase through a link. As an Amazon Associate, I earn from qualifying purchases. Please see my full disclosure for further information.
JUMP TO…
What better way to get kids excited about school than with an easy back-to-school craft that they can do while they count down the minutes to their first day?
And because nothing says “back to school” quite like a blackboard and chalk, this easy school-themed craft is the perfect choice. Not only does is require super simple materials, but the black construction paper acts as a “paper chalkboard” for your child’s chalk designs.
So if you’ve been looking for fun chalk art ideas for the back-to-school season, grab the free templates in the article and start doing this easy back-to-school craft with your kids!
Required Materials
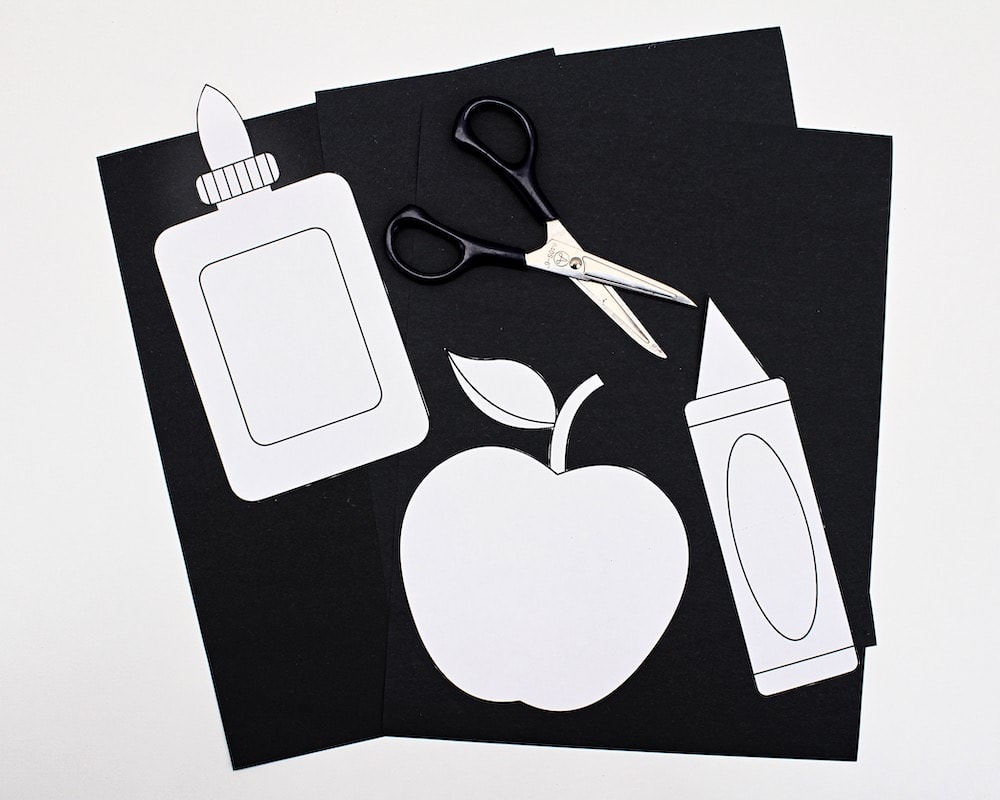
Here’s what you’ll need to make your own back-to-school chalk art:

- My free back-to-school template set, which you can download using the form below (there’s another form at the bottom of the article if you’d rather keep reading)
- Scissors
- Black construction paper
- Sidewalk chalk or chalk pastels
- Facial tissue (optional)
Note: For best results, I recommend sticking with light colours that will create a nice contrast with the black construction paper. Some of the ones I used turned out to be a little too dark.
How to Make Back-to-School Chalk Art (Step-by-Step)
1. Print & Cut Template
Start by printing out the templates on US Letter sized paper (8.5 x 11 inches). Regular printer paper will do just fine.
Then, grab a pair of scissors and cut all around the template. We used all three, but you can use whichever one you like best or divide them up between several children.

2. Place Template on Black Construction Paper
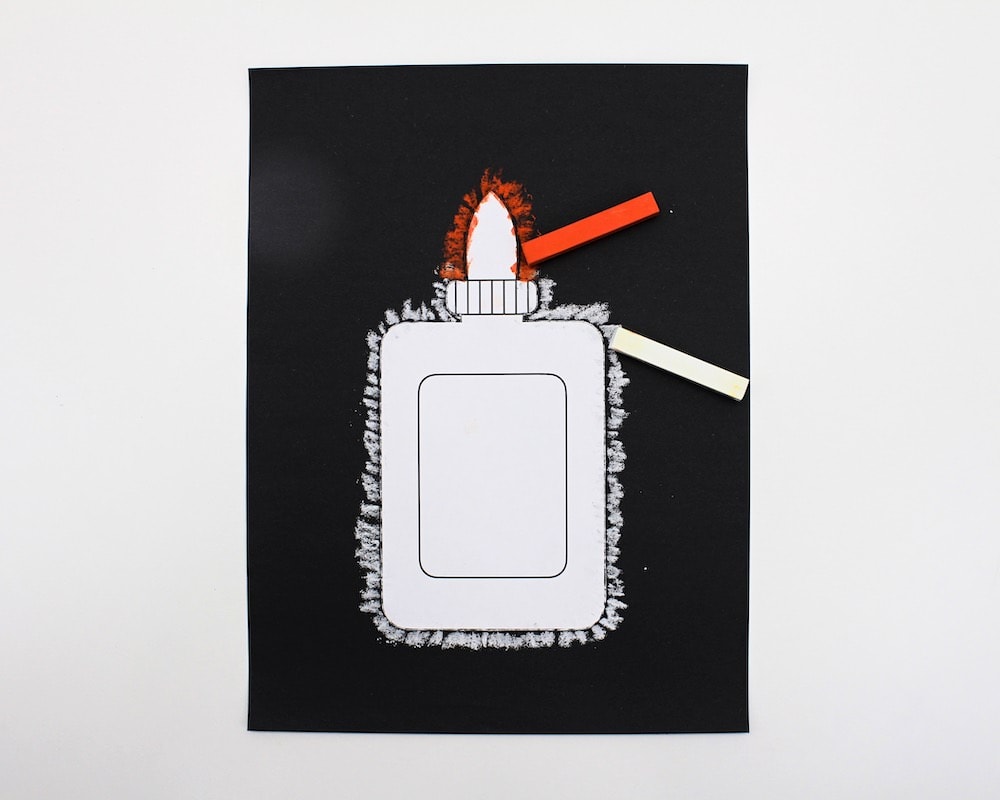
Next, position the template you cut out on top of a sheet of black construction paper. We used a separate sheet of construction paper for each template.
3. Draw Around Template
Grab a stick of sidewalk chalk or chalk pastel and use it to draw all around the template with small, outward-facing strokes.

We used the following colours of chalk pastel:
- Glue bottle: white for the body and orange for the tip
- Apple: red for the fruit, green for the leaf and brown for the stem
- Crayon: two different shades of purple (one for the paper and one for the wax)
We ended up reusing the crayon template and placing two crayons on the same sheet of construction paper (the second one was blue), but you don’t have to.
4. Smudge Chalk
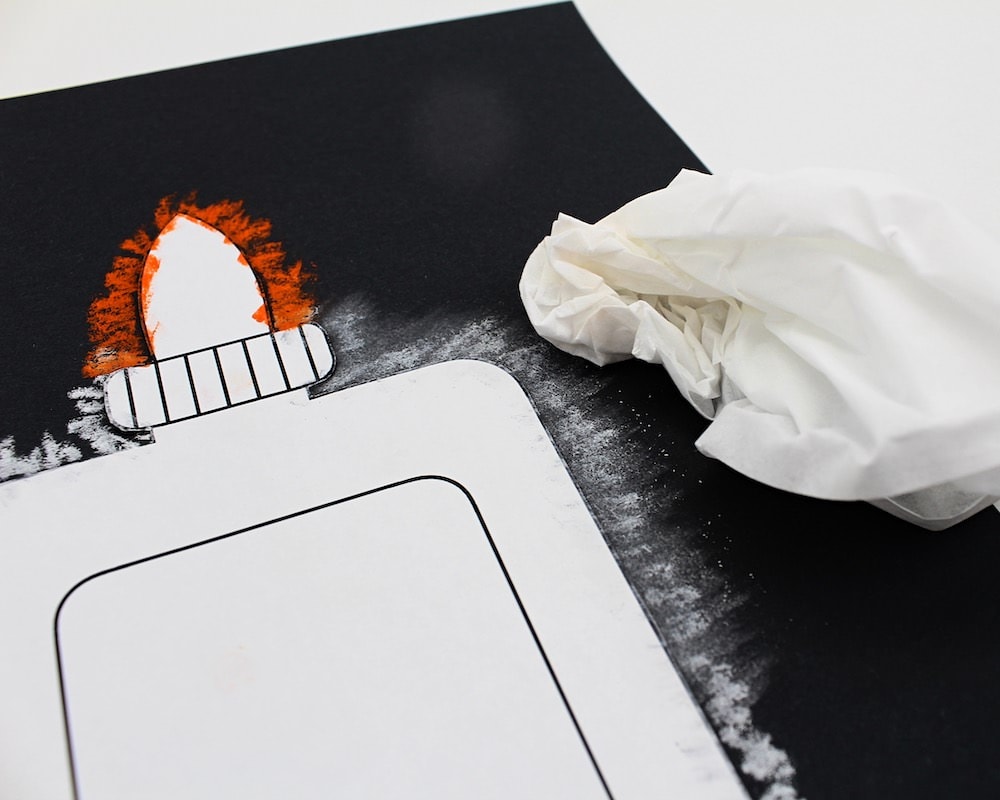
This step is where the magic happens! Using a tissue or your fingers, spread the chalk outward until the strokes are no longer visible and all that is left is a smudge of colour all around the template.

This step can get a little messy if you use your fingers, so I personally prefer to use a tissue.
5. Remove Template
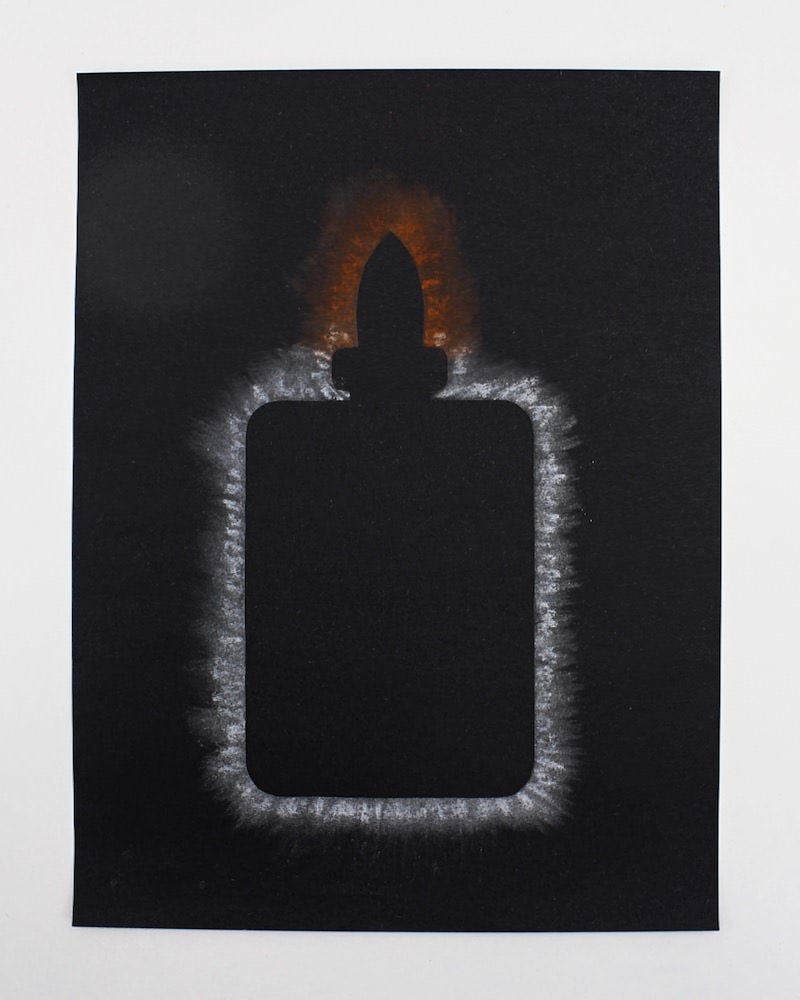
When you’re done smudging the colours, carefully peel off the template to reveal a colourful outline. Doesn’t it look neat?

This is such an easy craft, and it requires very few supplies!
Plus, if you happen to be a teach, you can definitely do this one with your students to welcome them back to school, or to connect with them on their first day.

Related Back-to-School Crafts
Looking for more fun crafts to make to celebrate the back-to-school season? Check out these articles:
- Recycled Milk Carton School Bus (with Free Template!)
- Free Hand-Drawn Back-to-School Colouring Pages for Kids
- DIY Air Dry Clay Pencil Toppers
Join my mailing list using the form below to receive your free back-to-school templates as a welcome gift! Subscribers gain access to my free printables library as well as to exclusive content that may never be published on my site.

Only your name will be made public. Please note that by submitting your comment, you are agreeing to the terms of our Privacy Policy.