Love DIY Christmas ornaments? Use Mod Podge to transform a regular roll of twine into a set of gorgeous twine ball ornaments that would look great hanging on any tree. (And they won’t shatter if dropped!)
JUMP TO…
Can a Christmas tree be too decorated? We’re starting to have quite the collection of homemade ornaments and Christmas garlands, and we keep adding more with each passing year.
Personally, I love seeing all the Christmas decorations we’ve made and reminiscing about the year we made them.
We have lots of salt dough ornaments decorated with little thumbprints and handprints, but also glitter ornaments, filled plastic ornaments, felt garlands and lots of other DIY Christmas decorations that we made as a family.
Having four young kids and two cats at home, we usually stick to plastic ornaments and fabric garlands to prevent any of our decorations from breaking. Another good option is to use twine, which is equally difficult to break and adds a lovely touch of rustic decor to any tree.
I love using twine to dress up old plastic baubles that have seen better days. But it also looks lovely in the form of a jute ball—and as it turns out, that particular Christmas craft is even easier to make!
So whether you have kids and pets like we do or you’re simply a fan of the farmhouse look, this easy Christmas craft is a great one to try over the holidays. And all you’ll need are a few simple supplies!

Get hundreds of pages of activities!
Get access to all our paid printables, as well as monthly activity planners, for just $5/month. (New printables added twice per month!)
Required Materials
Here’s what you’ll need to make an easy homemade twine ball ornament:

- Twine (feel free to vary the color and thickness to make a whole array of one-of-a-kind twine balls)
- 5-inch balloon
- Mod Podge
- Water
- String or rope (to hang up the twine ball while the Mod Podge dries)
- Scissors
- Fine glitter (optional)
- Satin ribbon
Note: We chose to use copper glitter to make glitter twine ball ornaments, but feel free to skip the glitter if you’re not a fan.
How to Make a Jute Twine Ball Ornament with Mod Podge (Step-by-Step)
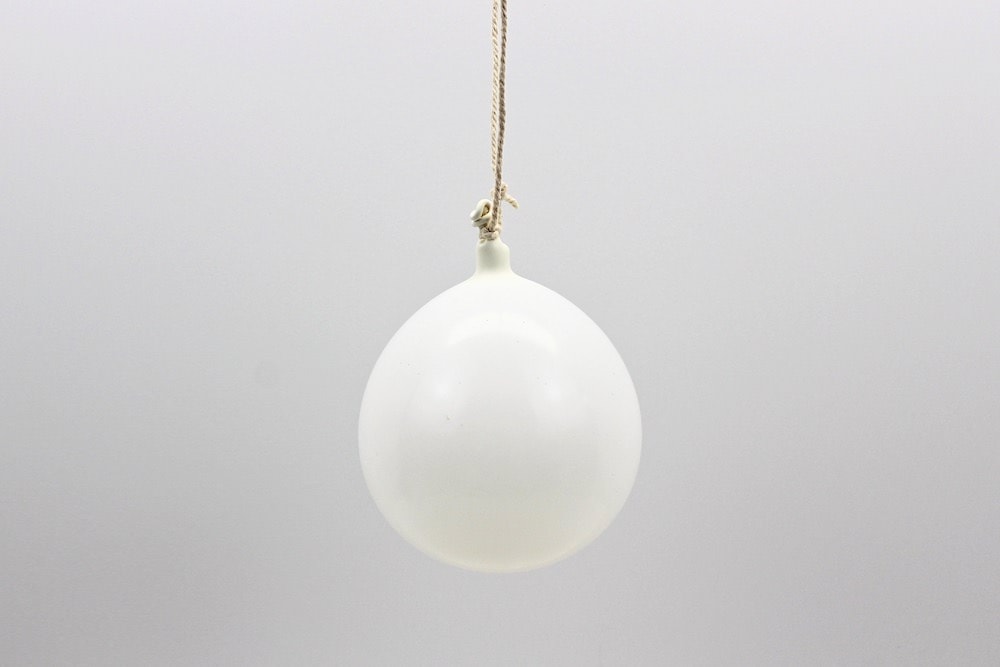
1. Inflate Balloon
Start by inflating a 5-inch balloon to whatever size you’d like your DIY jute ball to be. (They’re a little harder to inflate than regular balloons.)

If you’re making several of these ornaments, feel free to experiment with a variety of different sizes to make each one unique.
Note: You can try using a regular-sized balloon, but I’ve found that they’re never completely round when only partially inflated, and the ornaments end up looking a little lopsided. You can find 5-inch balloons on Amazon, at your local Walmart or at a number of other stores.
2. Hang Balloon
Use a piece of string to hang the balloon upside down.
Make sure you choose a spot where you’ll have enough room to work and where you’ll be able to cover your work surface with newspaper or parchment paper to prevent the Mod Podge from leaking everywhere as it dries.
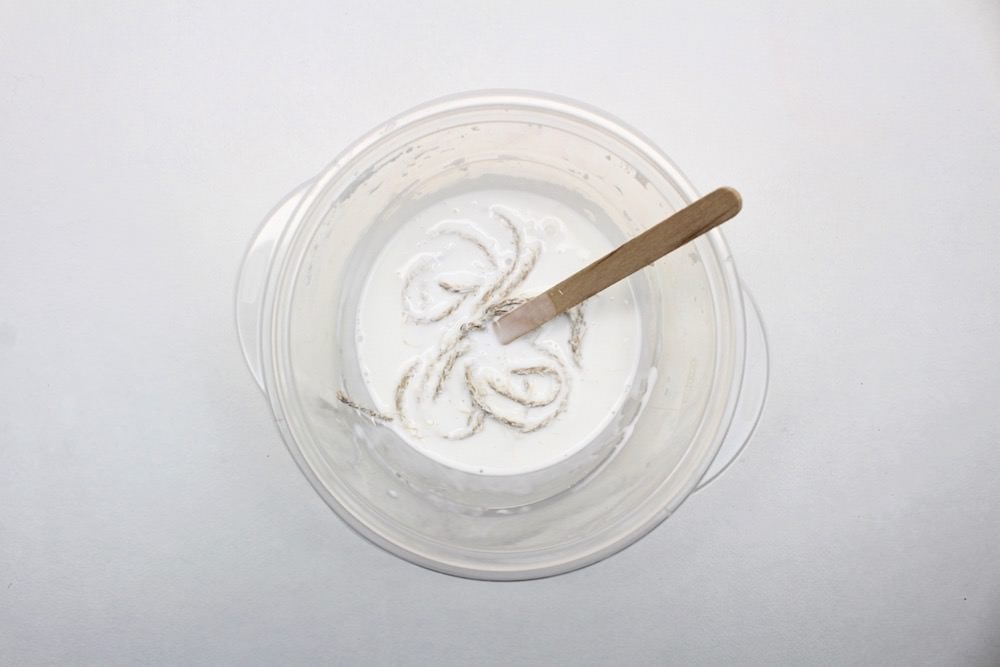
3. Combine Mod Podge & Water
Pour some Mod Podge into a plastic or disposable container and add a small amount of water.
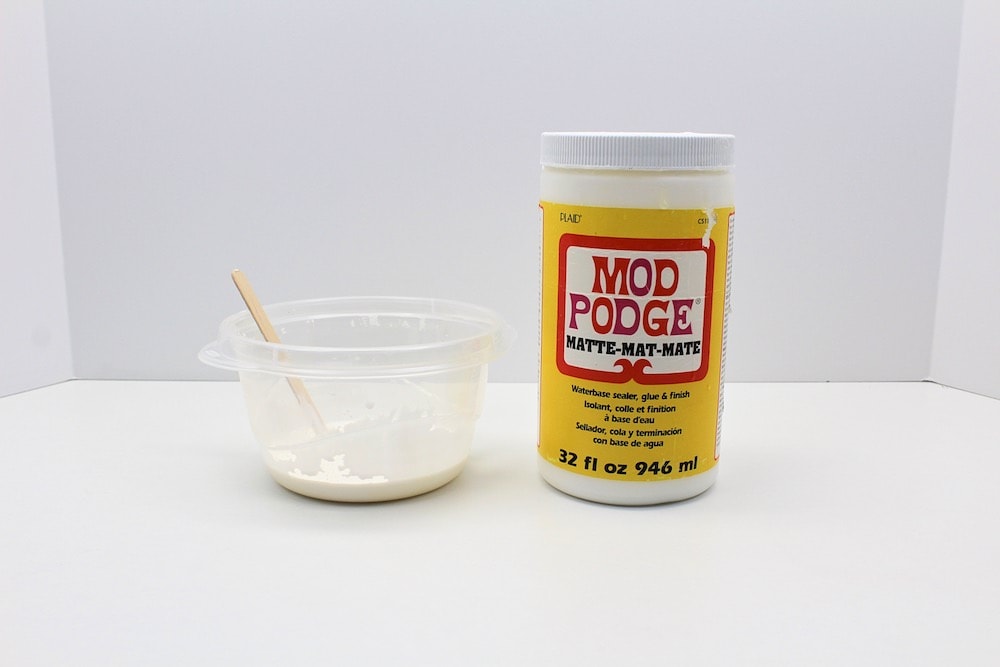
Don’t add too much—just enough to thin it out slightly so that it’s easier to wrap the soaked twine around the balloon. If ever your mixture is too runny, simply add more Mod Podge until you’re satisfied with the consistency.
4. Soak Twine in Mod Podge
Use scissors to cut a few pieces of twine measuring several feet in length. Then, place them inside the Mod Podge mixture and push down until they’re completely covered.
The quantity you’ll need will depend on the size of your balloon, so if you’re not certain, start with a single length of twine and cut more as needed after wrapping it around the balloon.
5. Wrap Balloon with Twine
Gently pull the twine out of the Mod Podge, letting any excess glue drip down, then wrap the twine around the balloon in a random pattern, covering as much surface as possible.
I kept the container of Mod Podge underneath the balloon to allow any excess to drip back into the bowl.
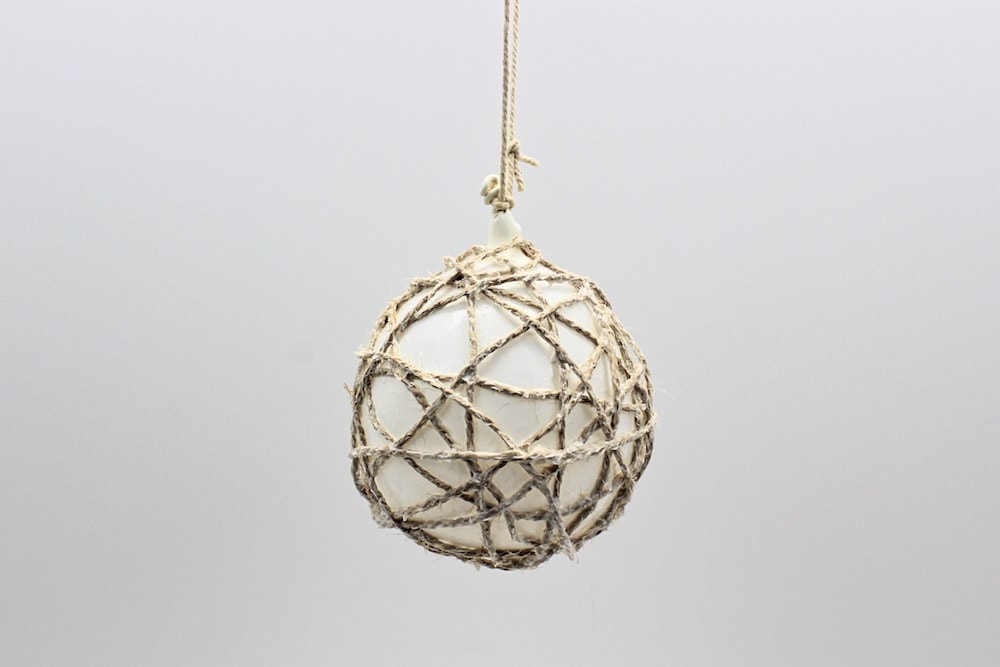
Once your first piece of twine is completely wrapped around the balloon, tuck in the end so it’s not visible and determine whether you need any more twine. The more you use, the more solid your twine ball will be.
If you’re satisfied with how your ornament looks, you can move on to the next step. If not, cut some more twine, soak it in the Mod Podge mixture and continue wrapping up the balloon until you’re happy with the way it looks.
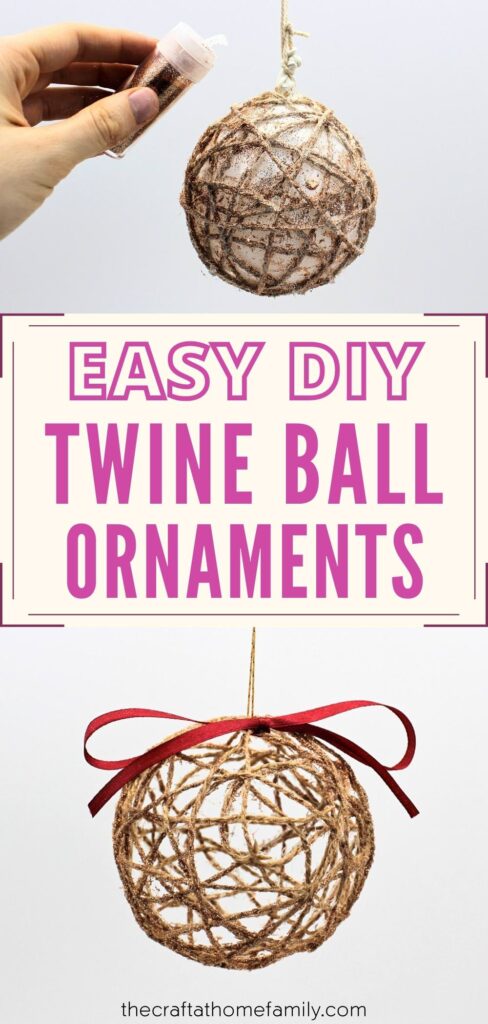
6. Add Glitter (Optional)
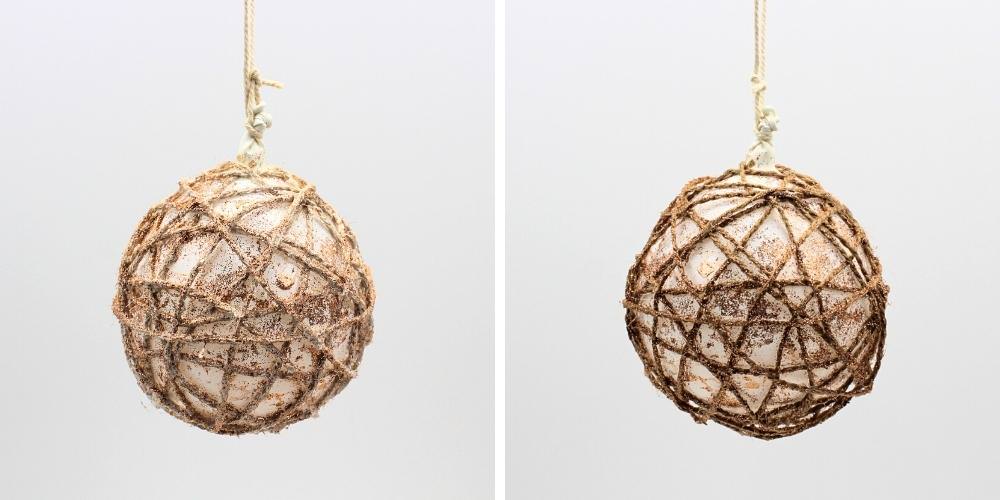
To make a glitter ball, gently sprinkle some fine glitter all over the twine while the Mod Podge is still wet. I chose copper-colored glitter because I felt that it nicely complemented the color of the twine.
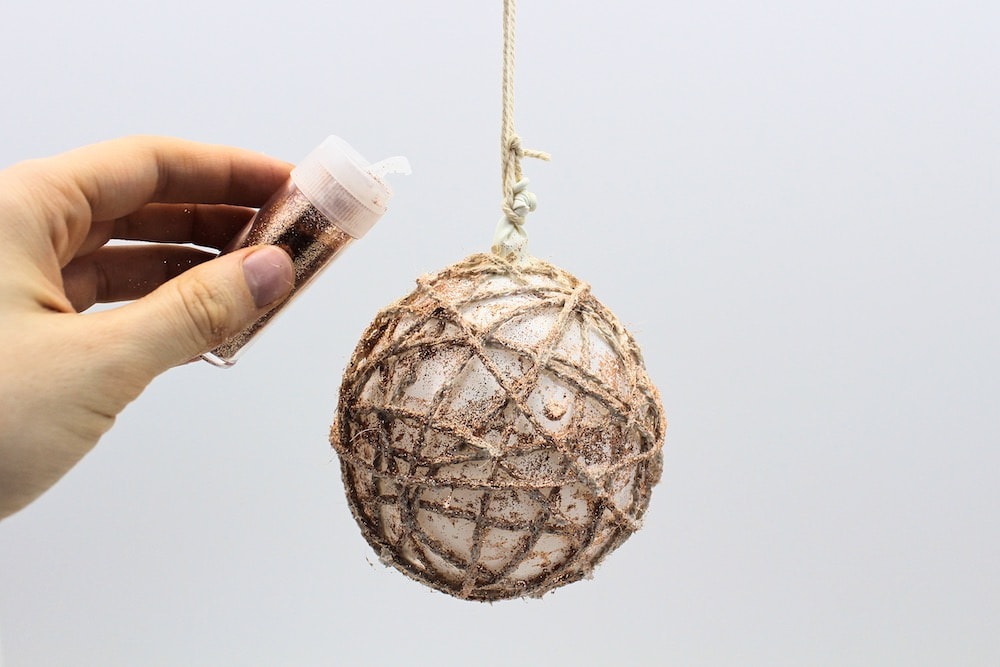
If you don’t like glitter or you’d rather make a basic rustic ornament instead, simply skip this step and move on to the next one.
7. Let Dry
Leave the balloon hanging upside down for several hours or overnight, until the Mod Podge is completely dry.
Make sure your work surface stays covered with newspaper or parchment paper to catch any excess glue that may leak down as it dries.
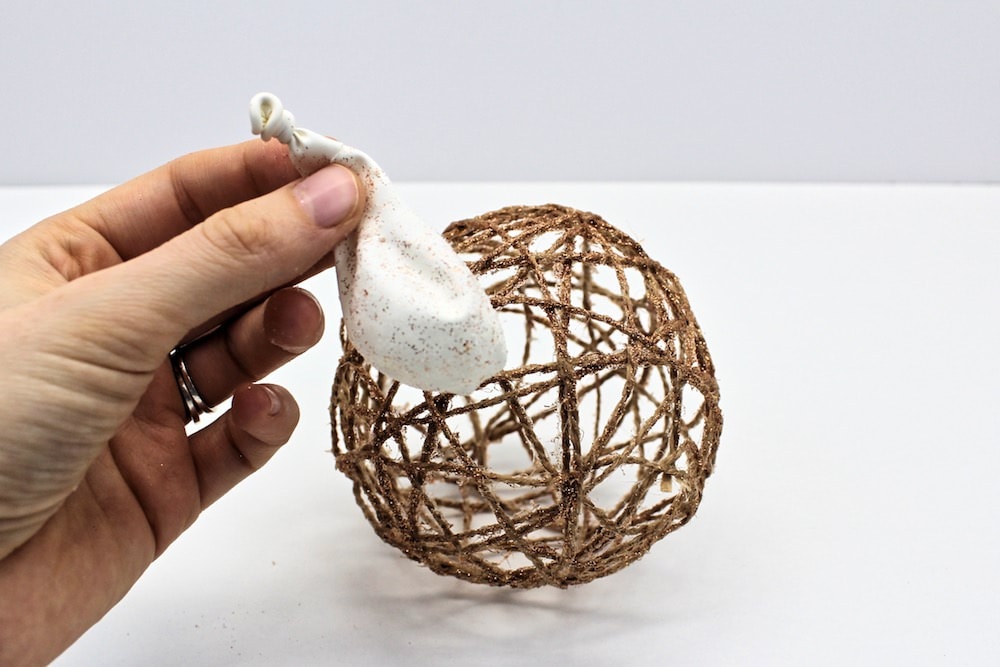
8. Remove Balloon
Placing your fingers in the holes between the pieces of twine, gently press the balloon away from the twine all the way around. This will prevent the balloon from pulling the twine inwards as it deflates.
Once you’ve completely detached the twine from the balloon, use scissors to cut a small hole at the base of the balloon. This will deflate the balloon, and you’ll be able to gently pull it out through one of the holes.
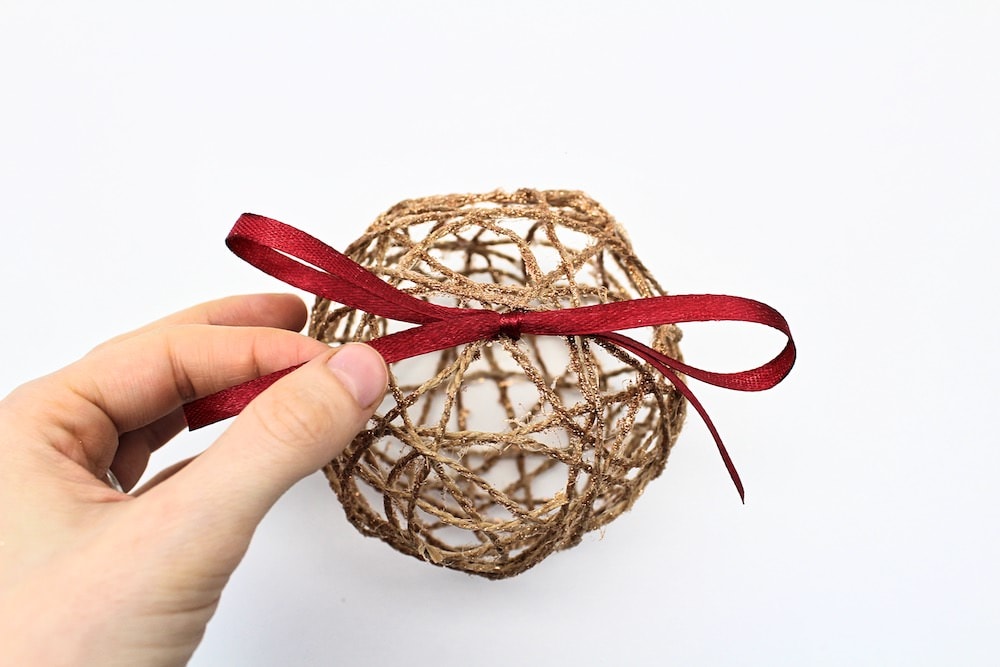
9. Add Ribbon
Choose which side of the twine ball should be at the top, then wrap a satin ribbon around it and pull it into a bow. I chose a red ribbon because I liked the way it looked next to the twine, but feel free to choose any color you like.
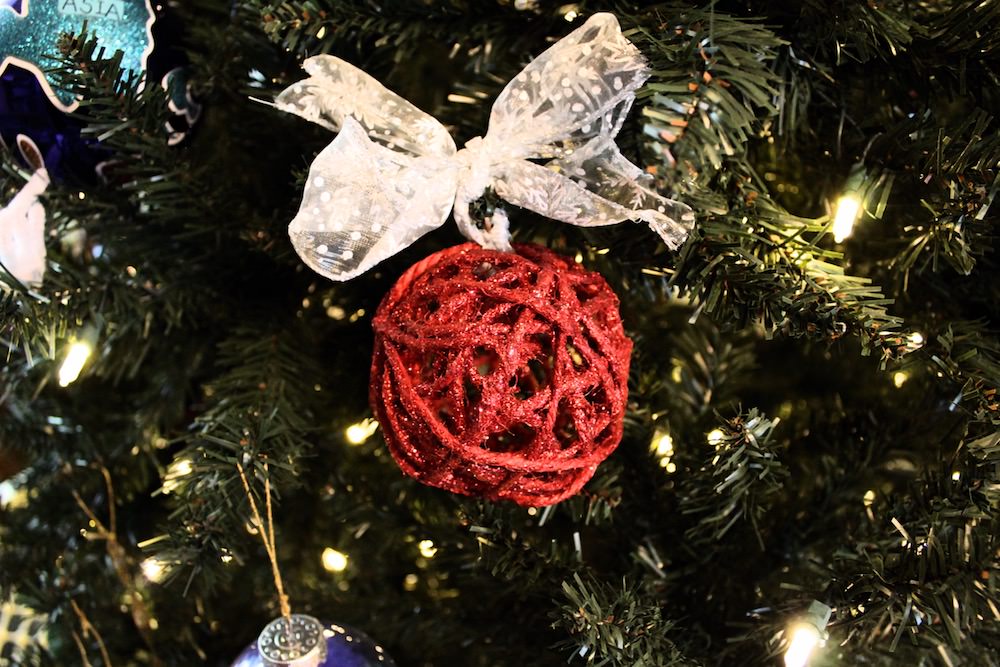
10. Hang Ornament
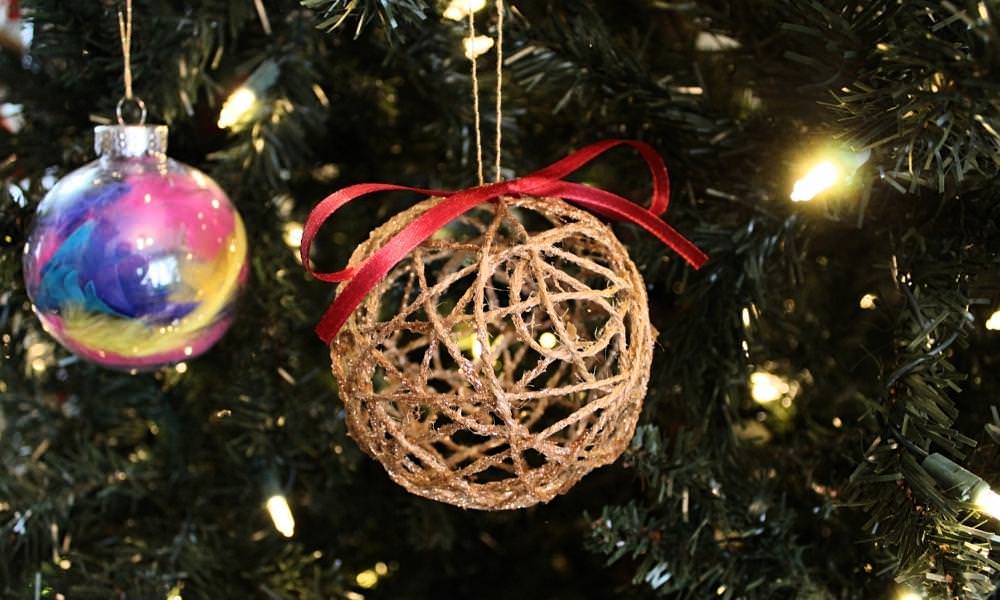
Hang the ornament on your tree using your preferred method! We’ve replaced all our hooks with gold thread because we have young kids at home and we feel it’s safer for them.

Doesn’t it look gorgeous? There are actually lots of ways to customize these ornaments, too—for instance, switching up the size of the balloon, the color and thickness of the twine, or the type of ribbon.
I made one using thick red twine and a large silver bow a couple of years ago and it looks like a completely different project!
Related DIY Christmas Ornament Ideas
Looking for more Christmas ornament ideas that you can make at home? Check out these articles:
Only your name will be made public. Please note that by submitting your comment, you are agreeing to the terms of our Privacy Policy.