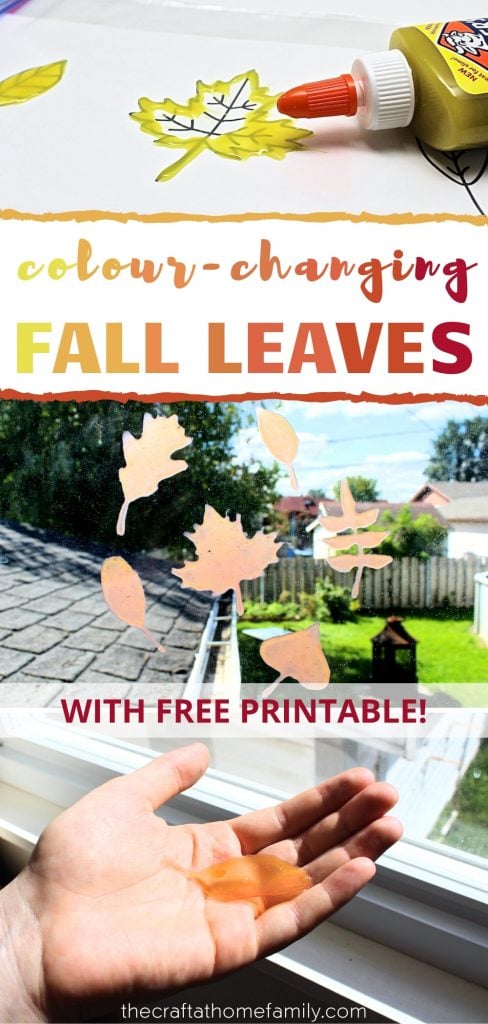
You only need one inexpensive ingredient to make these amazingly cool fall leaves that change colors when they’re exposed to sunlight! Whether you place them on your windows, shine a black light on them or take them outside to explore their transformation, this easy DIY project is the perfect way to get into the season’s spirit—and the included fall leaf template can be used for any number of autumn crafts!
JUMP TO…
Fall is coming, and with it, colorful leaves—and gorgeous craft opportunities!
My kids love going on walks in the fall and gathering the most beautiful leaves they can find. It’s a fun outdoor activity, and there are so many things you can make with them at home once you’re done collecting them!
To celebrate the changing color of the leaves, we decided to make these gorgeous color-changing fall leaves that go from yellow to red when they’re exposed to sunlight. Place them on your window as a fun seasonal decoration, or peel them off and let your child explore!
This craft is a great way to get into the season’s spirit, and the best part is that all you need to make it is one single inexpensive ingredient!

Get hundreds of pages of activities!
Get access to all our paid printables, as well as monthly activity planners, for just $5/month. (New printables added twice per month!)
About this Project
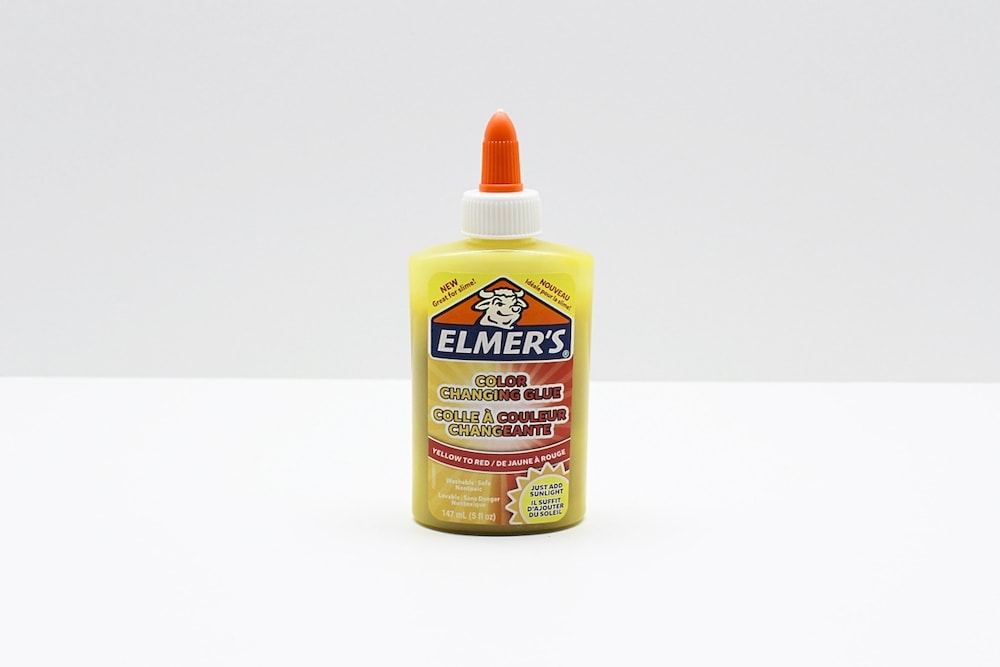
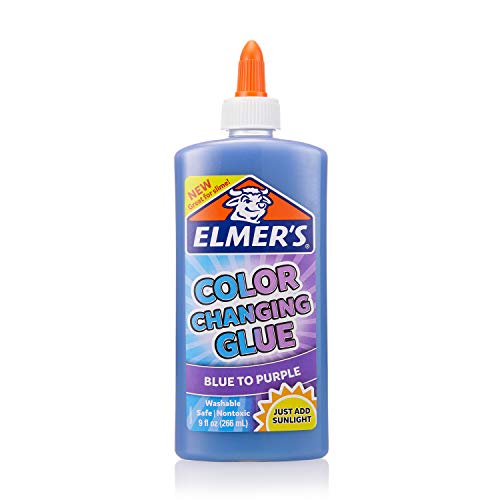
The secret to making these cool window clings is Elmer’s color-changing glue.
Color-changing glue contains pigment that makes it change colors when it’s exposed to sunlight. It’s a great addition to fun homemade slime recipes!
Sun-activated color-changing slime is a great project for summer. But since I live in Canada, we have to play with slime indoors during most of the year, which means we don’t have enough sunlight to activate the glue.
We do, however, have enough sunlight to activate glue that’s been placed against a window. So using it to make window clings is a great way to make use of its color-changing capacities year-round!
And if you decide to peel these leaves off your windows and take them outside to explore with your kids, you’ll probably also find patches of sunlight that will cause the leaves to transform. I’ll be detailing the various ways you can play with these leaves at the end of this article, so be sure you read all the way to the bottom!
Love this project? Start planning for winter by checking out my tutorial for Color-Changing Snowflake Window Clings. It even comes with a free snowflake template that you can use for any project you like!
Required Materials
Here’s what you’ll need to make your very own fall-themed color-changing window clings at home:
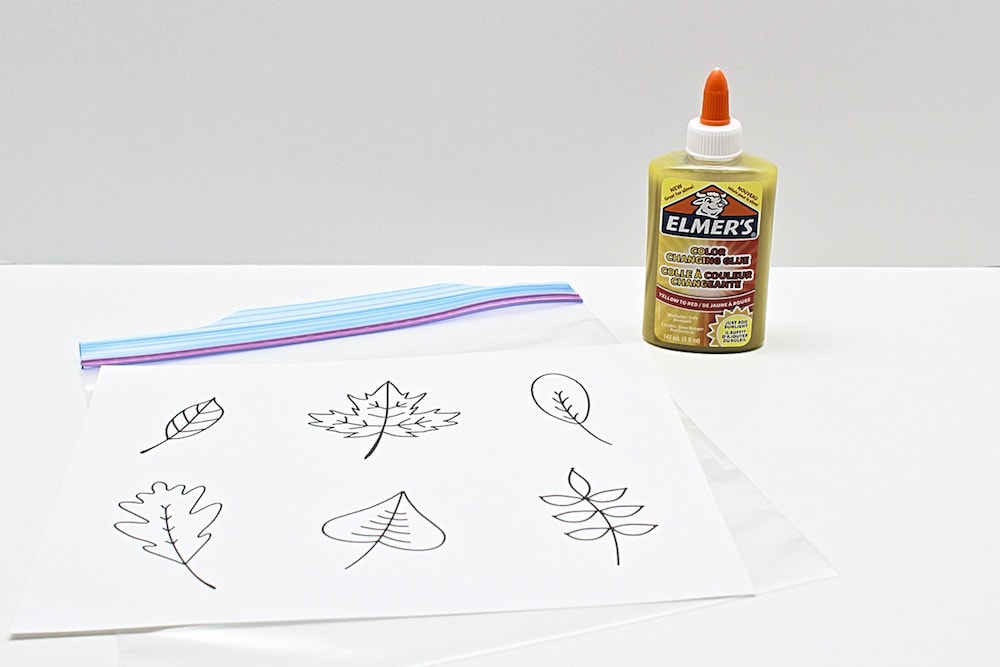
- My free fall leaf printable (which you can download using the form at the bottom of this article) or any other leaf design of your choosing
- Elmer’s color-changing glue
- Gallon-sized freezer bag (we buy ours at Costco when they go on sale)
Elmer’s color-changing glue comes in two color combinations: yellow/red and blue/purple. I thought yellow/red was perfect for autumn, but you are of course free to make frosty blue/purple leaves if you so choose!
- Liquid glue that changes color when exposed to sunlight
- Creates vibrant, color-changing slime without the need of food coloring
- Specially formulated glue that is washable with soap and water
And since this project only uses up a fraction of the glue in the bottle, it really does cost only a couple of dollars to make. So be sure to request your printable using the form at the bottom of this article, and consider joining my mailing list to receive fun subscriber bonuses right in your inbox!
How to Make Magic Color-Changing Fall Leaves (Step-by-Step)
1. Print Template
Start by printing my free autumn leaf template (or any other leaf template of your choosing) on a sheet of Letter-sized paper.
2. Place Template in Bag
Next, place your fall leaf design inside the freezer bag. The printable file I created works great with Letter-sized paper (8.5” x 11”), which also happens to fit perfectly inside gallon-sized freezer bags!
3. Trace Leaves
Once your design is inside the bag, start tracing the autumn leaves.
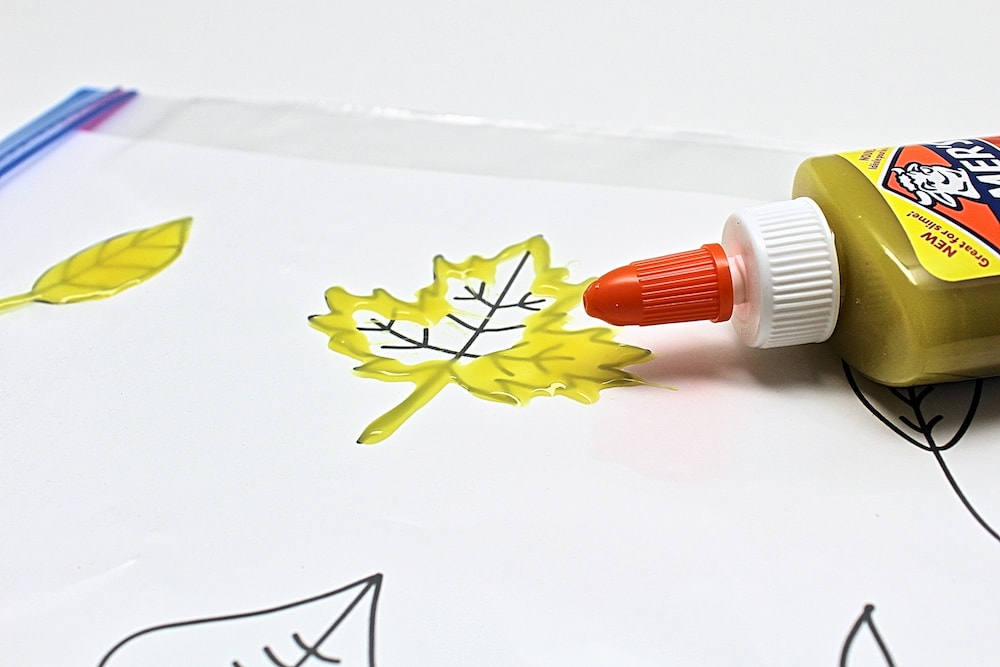
To make things easier, I recommend starting with the outline, then filling in the whole leaf with glue once you’re sure you’ve gotten the shape right.
Note: The details inside the leaves are included in case you’d like to use the template for something else, but you don’t need them for this project since you’ll be filling in the designs completely!
4. Let Dry
Once you’re done tracing the leaves, let them dry overnight or longer.
If you’ve ever made window clings using fabric paint, you may be wondering whether glue takes the same amount of time to dry. In my experience, glue does dry more quickly than fabric paint and can be fully dry within 12 hours.
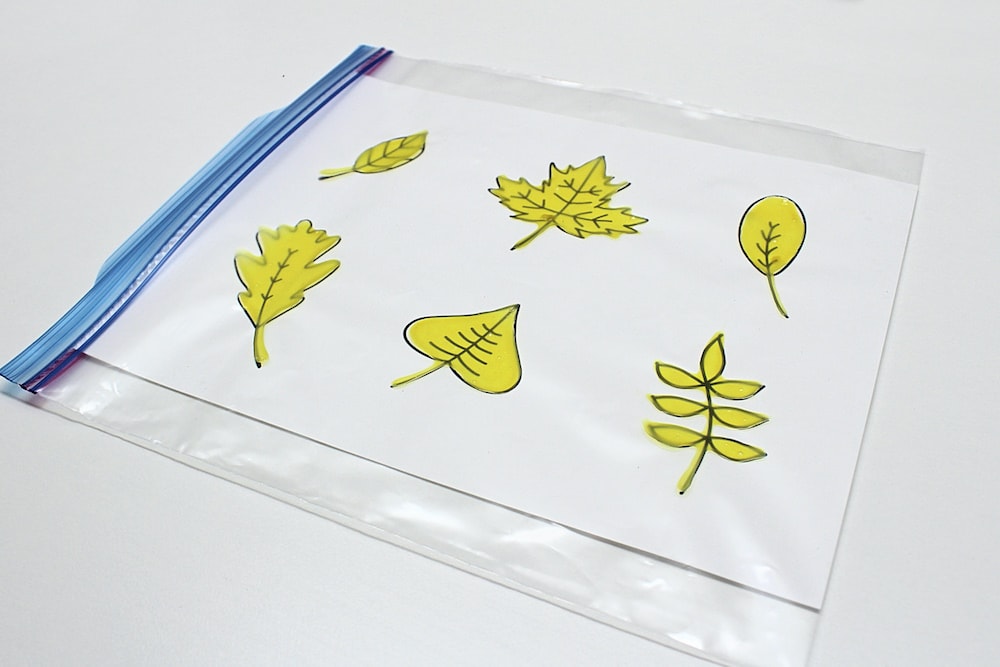
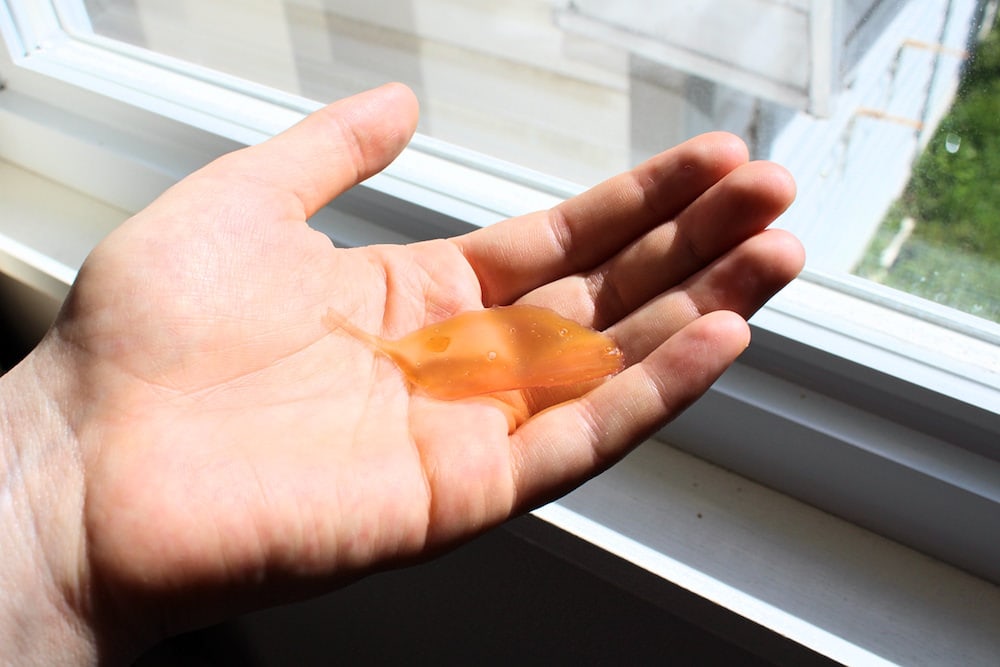
Out of precaution, I still waited about 24 hours before trying to peel them off the bag. As you can see, they remain yellow even once they’re dry!
Using Your Color-Changing Fall Leaves
Sticking Them to Windows
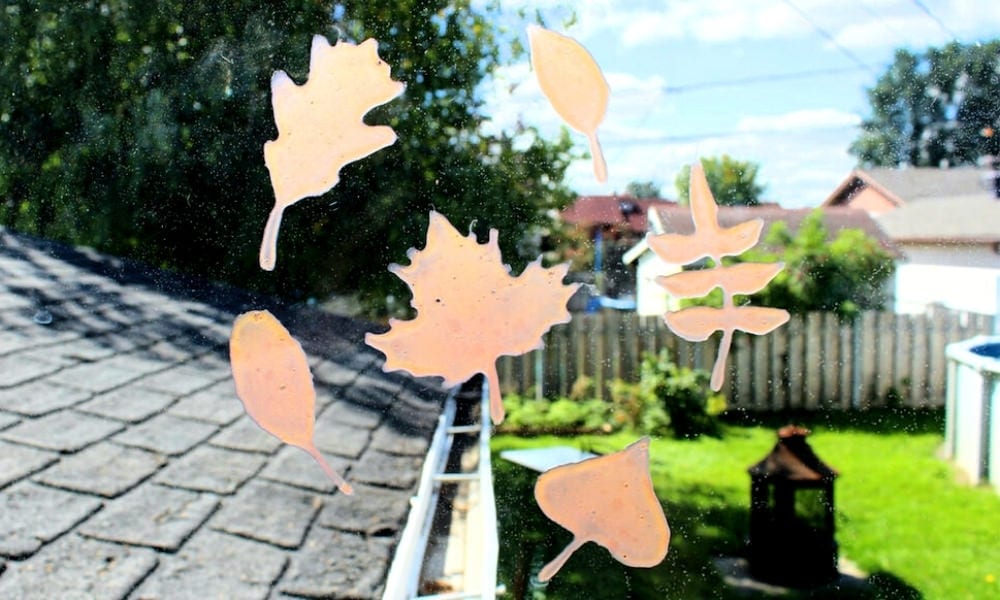
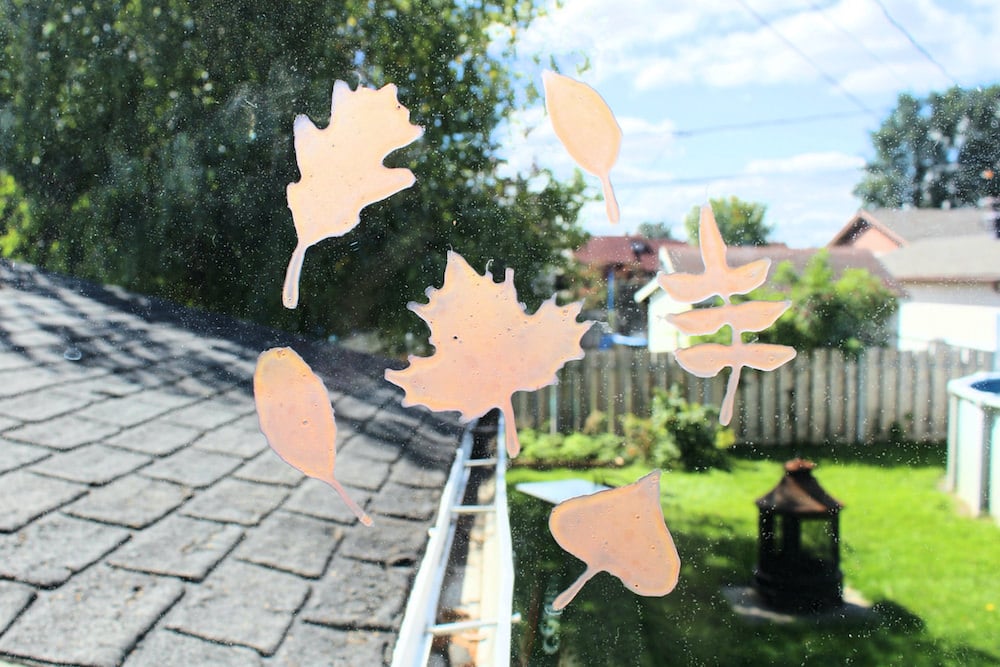
One of the ways you can use these cool color-changing leaves is to place them on your windows as autumn-themed decorations. If this is what you choose to do, you’ll need to add a little bit of water in order to get the window clings to adhere.
I wouldn’t suggest adding the water directly onto the leaves. Doing so might cause them to stick to themselves, and if this happens, you could find yourself unable to pull them apart.
Instead, dip a paper towel or tissue in some water and use it to wet a small area of your window. Then, press the leaves onto the window in one smooth motion. Run your fingers over the design to make sure it’s sticking and you’ll end up with this!
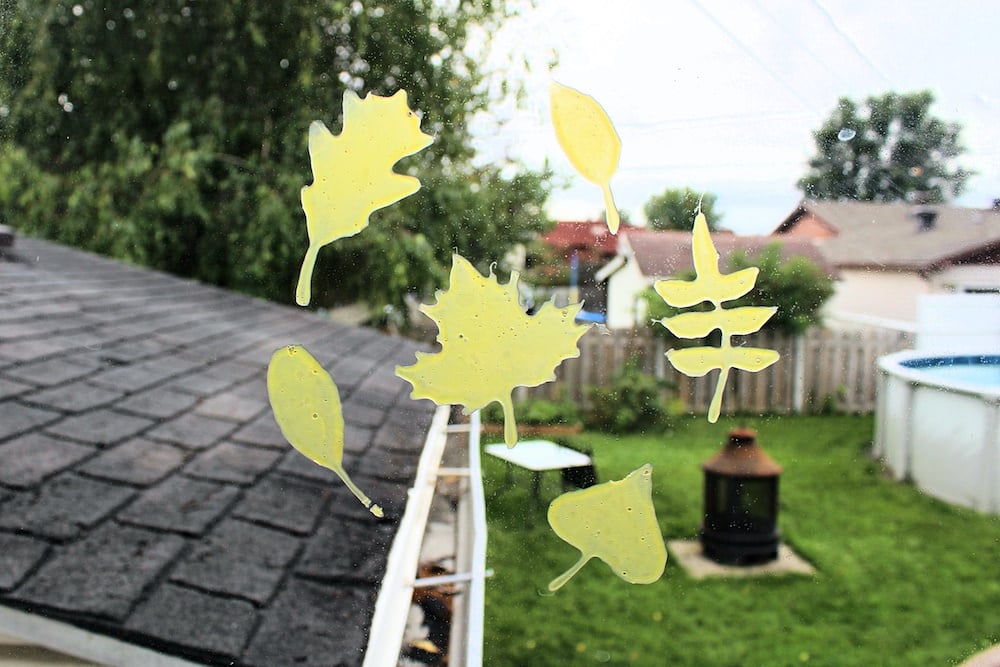
Just make sure to place the leaves on a well-lit window or you might be disappointed with the results!
Note: Over time, you might notice the leaves starting to peel off the window, especially if the sun keeps beating down on them. If that happens, just add a bit more water to the window and press the window clings up against it to make them stick again!
Exploring Color Transformations
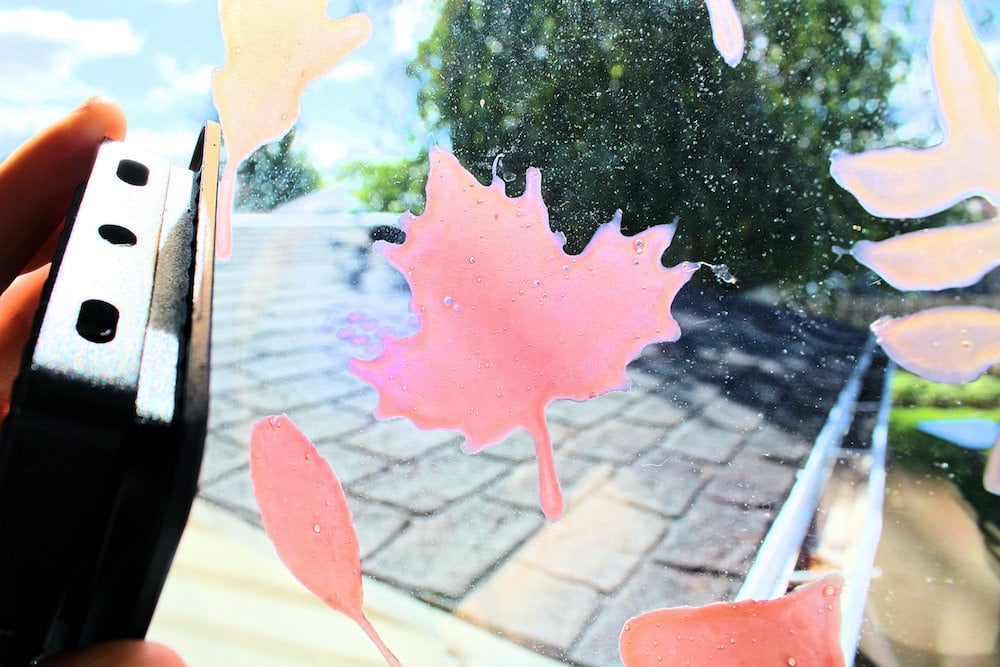
Unlike with our color-changing snowflakes, the change in color won’t be as drastic if you place these leaves on your windows.
I suspect this might be because the snowflakes are made up of thin lines, so the sunlight easily shines through. The leaves, on the other hand, are completely filled in, which means that the color change is a lot more apparent on the other side of your window—which you can’t see!
But that doesn’t mean there aren’t many other fun ways to play with them!
One of the simplest ways to see the color change is to simply peel the leaves off the windows after they’ve been exposed to sunlight. If you do, you’ll be able to see the color change that was visible on the window-facing side!
You can also take the leaves outside to explore. Their color will then change depending on whether you look at them in the shade or under a patch of sunlight!
How awesome is to be able to play with these DIY color-changing leaves while the leaves outside are actually changing colors?!
Exposing Them to Black Light
Another fun way to play with these leaves is to expose them to black light!
The color change may not be drastic if you simply place them on your windows, but while they’re up there, try breaking out your black light flashlight and shining it directly onto the leaves!
Their color will instantly change to dark red—then revert back once you remove the black light. Your kids will love shining the flashlight onto each leaf to see the instant color transformations that occur!
Related Window Cling Tutorials
Do you love making your own DIY window clings at home? Check out these cool projects:
- Color-Changing Snowflake Window Clings (with Free Printable!)
- Sparkly Spiderweb Window Clings (with Free Printable!)
Only your name will be made public. Please note that by submitting your comment, you are agreeing to the terms of our Privacy Policy.