This cute homemade Valentine’s Day garland is so fun to make—and the only supplies you’ll need are cardboard and yarn! Festive DIY pom-poms and pretty yarn-wrapped hearts are all you need to brighten up your living space this February!

JUMP TO…
Are your kids excited for Valentine’s Day? Ours have spent the last couple of weeks talking about “Love Day” and creating heart-themed drawings and crafts!
Our four-year-old even decided to create cute little love bugs using some glitter pom-poms we had bought at the store—but she’s also been curious about making pom-poms ever since I mentioned that there was a way to do so.
So we figured Valentine’s Day was the perfect excuse to create a pom-pom garland using one of the million balls of yarn I have lying around the house!
Our experiment was a success, and she enjoyed it so much that we’ve actually been using the leftover yarn to practice different sewing techniques all week! (More on that in an upcoming article.)
GRAB OUR FREE 30-PAGE ACTIVITY BUNDLE!
By submitting your email address, you are agreeing to the terms of our Privacy Policy. You can unsubscribe at any time.
Required Materials
Here’s what you’ll need to make a cute homemade heart and pom-pom garland for Valentine’s Day:

- Thick cardboard (we used an old Amazon box)
- Pencil
- Scissors
- Yarn (I happened to have some lying around, but I’ve linked to something similar)
- Fork (optional—see step 4)
- Hot glue gun or plastic needle (see step 6)
How to Make a Yarn-Wrapped Heart & Pom-Pom Garland (Step-by-Step)
1. Trace Hearts on Cardboard
Start by tracing several hearts on thick cardboard using a pencil. Trace as many as needed for the length of your garland, keeping in mind that you’ll be alternating between hearts and pom-poms.
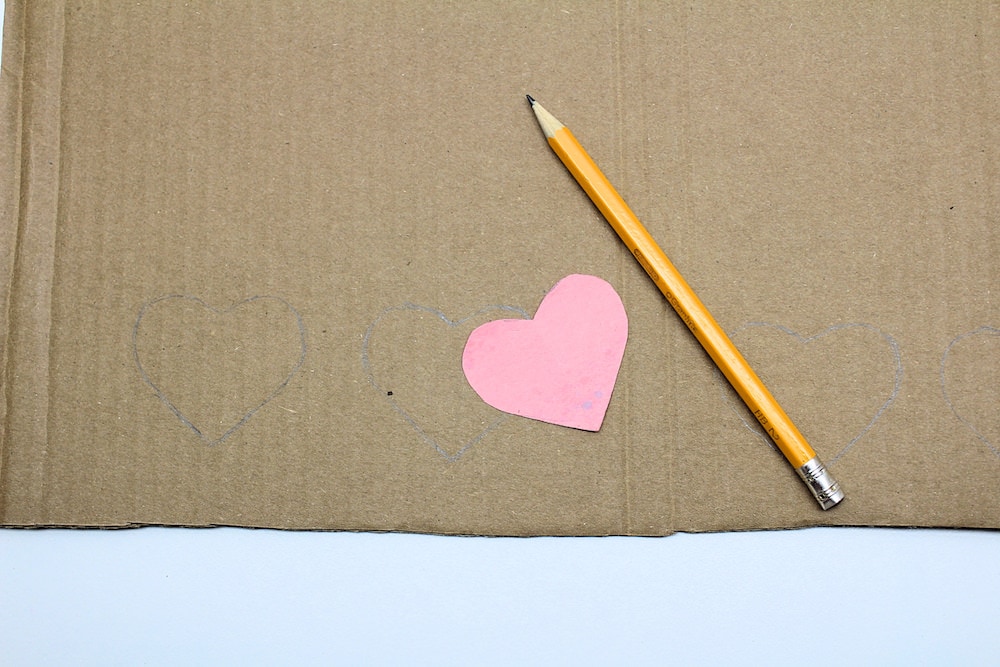
If you’re confident that you can get the shape right, go ahead and freehand it.
If not, fold a piece of scrap paper and draw half a heart next to the folded side. Then, cut along the line you traced and unfold the paper to create a heart template. This is the method I used because I wanted to be sure that the hearts would be the same size and shape.
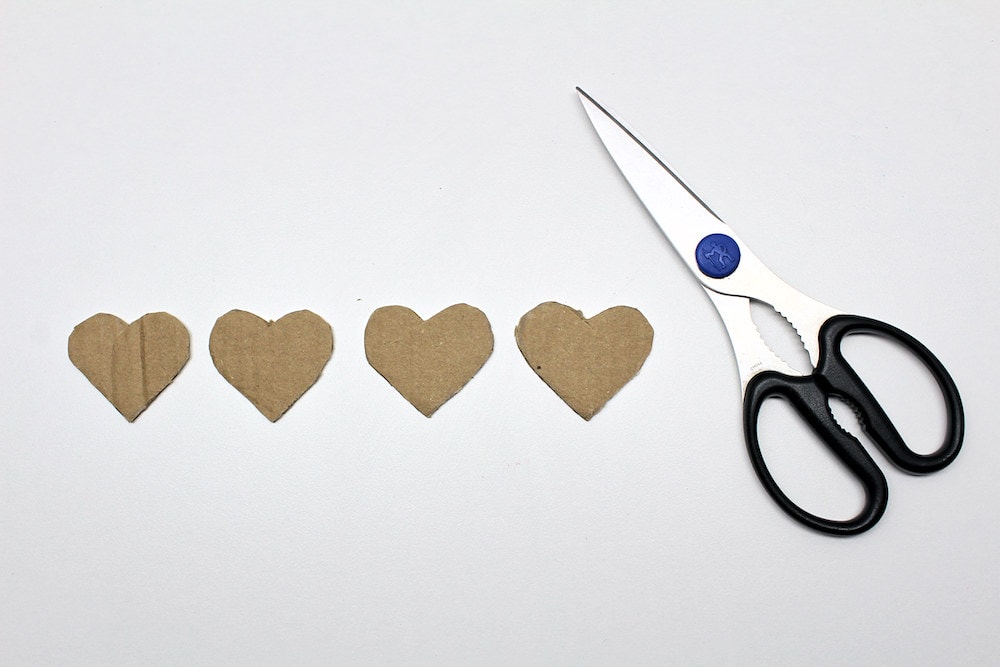
2. Cut Cardboard Hearts
Use sharp scissors to cut along the pencil lines and create several cardboard hearts. Don’t worry if the cuts aren’t perfect—you’ll be covering them in yarn anyway.
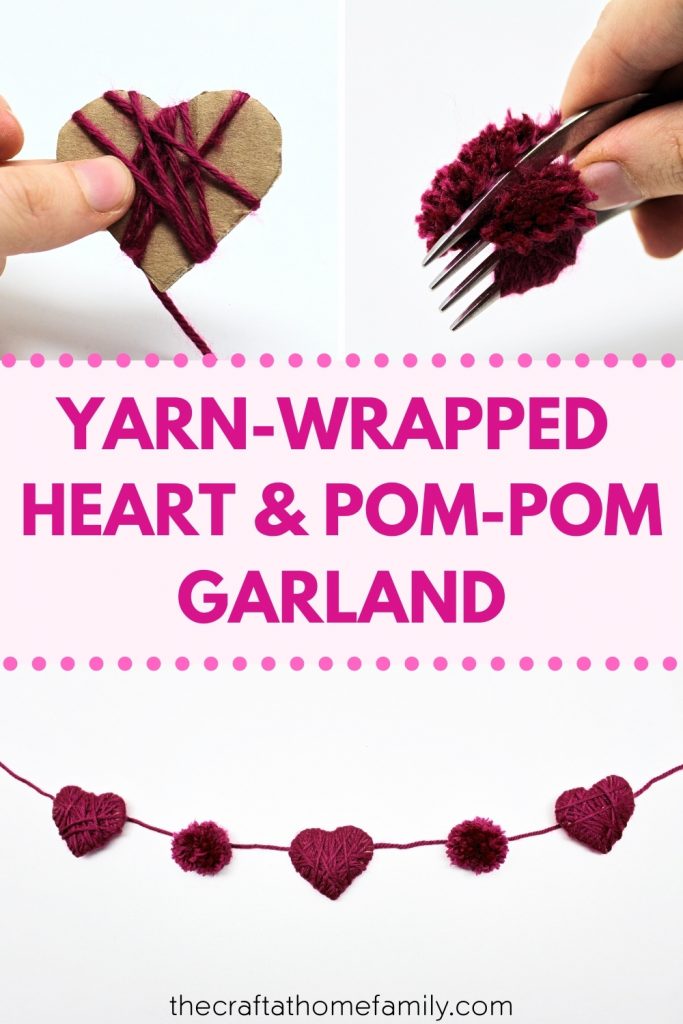
3. Wrap Cardboard Hearts
Use yarn to completely wrap up your cardboard hearts. There’s a bit of a trick to covering them completely, so feel free to experiment in order to see what works—or let your child experiment if you’re doing this project with kids!
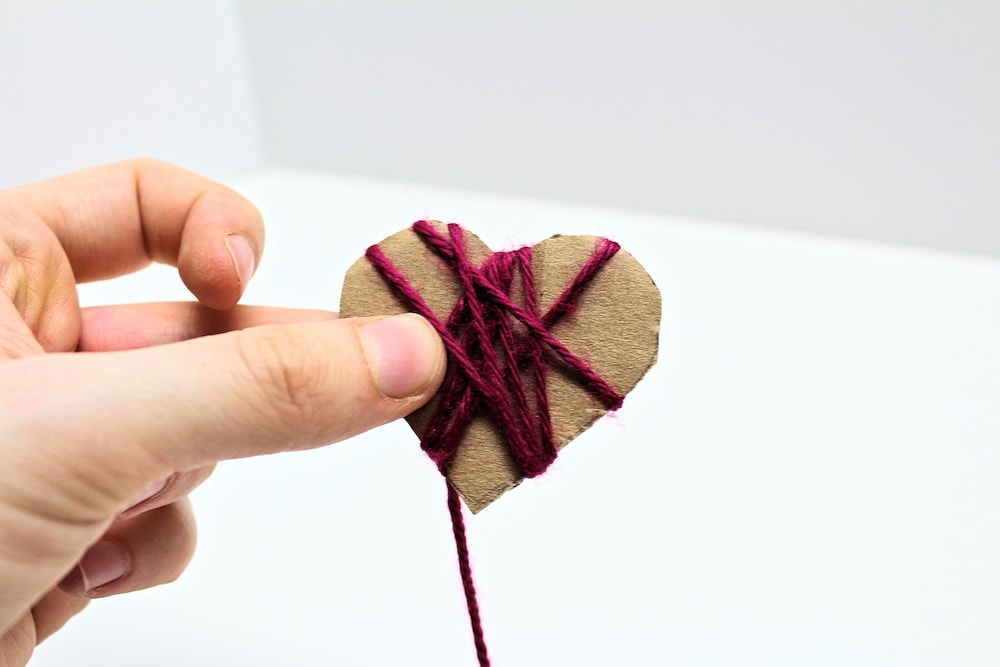
Once your heart is completely covered, tie a knot to prevent it from unravelling and tuck in the remaining bit of yarn.
4. Create Pom-Poms
Wrap some yarn around the outer prongs of a fork several times, until the fork is covered in several layers of yarn.
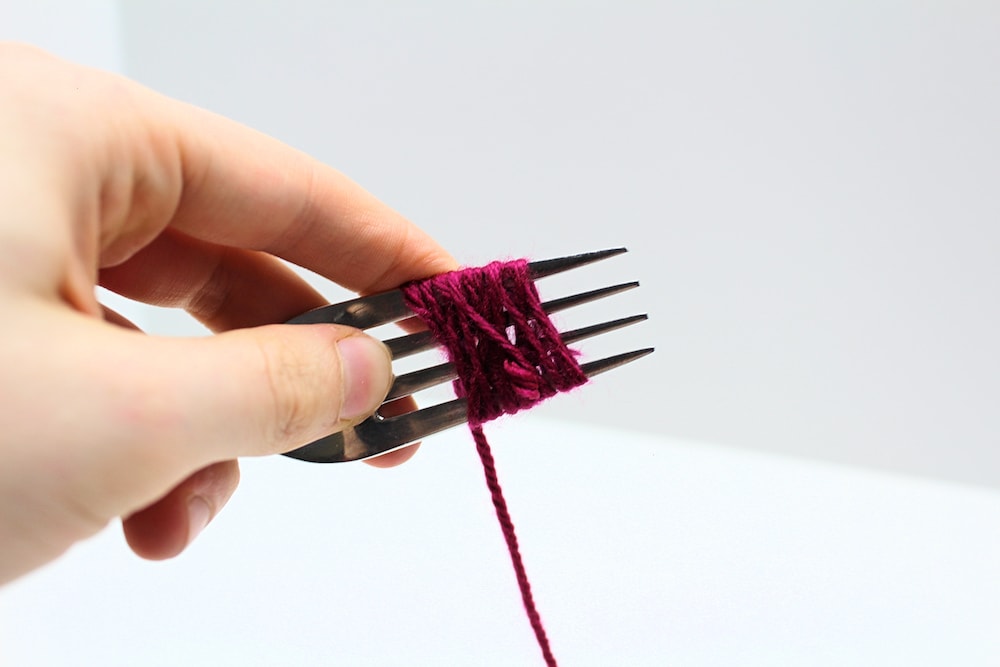
Once that’s done, feed some yarn between the two middle prongs and wrap it around a couple times. Then, tie a knot to keep it in place.
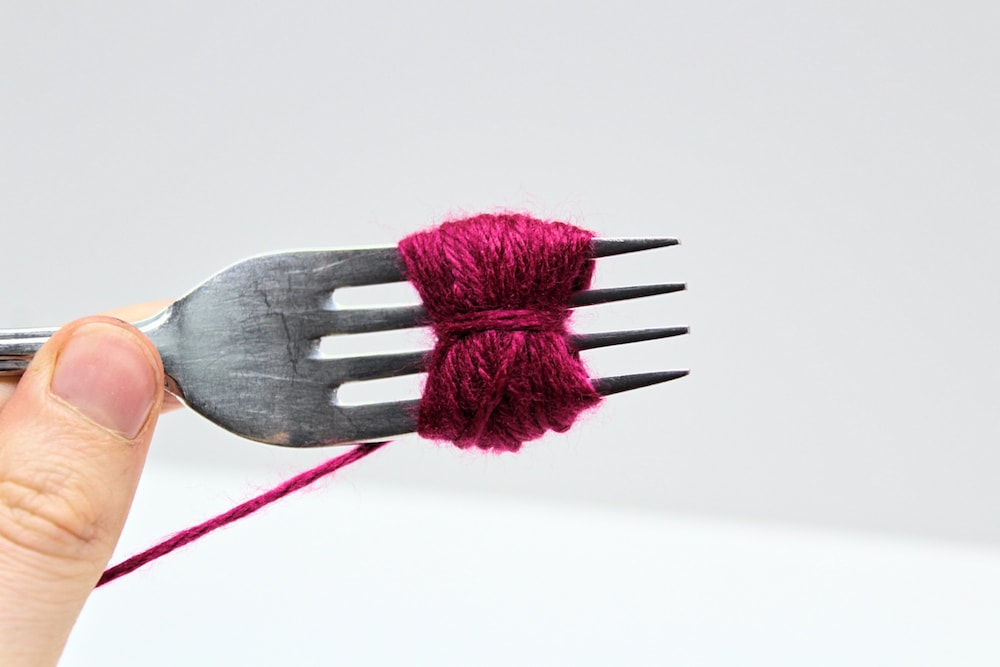
Finally, use scissors to cut along the two outer prongs of the fork.
Note: If you have trouble with this method, there are several others you can use to create homemade pom-poms—including one that requires nothing but your fingers. Check them out here!
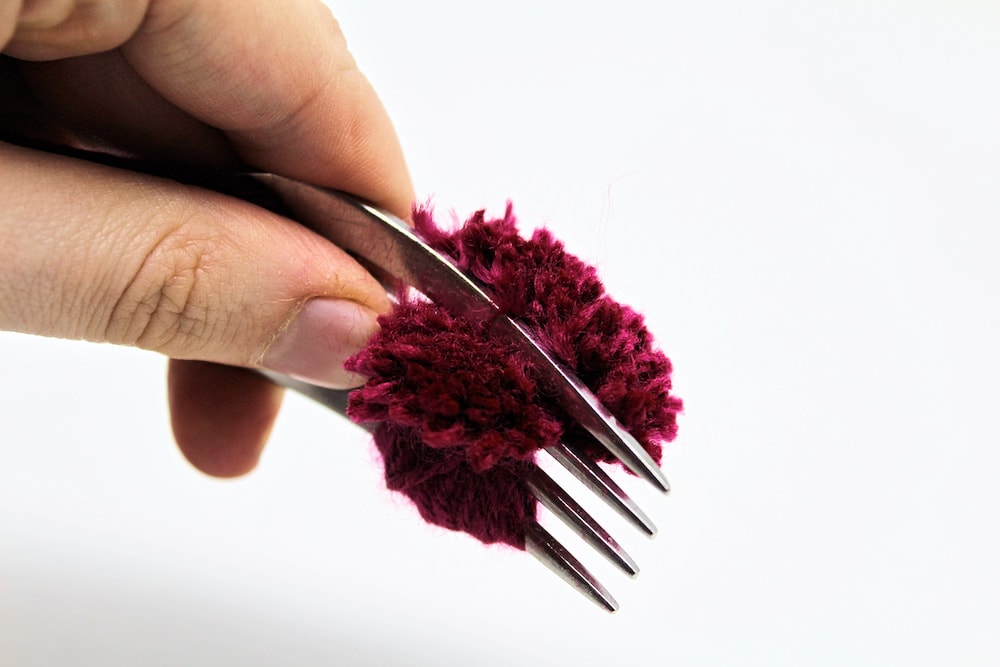
5. Trim Pom-Poms
Once you’re done cutting along the outer prongs of the fork, your pom-poms will be ready… but they may look a little ragged! If that’s the case, simply use scissors to trim the yarn and give it an even length all the way around. This will make your pom-poms look nice and fluffy.

6. Assemble Garland
Once you’ve created enough yarn-wrapped hearts and pom-poms, it’s time to string them into a garland! There are two methods you can use to do this.
The quickest way would be to simply glue them all to the same piece of yarn using hot glue. (You should obviously take care of this yourself if you are doing this project with kids who are too young to handle a hot glue gun.)
But my preferred method for assembling this garland would be to string the various pieces together using a plastic needle!
We ordered some on Amazon a little while back and received a whole bag of them for just a few dollars. They’re great for teaching kids how to sew and practicing fine motor skills!
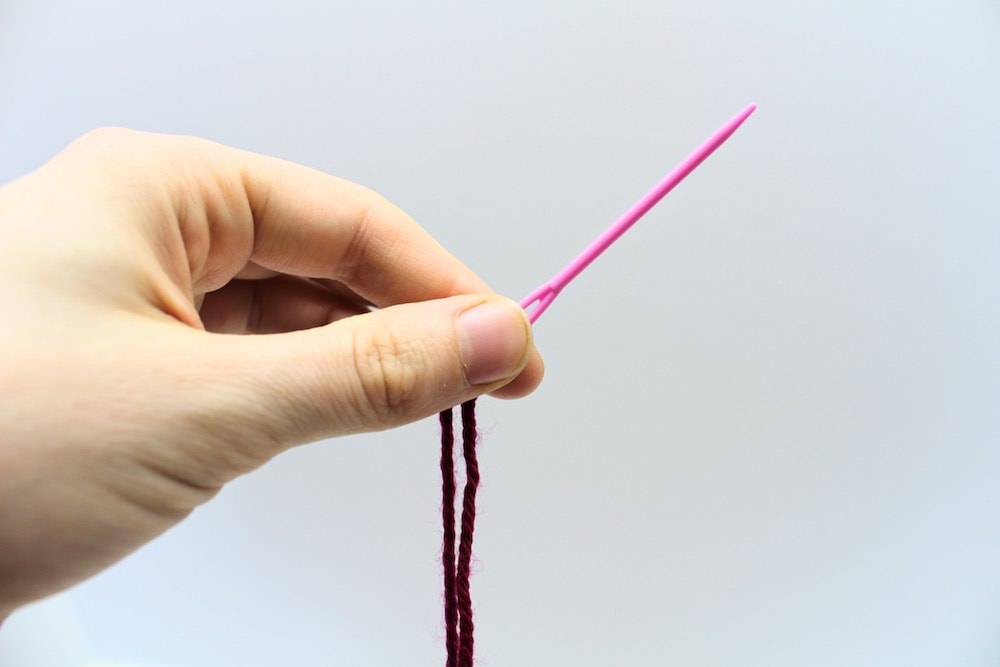
If you choose this method, simply use the needle to poke some extra yarn through the wrapped hearts as well as through the middle of the pom-poms. (It may take a few tries to find the middle.)
Once you’re done stringing together the hearts and pom-poms, the garland is ready!

Doesn’t it look so pretty? We’ll definitely be making more crafts with homemade pom-poms this year!
Related Valentine-Themed Crafts
Looking for more fun Valentine’s Day crafts to do with your kids? Check out these articles:
- Easy Pom-Pom Love Bugs
- Bubble-Painted Valentine’s Day Card
- Torn Paper Strip Hearts
- Glitter Handprint Valentine’s Day Card
Only your name will be made public. Please note that by submitting your comment, you are agreeing to the terms of our Privacy Policy.