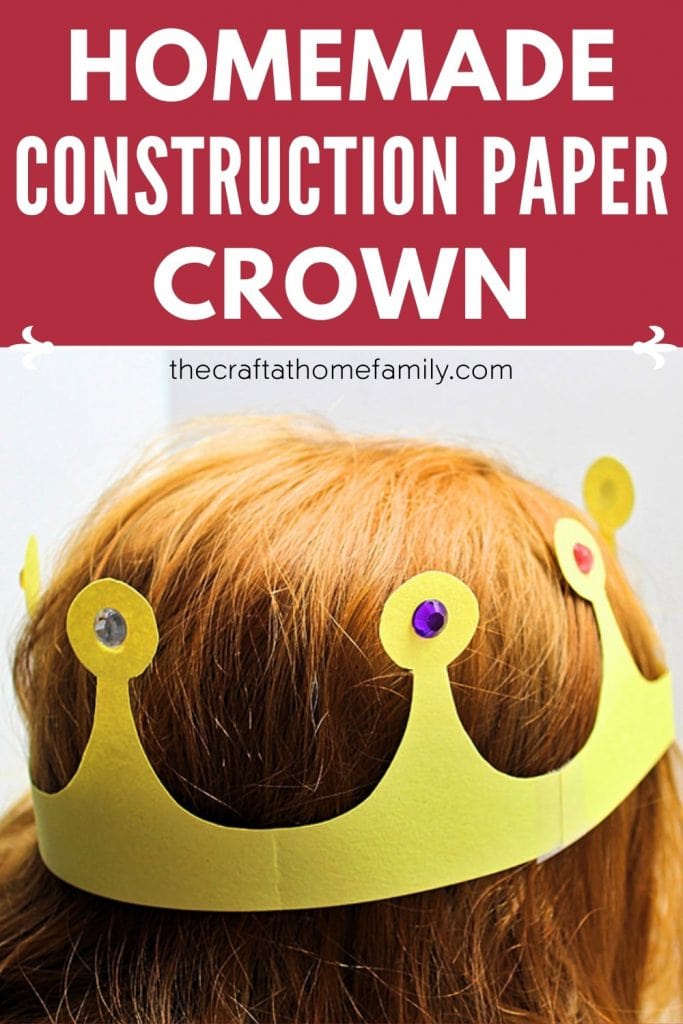
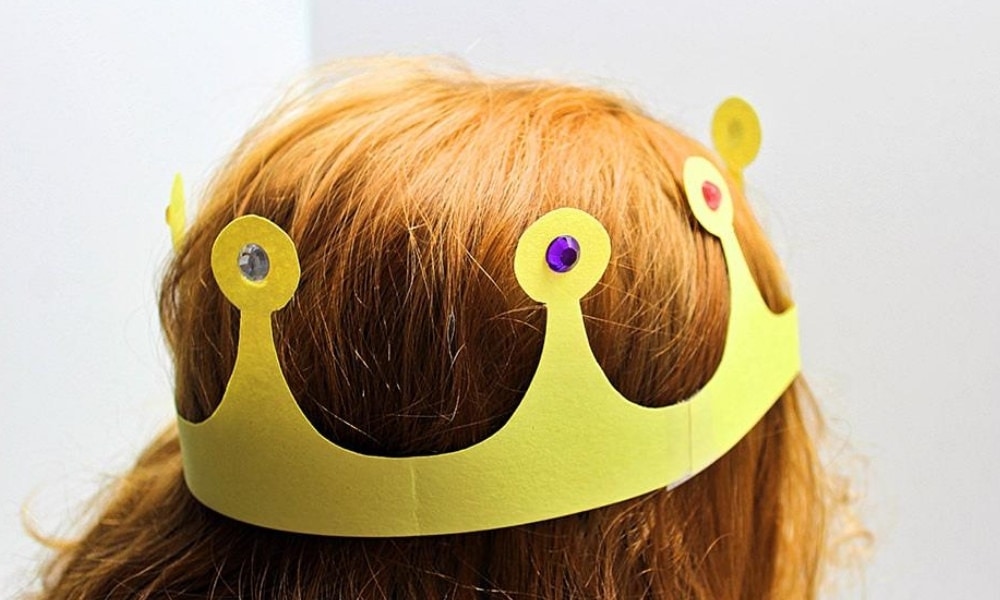
These fun paper crowns are easy to make and kid-approved! And since they require very basic materials, you probably already have everything you need to make one at home. A perfect project for a rainy day… and it even includes a free template that you can download and print at home!
This post may contain affiliate links, which means I may receive a commission, at no extra cost to you, if you make a purchase through a link. As an Amazon Associate, I earn from qualifying purchases. Please see my full disclosure for further information.
JUMP TO…
These simple paper crowns only require a few basic materials that you probably already have at home, and they are perfect for birthday parties… or for kids who love pretend play. (My daughters use them play princess!)
Grab the printable template and print it out at home to make these DIY construction paper crowns more easily.
Required Materials
Here’s what you’ll need to make a fun paper crown for your kids to play with:

- My free crown template, which you can download using the form at the bottom of this article
- Construction paper (we used yellow and orange because they’re our children’s favourite colours—just make sure you use construction paper rather than regular printer paper if you want the template to be the right size!)
- Pencil
- Scissors
- Eraser
- Clear adhesive tape
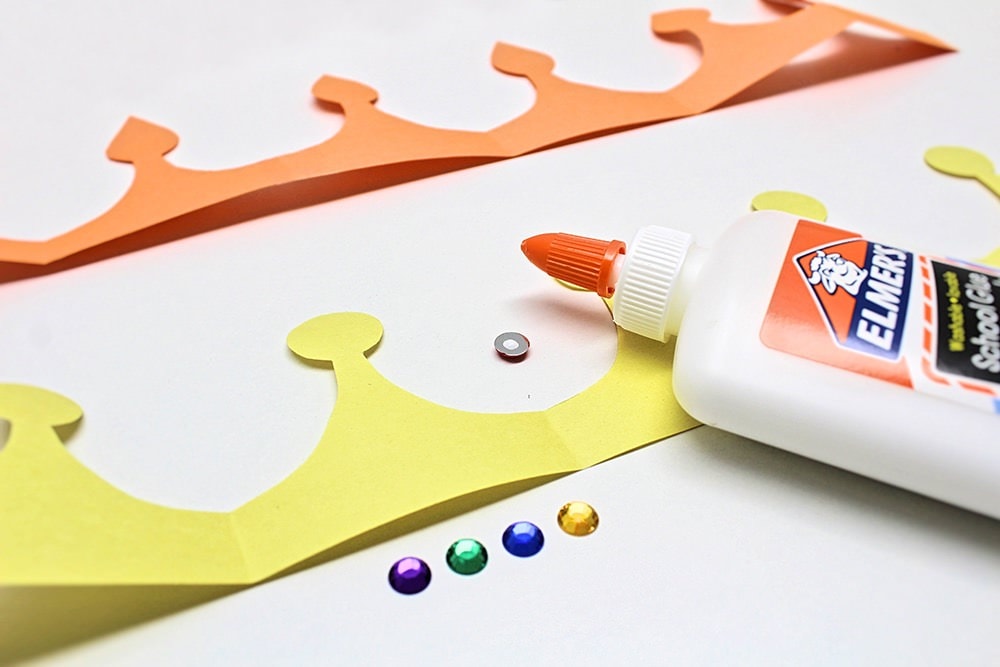
- Decorative gemstones (optional—we got ours at Walmart)
- Extra-strong glue (if using gemstones)
Note: Because the back of the gemstones is so smooth, they tend to fall off pretty quickly when kids start playing. For this reason, I really recommend using something stronger than school glue, especially if you have younger kids at home who could choke on fallen gemstones!
How to Make a Paper Crown (Step-by-Step)
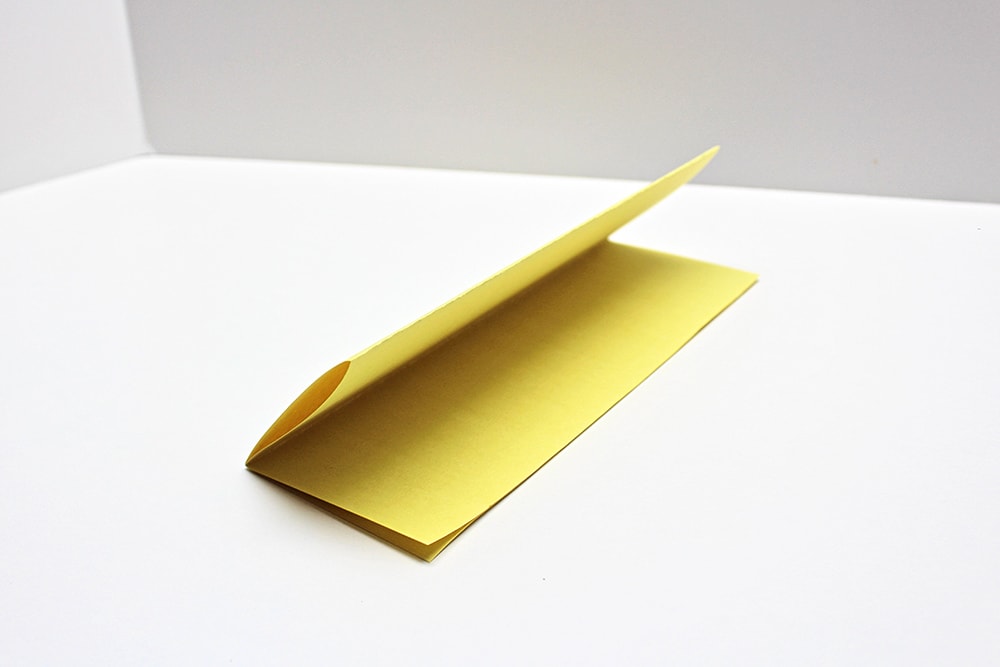
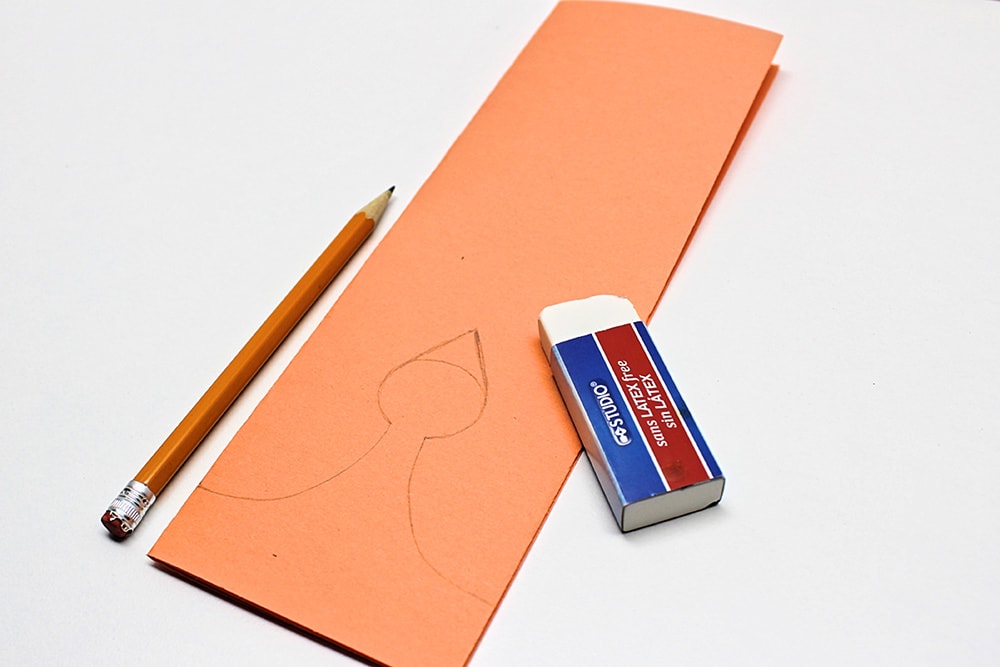
1. Fold Construction Paper
Start by folding the construction paper widthwise (not lengthwise), then folding it a second time as shown in the picture.
2. Trace Crown
Next, use a pencil to draw a section of the crown on the folded paper. You can draw the same thing I did (as shown in the picture below) or make up your own design.
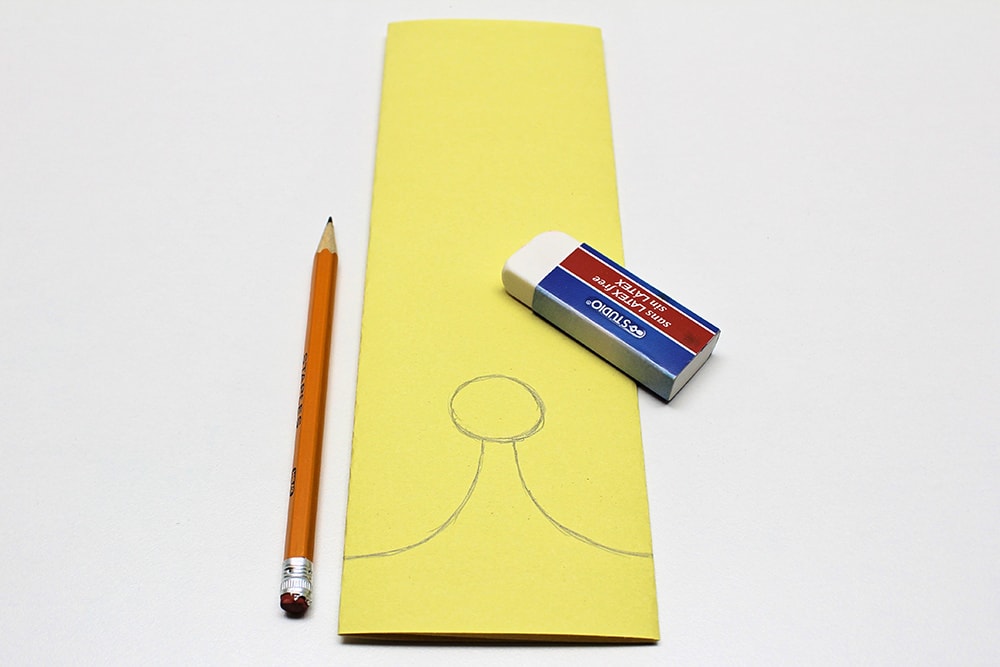
Make sure to press down lightly with your pencil so you can erase and adjust the drawing as needed.
MARCH 2021 UPDATE: If you’d rather use the template I created, request it using the form at the bottom of this article and confirm your subscription to receive the file by email. Then, you’ll simply need to print it, cut along the lines and use it to trace the design onto your folded construction paper. It should be exactly the right size!
3. Cut Crown
Leaving the paper folded, cut out the design you drew.
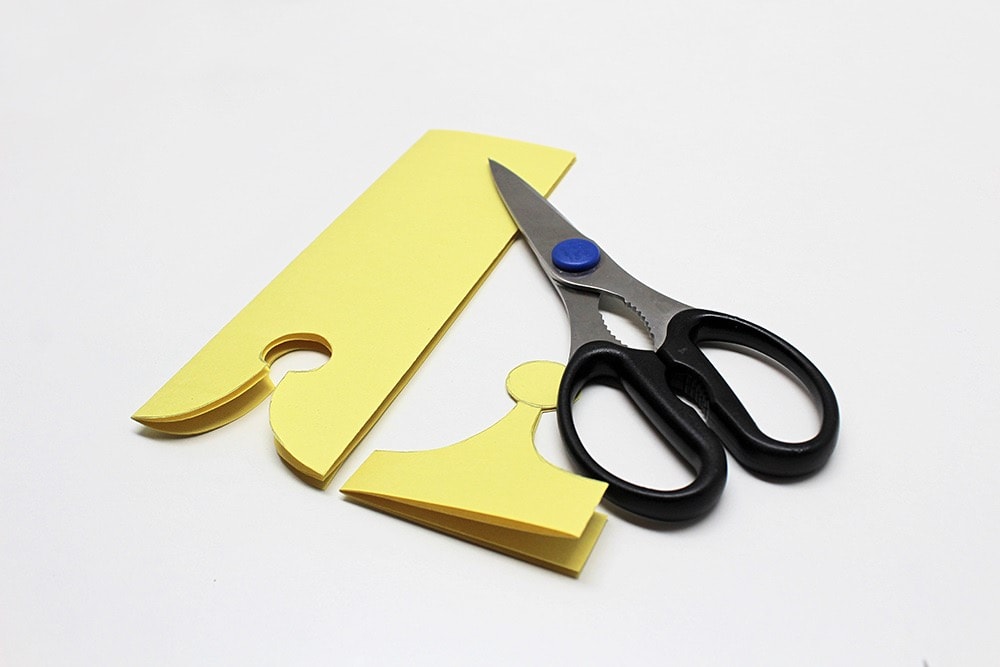
4. Repeat Design
Flip the paper around and use the section you cut out (or the printed template) to trace the same design on the opposite end of the paper. Then, cut that out too.
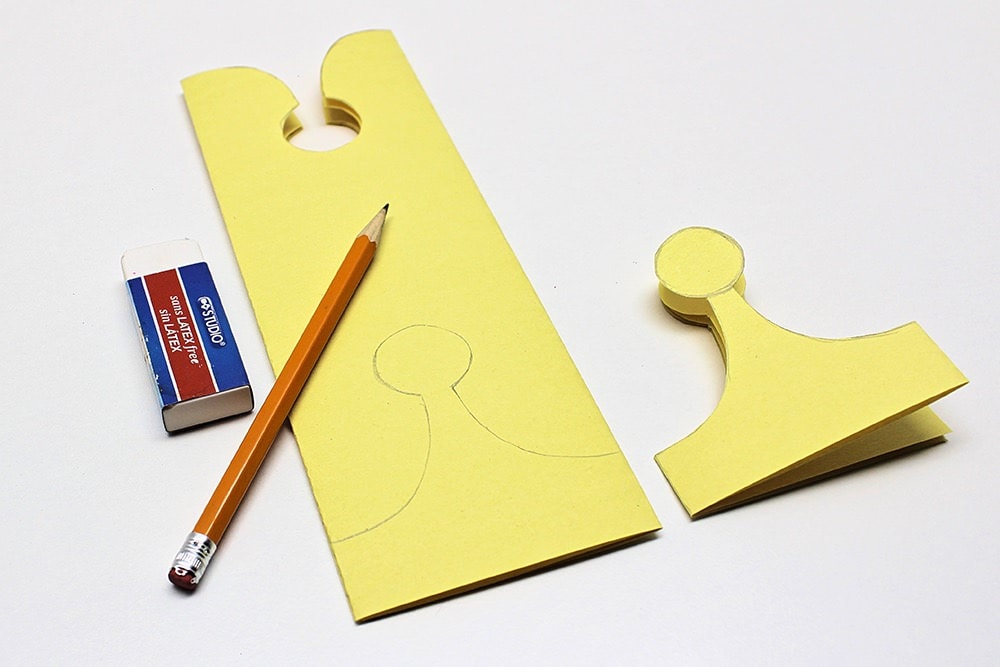
At this point, you can place both cutouts on top of each other to make sure they’re even. I did this and realized that one side was higher than the other, so I kept them pressed together and evened out the sides with scissors. (This shouldn’t be an issue if you used the template, but it can’t hurt to check.)
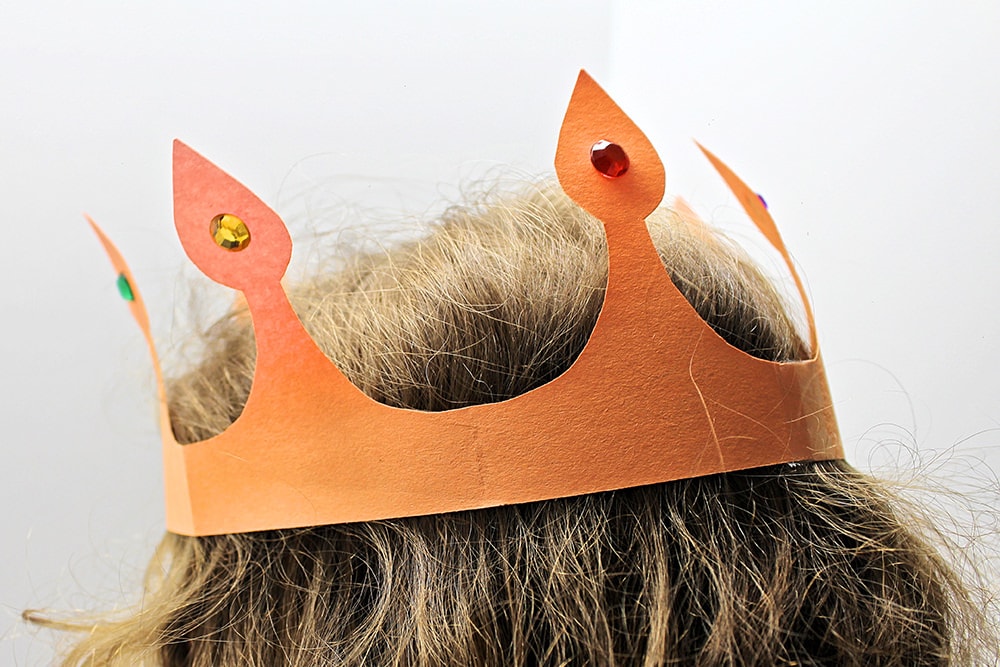
Since I was making two crowns, I decided to tweak the second design slightly by adding a point above the circle. (The printable template includes both designs.) Feel free to make whatever changes you like!
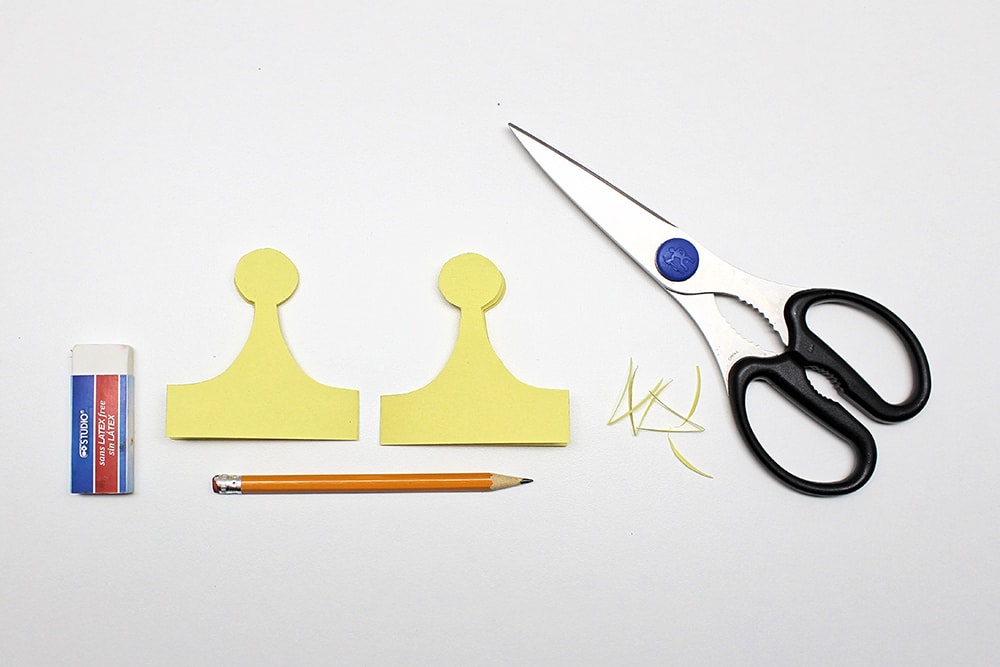
5. Unfold & Tape Ends
Once you’re satisfied that the sides are even, use an eraser to erase any remaining lines, then unfold your design and use adhesive tape to stick two of the ends together.
6. Measure & Cut (if Needed)
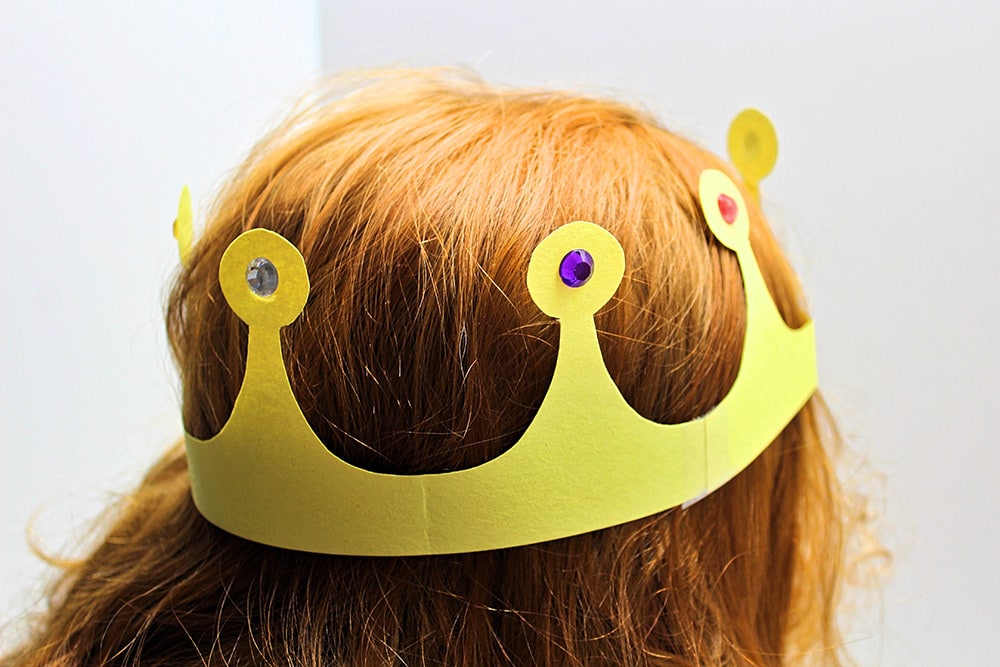
Depending on your child’s age and the size of their head, you might have to cut off some sections to make the crown fit.
Ask your child to stand still while you place the crown on their head and join up the two ends to see how big it needs to be. Make sure to leave a little bit of wiggle room, because if you cut off too much, the crown will be too tight to rest on your child’s head once you tape the remaining ends together.
I had to cut off one section of each crown to make them fit. My two-year-old has a smaller head than her sister’s, so hers was a little looser, but if I had cut off two sections, it would have been too tight to fit.
Tip: I always keep the sections I cut off so I can use them as a template the next time we make crowns!
7. Decorate Crown
Once you’ve determined the correct size and cut off one or more sections as needed, don’t tape the ends together right away. It’s time to decorate the crown, and that’s a lot harder to do once it’s been taped together!
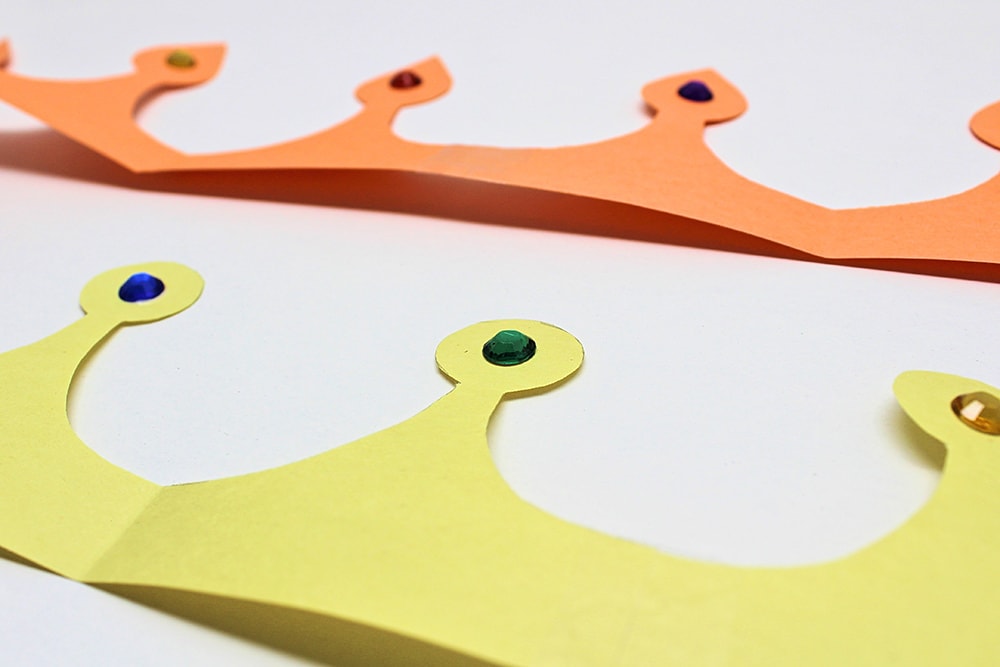
You can decorate your crown any way you like, or even skip the decorating altogether and leave it plain. The first time we made these, we drew on them with markers. This time, we decided to add little gemstones to make them look more realistic.
All it took was a small dot of glue on the back of each gemstone and a little bit of time to dry!

8. Tape Remaining Ends
Once you’re done decorating the crown, just tape the remaining ends together and it will be ready to play with!
Our kids always have a blast with them—and now that we have a template to use, making these crowns will be that much easier!
Related Crafts for Kids
Looking for more fun crafts to do with your kids? Check out these articles:
- Bubble Wrap Butterflies (with Free Printable!)
- Fizzing Baking Soda Paint Volcano (with Free Printable!)
- Puffy Paint Lamb
- Glue Resist Watercolour Rainbow
Join my mailing list using the form below to receive your free paper crown template as a welcome gift! Subscribers gain access to my free printables library as well as to exclusive content that may never be published on my site!
I would love to see the crown template.
Of course! You can use the form in the article to have them sent to your inbox!
Very cute idea.
Thank you, so glad you enjoyed it! I hope you love how your paper crown turns out!