Love making crafts with your kids? This magic salt painted ghost is a fun blend of art and science! You’ll only need a few minutes and a few simple supplies to make this cool Halloween craft at home.

JUMP TO…
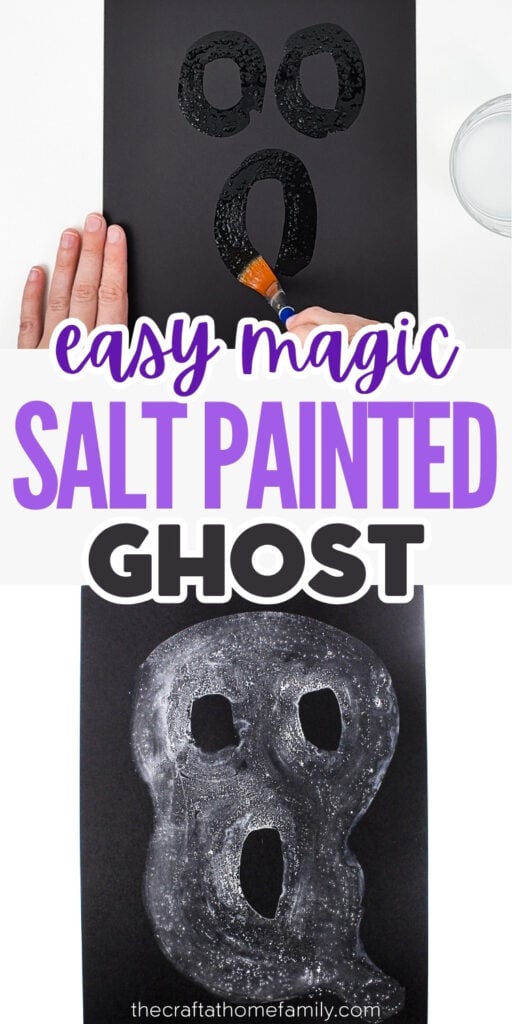
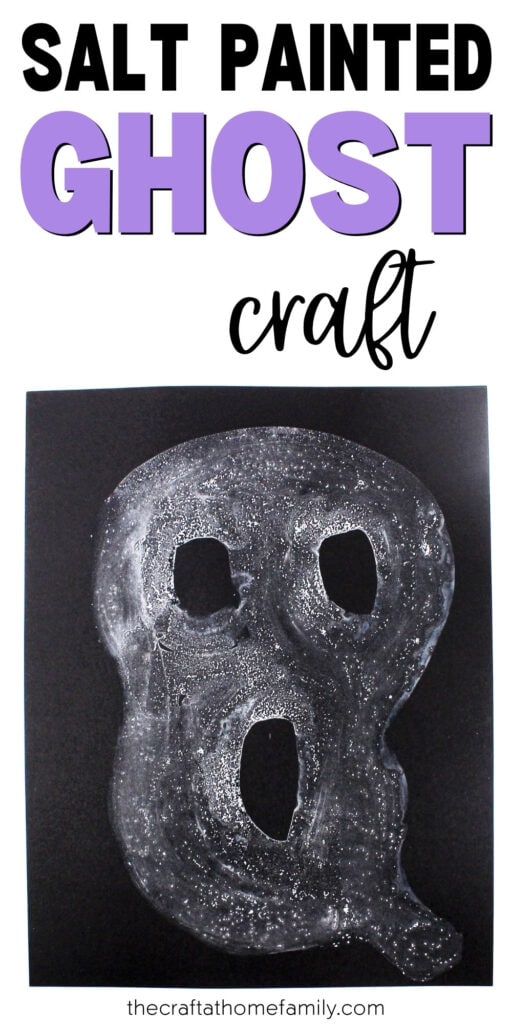
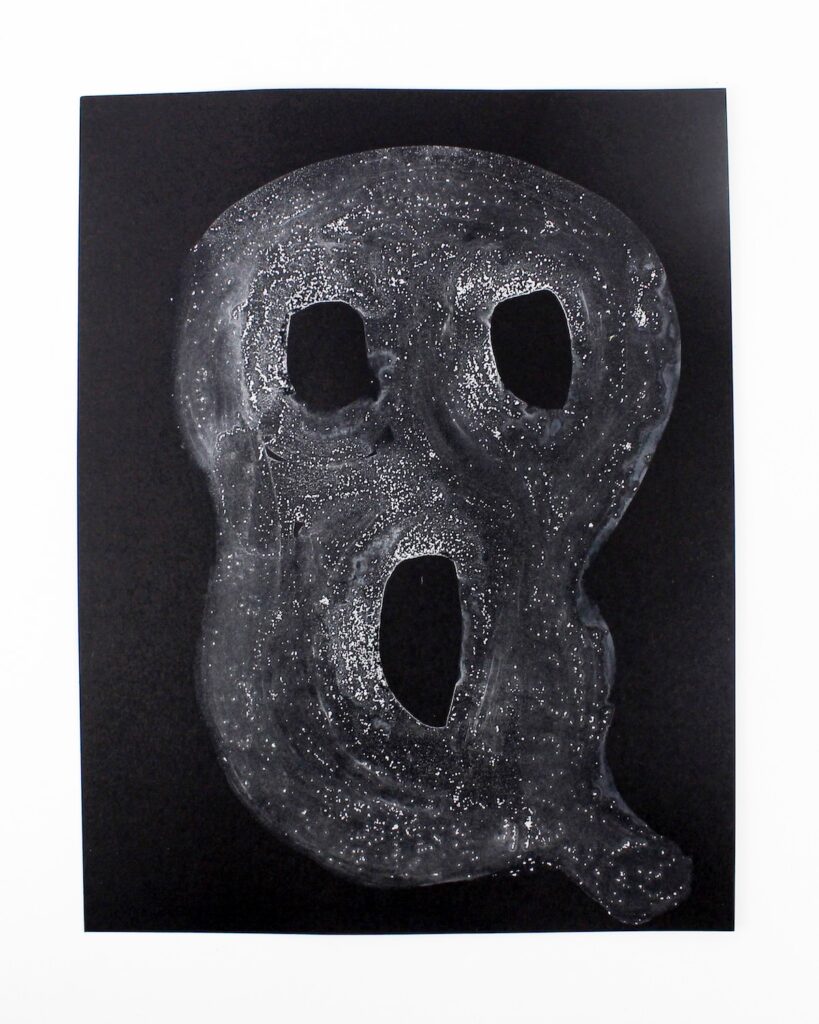
If your child loves science, they’ll love this simple Halloween craft that is part craft, part science experiment! Use salt to create your own paint, then paint a ghost and watch as it materializes when the paint dries.
This project is perfect for kids of all ages, and it only uses a few basic supplies. Your kids will love watching their ghosts appear on the paper!
Why You’ll Love This Craft
- Simple supplies: You’ll only need a few basic supplies to make this craft with your kids, and you probably already have all of them at home.
- Cool transformation: The coolest part of this craft is seeing the ghost magically appear on the black background. This project is perfect for kids who love to do science experiments!
- Easy to make: This craft is perfect for both younger and older kids, because it only involves a few simple steps that even toddlers can do.
Looking for more ghost-themed fun? Check out these Blow Painted Ghosts, this Ghost Lollipop Craft or these Free Ghost Coloring Pages!
GRAB OUR FREE 30-PAGE ACTIVITY BUNDLE!
By submitting your email address, you are agreeing to the terms of our Privacy Policy. You can unsubscribe at any time.
Required Materials
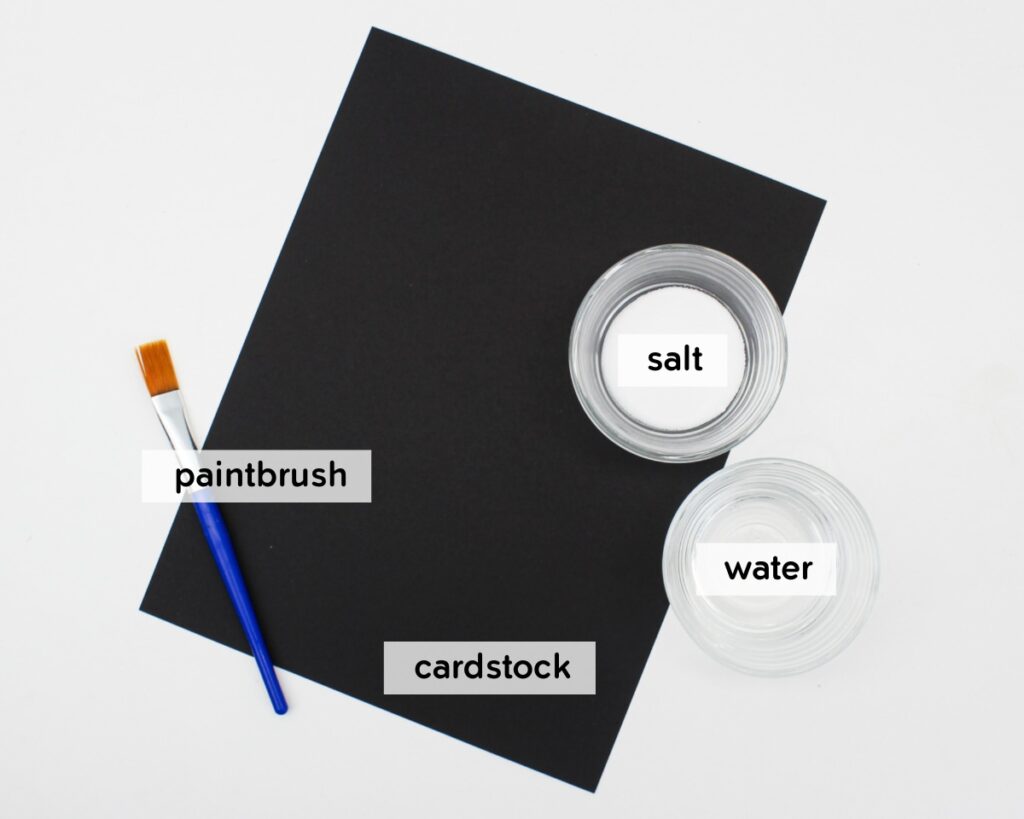
- Water: I used tap water. You won’t be drinking it, so any water is fine. Make sure it’s warm, as this will help the salt dissolve.
- Salt: Regular table salt is what I used, but coarse or sea salt will work too (with slightly different results).
- Paintbrush: Choose the size according to the size you want your ghost to be. I chose a medium-sized brush.
- Cardstock: I used black cardstock for maximum contrast, though another dark color could work as well. Cardstock is best for this project because it is thick, sturdy and unlikely to get wavy after the paint is added, but if you don’t have any, you can use black construction paper instead. Whatever you choose to use, just make sure that it isn’t coated, as this will prevent the paint from adhering to the paper.
- Hair dyer (optional): This is optional, but it will help the ghost appear more quickly, which makes this experiment more fun for kids. If you have one, I highly recommend using it.
The full supply list and instructions can be found in the how-to card.
GRAB OUR FREE 30-PAGE ACTIVITY BUNDLE!
By submitting your email address, you are agreeing to the terms of our Privacy Policy. You can unsubscribe at any time.
How to Paint Ghosts with Salt (Step-by-Step)
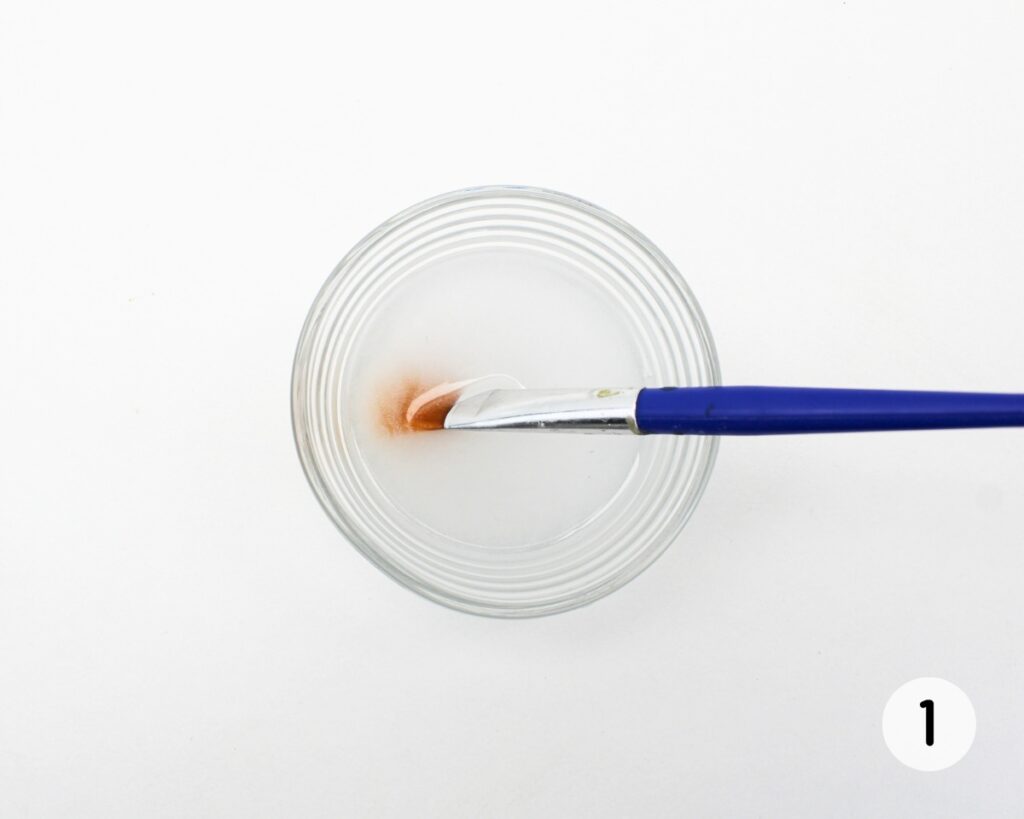
Step 1: Make salt paint. Pour some warm water into a small bowl and stir in 1 tablespoon of salt. Stirring, slowly add ½ to 1 additional tablespoon, stopping when the water is fully saturated and the salt stops dissolving.
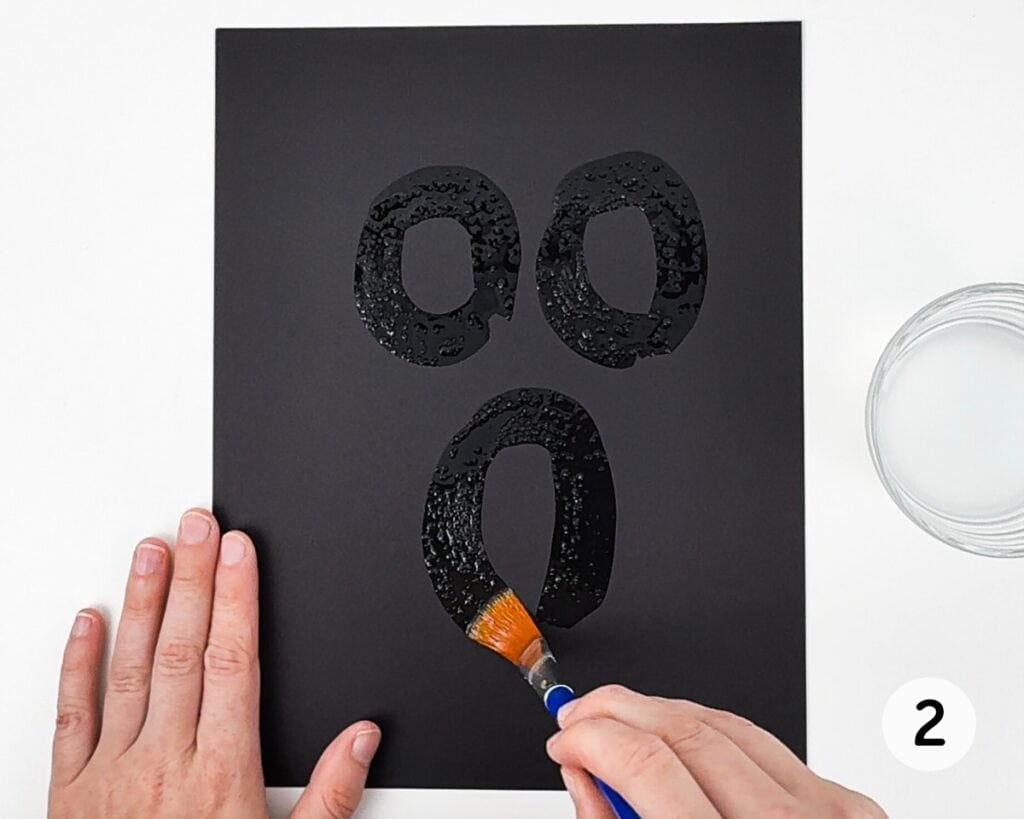
Step 2: Paint eyes and mouth. Dip a paintbrush in the salt solution and paint the outline of two eyes and a mouth for your ghost, making sure not to fill in the circles.
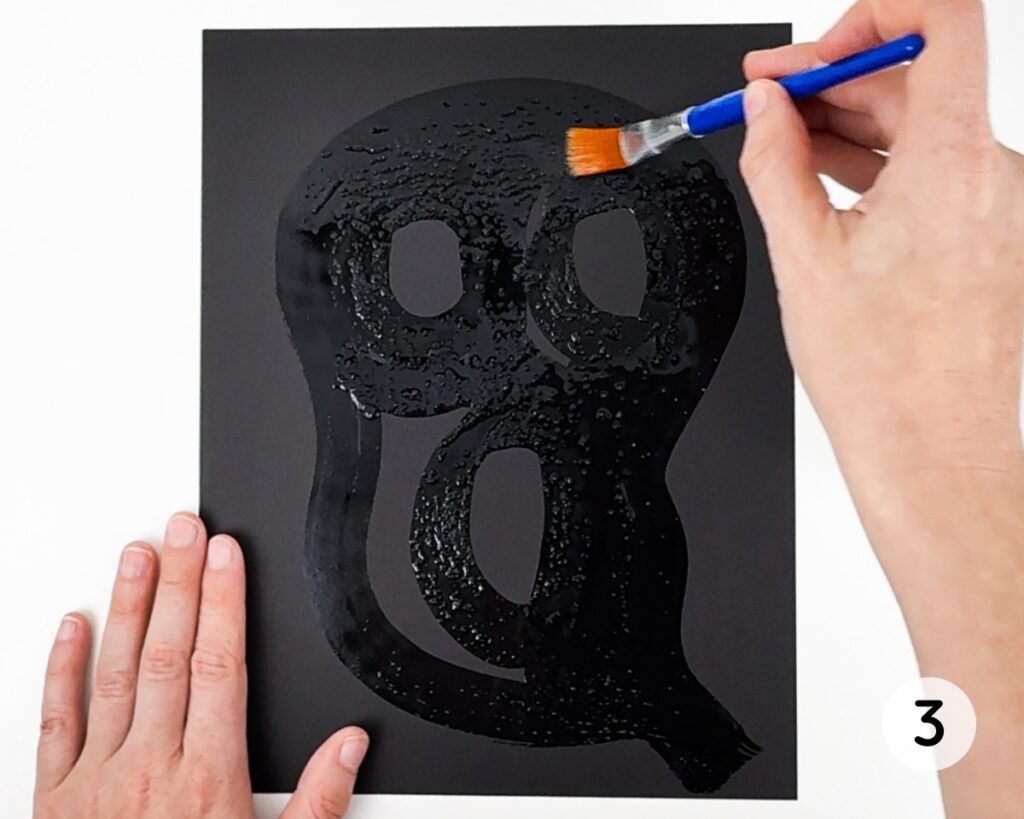
Step 3: Paint body. Paint a body for your ghost and fill in the shape with salt paint, leaving the inside of the eyes and mouth untouched.
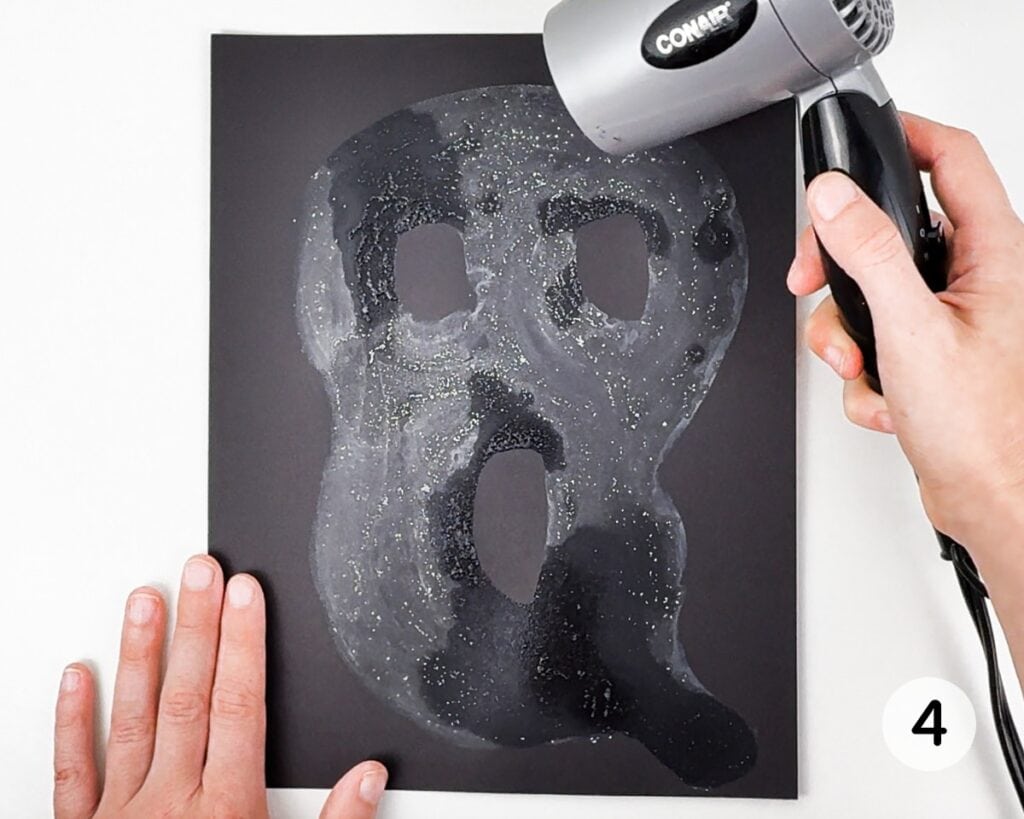
Step 4: Let paint dry. Wait for the salt paint to dry—once it does, the ghost you painted will magically turn white. To speed things up and see the effect immediately, use a hair dryer to help the paint dry more quickly!
This was such a fun little project. It required minimal supplies, was super easy to make, and watching the ghost appear as the paint dried was a lot of fun! We’ll definitely be making this again.
Helpful Tips
- Use warm water: This project will work best with warm water, as the salt won’t dissolve properly in cold water.
- Experiment: This activity involves a scientific component, so don’t be afraid to experiment with different quantities and types of salt to see what works best!
- Use a hair dryer: The ghost will eventually appear if you allow the paint to dry on its own, but the effect is much cooler and quicker if you use a hair dryer to speed up the process.
Frequently Asked Questions
Have a question that wasn’t answered here? Let me know in the comments and I’ll be happy to help!
More Halloween Crafts for Kids


If you have tried this Magic Salt Painted Ghost Craft or any other project on my website, please let me know how it went in the comments below. I can’t wait to hear from you!
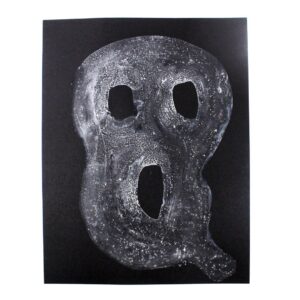
Magic Ghost Salt Painting
Materials
- ¼ cup warm water
- 1 ½ – 2 tbsp salt (table, coarse or sea)
- 1 paintbrush
- 1 sheet black cardstock uncoated
- 1 hair dryer optional
Instructions
- Pour the water into a small bowl and stir in 1 tablespoon of salt. Stirring, slowly add ½ to 1 additional tablespoon, stopping when the water is fully saturated and the salt stops dissolving.
- Dip your paintbrush in the salt solution and paint the outline of two eyes and a mouth for your ghost, making sure not to fill in the circles with paint.
- Paint a body for your ghost and fill in the shape with salt paint, leaving the inside of the eyes and mouth untouched.
- Holding down the paper with your hand, use a hair dryer to help the paint dry. As it dries, the ghost you painted will magically turn white, and you'll be able to see it! (You can also allow the paint to dry on its own, but this can take up to 24 hours, so using a hair dryer will make things more interesting for your kids.)
Only your name will be made public. Please note that by submitting your comment, you are agreeing to the terms of our Privacy Policy.