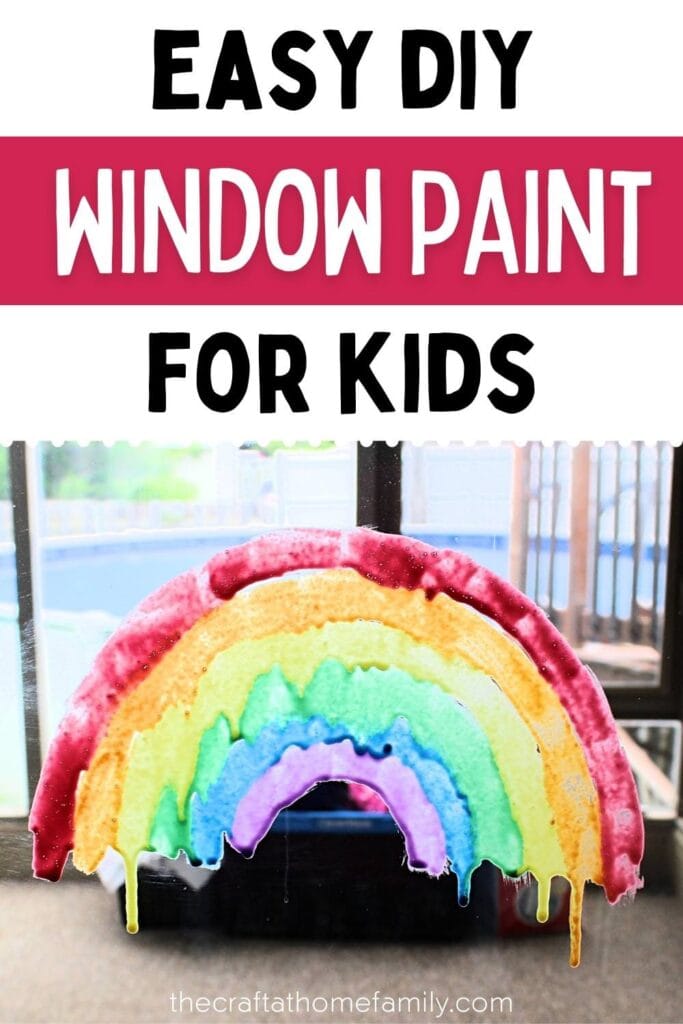
Need a fun activity for a rainy day? Homemade window paint is super simple to make, and you probably already have all the ingredients you need at home. This easy paint recipe is washable and great for entertaining toddlers and preschoolers!
JUMP TO…
On days when the weather is warm and sunny, my kids like to spend their mornings outside with me, swinging the the swing set, running around and playing with their water table.
But unfortunately, those days don’t happen every day. The weather up here in Canada can be pretty fickle, and it can sometimes get uncomfortable chilly and rainy even after a weeklong heat wave.
So for those days when we would rather stay indoors, it’s always good to have some activities to fall back on that won’t take up a lot of time or supplies.
Our go-to is this “Wash the Muddy” Farm Animals Sensory Bin, but as far as I’m concerned, you can never have enough low-prep activities in your arsenal. And since our kids love window markers so much, I thought DIY window paint would be right up their alley.
This easy window paint recipe takes just a few minutes to make, and you probably already have all the ingredients you need at home. It is great for toddlers and preschoolers who want to explore a different way of making art, and even my seventeen-month-old decided to join in the fun by using it as window finger paint!
Also, since you probably don’t want to keep their artwork on your windows permanently, this homemade glass paint is both temporary and washable.
We will definitely be adding this one to our activity rotation!

Get hundreds of pages of activities!
Get access to all our paid printables, as well as monthly activity planners, for just $5/month. (New printables added twice per month!)
Required Ingredients
Here’s what you’ll need to whip up a batch of homemade window paint for your kids:
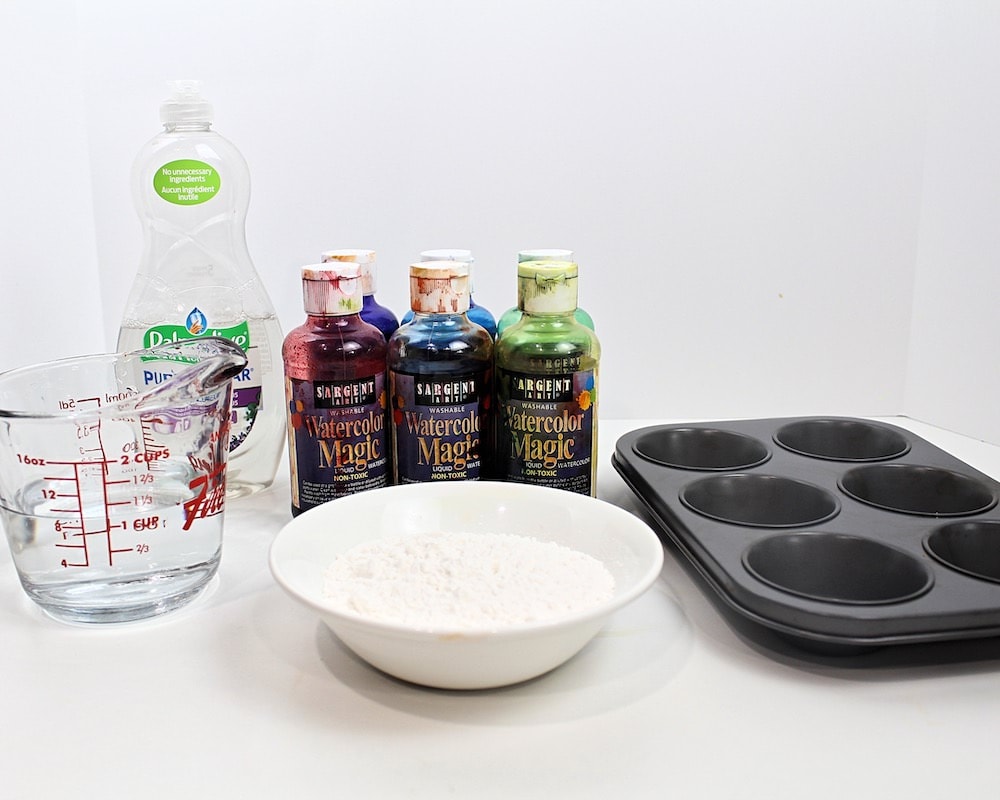
- Water
- All-purpose flour
- Clear dish soap
- Liquid watercolor paint
Note: I used a muffin tin as a tray for the paint, but feel free to use whatever you have on hand.
How to Make Washable Window Paint (Step-by-Step)
1. Pour Water
Start by pouring some water into small containers or into the cavities of a muffin tin.

You’ll need 2 tablespoons of water for each of the colors you’re planning on making. I wanted to make all the colors of the rainbow, so I add 2 tablespoons of water to each of the six cavities of my muffin tin.
2. Add Flour
Add 2 tablespoons of all-purpose flour to each of the containers or cavities and stir until combined. This will create the base for the paint.

3. Add Dish Soap
Add 1 tablespoon of clear dish soap to each. Stir until the mixture is smooth and no longer has any visible clumps of flour.

4. Add Coloring
Add some coloring to each of the containers of cavities and stir until the color has been evenly distributed throughout the paint.
I decided to use liquid watercolor paint because I like the fact that it’s washable. In order to get vibrant colors, added about 1 teaspoon of watercolor paint to each of the cavities of my muffin tin.

If ever you don’t have any liquid watercolors on hand, you can replace them with an equivalent amount of liquid food coloring or with as much gel food coloring as needed to achieve the colors that you want. (You may have to add a bit more water if you use gel food coloring since it doesn’t have a liquid consistency.)
Once you’re done adding the coloring, it’s time to play. Give your child a paintbrush and let them have fun!

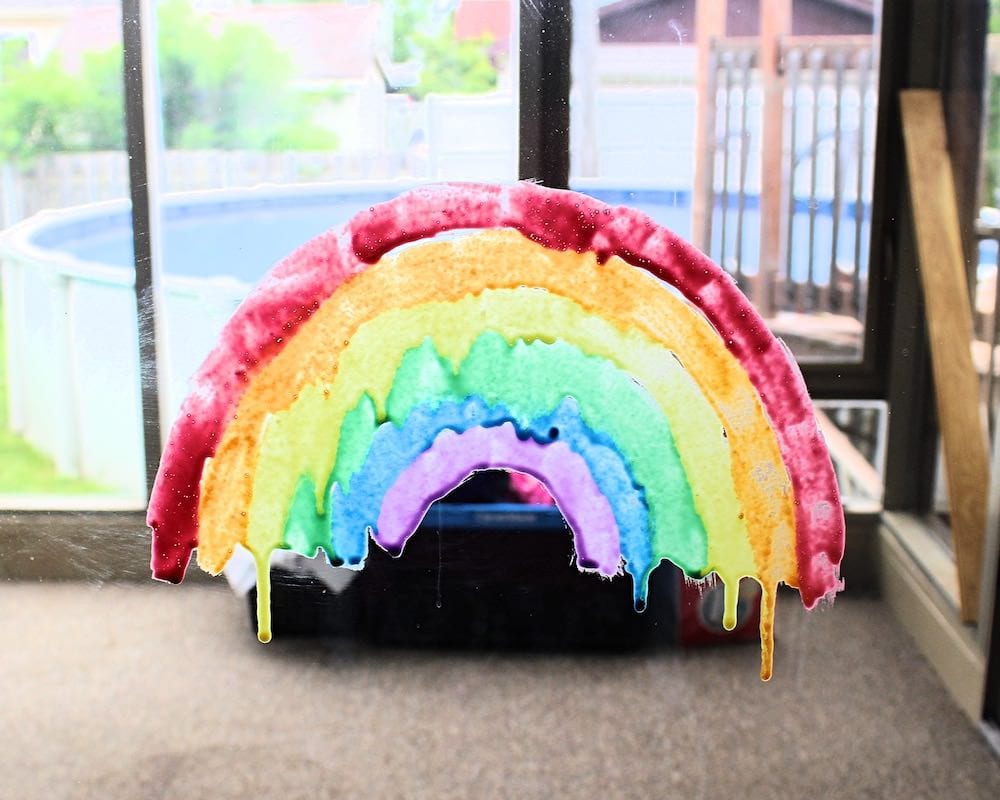
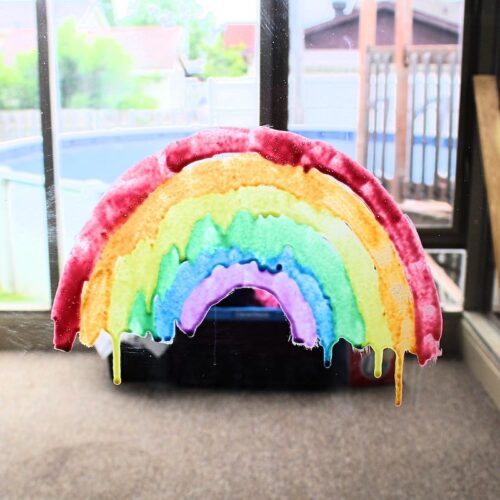
I painted a rainbow, of course, because who doesn’t love rainbows?
Adjusting the Paint Consistency
As your child paints, you may notice that the paint is a little runny. If this is the case, you can always add a bit more flour to thicken it.
If, on the other hand, your paint is too thick and difficult to paint with, you can always add a bit more water or dish soap to achieve the perfect consistency.
How to Clean DIY Window Paint
The easiest way to clean this paint is right after your child finishes playing with it, before the paint has time to dry. If you do this, you should be able to simply wipe it off with a cloth or paper towel and clean you window with some glass cleaner to make it totally clear again.
That being said, if cleaning it right away isn’t possible for you and the paint does end up drying on the window, you’ll still be able to clean it. It will just be a bit more difficult.
In order to clean window paint that has had time to dry on the window, you’ll want to skip the paper towels and use a wet cloth. Dry paper towels won’t clean the paint effectively (even if you use glass cleaner), but the water from the wet cloth will help the paint dissolve and detach from the window.
Once you’ve gotten most of the paint off with the cloth, you’ll be able to polish it off with a paper towel and some glass cleaner like you normally would.
DIY Washable Window Paint
Ingredients
- 2 tbsp water
- 2 tbsp all-purpose flour more as needed
- 1 tbsp clear dish soap
- 1 tsp liquid watercolor paint
Instructions
- Pour 2 tablespoons of water into a small container or one of the cavities of a muffin tin. Repeat for as many colors as you're planning on making.
- Add all-purpose flour and stir until combined.
- Add clear dish soap and stir until the mixture is smooth and free of clumps.
- Add liquid watercolor paint, stirring until the color has been evenly distributed throughout. Use immediately.
Notes
Related Paint Recipes for Kids
Enjoy making your own paint at home? Check out these articles:
Love this
So glad you enjoyed the paint!!