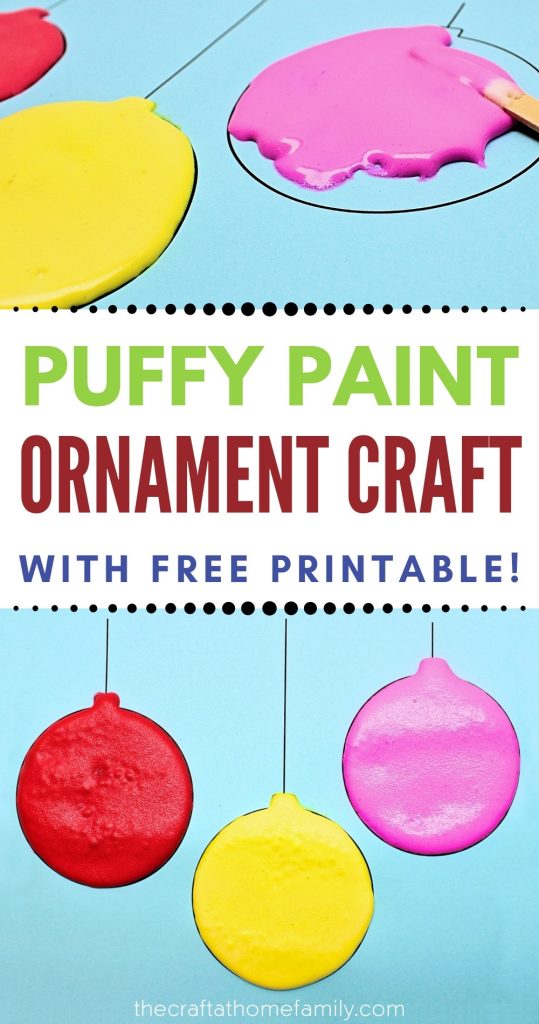
Looking for a fun holiday craft to do with your kids? All you’ll need to make this colourful project is a few simple supplies that you may already have at home! Your kids will love making this cute textured Christmas ornament craft using DIY puffy paint—and it even comes with a free template that you can download and print at home!
This post may contain affiliate links, which means I may receive a commission, at no extra cost to you, if you make a purchase through a link. As an Amazon Associate, I earn from qualifying purchases. Please see my full disclosure for further information.
JUMP TO…
Have you ever made puffy paint for your kids? It’s so easy to make, but it gives their artwork such a cool three-dimensional look!
We tried it for the first time about a year and a half ago. Since then, we’ve made it lots of times and we even used it to make a cute 3D lamb painting for the nursery!
Puffy paint is so easy to whip up when your kids feel like trying something a little different—and all it requires is three simple supplies that you may already have at home! So with the holidays fast approaching, we decided to use it to make some cool Christmas-themed artwork!
To make things easier for you, I’ve even created a free Christmas ornament template that you can print at home. To download it, simply scroll down to the bottom of this article and sign up for my newsletter. You’ll receive the template as a free gift, and you’ll also gain access to some fun bonuses that are only available to subscribers!
(If you’re already a subscriber, no need to request it below. Simply head over to my free printables library and enter the password to download any template you like!)
Required Materials
Here’s what you’ll need to make this cool 3D Christmas art with your kids:
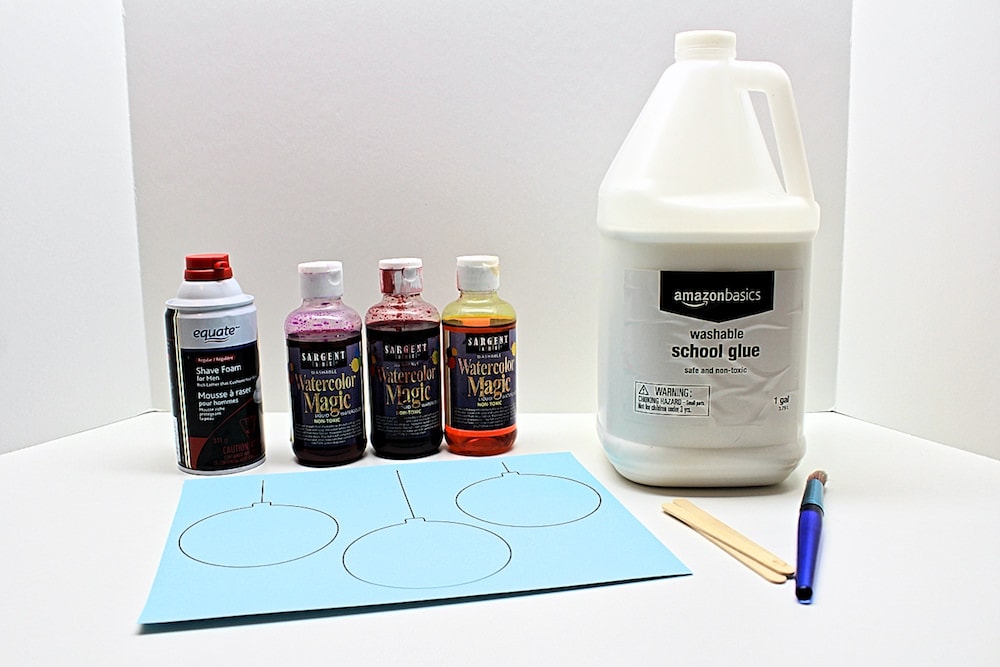
- My free Christmas ornament printable, which you can download using the form at the bottom of this article
- Cardstock (I used some leftover pastel cardstock from our Easter crafts)
- White school glue (we buy ours in bulk)
- Shaving foam (we get ours at Walmart for under $2)
- Liquid watercolours or liquid food colouring
- Popsicle sticks
- Paintbrushes (optional)
How to Make a Puffy Paint Christmas Ornament Craft (Step-by-Step)
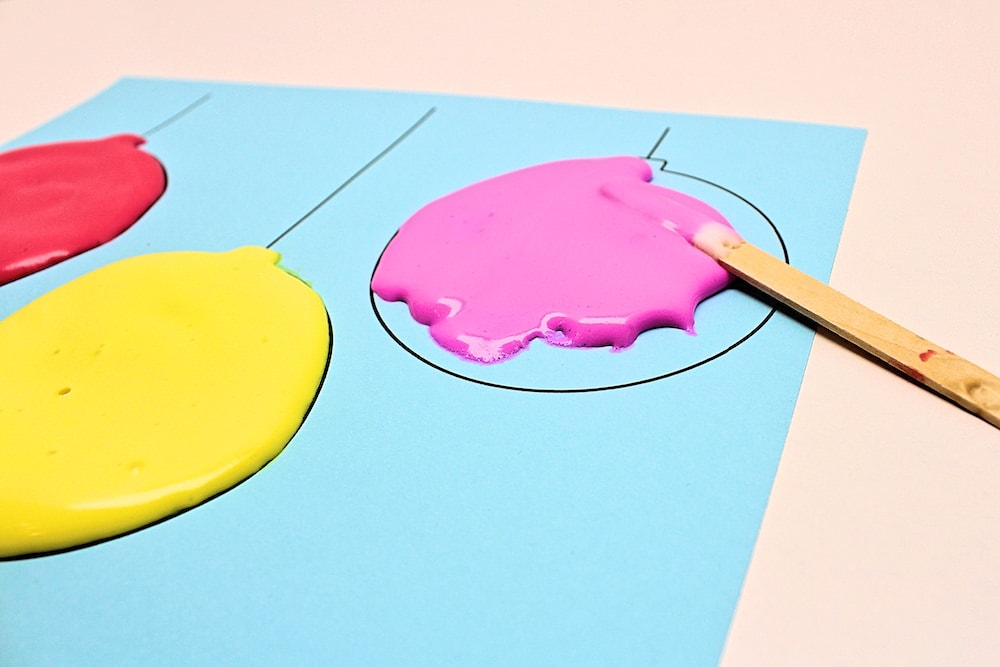
1. Print Template
Start by downloading my free Christmas ornament template and printing it on a sheet of Letter-sized cardstock. I used light blue for the background, but you’re free to choose any colour you like.
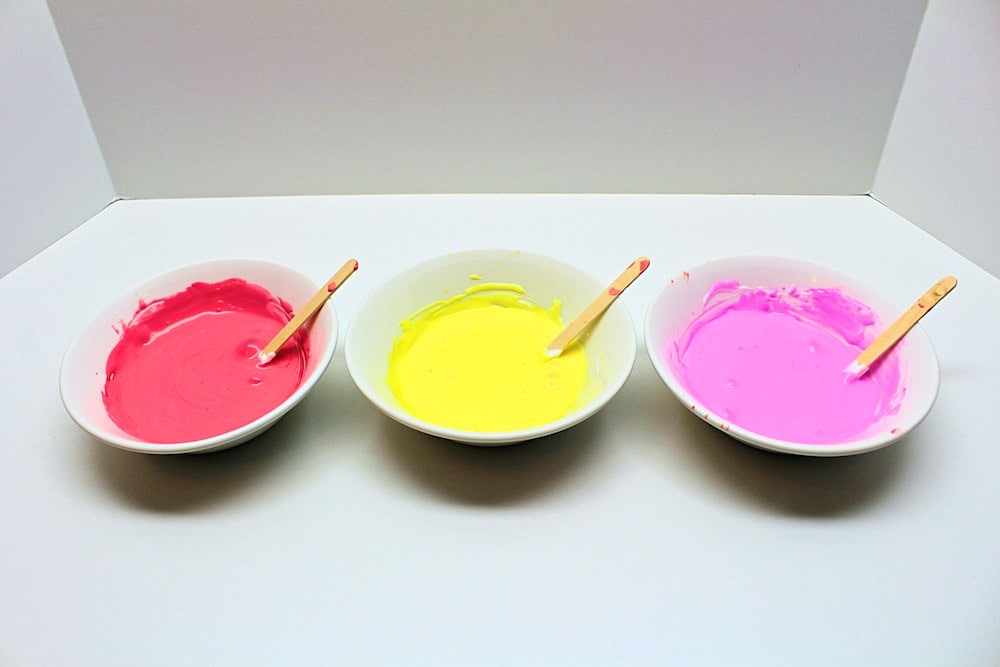
2. Make Puffy Paint
To make your DIY puffy paint, all you’ll need to do is mix a little bit of white school glue with some shaving cream using a popsicle stick. I generally try to use an even amount of both, but I don’t bother to measure out the quantities.
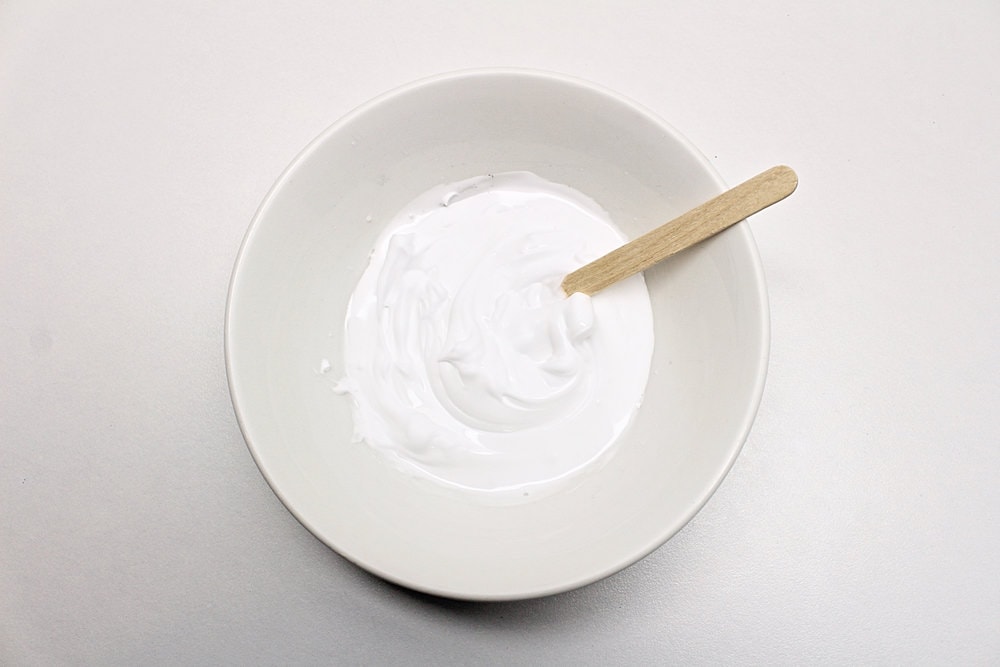
You’ll want the paint to still look “puffy” even after you’re done mixing it. If it doesn’t, add some extra shaving foam to make it puffier!
3. Add Colour to Puffy Paint
Next, choose the colours you want for your ornaments and mix them in with the puffy paint, repeating the process for each colour. My four-year-old was excited to help with this!
I personally prefer to use liquid watercolours because they’re washable, but if you don’t have any, food colouring works well too.
The colours will darken a little as the paint dries, but in order for them to pop, you’ll still want them to be nice and vibrant while wet. So unless pastel colours are what you’re going for, be sure to add enough paint or food colouring!
Note: I made way more puffy paint than was actually necessary for this project because I figured my kids would want to do some abstract painting with the excess. Feel free to make less than I did if you’re not planning on using it, as it doesn’t really keep if not used right away!
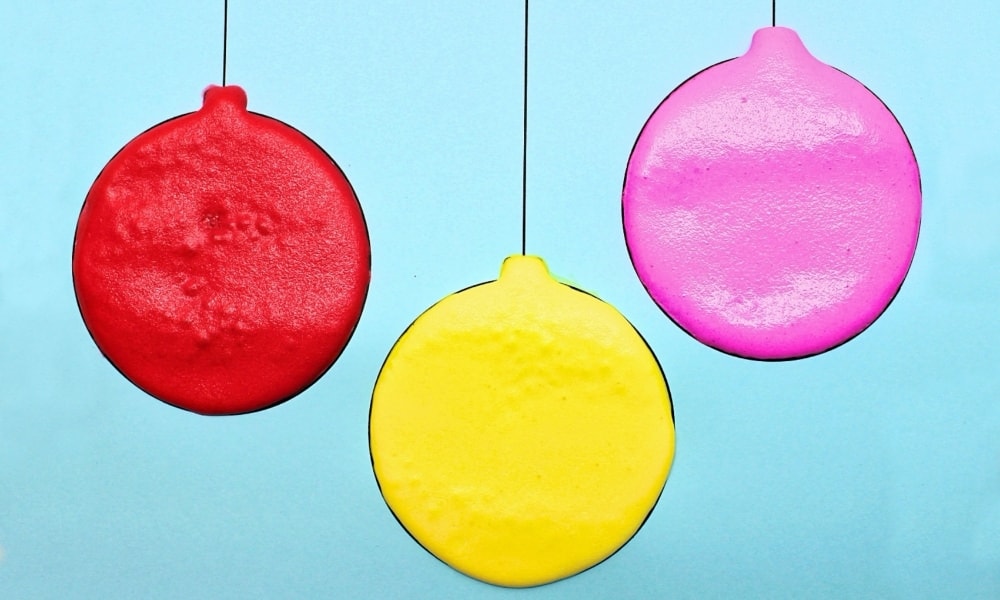
4. Paint Ornaments
Once you’ve added enough colour to the puffy paint, use it to paint your ornaments! I did this using the popsicle sticks that we used to mix it, but you could also use a paintbrush.
5. Let Dry
Once your ornaments are filled, let the paint dry for several hours undisturbed.
It’s important not to move the artwork while it’s drying. I made the mistake of moving ours, and the paint ended up forming little bubbles underneath the surface that looked a little odd once dry.
I also made the mistake of leaving ours to dry on the kitchen counter… despite having a cat who likes to jump on the counters whenever we’re not around. So please, don’t do like me—place your artwork somewhere safe where it won’t be disturbed!
Once everything is dry, your Christmas art is ready to display!
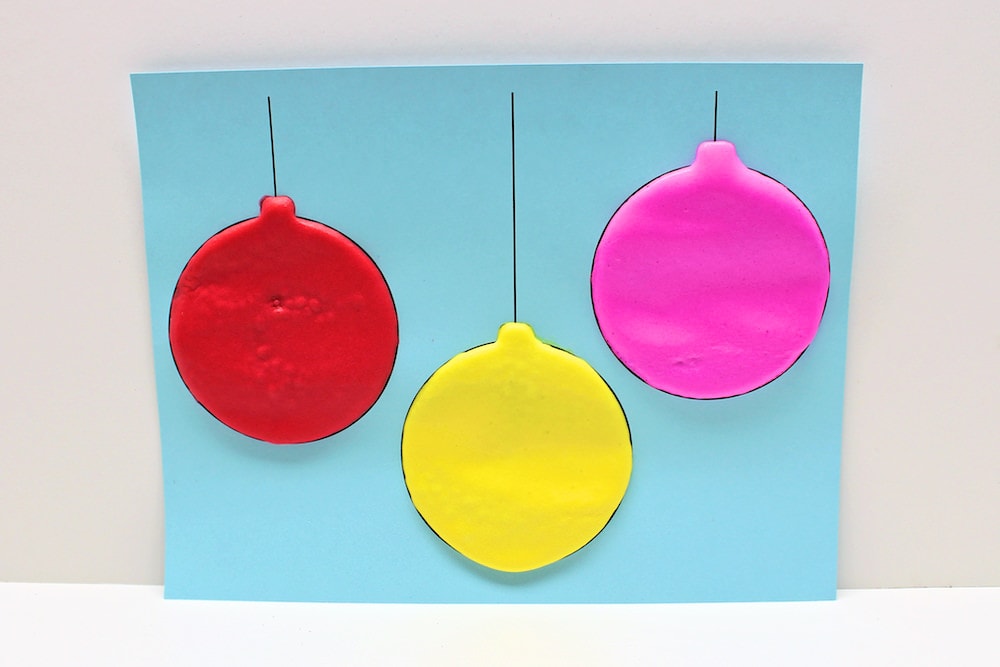
Try not to be too rough with it as puffy paint remains a little fragile once it’s dry. The reason for this is that even after it’s done drying, it still retains some of the air bubbles from the shaving foam. These bubbles are what keep it looking three-dimensional!
Puffy paint is also good for abstract painting, so it’s a great activity to keep in your repertoire! My kids love experimenting with different kinds of homemade paint, and puffy paint always gives their artwork a unique textured look!
Related Christmas Crafts
Looking for more easy crafts that you can do at home using our free Christmas ornament printable? Check out this article:
Join my mailing list using the form below to receive your free Christmas ornament printable as a welcome gift! Subscribers gain access to my free printables library as well as to exclusive content that may never be published on my site!
Only your name will be made public. Please note that by submitting your comment, you are agreeing to the terms of our Privacy Policy.