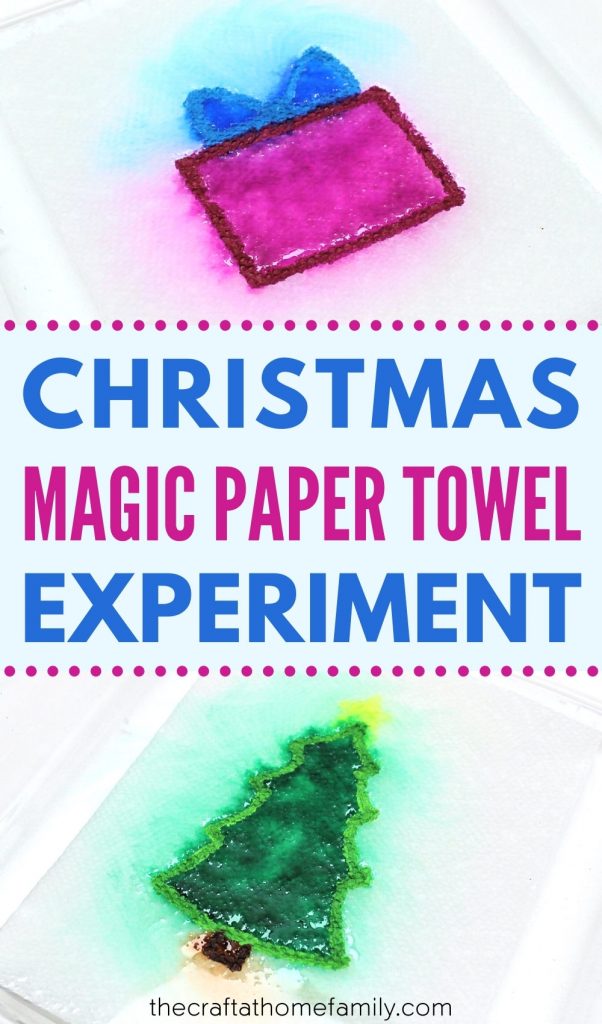
This easy Christmas-themed science experiment is so simple to set up, and it’s sure to keep your little ones entertained! Plus, there’s no need to plan in advance or make a run to the craft store—this fun last-minute activity requires zero prep time and nothing but simple supplies that you probably already have at home!
JUMP TO…
This one is super easy to set up, but children find it so entertaining! (Or at least, mine did!)
I decided to try this with my kiddos yesterday morning and they couldn’t get enough of it. In fact, they were enjoying it so much that I eventually had to say, “OK, last one!” or we probably would have continued straight through nap time.
Thankfully for them, both the process and materials are so simple that we’re sure to have many other chances to do this type of experiment!

Get hundreds of pages of activities!
Get access to all our paid printables, as well as monthly activity planners, for just $5/month. (New printables added twice per month!)
About Magic Paper Towel Experiments
What to Expect
The idea behind magic paper towel art is quite simple, and it can be adapted in pretty much every way that you can think of.
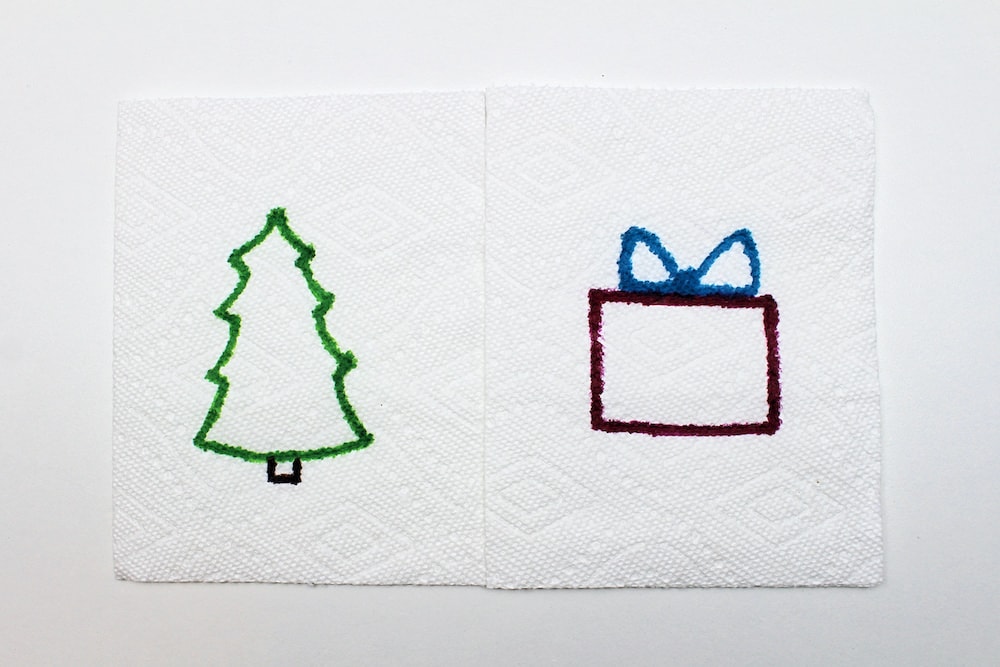
Simply fold a paper towel in half and draw the same design on both layers of paper towel. The top layer should be just an outline of your drawing (in permanent marker) while the bottom layer should be filled in with washable markers.
Once the drawing is done, drop the folded paper towel into a shallow dish filled with water and watch the magic happen! The marker from the bottom layer will soak through to the top and your outline will instantly be filled in with colors.
When to Use Permanent or Washable Marker
When the paper towel is placed in water, anything that was drawn using permanent marker will remain in place, while anything that was drawn using washable marker will bleed. For this reason, it’s best to trace your drawing using permanent marker on the top layer, and color it in with washable markers on the bottom layer.
However, you’re free to use permanent marker on the bottom layer as well if you want to make sure that certain details hold their shape! Do this, for instance, if you want specific words to appear when the paper towel is placed in water.
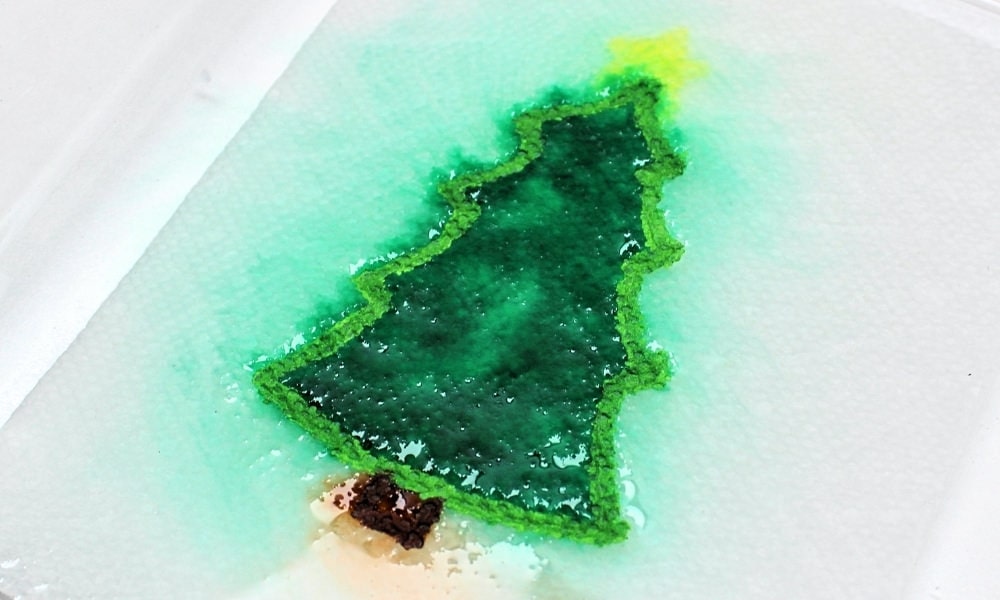
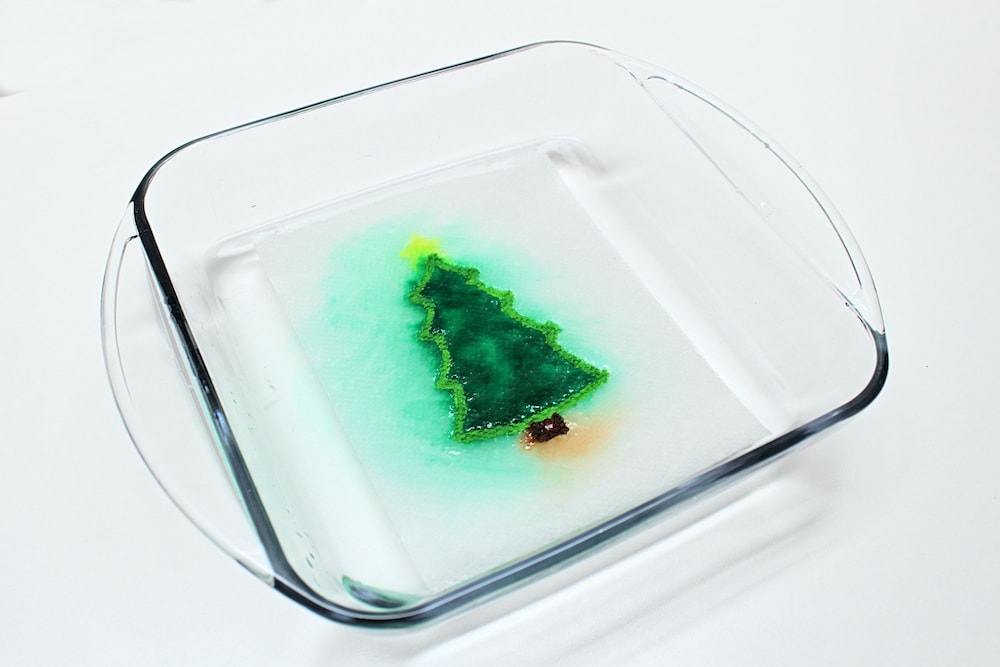
For this experiment, I decided to use permanent marker to draw the star at the top of the Christmas tree, even though it was on the bottom layer of paper towel. This ensured that it remained star-shaped instead of turning into a yellow blur.
Keep this in mind when coming up with your own magic paper towel experiments!
Required Materials
Here’s what you’ll need to do this super simple Christmas-themed science experiment at home:
- Paper towels
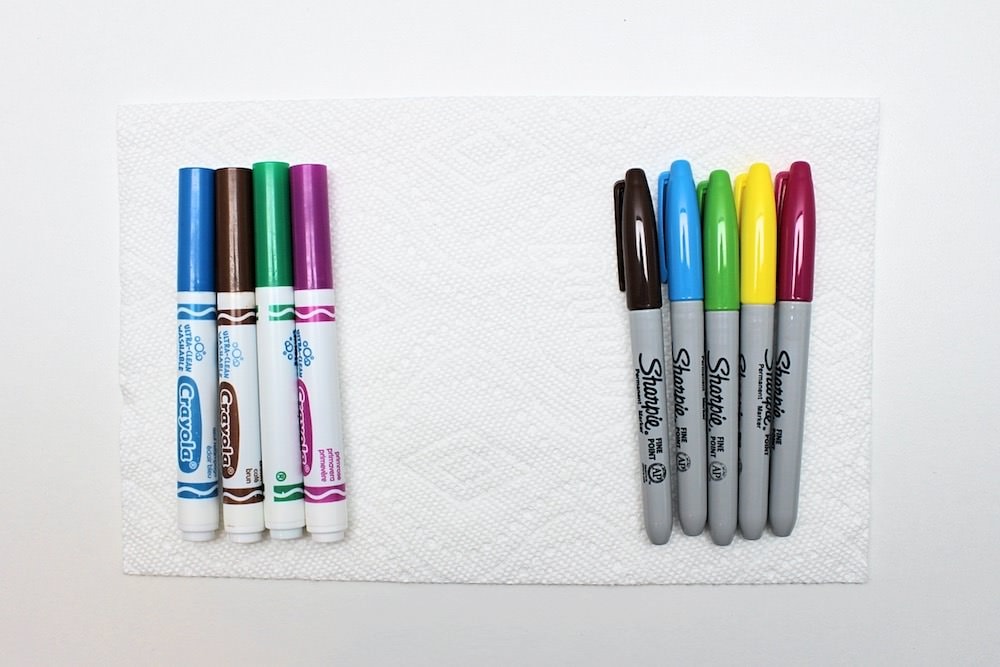
- Permanent markers
- Washable markers
- Shallow dish (I used a small casserole dish)
- Water
Note: I used colored Sharpies because I happened to have them on hand, but if all you have is black, that can work too.
How to Conduct a Christmas-Themed Magic Paper Towel Experiment (Step-by-Step)
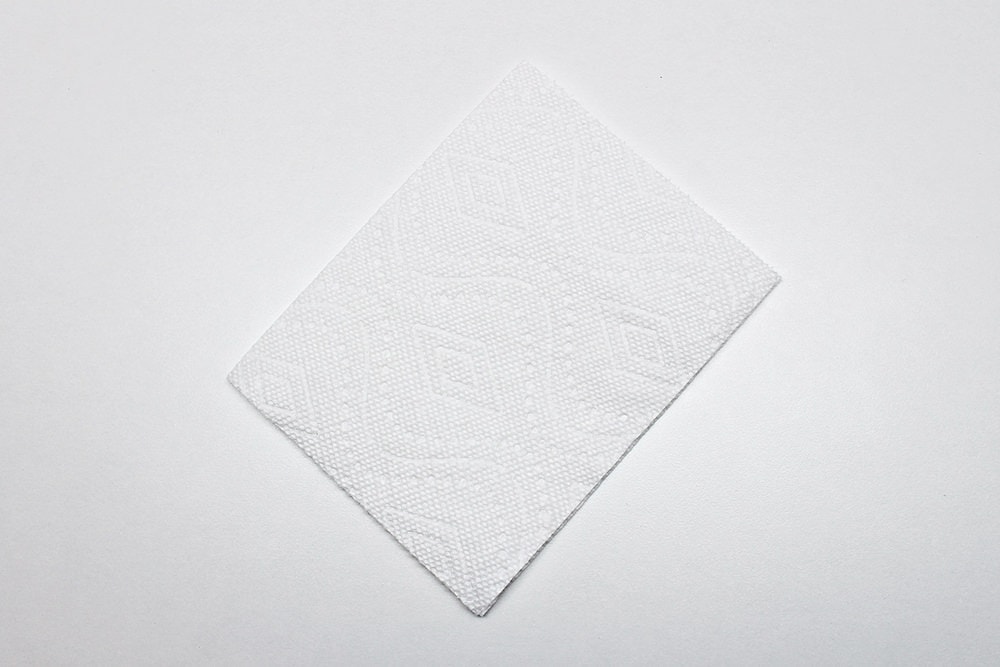
1. Fold Paper Towel
Start by folding the paper towel in half to create two layers.
2. Draw Design in Permanent Marker
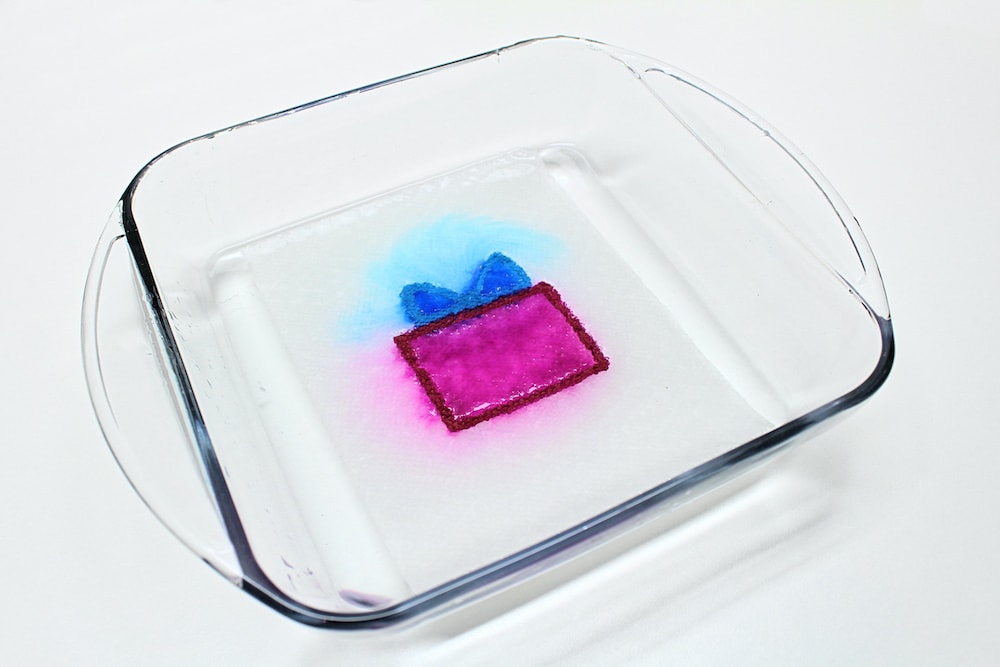
Keeping your paper towel folded, trace the outline of your Christmas design on the top layer of the paper towel using permanent marker. I decided to draw a Christmas tree and a gift box!
3. Unfold Paper Towel
Unfold the paper towel to see whether the permanent marker left a trace of your drawing on the bottom layer.
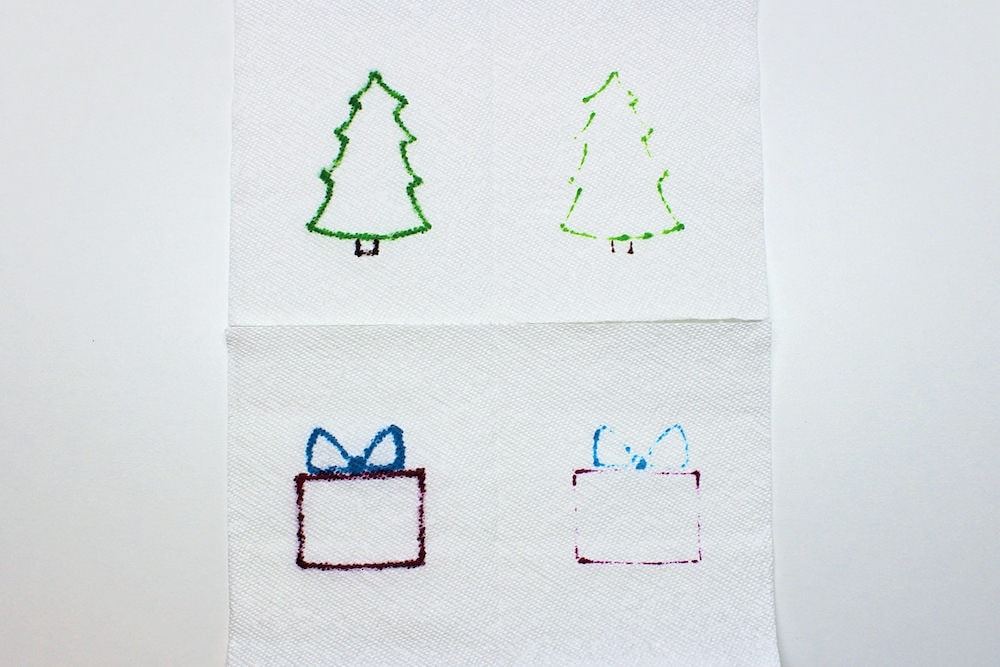
If an outline is present, you can move on to the next step. If not, fold your paper towel back up and trace over your design a second time, pressing down a little harder, until a trace is visible on the other layer of paper towel.
4. Color Bottom Layer
Once you can see a trace of your design on the bottom layer of paper towel, fill in the colors using washable markers. (As mentioned above, I used yellow permanent marker for the star at the top of the tree to help it keep its shape in water!)
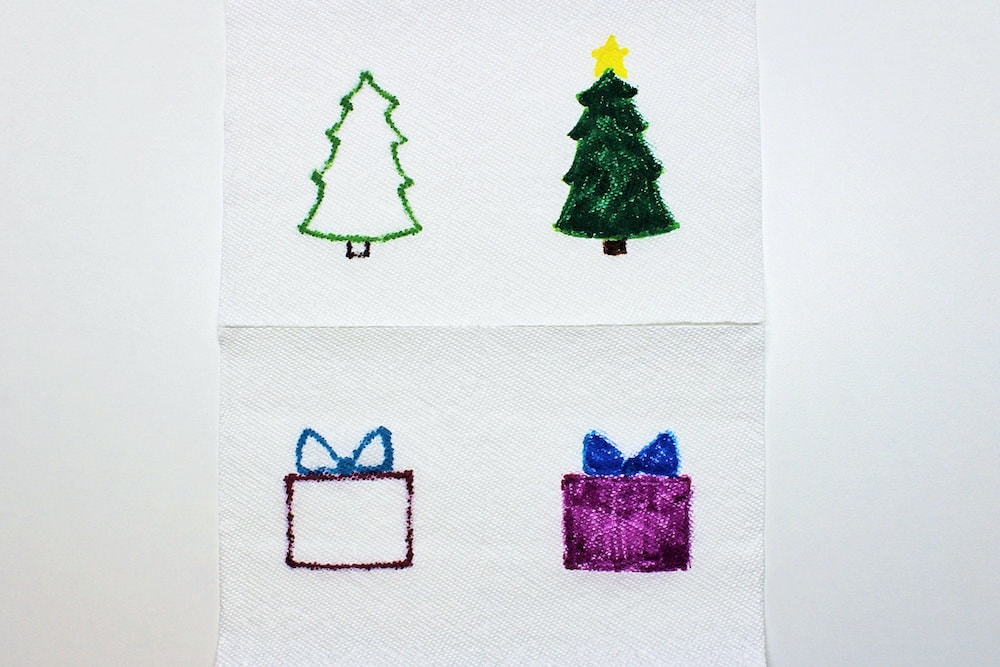
During my first attempt, I decided to add decorations to the tree and draw a teddy bear inside the gift box—but the results were honestly pretty underwhelming. The main color of the drawing bled so much that it pretty much covered up all those details.
For this reason, I recommend simply filling in the colors, which is both easier and less time-consuming. I put my three- and four-year-old in charge of this step and they had a blast!
5. Fold Paper Towel
Once you’re done coloring in your design, fold up the paper towel again so that only the top layer is visible.
Your kids will probably want to do this step, which is perfectly fine—but if they’re young like mine, you may want to double-check that the two designs are properly aligned once the paper towel has been folded!
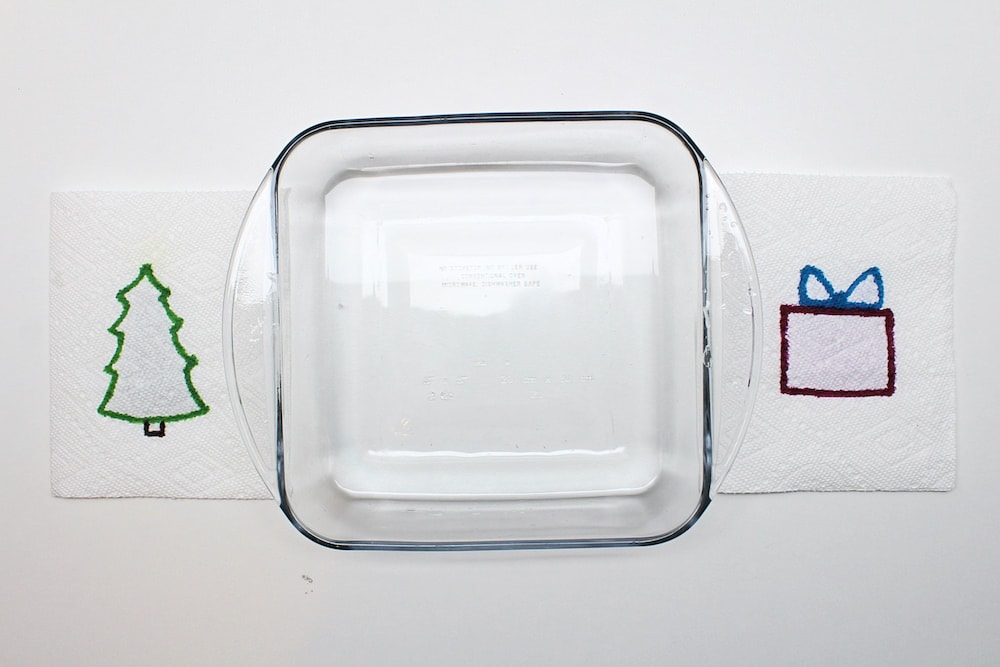
6. Drop Paper Towel in Water
Fill the bottom of your dish with water and let your kids gently drop the paper towel into it. Anything that was traced using permanent marker will remain unchanged, but the washable marker from the bottom layer will bleed through and give a sudden burst of color to whatever you drew!
My three-year-old was particularly obsessed with seeing the star appear at the top of the Christmas tree. Every time it did, she shouted, “Magic!” and asked me to draw another one.
And there you have it! This experiment is incredibly simple to do, but it kept my kids busy for quite a while! The only reason we stopped was so that we could get ready for lunch and nap time.
Even my one-year-old had fun drawing with markers at the table with us—though obviously she hasn’t quite reached the coloring-inside-the-lines stage yet!
Related Science Experiments for Kids
Looking for more easy science experiments that you can do at home with your kids? Check out this article:
Only your name will be made public. Please note that by submitting your comment, you are agreeing to the terms of our Privacy Policy.