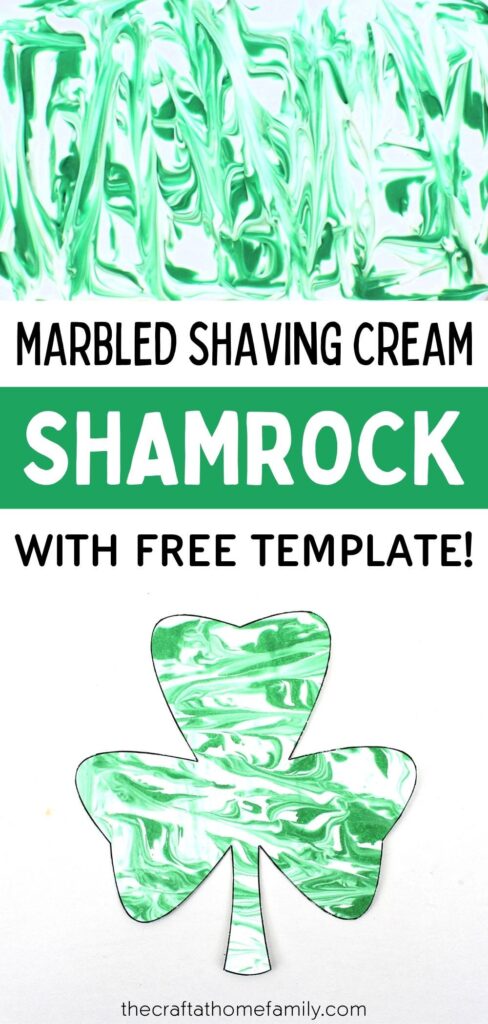
Have you ever tried marbled shaving cream art with your kids? These marbled shaving cream shamrocks are so cute and easy to make, and they would make a great Saint Patrick’s Day process art activity for toddlers or preschoolers! (Free template included.)
JUMP TO…
If you have young kids at home, you know what it’s like to do structured crafts with them—and how much of a challenge it can be.
Even if you don’t try to influence what the final result will look like, there’s usually a lot of prep work involved. And I don’t know about you, but there are days where I just want to find a project that won’t require me to spend 20 minutes prepping all the materials before the crafting can even begin.
That’s why I love process art. Not only does it require less prep work, but it’s also child-led and the finished product is always completely unique. And since there’s no expectation of what it should look like, it’s easy for kids to be proud of their work!
One of the first process art activities I ever tried with my kids was shaving cream marbling. At the time, we had an infant, a toddler and a preschooler at home, so I was looking for easy projects to entertain our two eldest while their little sister napped.
This project was an instant hit, and we went on to try many more process art activities in the following years. But as the first one we tried, shaving cream marbling will always hold a special place in my heart.
So with Saint Patrick’s Day is coming up, I thought now would be a perfect time to do it again! And because I’d already created a shamrock and four-leaf clover template this time last year, this project took literally two minutes to set up.
I hope your little ones love it as much as ours did!
Related: Marbled Shaving Cream Shirt & Tie Card for Father’s Day (with Free Template!)

Get hundreds of pages of activities!
Get access to all our paid printables, as well as monthly activity planners, for just $5/month. (New printables added twice per month!)
Required Materials
Here’s what you’ll need to make your own DIY shaving cream shamrocks at home:
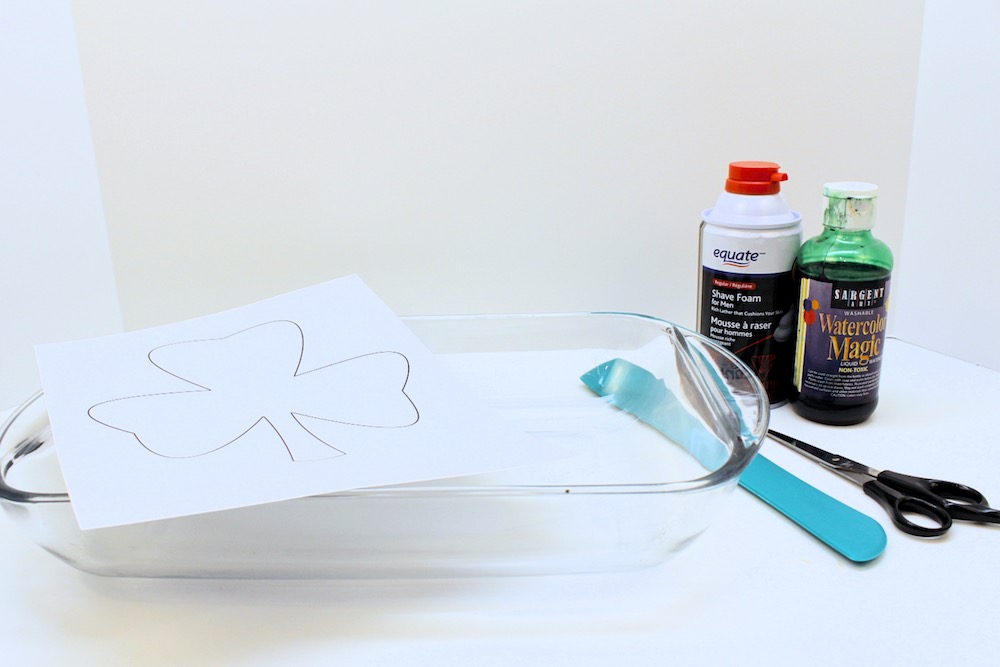
- My free shamrock and four-leaf clover template, which you can download using the form below (there’s another form at the bottom of the article if you’d rather keep reading)
- White cardstock (you can use another color if you like, but I find that white cardstock creates the nicest prints for this particular project)
- Large casserole dish or baking sheet
- Shaving cream (we get ours at Walmart for under $2)
- Liquid watercolors or liquid food coloring
- Spatula or scraper
- Scissors
Note: If you don’t have any cardstock, I really recommend that you buy some for this project instead of using regular printer paper. Regular paper will get soaked through if it comes into contact with shaving cream.
How to Make Marbled Shamrock Cream Shamrocks (Step-by-Step)
1. Print Template
Start by downloading my free template and printing it on a sheet of Letter-sized cardstock.
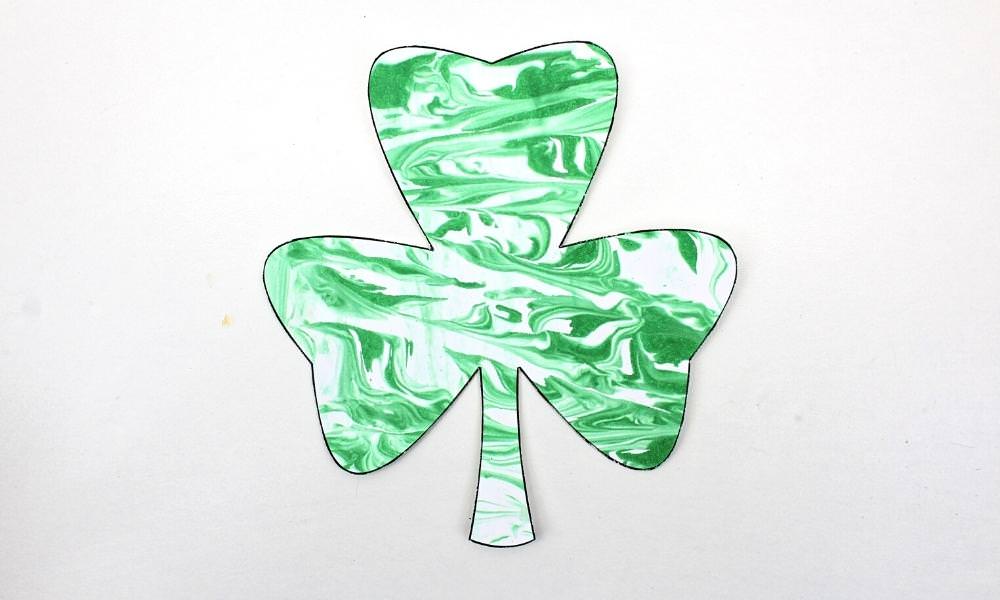
The template includes both shamrocks and four-leaf clovers, and each of them come in multiple different sizes. I decided to use the largest shamrock template, but feel free to choose something different if you prefer.
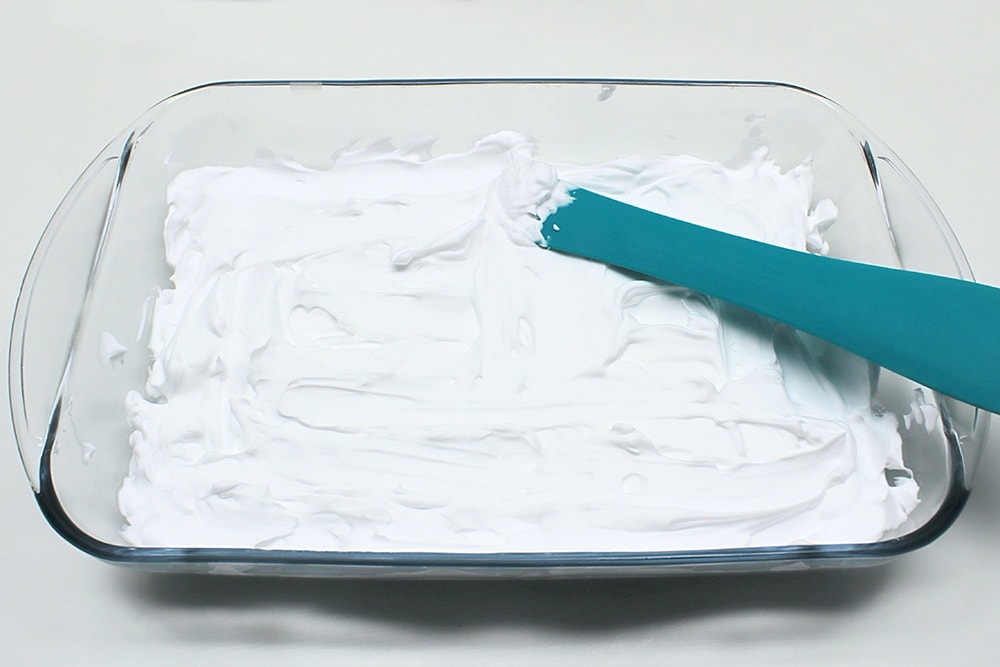
2. Prep Shaving Cream
Next, cover the bottom of a baking sheet or large casserole dish with shaving cream and use a spatula to even out its surface.
3. Add Colors
Once you’re done spreading out the shaving cream, grab your food coloring or liquid watercolors and sprinkle dots of color on top.
We usually use liquid watercolors to save money since they’re sold in larger quantities, but if you don’t have any, you can absolutely do shaving cream art with food coloring. There’s no need to buy extra supplies just for this project.
We decided to stick with green, but feel free to experiment and add multiple colors if you like—though I wouldn’t recommend using more than three or four colors at one time because they tend to get all muddy if you use too many.
For best results, I recommend using colors that are complementary to one another.
4. Swirl Colors
The next step is to swirl the colors around to create a pattern. I used the same spatula I had used to even out the surface of the shaving cream, but if that’s too difficult for your child, you could always give them something smaller to work with, like a toothpick.
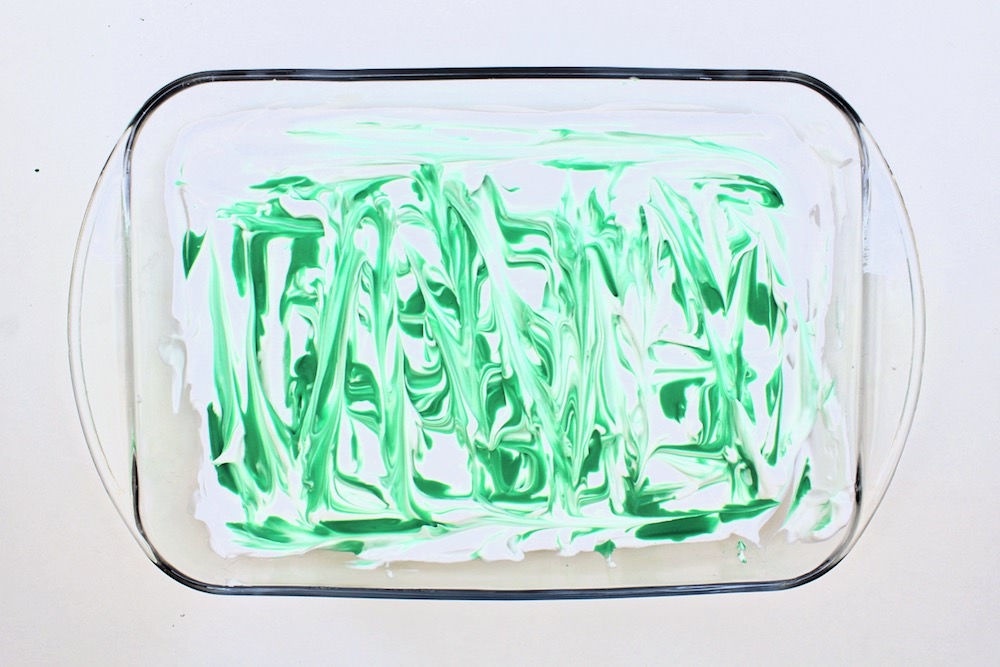
In order to create a nice pattern, you’ll want to make sure you don’t swirl the colors so much that they start to blend into one another—a few vertical and horizontal strokes of your spatula should be sufficient to create nice, clean prints.
5. Press & Scrape Template
Let your child press the card into the shaving cream, printed side down. Then, quickly remove it and use your spatula to scrape off all the shaving cream.
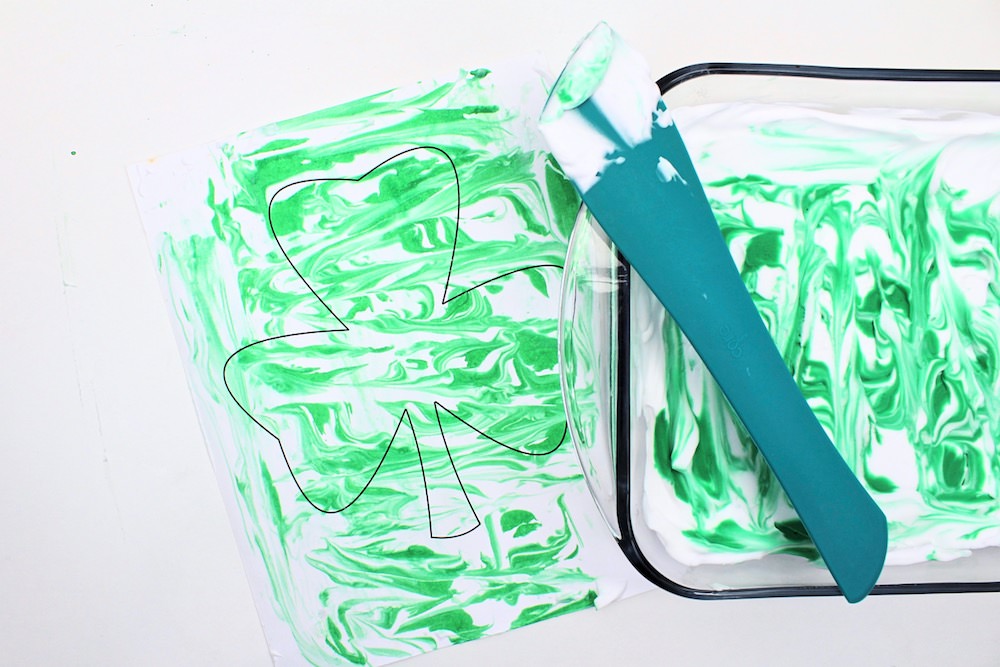
Note: Press down just enough for the paper to be covered, then remove it immediately. If you leave the card pressed into the shaving cream for too long, or if you wait too long to scrape off the shaving cream, you’ll risk ending up with soggy paper and a blurry print.
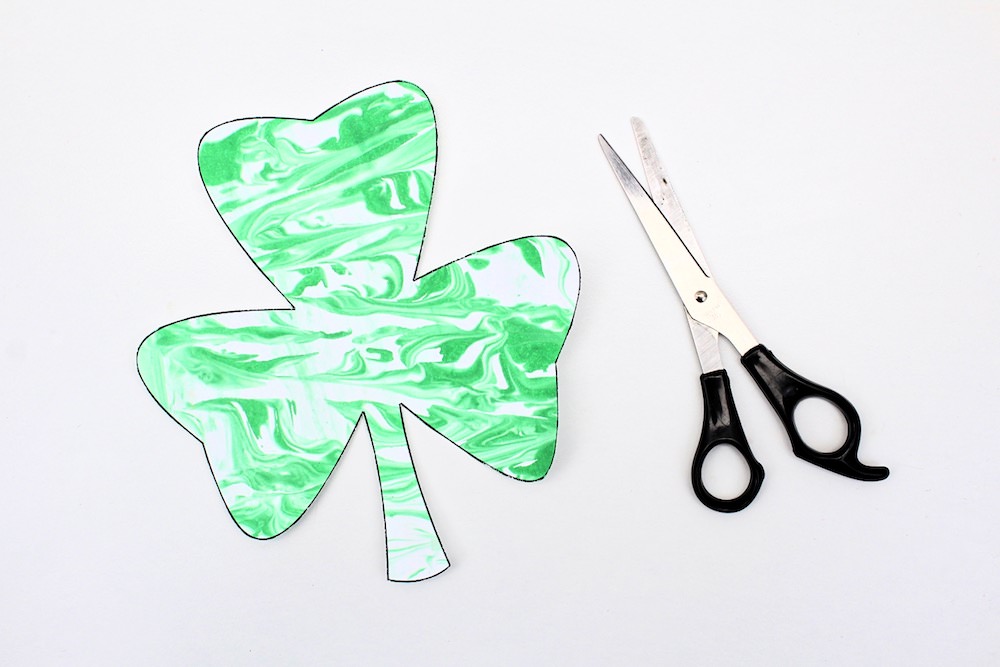
6. Cut Template
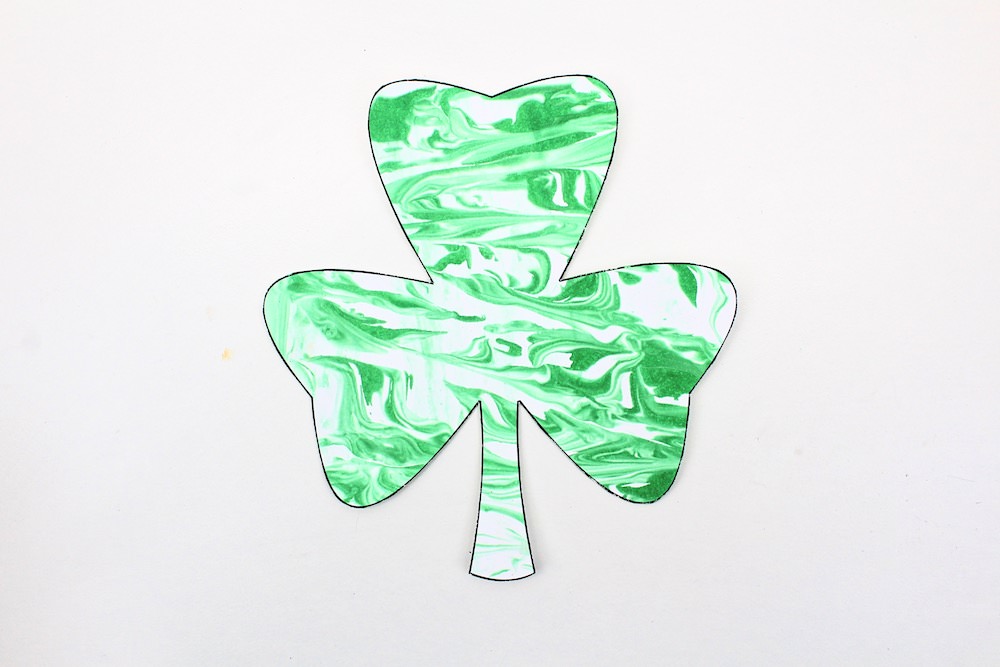
Once you’re done creating your shaving cream prints, use scissors to cut along the lines of the template and separate the shamrock from the rest of the sheet of cardstock.
Then, display your artwork however you like! Feel free to get creative with this. For instance, you could try glueing the shamrock to a green background and placing it inside a frame.
This is such a cute and easy project, and we love that it can be adapted to pretty much any holiday. We’ll probably be trying marbled shaving cream Valentine’s Day hearts next!
Related Shamrock & Clover Crafts
Looking for more cute shamrock crafts to make with your kids for Saint Patrick’s Day? Check out these articles:
Only your name will be made public. Please note that by submitting your comment, you are agreeing to the terms of our Privacy Policy.