Looking for a fun DIY art project that younger kids can help out with? These easy bleeding tissue paper bookmarks are pretty, colourful and fun to make! They’re made using a process art technique that children of any age will love—and they also happen to make a great homemade gift for book lovers!
This post may contain affiliate links, which means I may receive a commission, at no extra cost to you, if you make a purchase through a link. As an Amazon Associate, I earn from qualifying purchases. Please see my full disclosure for further information.
JUMP TO…
Have you ever made art using bleeding tissue paper? We tried it for the first time last year and immediately fell in love with it! Not only is it a great process art activity for kids, but with a little creativity, it’s also a unique way to decorate homemade cards and gifts for your loved ones!
These bookmarks are so cute, and because they’re made using bleeding tissue paper, they’re a project that even younger kids can help out with! They’d add a great personal touch to any books that you’re planning on giving as gifts this Christmas!
About Bleeding Tissue Paper Art
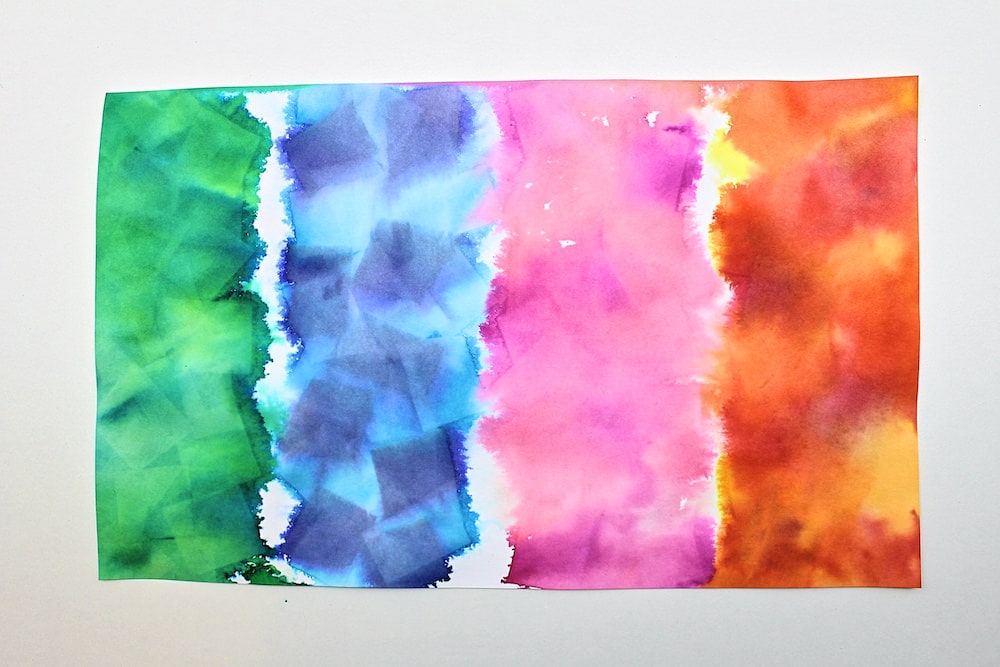
Bleeding tissue paper art is so fun, and all it really requires is tissue paper, cardstock and water!
The idea is to cut the tissue paper into small pieces, place them on top of a sheet of cardstock and use a spray bottle or paintbrush to wet them. This will cause the colour from the tissue paper to bleed out onto the paper, leaving a bright-coloured imprint once it dries.
Our kids are quite young, but they’re still able to actively participate in this activity. They especially love using spray bottles to wet their artwork!
One thing you do need to be aware of is that this project won’t work with just any type of tissue paper. You’ll need to purchase bleeding art tissue paper. (Don’t worry, it’s not expensive!)
As it happens, when I first heard about this type of artwork, I was so excited to try that I immediately bought several packages of regular gift-wrapping tissue paper from the dollar store—and was disappointed to find that the colours didn’t bleed at all!
So just keep this in mind and make sure to double-check the description before you buy anything!
Required Materials
Here’s what you’ll need to make colourful homemade bookmarks using bleeding art tissue paper:
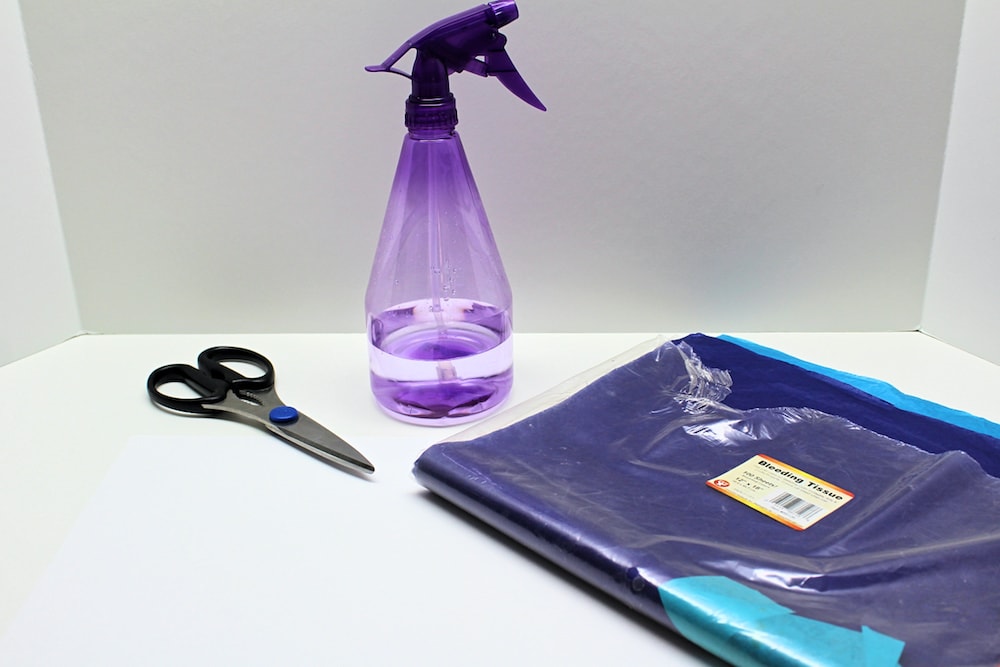
- White cardstock (regular paper will get too soggy)
- Bleeding art tissue paper (not regular tissue paper—see above notes)
- Scissors
- Spray bottle or paintbrush
- Water
Additional Suggested Supplies
You can easily make these bookmarks using only the materials listed above. However, using the equipment below will speed up the process and ensure that your bookmarks are both durable and waterproof:
Paper trimmers are so useful for making nice, clean cuts with very little effort. That’s why I chose to use mine to cut the bookmarks down to size—though of course you’re perfectly welcome to use scissors and a ruler if that’s what you have on hand!
As for the laminator, you’re free to skip it as well if you don’t happen to own one. But now that I have one, I keep finding new uses for it!
They’re great for a number of crafts, for protecting children’s artwork, and for making reusable learning resources like play dough or writing mats that you can print at home. And contrarily to what you may think (I know I did), they’re not at all expensive!
You can check out the exact products I used below:

- SEWING, ARTS, AND CRAFTS STAPLE: Fiskars Recycled Bypass Paper Trimmer features a self-sharpening, bypass blade, and a 12″ deck made from 100% post-consumer-recycled materials

- LAMINATING MACHINE: One Scotch TL902VP Thermal Laminator to help you protect frequently used documents up to 9 in. wide
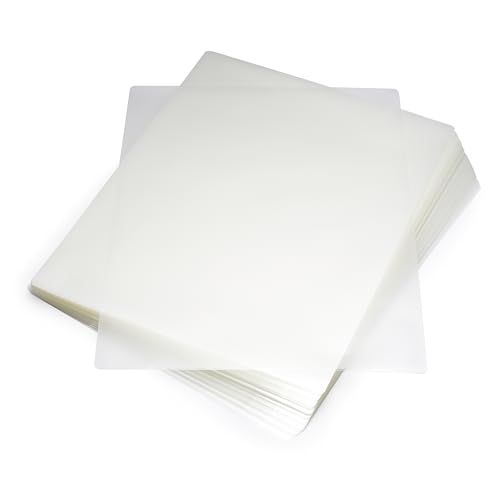
- 11.5 x 9-inch plastic laminating sheet (100-pack)
How to Make Bleeding Tissue Paper Bookmarks (Step-by-Step)
1. Cut Tissue Paper into Pieces
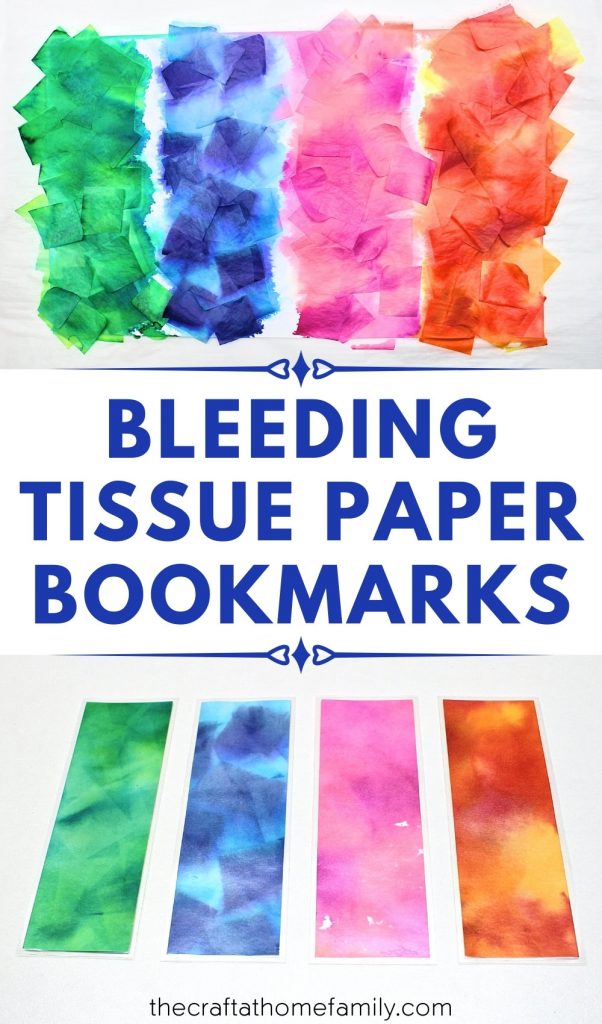
Start by cutting the bleeding tissue paper into small squares. You can get your child to help with this if they’re old enough.
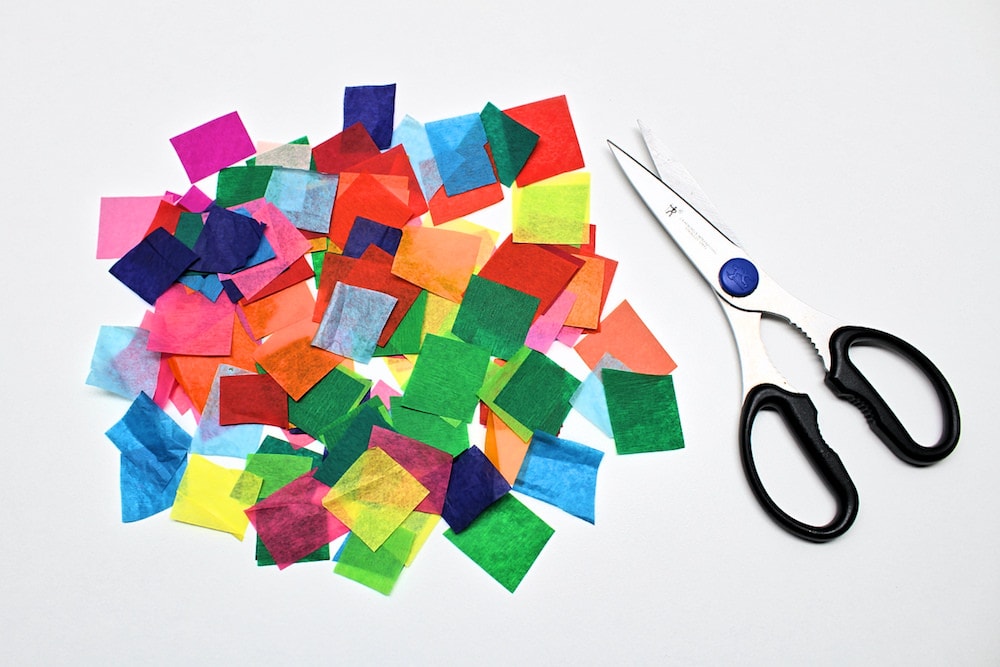
For best results, make sure to choose a variety of colours that complement each other nicely. I decided to use four different colour schemes, and each one was made up of three or four similar colours.
Of course, you’re under no obligation to use more than one colour scheme. Making several bookmarks in similar colours would be just as fun!
2. Place Tissue Paper on Cardstock
Once you’re done cutting up the tissue paper, arrange the pieces on top of your sheet of cardstock. You don’t need to arrange them perfectly, and it’s not a big deal if small areas are left uncovered since the colours will probably end up bleeding everywhere anyway.
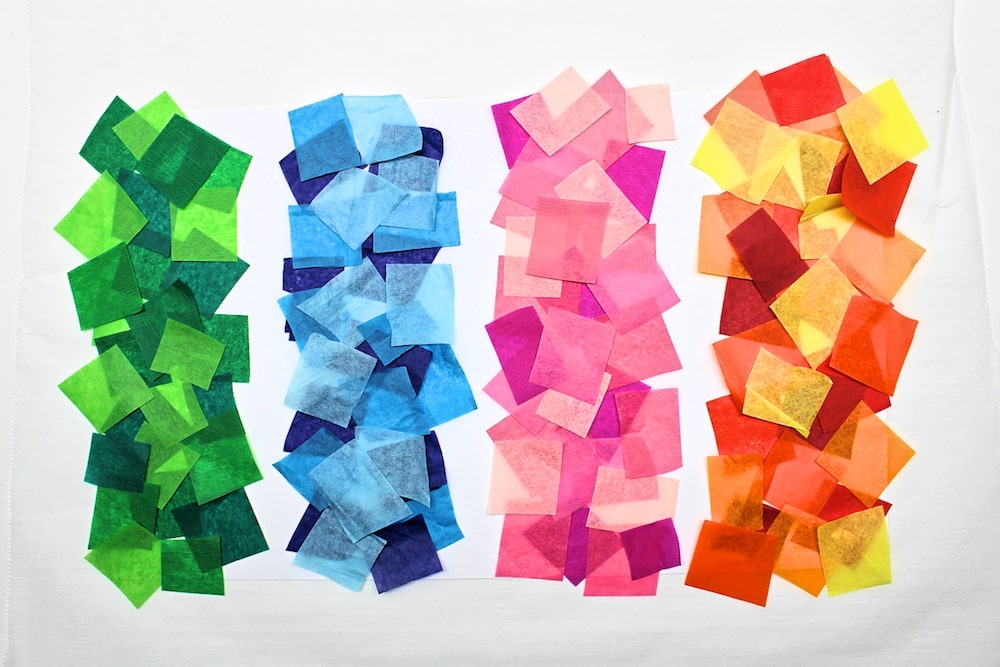
Note: Things can get pretty messy once the colours start bleeding, so I highly recommend protecting your work surface to prevent any staining. I placed my cardstock on top of a piece of parchment paper.
3. Wet Tissue Paper
Use a paintbrush or spray bottle to wet every piece of tissue paper! This is my children’s favourite step—though because they’re still young, I do have to make sure that they don’t add way too much water and destroy the cardstock!
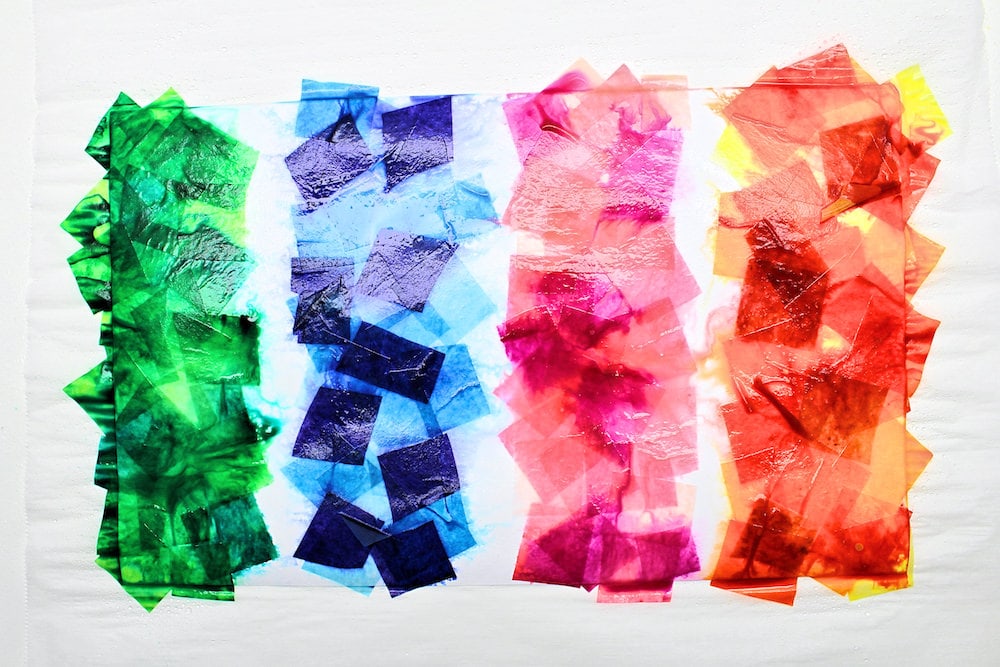
This step is the reason you’ll want to use cardstock rather than regular printer paper. The paper needs to be thick enough to withstand being wet without turning into a soggy mess.
4. Let Dry
Once you’ve wet all the tissue paper, you’ll notice the colours starting to bleed. Simply let your artwork sit undisturbed for a few hours to give everything a chance to dry completely before you move on to the next step.
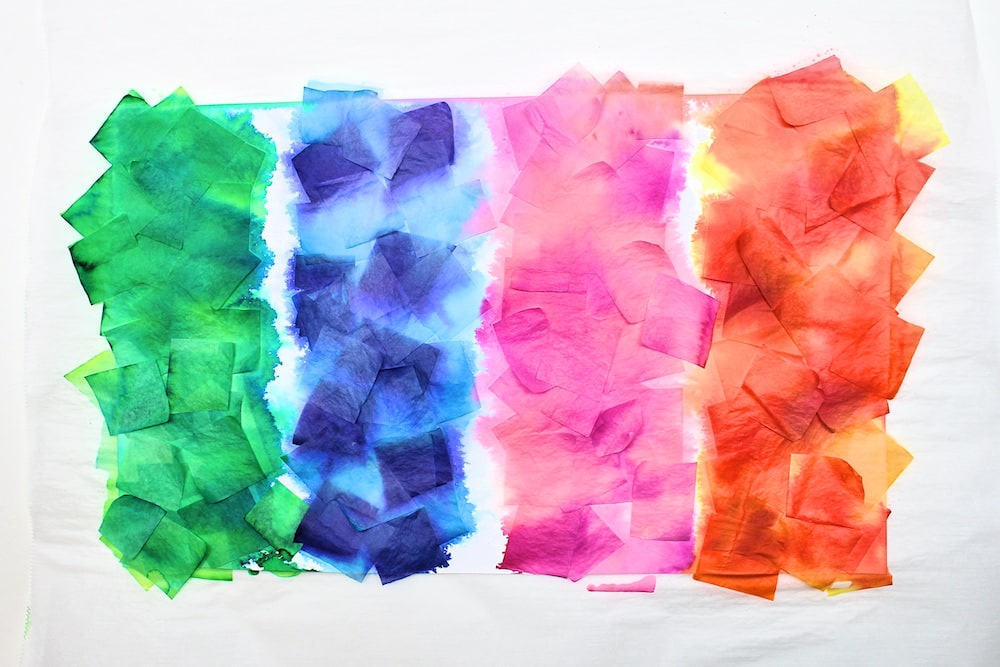
5. Remove Tissue Paper
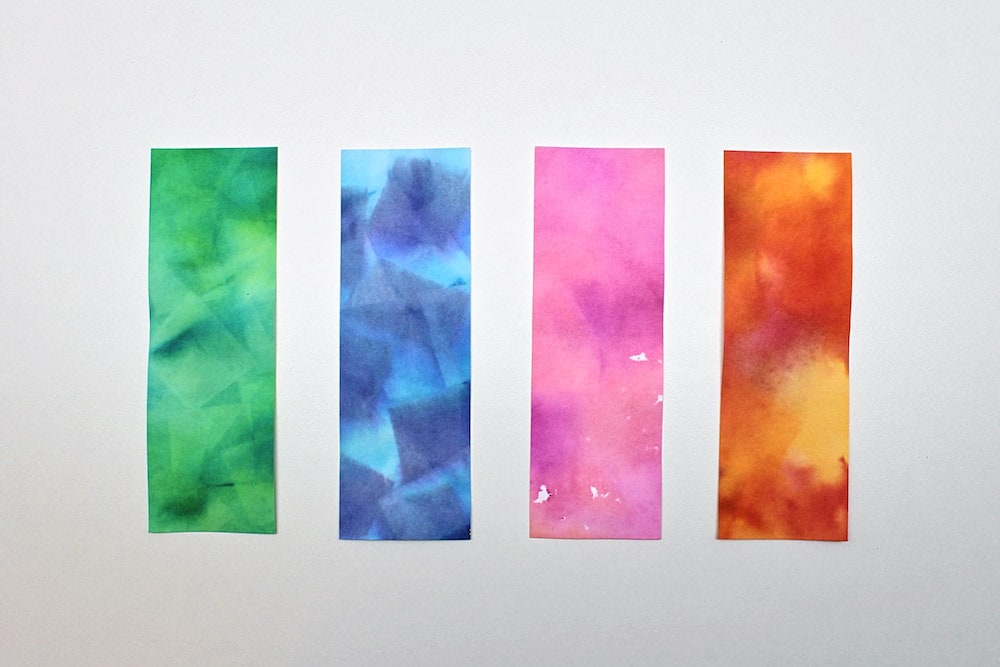
Once everything is dry, peel off the pieces of tissue paper to reveal the imprint left by the colours! Isn’t it just gorgeous?
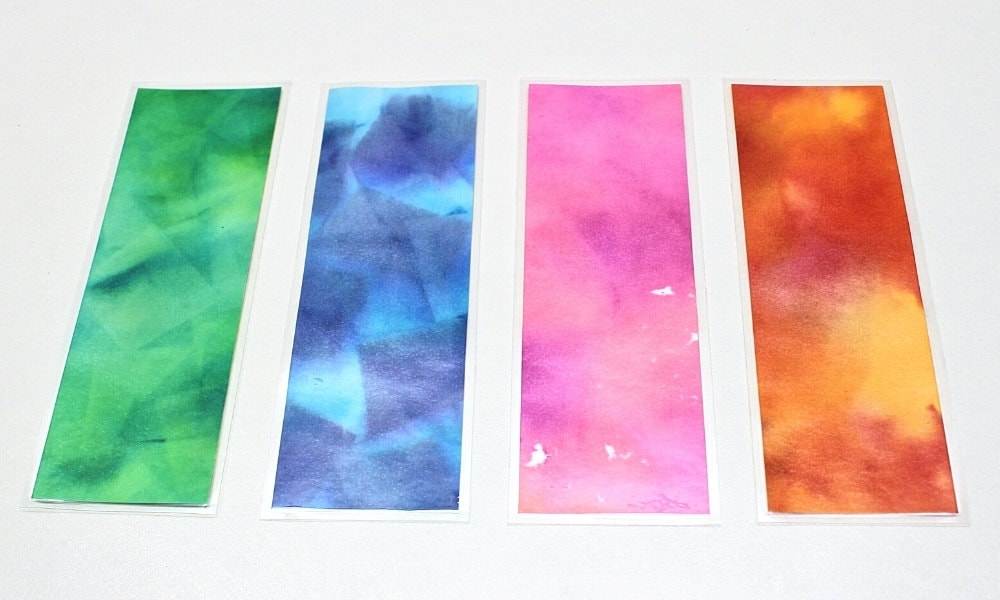
6. Cut Bookmarks
The next step is to cut the bookmarks down to size. Standard bookmarks tend to be 2” x 6”, so those are the measurements I used. For your bookmarks, try to select the prettiest parts of the pattern left by the tissue paper!
Since I have a paper trimmer, I didn’t bother with scissors or a ruler. However, you’re free to cut your bookmarks to size using whatever tools you have available to you!
(Note: If you do use a paper trimmer, please keep it away from your kids at all times. I love how easily it cuts through paper, but I have no intention of finding out what else it can cut through.)
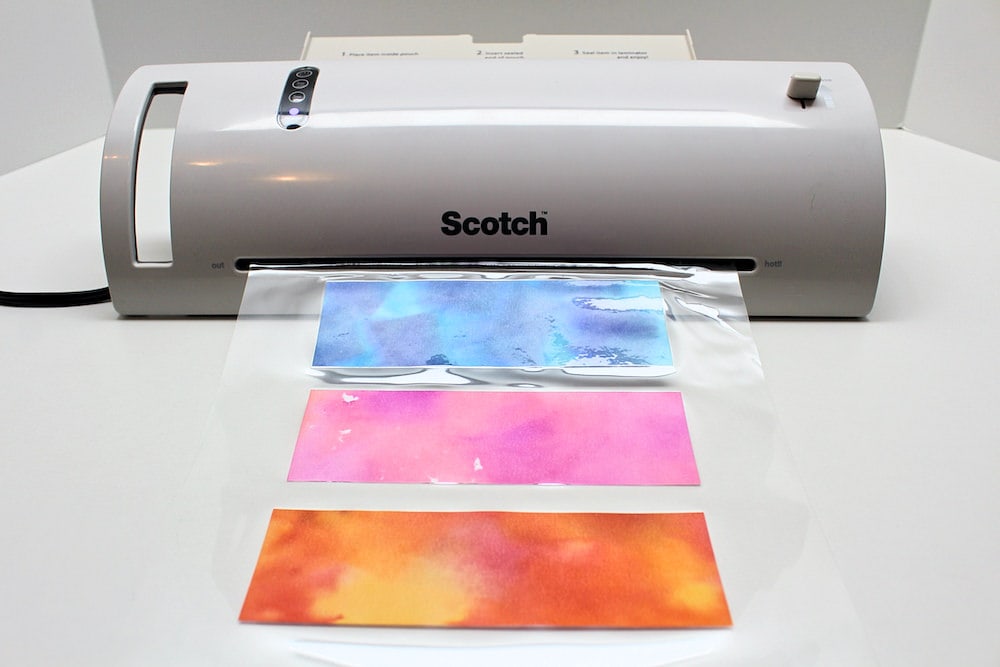
7. Laminate Bookmarks (Optional)
This next step is optional, but it’s one that I highly recommend if you do happen to have a laminator at home. (And if you don’t—they’re awesome, and they’re also quite inexpensive. Plus, if you’re anything like me, you’ll find a million uses for it once you have one!)
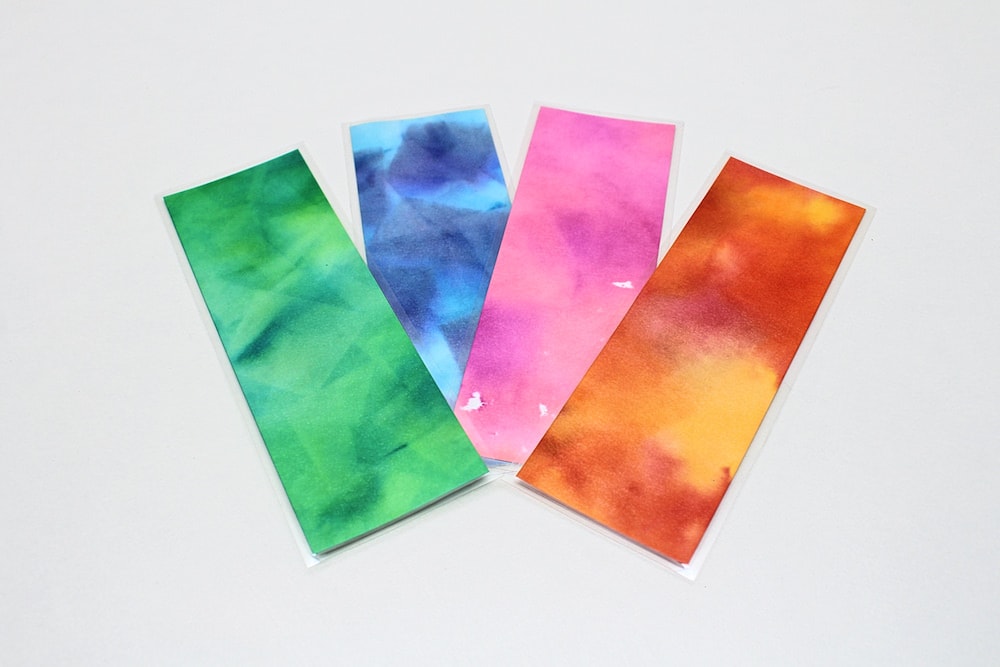
Laminating the bookmarks not only makes them more durable, but it also ensures that your books will stay safe!
Please note that there’s no reason why the bookmarks should damage your books at all, even if they’re not laminated (unless you use them while wet, which you wouldn’t do). But I like having extra assurance that both my bookmarks and books and properly protected!
In order to laminate the bookmarks, simply place them inside a laminating pouch and follow the instructions that came with your laminator. Once they’ve been laminated, simply cut off the excess plastic around each bookmark (I used my paper trimmer to do this) and you’ll end up with beautiful, durable bookmarks!
It’s actually pretty hard to photograph items that have been covered in plastic, so the pictures really don’t do them justice. But in person, these bookmarks are so colourful and pretty—and they’re an easy DIY project that even younger kids will love to help out with!
Related Crafts for Kids
Looking for more fun crafts that you can involve your kids in? Check out these articles:
- Fizzing Baking Soda Paint Volcano (with Free Printable!)
- Marbled Shaving Cream Shirt & Tie Card (with Free Printable!)
- Easy Button Pipe Cleaner Bracelets
- Bubble Wrap Butterflies (with Free Printable!)
You can also sign up for my mailing list to receive fun craft and activity ideas right in your inbox! Subscribers gain access to my free printables library as well as to exclusive content that will never be available on my site!
Wow !!! This is incredible and beautiful thank you for sharing!!