


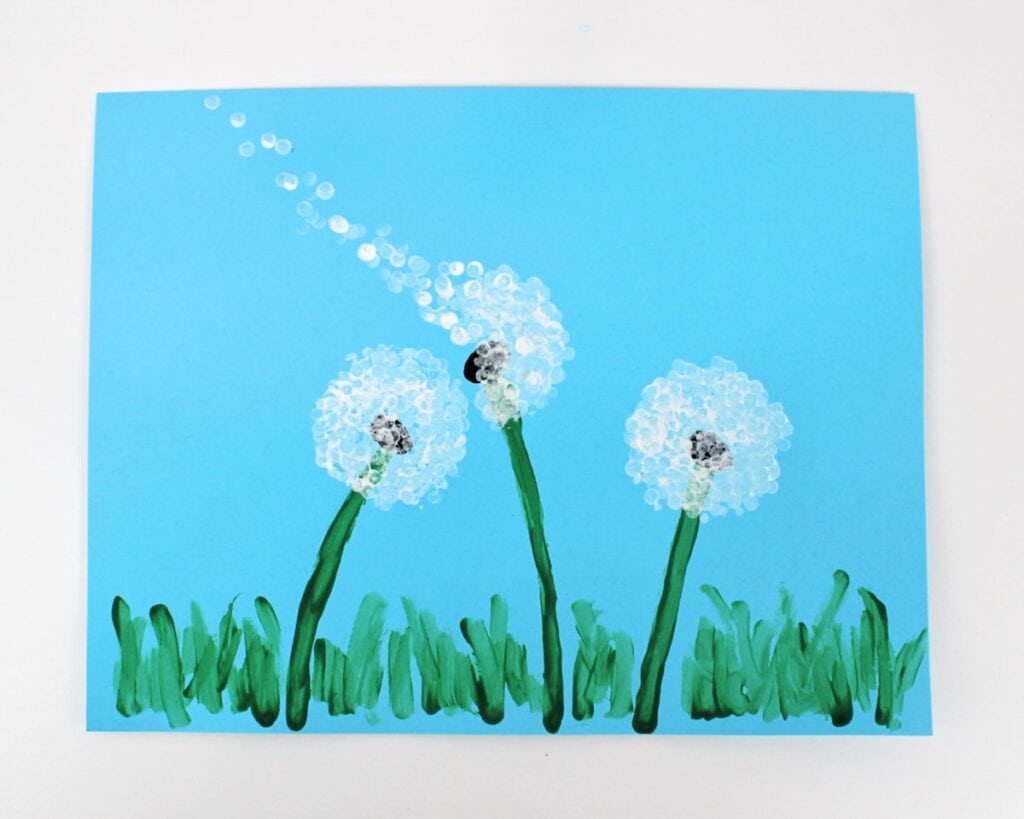
If your child enjoys crafting and painting, they’ll love these Q-tip painted dandelions! This cute craft is fun to make, only requires a few simple supplies, and is appropriate for both younger and older kids.
JUMP TO…
Do your kids love painting with anything that isn’t a paintbrush? If so, this adorable dandelion craft should be right up their alley.
This quick and easy project is lots of fun for kids to make, and it is perfect for spring or summer. Keep it in your back pocket for a rainy day when your kids are looking for something to do!
Why You’ll Love This Craft
- Easy to make: This craft is easy enough for older kids to make on their own, and even younger kids should be able to do a lot of the steps themselves.
- Simple supplies: This project only requires a few items that you probably already have at home, such as paint and cotton swabs.
- Fun for kids: For this craft, you’ll be doing all the painting using cotton swabs. If your kids are anything like mine, they’ll love the opportunity to paint without a paintbrush!
Love painting with Q-tips? Check out this Bundled Q-Tip & Leaf Print Sunflower, this Bundled Q-Tip Fall Tree, this Q-Tip Painted Christmas Wreath Card or these Free Q-Tip Painting Templates!

Get the “easy button” for summer!
Skip the planning and simplify summer break with this set of 280 activity cards that your child can pull out of a jar whenever they’re bored.
Required Materials
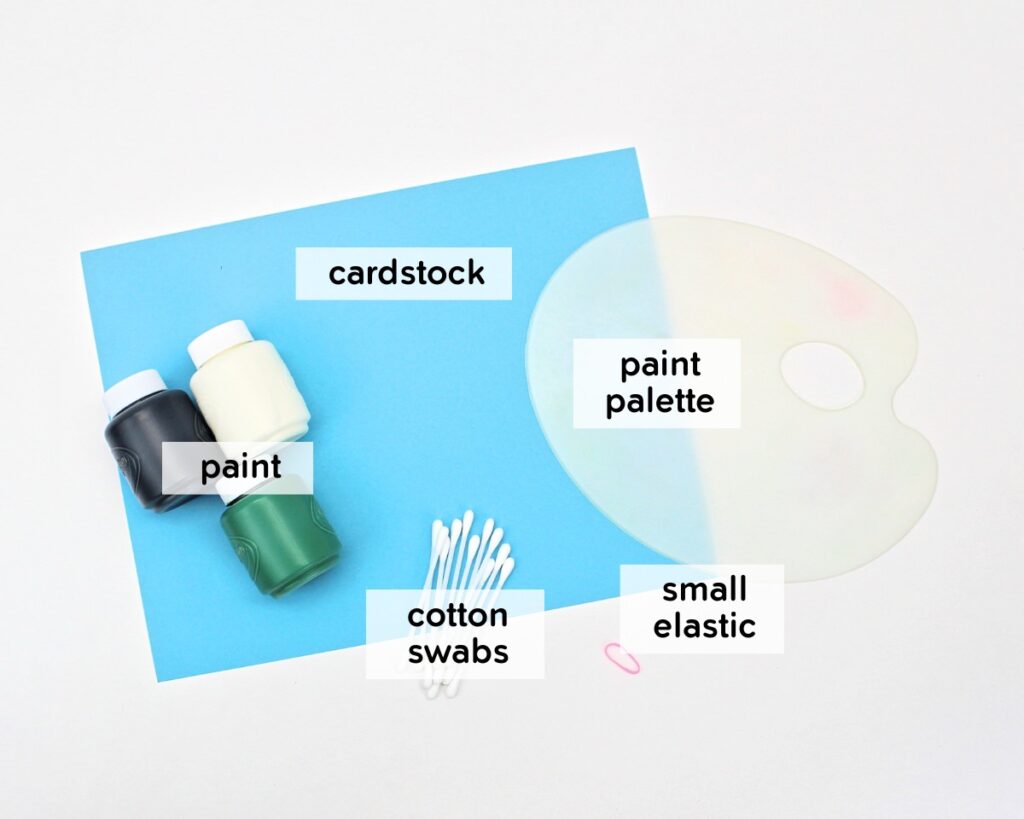
- Cotton swabs: You’ll need about 10 to 15.
- Paint (white, black and green): Washable kids’ paint and acrylic paint will both work for this project. I used washable paint.
- Cardstock: I used a light blue sheet from this set of multicolored cardstock. If you don’t have any cardstock, regular construction paper should do as well, but it may get a bit wavy when the paint is added.
- Elastic: I recommend using a mini hair rubber band for this craft to avoid having to wrap it around the Q-tips too many times, but a regular rubber band will do in a pinch.
- Paint palette: Make sure you use a paint palette with a flat surface large enough to accommodate 2 to 3 paint colors and a bundle of cotton swabs. If you don’t have one, you can also use a paper, plastic or ceramic plate. (I prefer plastic and ceramic because they can be washed and reused.)
The full supply list and instructions can be found in the how-to card.
GRAB OUR FREE 30-PAGE ACTIVITY BUNDLE!
By submitting your email address, you are agreeing to the terms of our Privacy Policy. You can unsubscribe at any time.
How to Paint Dandelions with Q-Tips (Step-by-Step)
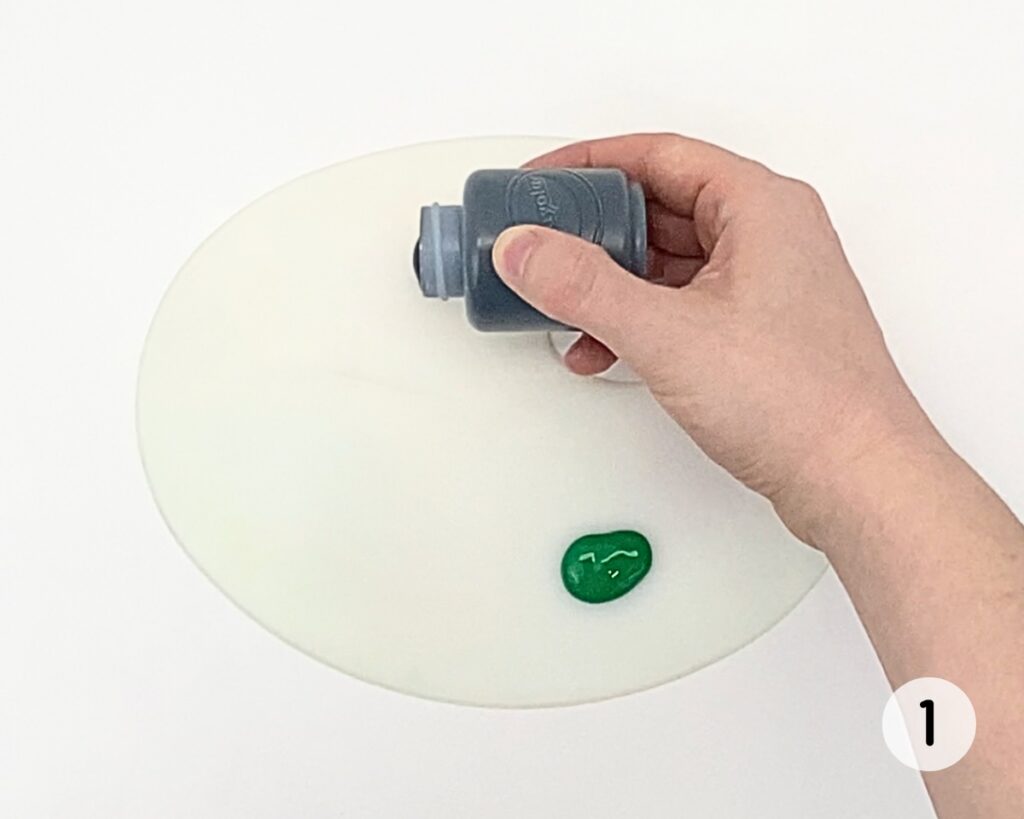
Step 1: Add paint to palette. Pour a bit of green and black paint onto a paint palette. (You can add the white paint now, or wait until step 5 to ensure it doesn’t have time to dry before you use it.)
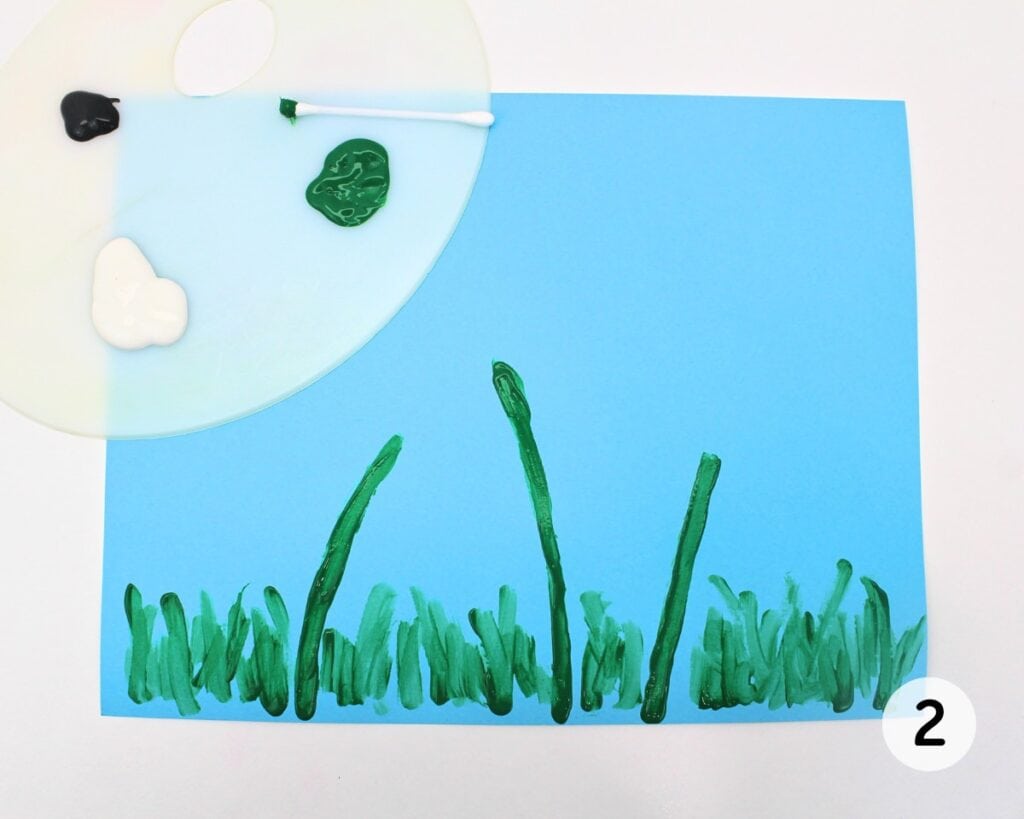
Step 2: Paint dandelion stems and grass. Dip a cotton swab in green paint and use it to paint 2 or 3 long stems for the dandelions, as well as shorter blades of grass on the bottom of the cardstock. (If desired, you can use a paintbrush instead.)
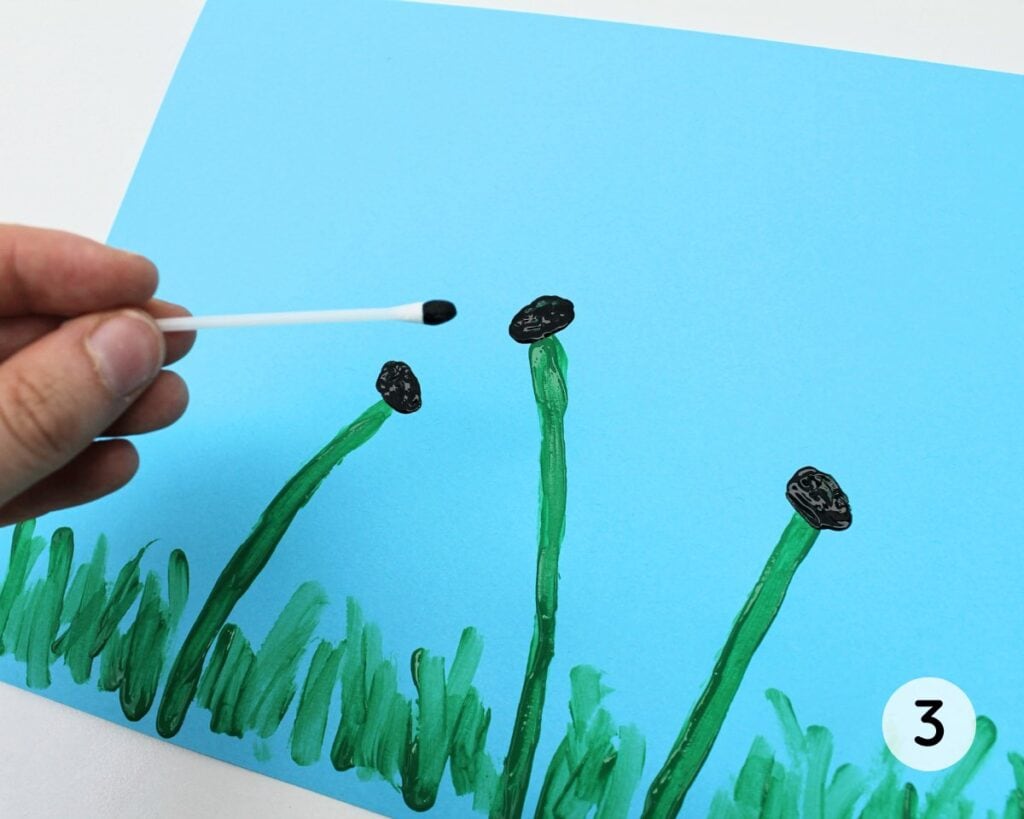
Step 3: Paint dandelion core. Dip a second cotton swab in black paint and use it to paint an oval at the top of each dandelion stem. Let the paint dry for about 30 to 60 minutes before moving on to the next step.

Step 4: Bundle Q-tips. Grab 8 to 10 cotton swabs, press them together with your fingers and tightly wrap a small elastic around the middle to bundle them together. Dip the Q-tips into white paint (pouring some onto the paint palette if you haven’t already) and press down as many times as needed to fully coat the ends.
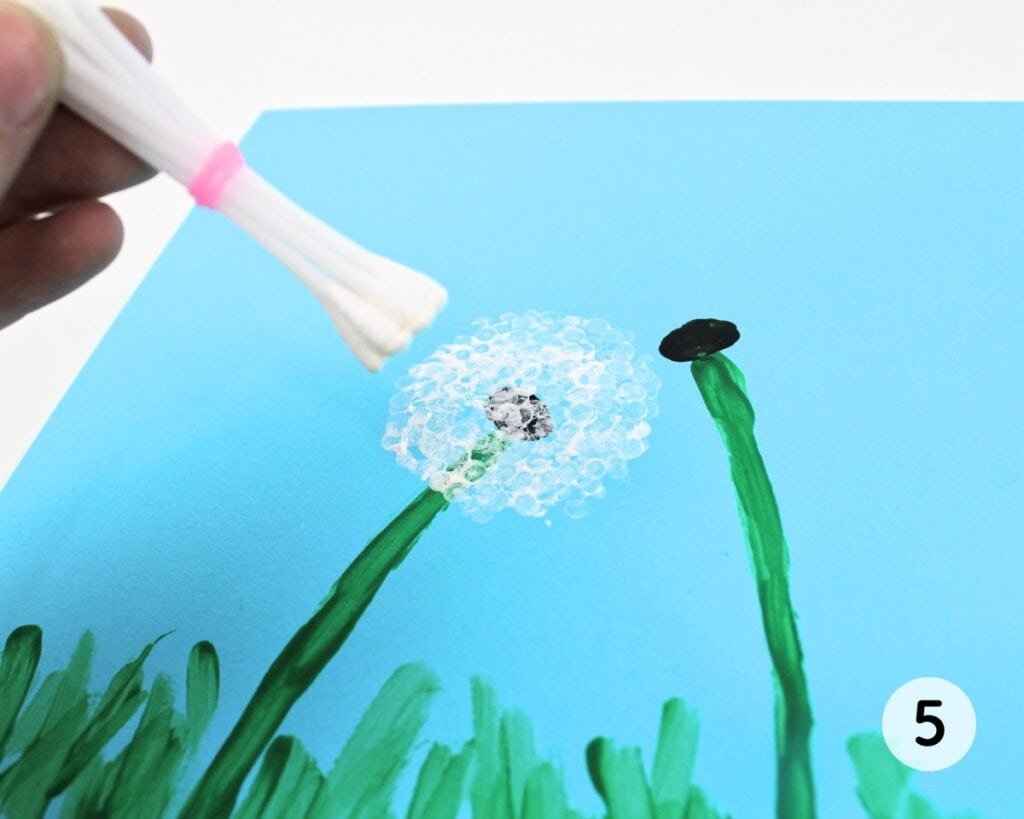
Step 5: Paint dandelion head. Before the paint has a chance to dry, gently press the Q-tips onto the cardstock to create a dandelion blowball on top of each black oval. Repeat as needed, dipping the cotton swabs back into the paint if necessary. Leave about half of one dandelion unpainted.
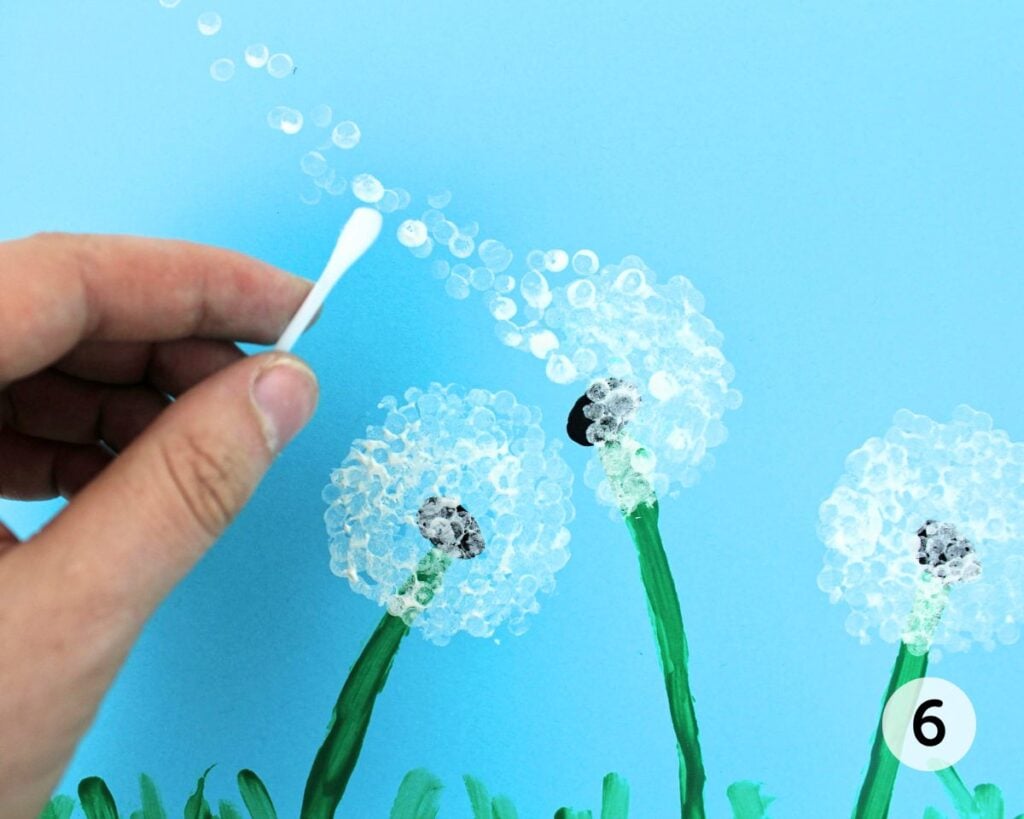
Step 6: Paint dandelion seeds. Grab another cotton swab, dip it in white paint, and use it to paint individual dandelion seeds flying off into the wind. Allow the paint to dry fully before displaying.
This project turned out so cute, and cotton swabs were the perfect way to paint the dandelions and make the craft more engaging for kids. This is a great project to try in May or June, when dandelions are growing everywhere outside!
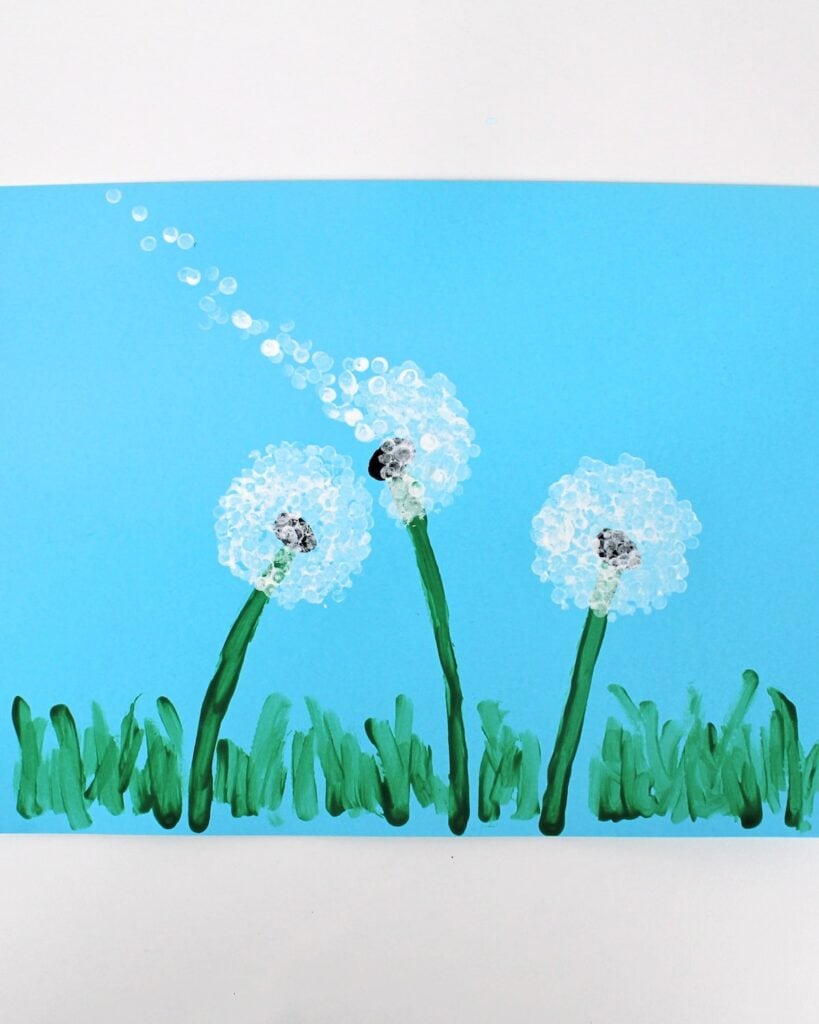
Looking for more fun dandelion-themed activities? Check out this Dandelion Play Dough or this Frozen Dandelion Sensory Bin!
Helpful Tips
- Don’t skimp on the paint: To create the nicest dandelion possible, use a generous amount of paint and dip the Q-tips in it as many times as needed as you make the craft.
- Let the black paint dry: Make sure to let the black paint dry for a bit before you start adding white paint using the bundled Q-tips—if you don’t, the black paint could transfer onto the Q-tips and end up all over the white dandelion head.
More Summer Crafts for Kids


If you have tried these Q-Tip Painted Dandelions or any other project on my website, please let me know how it went in the comments below. I can’t wait to hear from you!

Q-Tip Painted Dandelions
Materials
- 1 sheet blue cardstock
- paint (white, black and green) washable or acrylic
- 10-15 cotton swabs
- 1 small elastic
- 1 paint palette
Instructions
- Pour a bit of green and black paint onto a paint palette. (You can add the white paint now or wait a bit to prevent it from drying out.)
- Dip a cotton swab in green paint and use it to paint 2 or 3 long stems for the dandelions, as well as shorter blades of grass on the bottom of the cardstock. (You can use a paintbrush instead if desired.)
- Dip a second cotton swab in black paint and use it to paint an oval at the top of each dandelion stem. Let the paint dry for about 30 to 60 minutes.
- Grab 8 to 10 cotton swabs, press them together with your fingers and tightly wrap a small elastic around the middle to bundle them together.
- Dip the Q-tips into white paint (pouring some onto the paint palette if you haven't already) and press down as many times as needed to fully coat the ends. Before the paint has a chance to dry, gently press the Q-tips onto the cardstock to create a dandelion blowball on top of each black oval. Repeat as needed, dipping the cotton swabs back into the paint if necessary. Leave half of one dandelion unpainted.
- Grab another cotton swab, dip it in white paint, and use it to paint individual dandelion seeds flying off into the wind. Allow the paint to dry fully before displaying.
Video
Notes
- Don’t skimp on the paint: Make sure to add a generous amount of paint to the paint palette and dip the Q-tips in it as often as needed to re-coat the ends.
- Let the black paint to dry: To prevent the black paint from transferring onto the bundled Q-tips, allow the black paint dry a little before you start painting the dandelion head with white paint.

Only your name will be made public. Please note that by submitting your comment, you are agreeing to the terms of our Privacy Policy.